The default WooCommerce checkout page is terrible and in this article, I will show you the two best options you have to customize your Checkout form to make it two columns.
Here are two ways you can convert your WooCommerce Checkout Page into two columns:
- Option 1: Copy and paste the CSS on this page into your theme
- Option 2: Completely take control of your Checkout page and professionally design it using one of my favourite WordPress plugins FunnelKit (I use this method)
Option 2 (the FunnelKit plugin) will allow you to design checkout pages like this fast without writing code:

I wrote the first version of this article over 5 years ago and WooCommerce has come a long way since then.
So today, I am updating this article to give you the EASY way to create your two-column checkout and then also what I think is the BEST way to do it.
I do strongly suggest you read this entire article instead of just using the CSS option, because although the CSS option is fast and free, I’ve been running an eCommerce store now for over 5 years doing millions of dollars each year in sales, and I’ve learnt a lot along the way about checkouts.
In this article, we will cover using one of my favourite WordPress plugins called FunnelKit, a WordPress plugin you can use to completely customize your WooCommerce checkout page and turn it into a checkout page that looks better than Shopify’s…all with a few clicks.
Here is an overview of an A/B test I am running on one of my Checkout pages using FunnelKit.
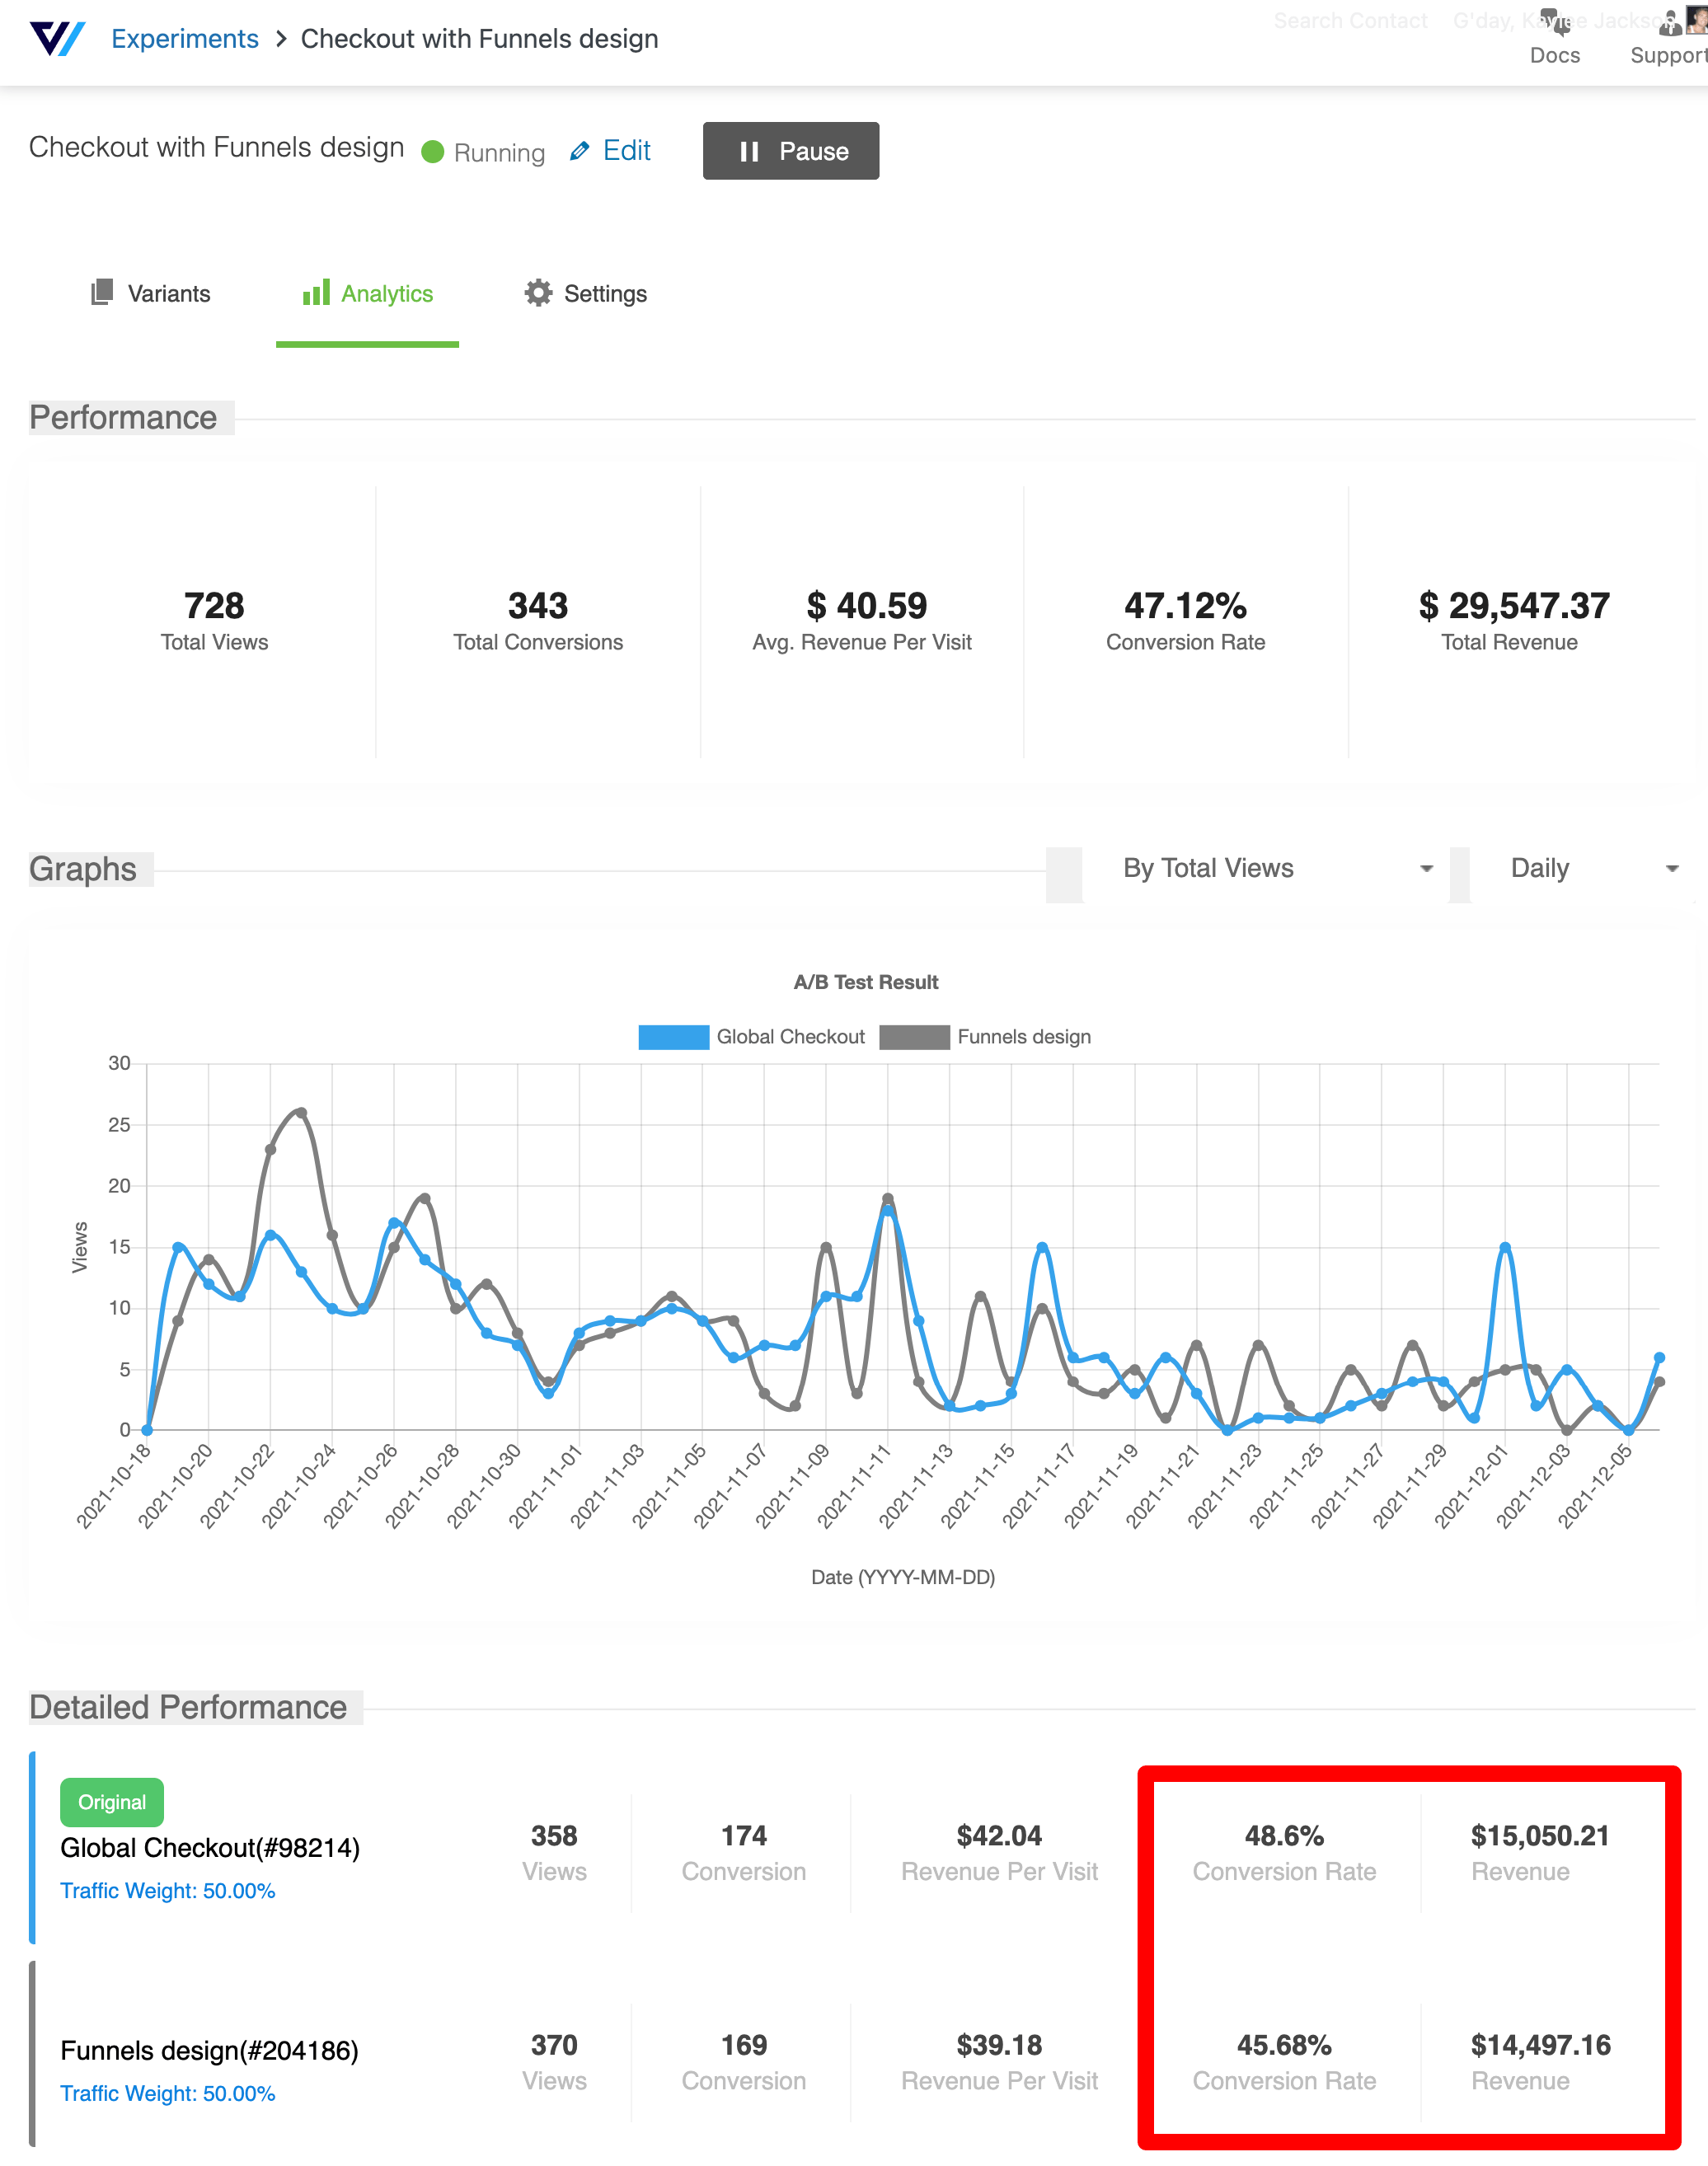
The design of the checkout pages, the set up of the A/B test – it’s all done within this one WordPress plugin.
But first, before we get into option 2, let’s do option 1.
Option 1: CSS code you can copy and paste
The CSS code below should work in most WordPress themes – all you have to do is copy and paste it.
#place_order {
	width:100%
}

.woocommerce-form-login label.woocommerce-form__label.woocommerce-form__label-for-checkbox.woocommerce-form-login__rememberme {
   margin-top: 12px;
}

@media (min-width: 768px){
    #customer_details{
        width: 60%;
        float: left;
    }
    #order_review_heading{
        width: 30%;
        float: left;
		margin-left:2%;
    }
    #order_review{
        width: 38%;
        float: left;
		margin-left:2%;
    }
    .woocommerce table.shop_table td{
        width: 50%;
    }
    .woocommerce .col2-set .col-1, .woocommerce-page .col2-set .col-1,
    .woocommerce .col2-set .col-2, .woocommerce-page .col2-set .col-2{
        width: 100%;
    }
}
Code language: PHP (php)
This code was posted by user lionel1702 on my old gist which you can check out here https://gist.github.com/grantambrose/d1bff123dd494e3049afe55dc3e51263 (don’t you love the programmer community and helpful everyone is?).
Thank you for that lionel1702!
NOTE: You paste this CSS into the following folder inside your Child Theme:
/wp-content/yourchildtheme/style.css – at the end of this file.
There are thousands of WordPress themes these days and they all have their own CSS code. Some themes will have their own CSS that affects the checkout page so this code may not work. If you paste in the above CSS code to your theme and it does not work, I would reach out to your theme developer and see if they can support you in customizing your theme.
Worth noting is that my WooCommerce Checkout Form is two columns by default with the Astra WordPress theme that I use to build my websites. This is shown in the image below – this is the Astra theme after I installed it, with no extra custom CSS.
If you don’t know CSS or you want to customize your WooCommerce checkout page even further, then please read on to learn more about FunnelKit.
[bricks_template id=”72291″]Option 2: Using FunnelKit to create your Checkout Page
FunnelKit is a WordPress plugin that you can use to customize the design of your WooCommerce Checkout pages, set up A/B tests, create one-click upsells that people can purchase after they complete your WooCommerce order form and much more.
You can read my full FunnelKit review here.
Here is a quick overview of how you set up a two column checkout page in WooCommerce using FunnelKit.
Once you install FunnelKit, you go to FunnelKit > Funnels in your admin area.
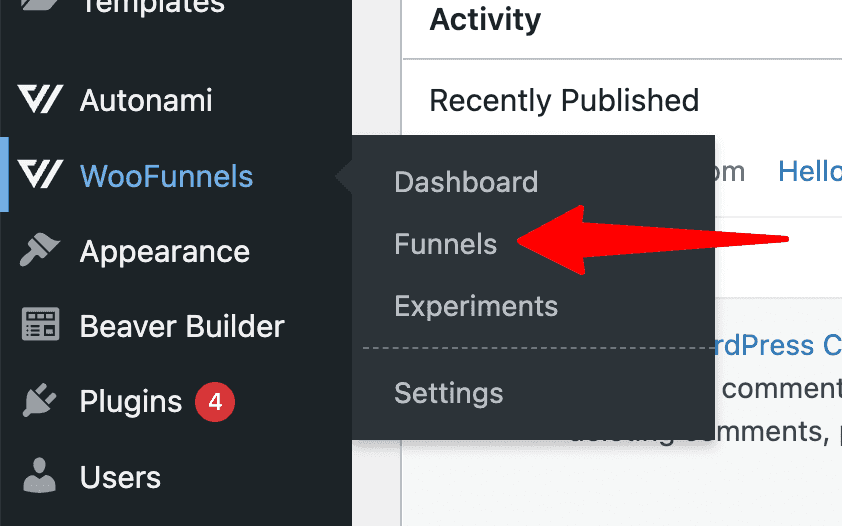
Then click Add New.
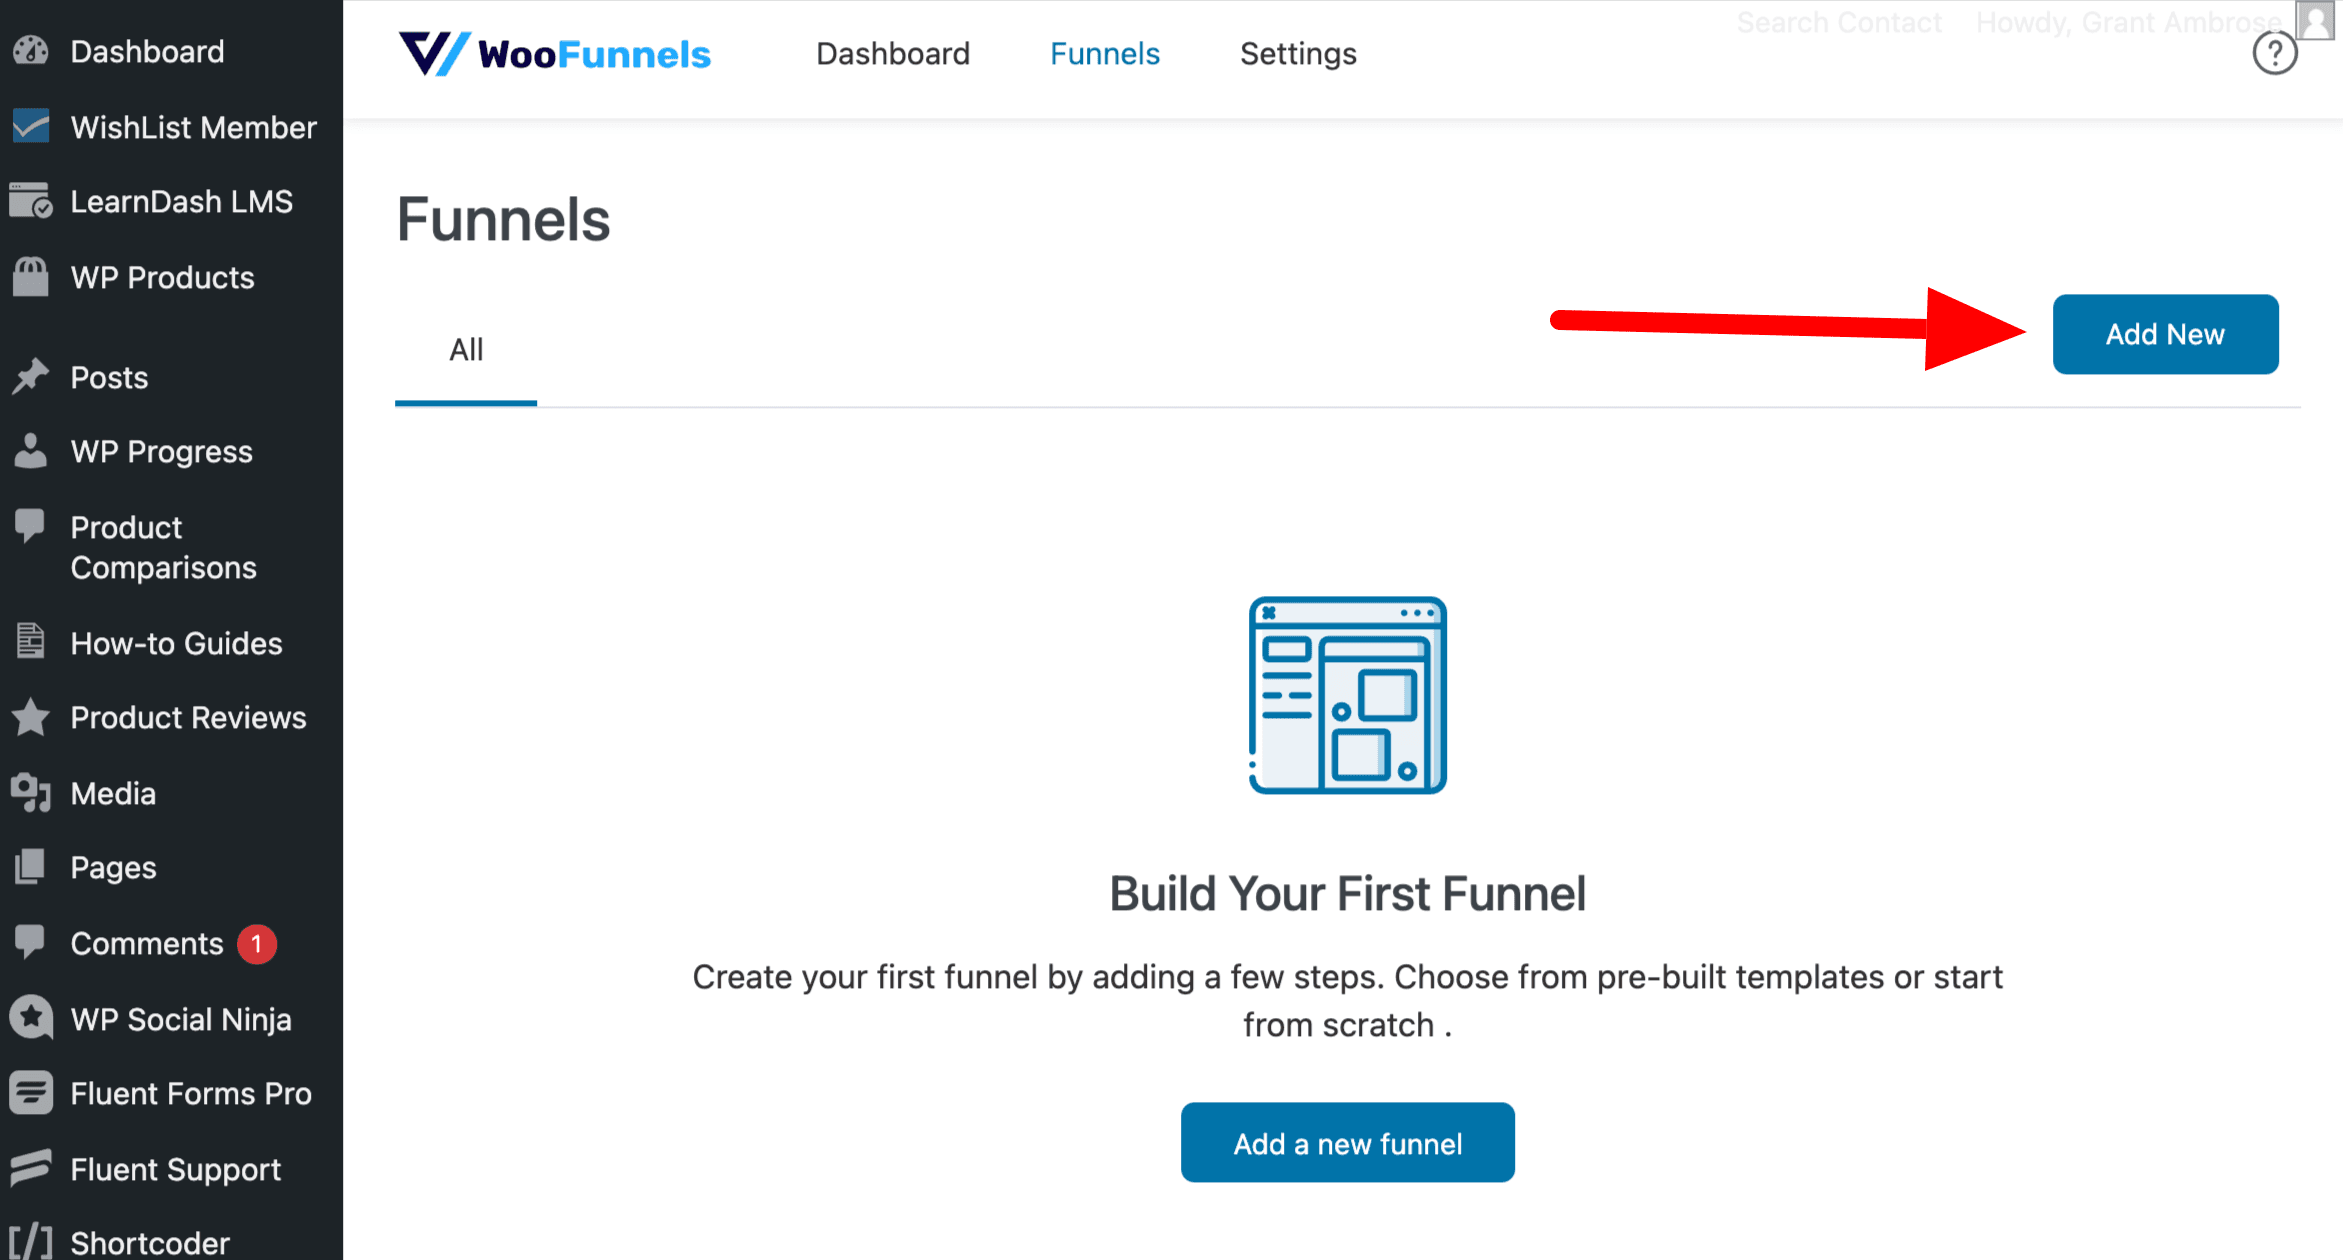
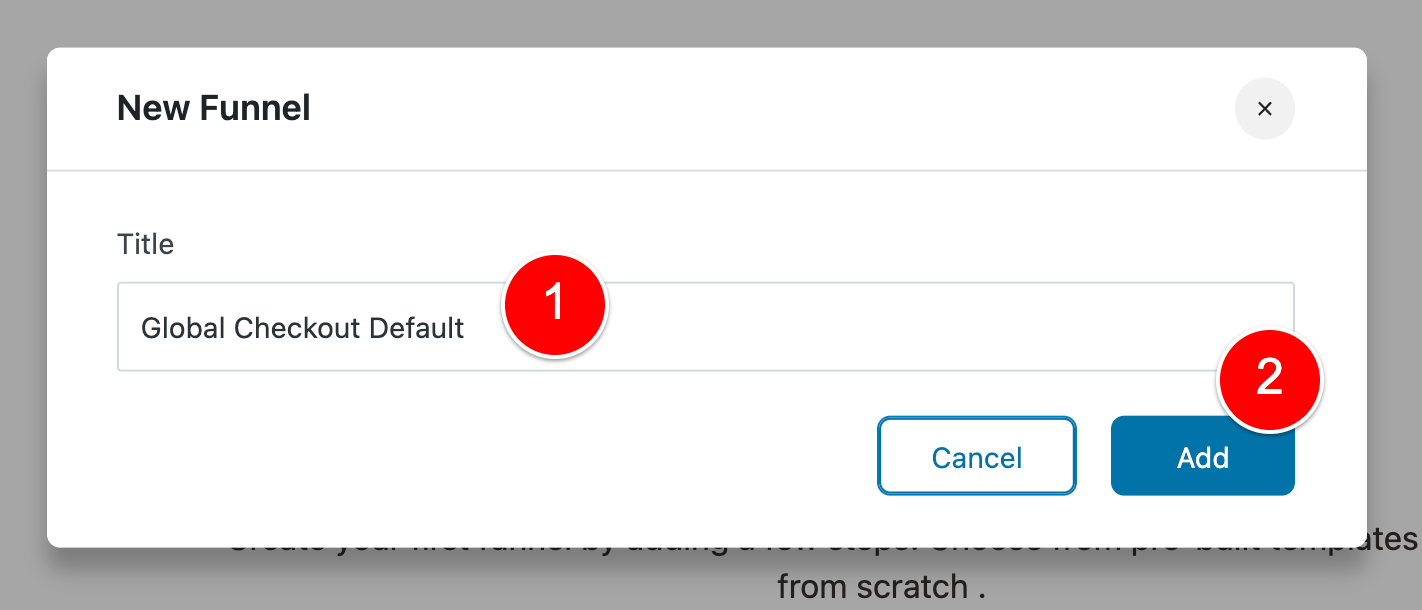
Give this Funnel a name and click Add. I like to write the word “Global” in this Title and you’ll see why later in this article.
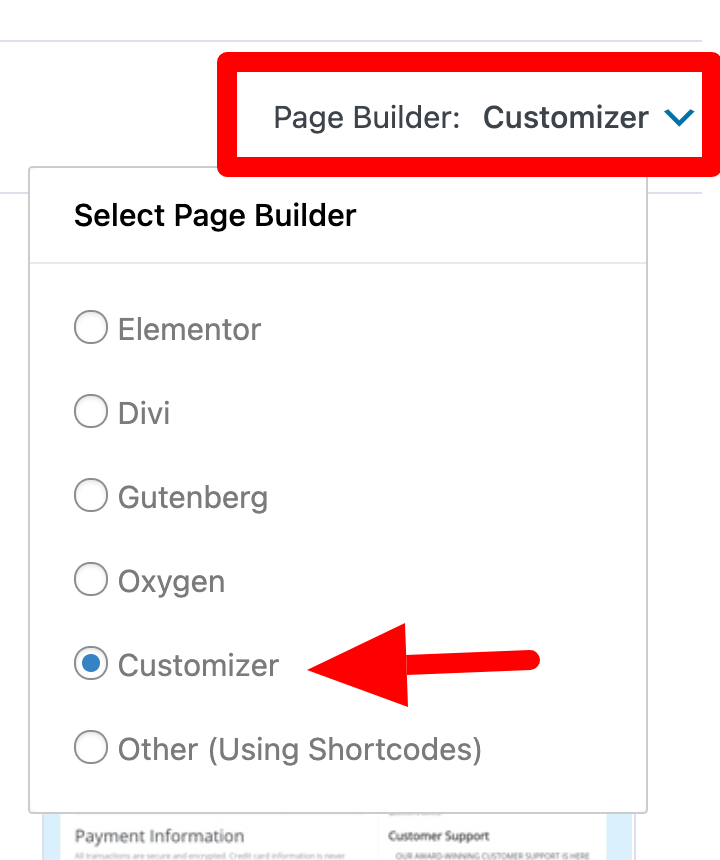
Next, click on Checkouts (1), choose your Page Builder if you’re using one at (2) and then, finally, choose your Checkout Page template you’d like to you.
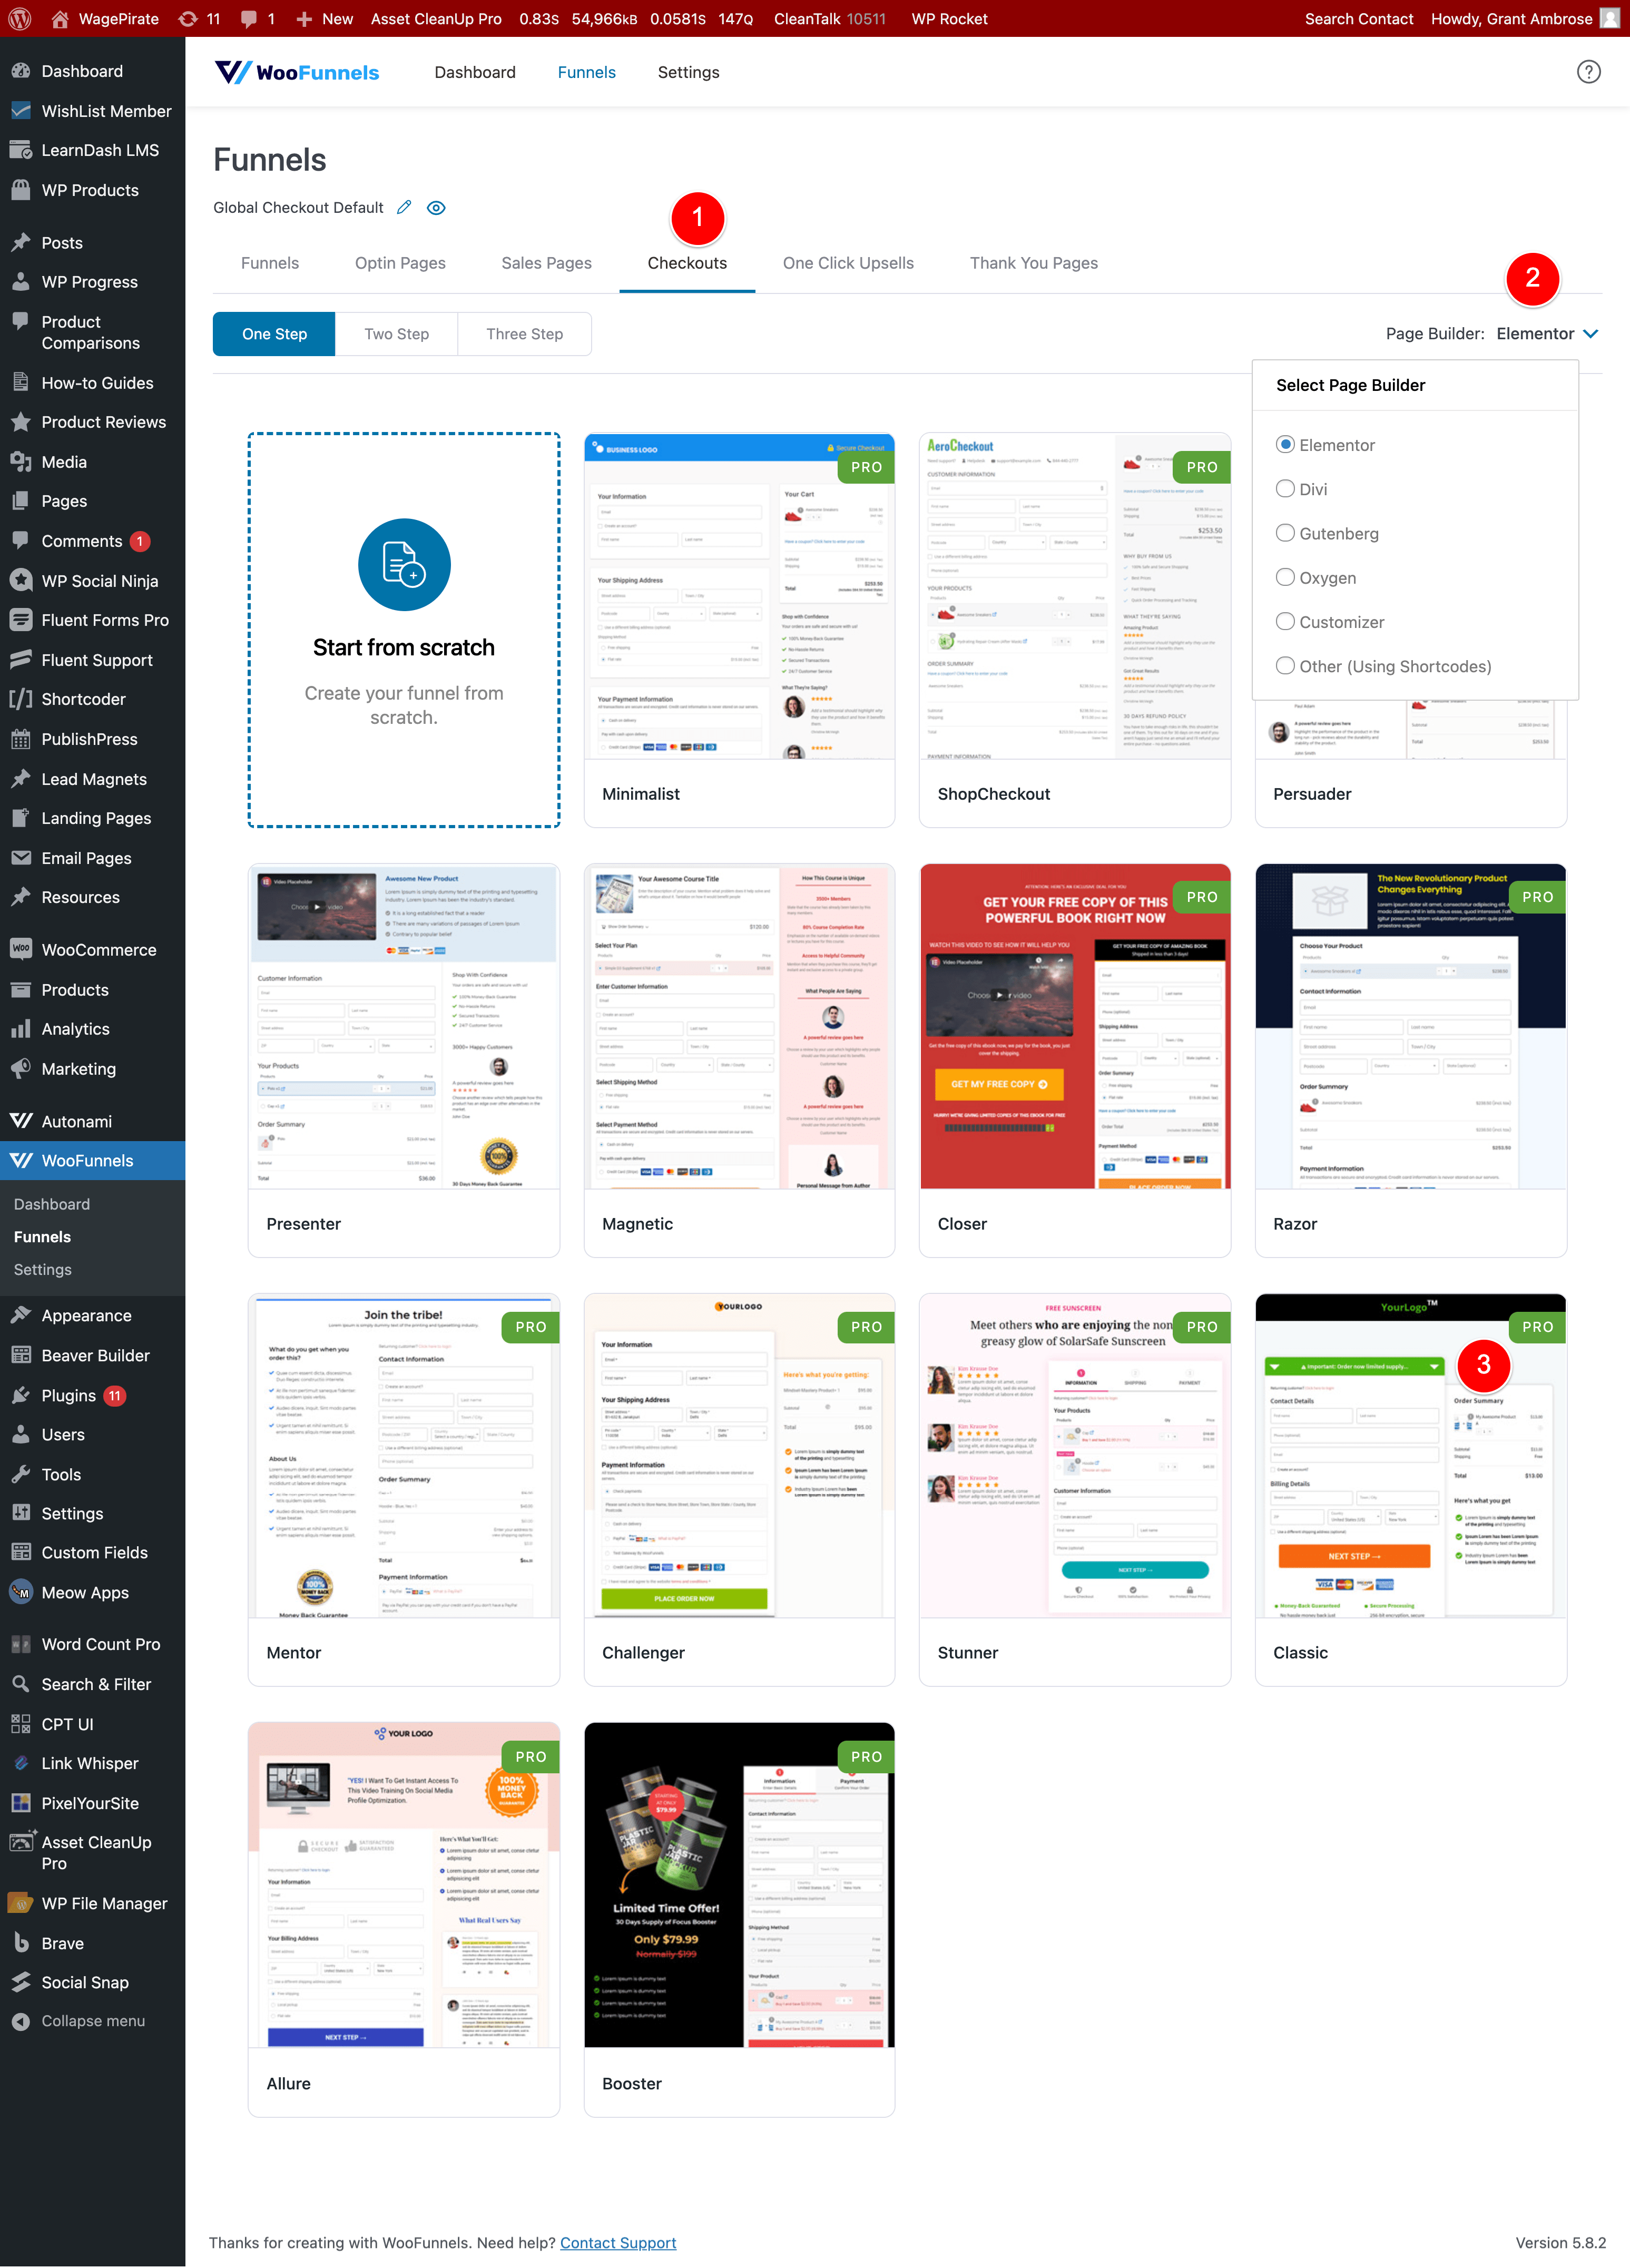
As you can see in the above screenshot, there are quite a few templates to choose from and the best thing is that they are all very different from each other. I have it set up to show Checkout Page templates that are built with the Elementor page builder, but there are many other options to choose from, depending on how you’re building your pages in WordPress.
I use the Bricks Builder page builder for WordPress to design all my websites. So I build my checkout page using Bricks and then I just add the shortcode FunnelKit gives you to output the Checkout Form into my design for the page I’ve made in Bricks.
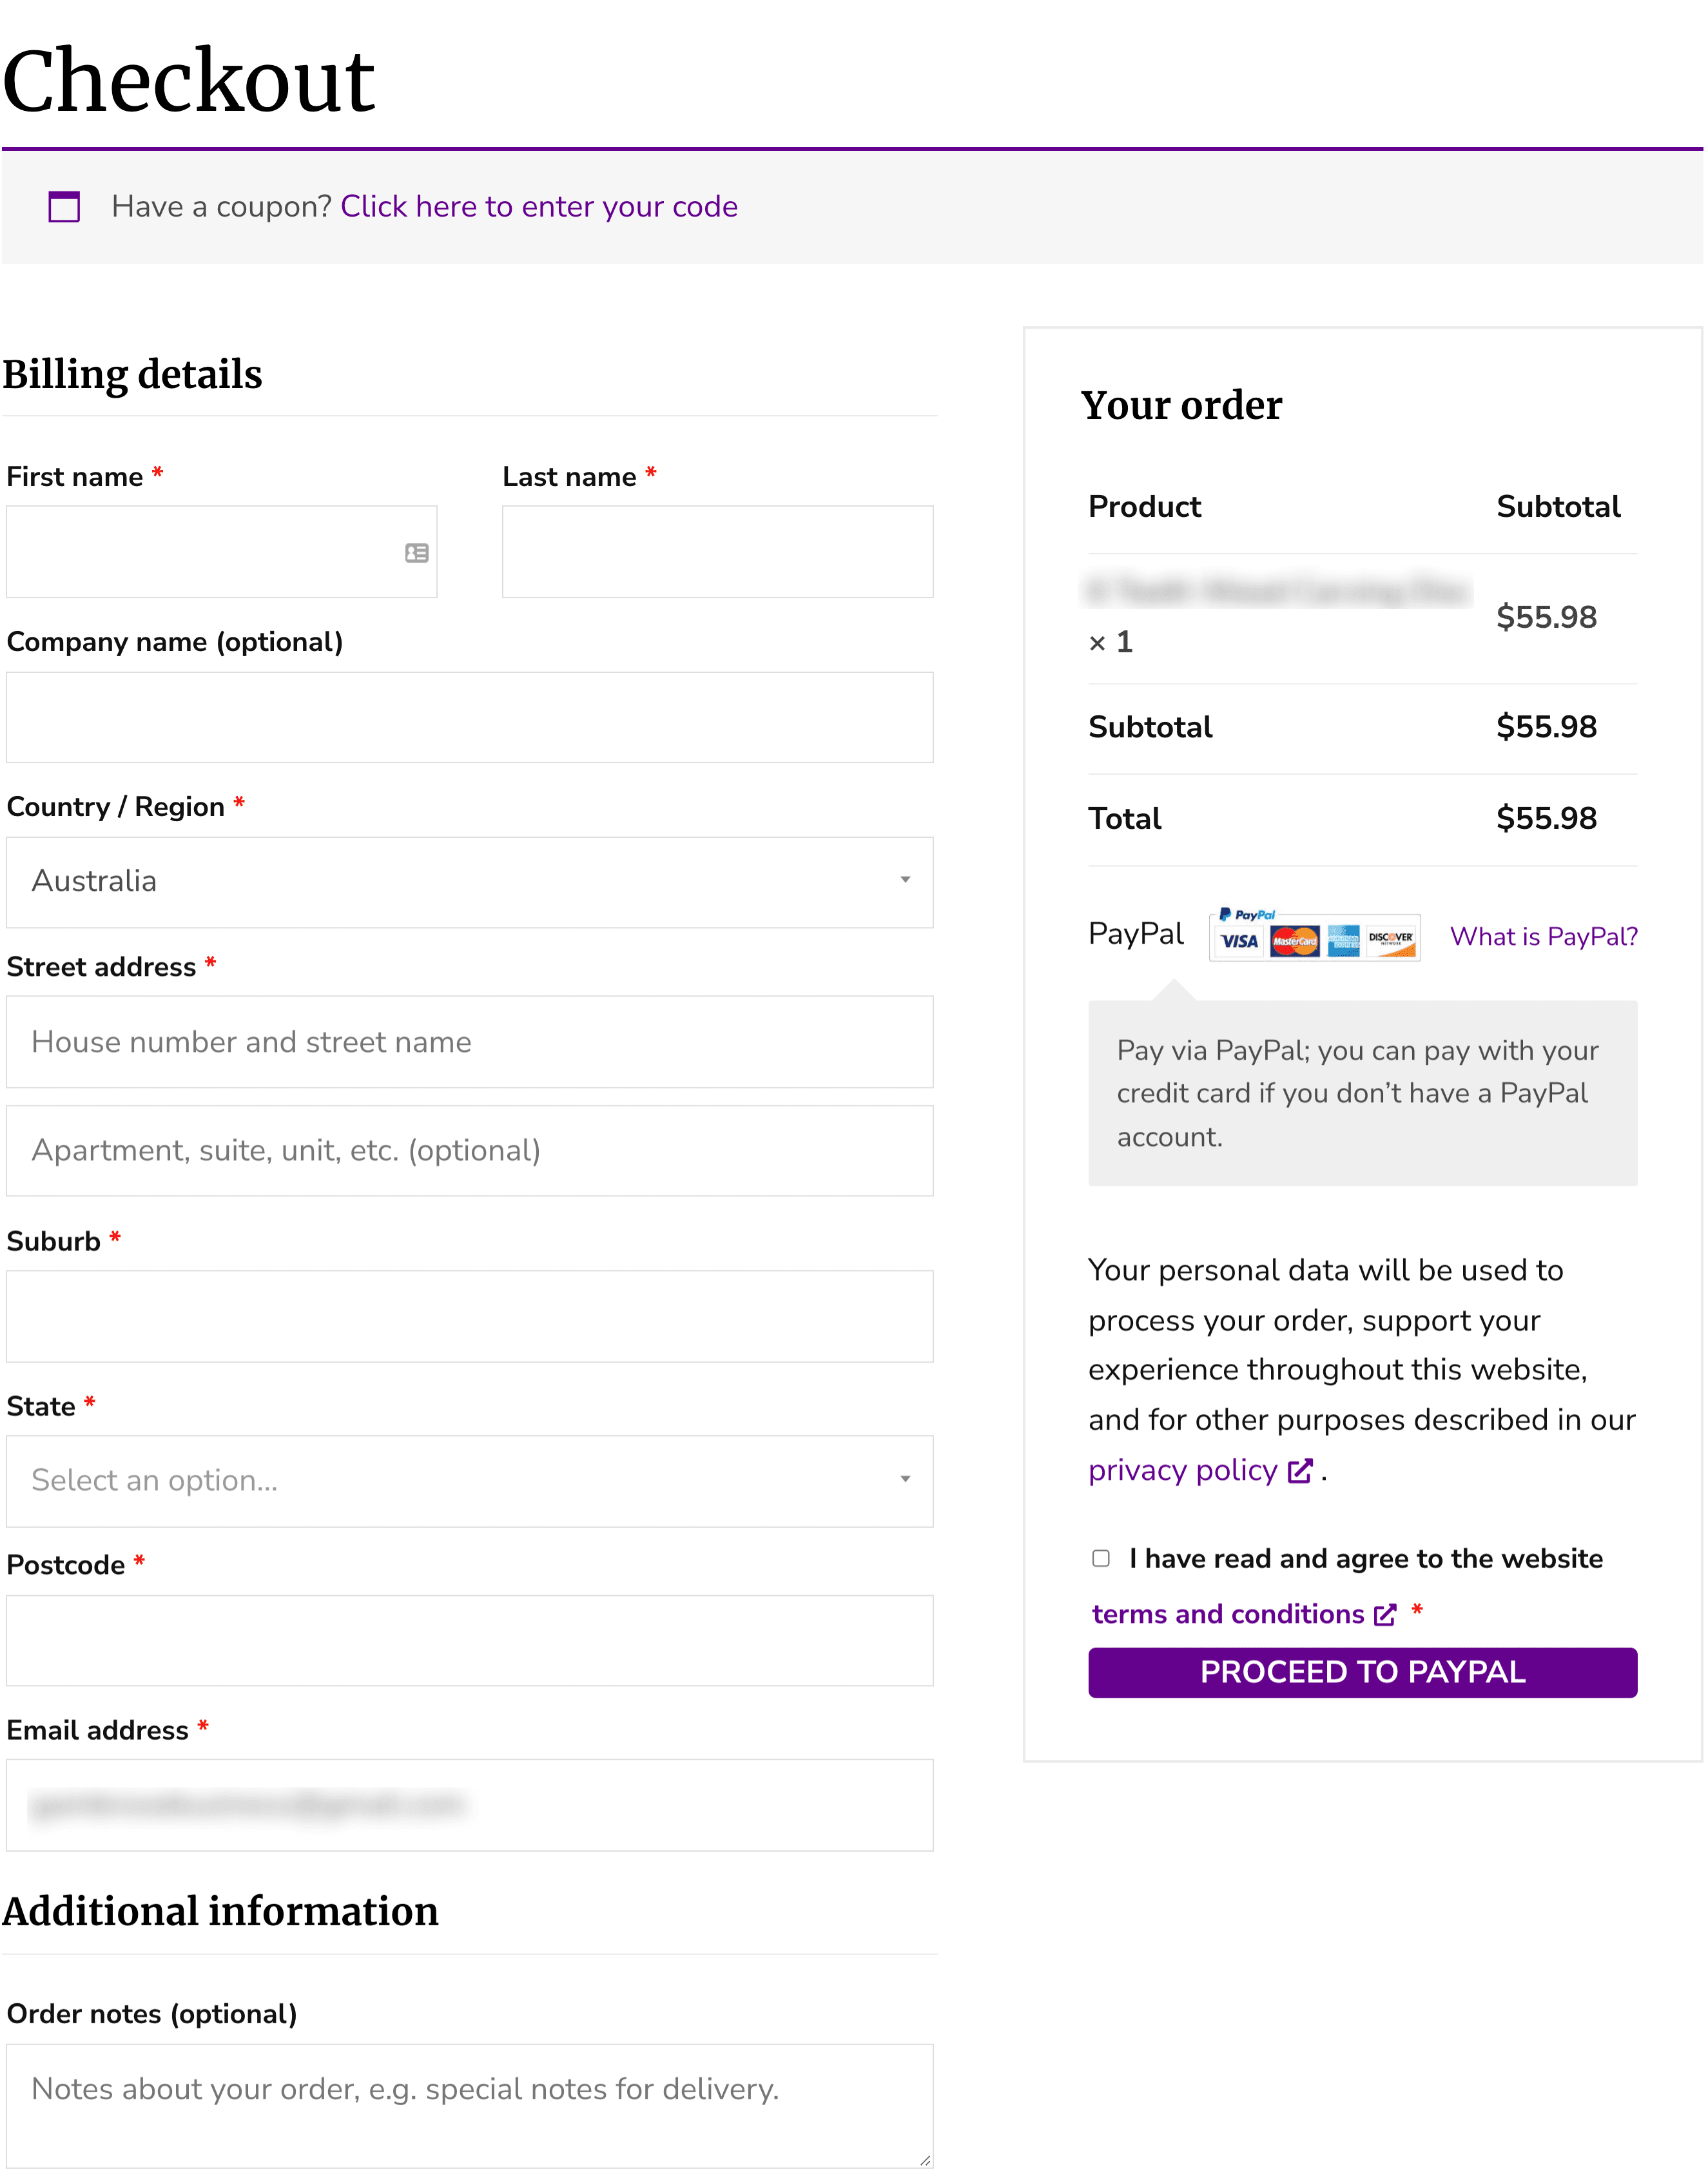
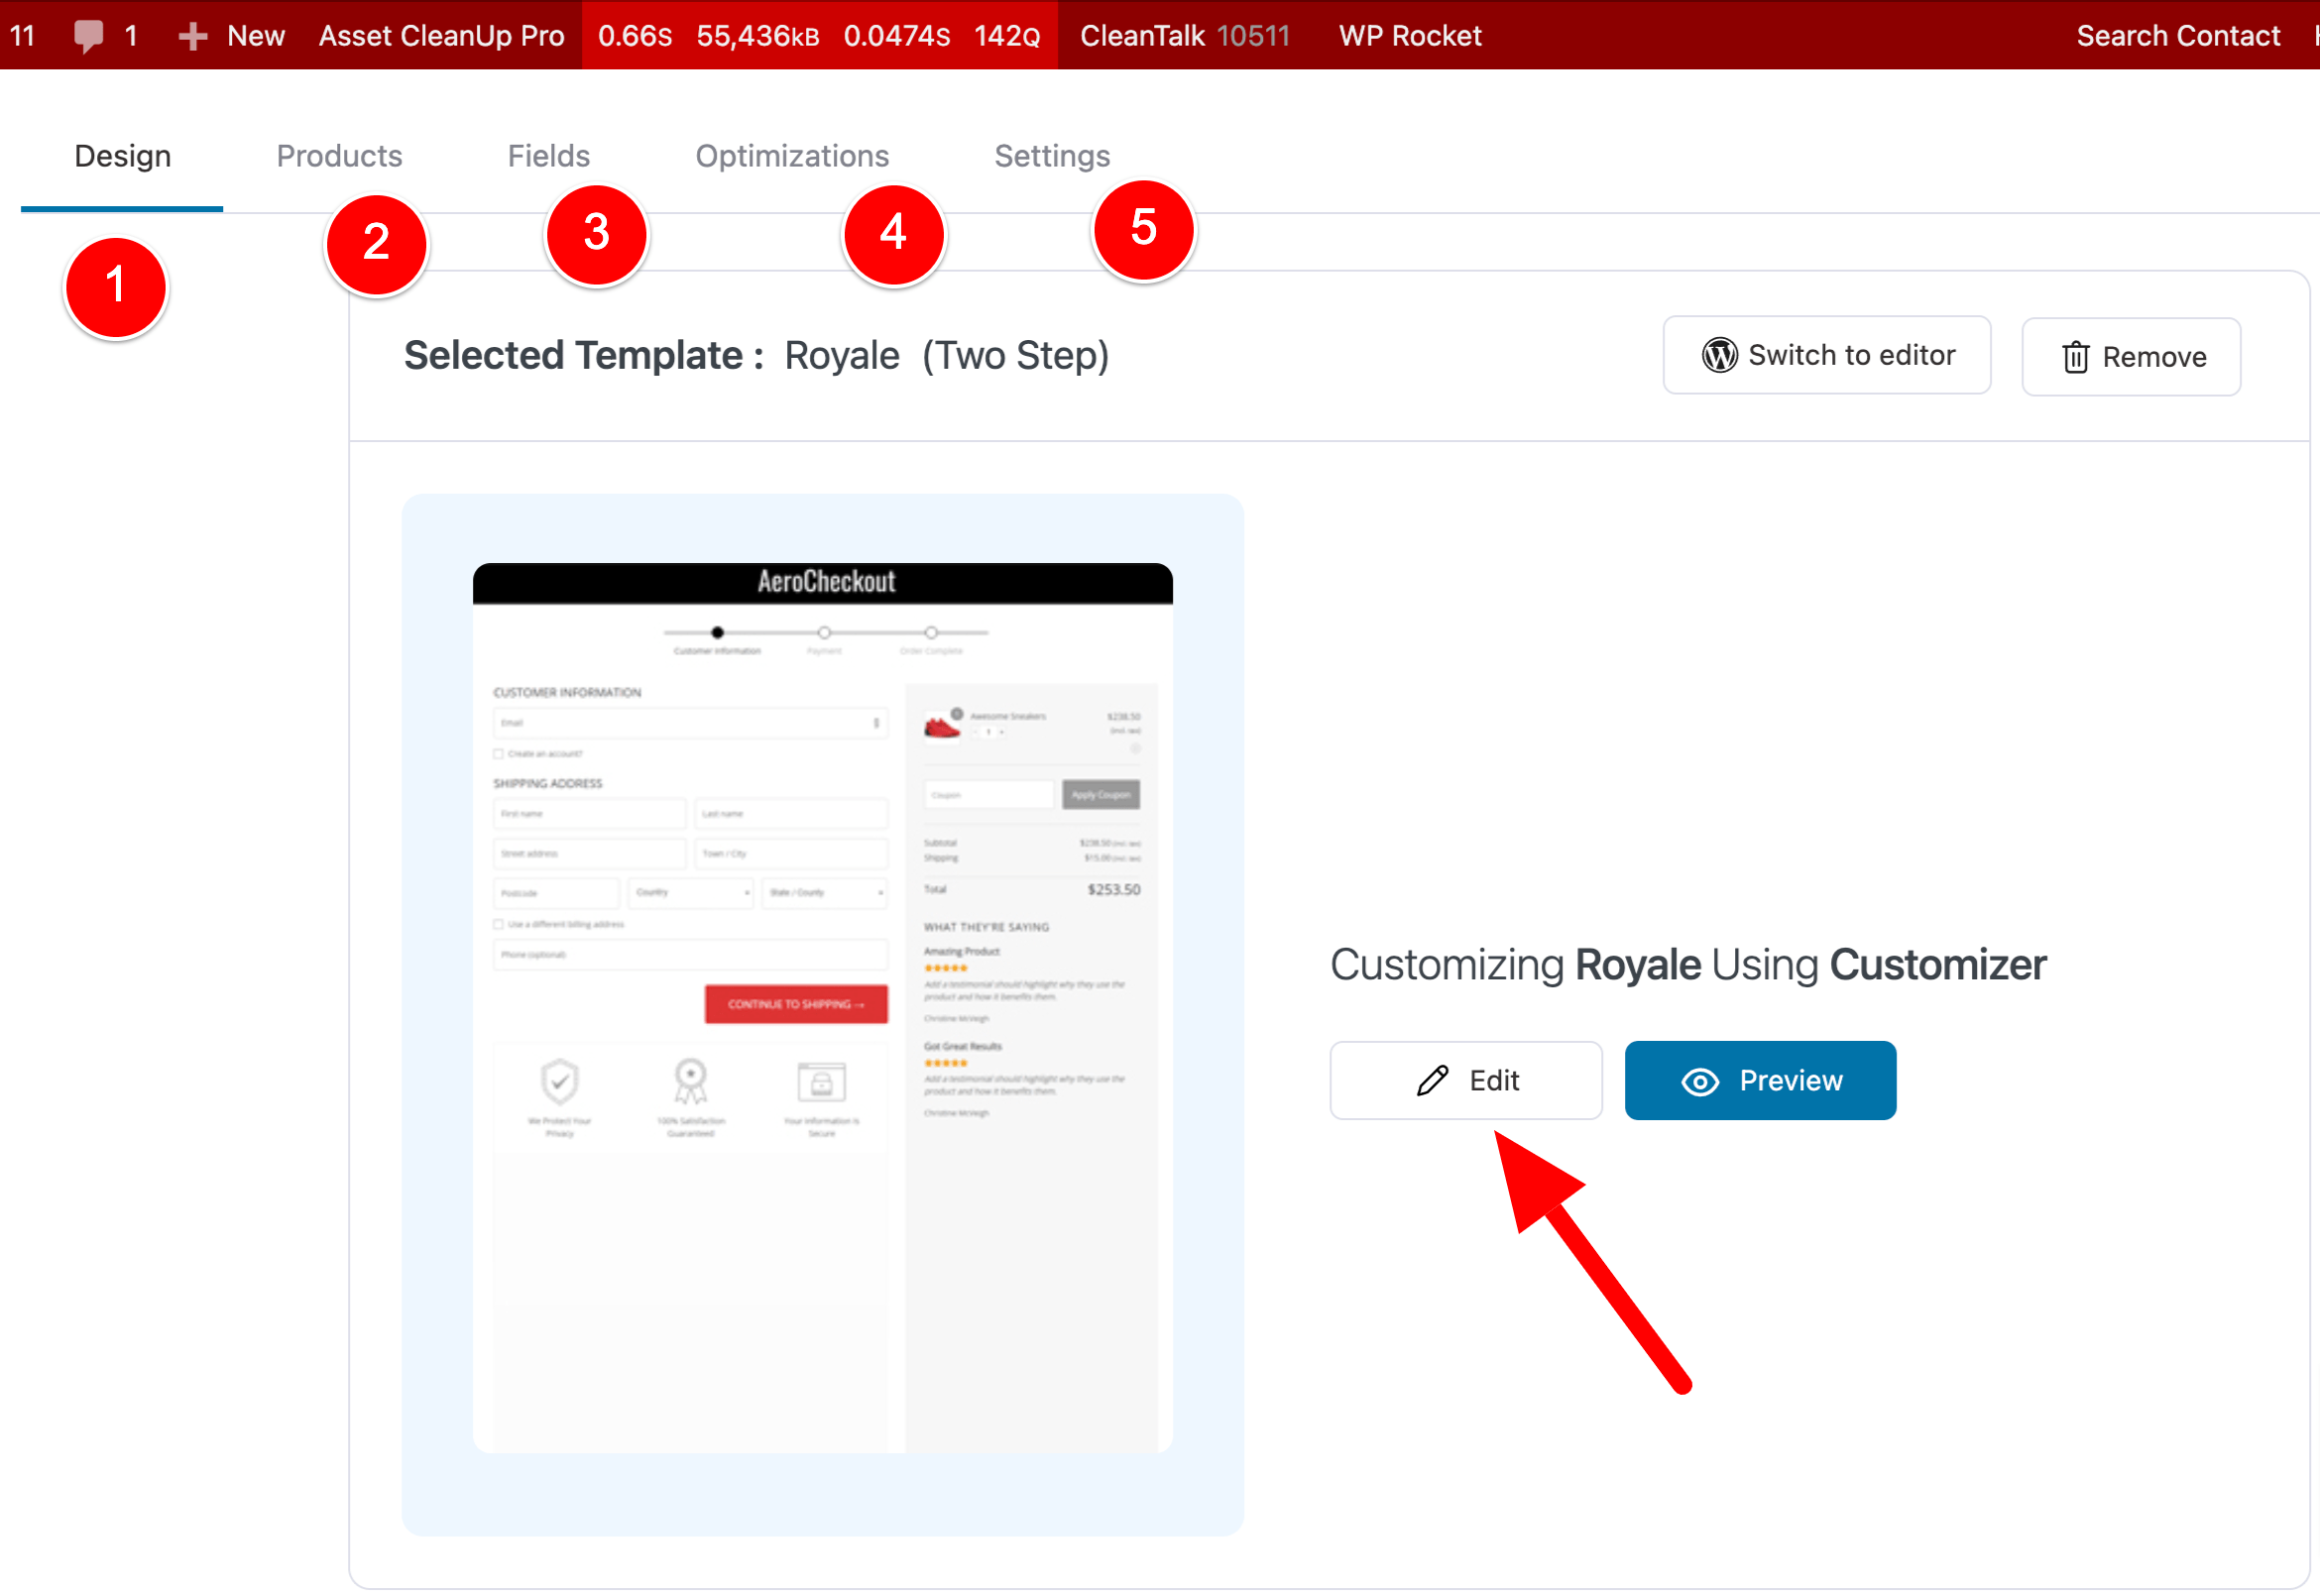
For this tutorial, I will choose the Customizer option as it doesn’t require you to have a 3rd party page builder, so anyone reading this article can follow this exactly as I do from here on.
The normal way you’d go about selecting your template is as below (just so you know). (1) Choose what Page Builder you’re using, (2) choose if you want your checkout form to be a One Step, Two Step or Three Step form (more on this in a bit). Once you choose those two options, you’ll then be shown a list of Checkout Templates that match your criteria and you choose one.
I chose to use the Customizer, a Two Step form and then went with the Royale template.

This is a full-screen capture of what this template looks like so you can get a better idea of what we’re working with out of the box.

After you select your checkout page template, you’ll be taken to a page that looks like the below.
The main thing I want you to take note of is the number 1 2 3 4 5 up the top. These are separate pages where you can customize settings for this two column WooCommerce checkout page.
We will go through each of these options, but for now, let’s stay on (1) and click Edit.
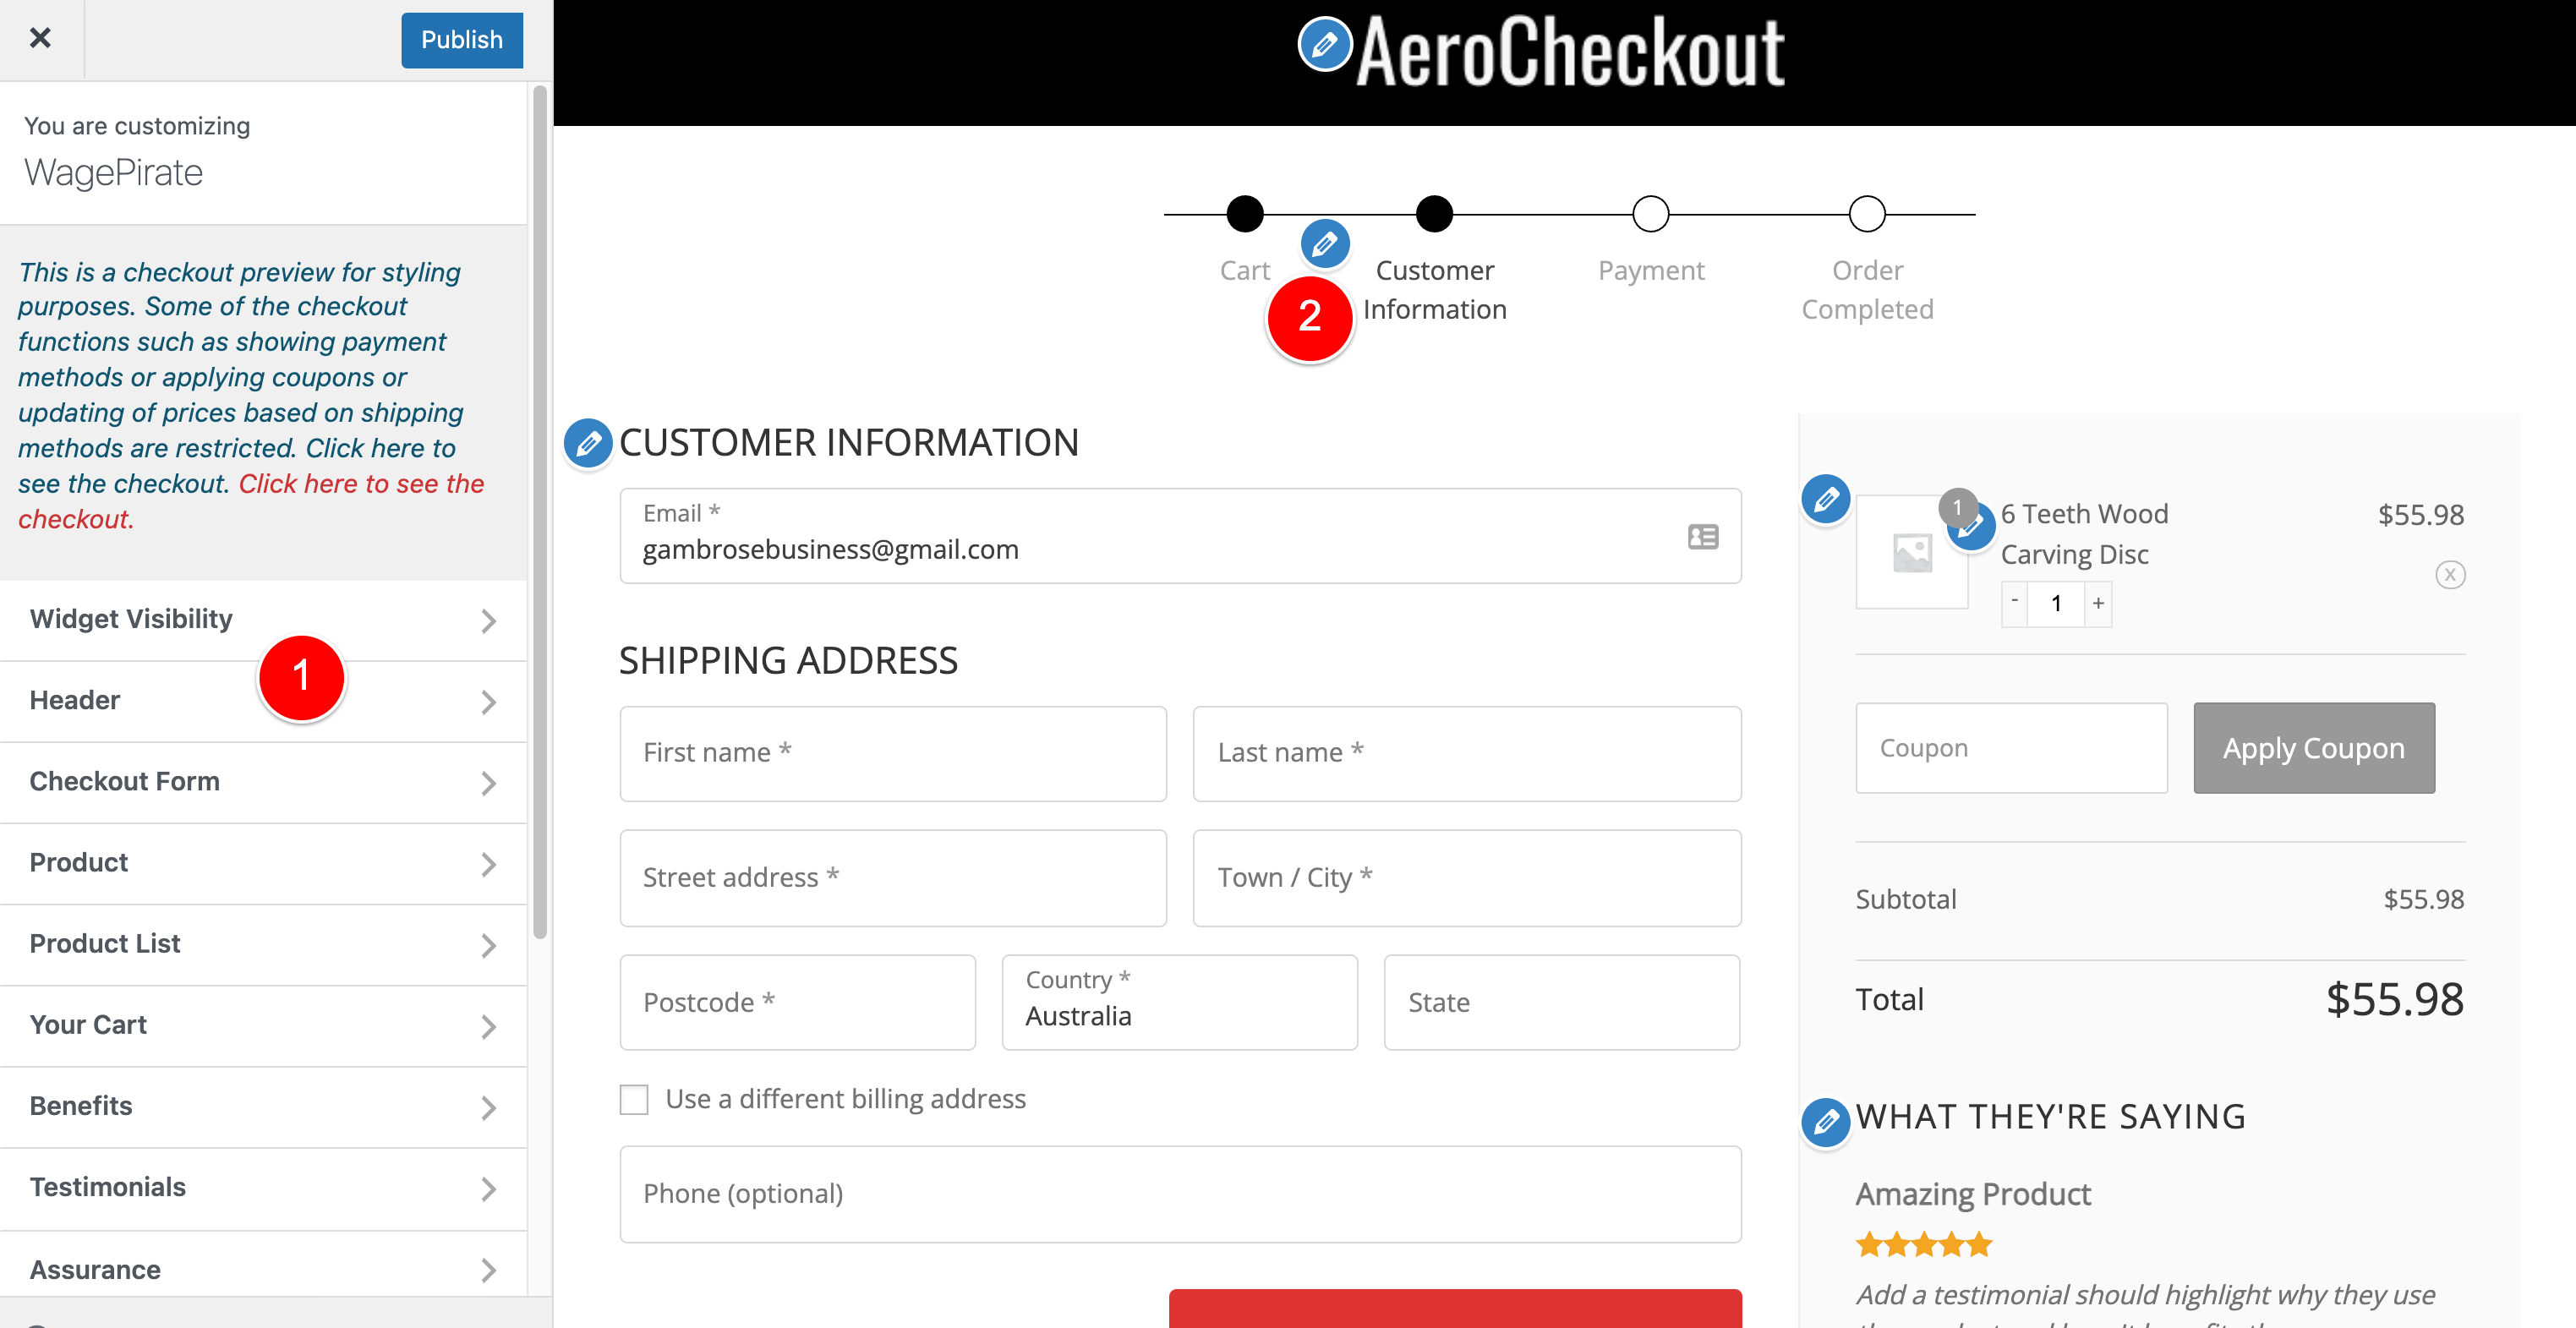
When you click on Edit, that launches the WordPress Customizer and you can then go through the options in (1) below to adjust each setting and that will update your checkout page design. As you are editing in the customizer, you can see your changes live.
If you click on any of the blue pencil icons like at (2) that will go directly to editing that element in the Customizer.
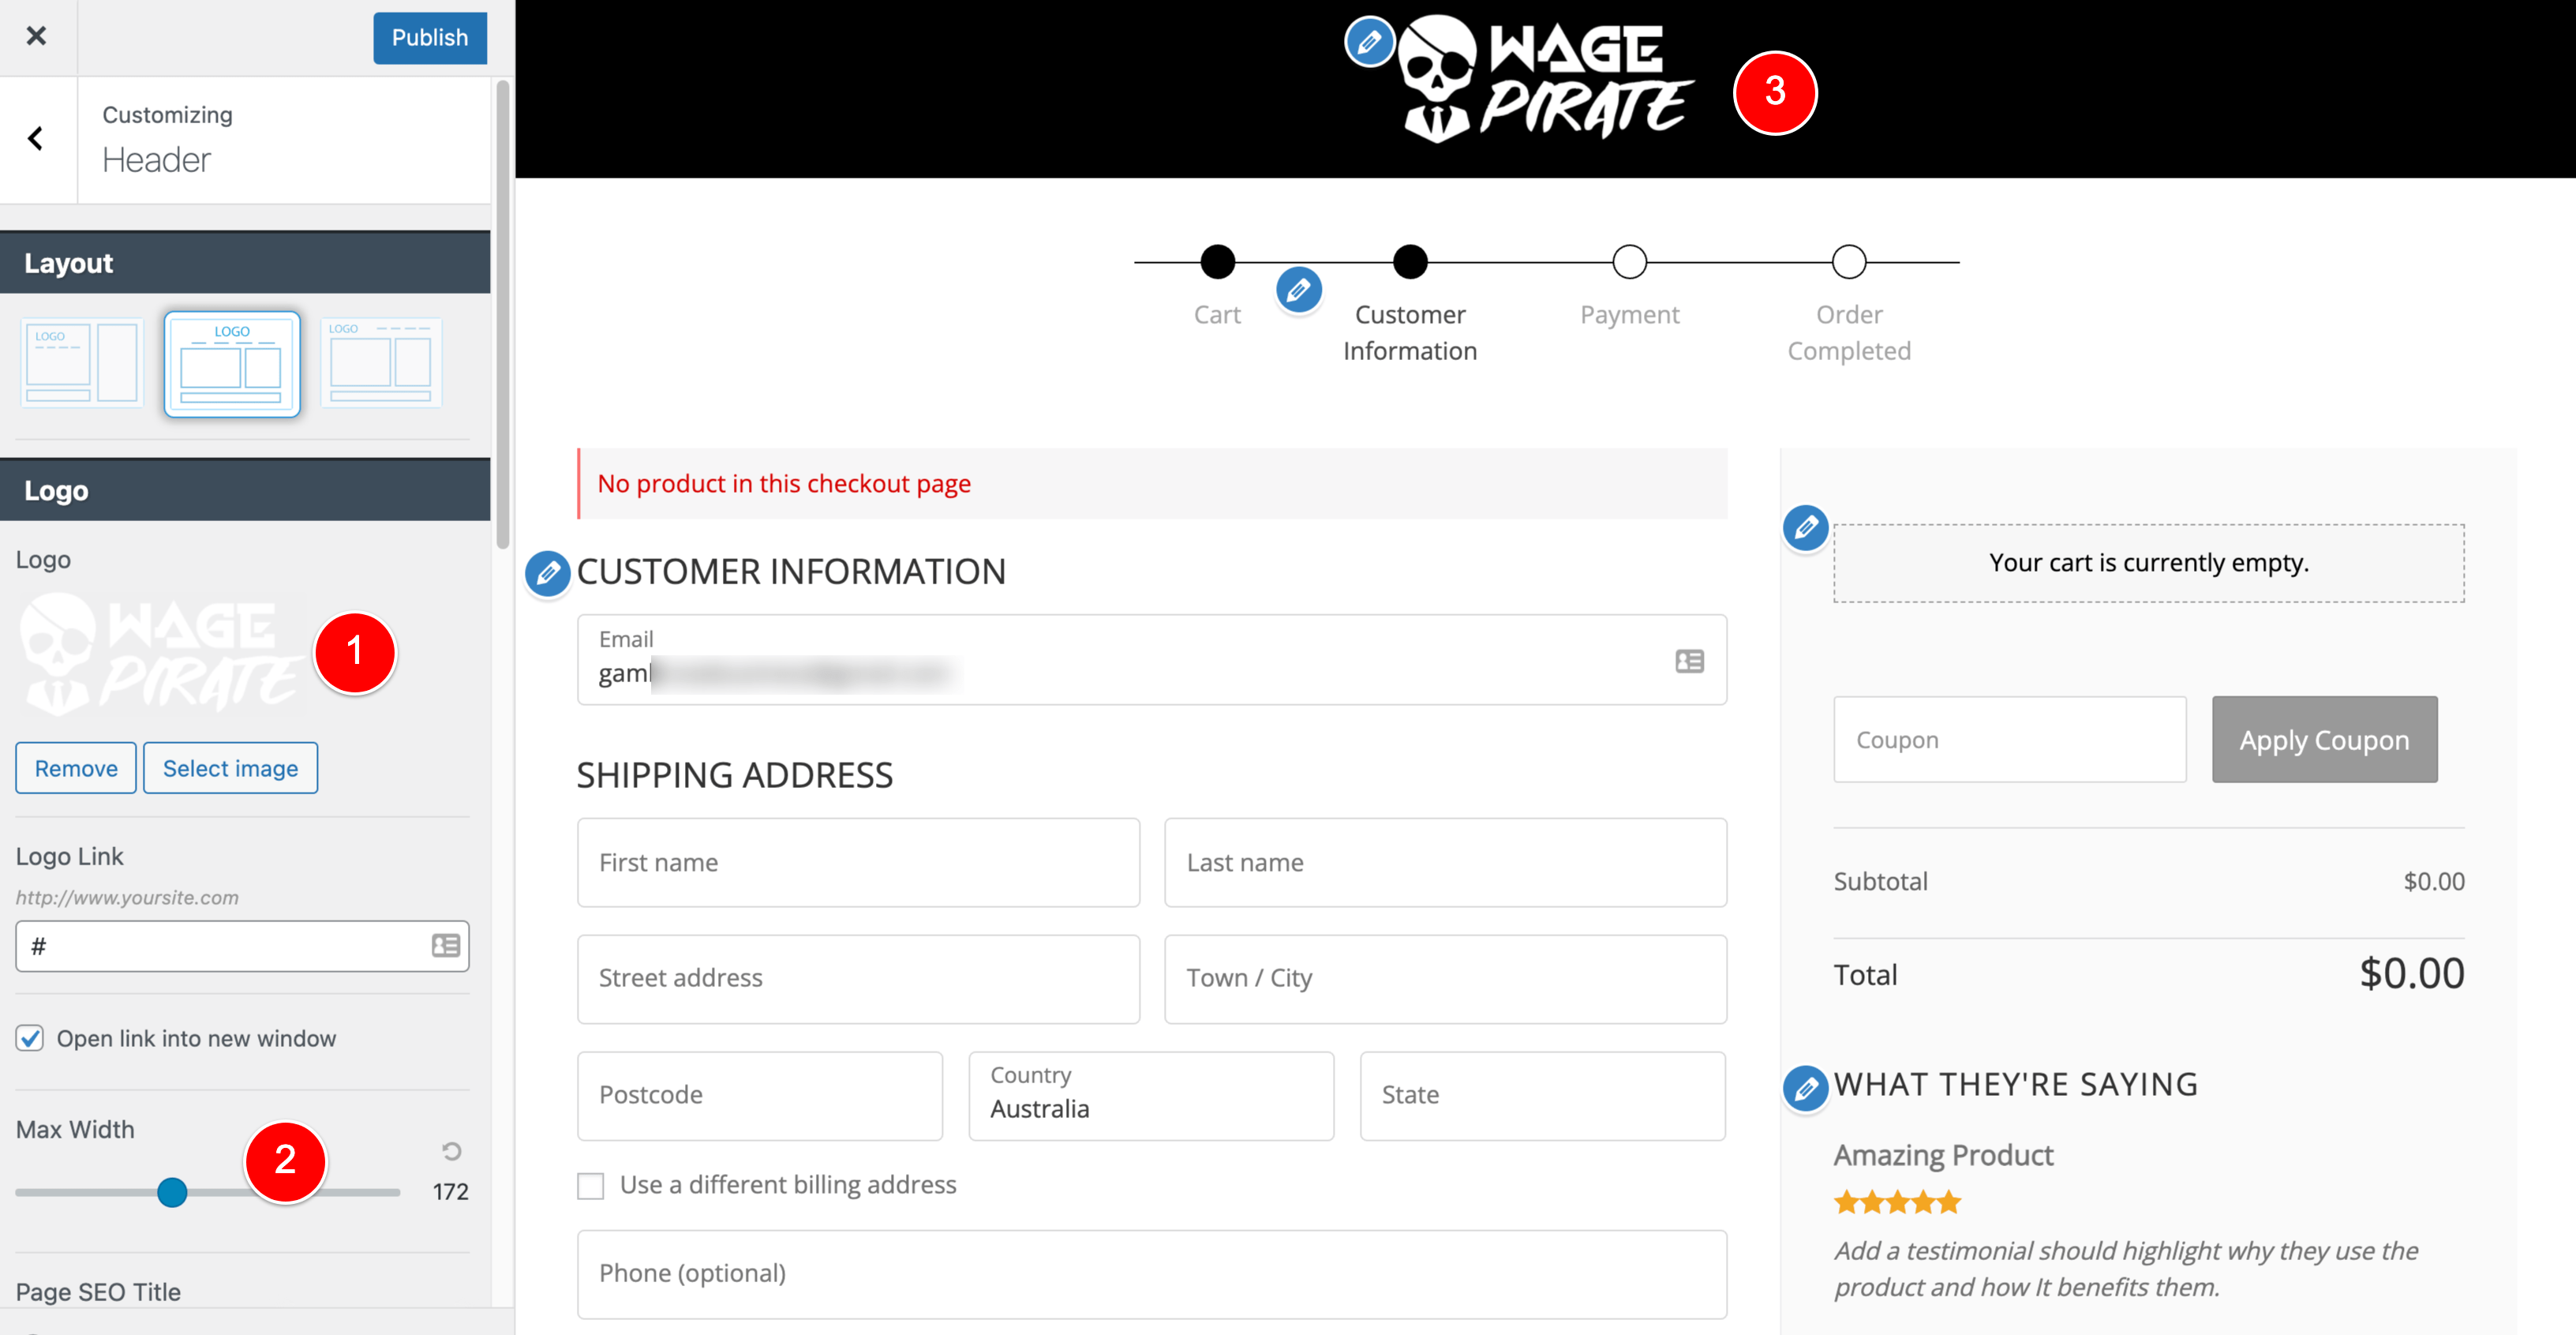
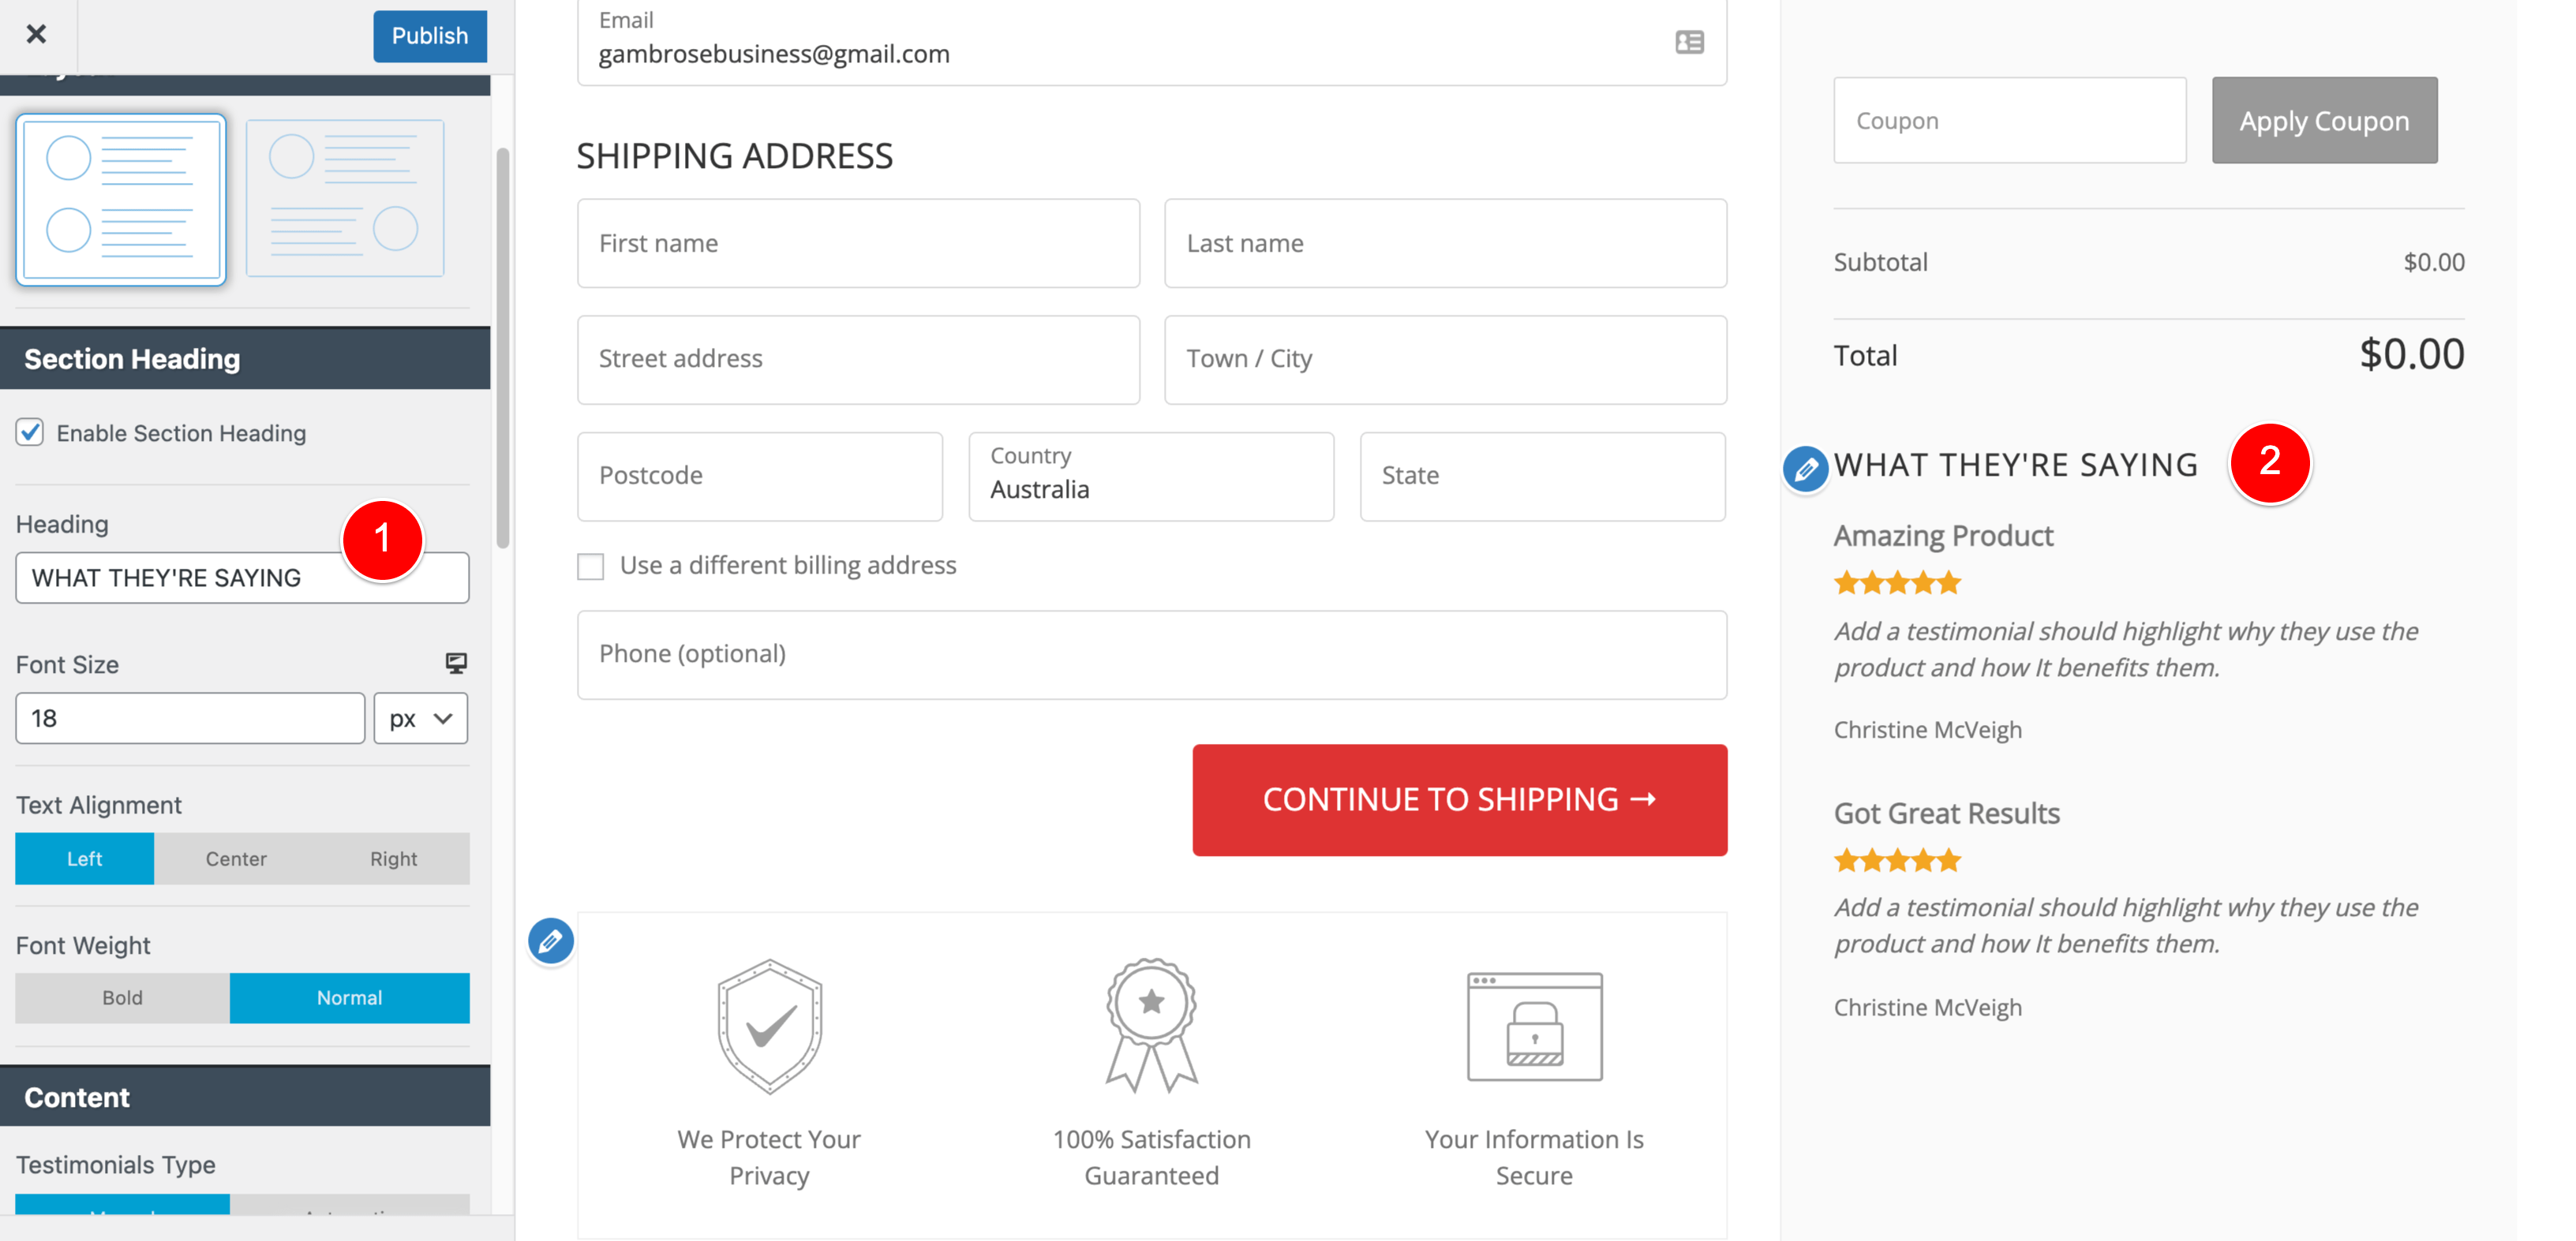
As a quick example, I’ll update the logo.
To do this, I click on Header in the Customizer sidebar, then upload the image (1), set the width of the logo (2) and it updates live on the website (3).
Here is one last example where you edit the title of the testimonials block. You edit every setting in a similar way to this one – it’s super easy.
So once you’ve edited all the settings in the Customizer, your checkout page is all designed and ready for the next step in this process.
Set your new Checkout Page design to be used by WooCommerce
Now that we have designed this Checkout Page template, we need to assign WooCommerce to use this template when it goes to load the checkout page for our visitors.
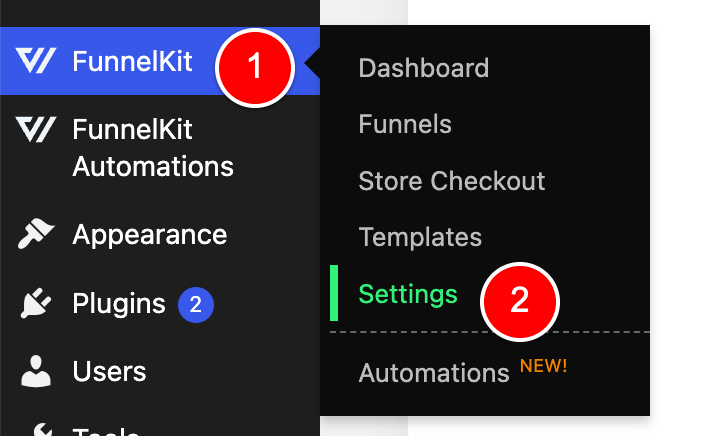
To do this, go to FunnelKit > Settings.
Then Checkouts > Global Checkout and select the template you just created.
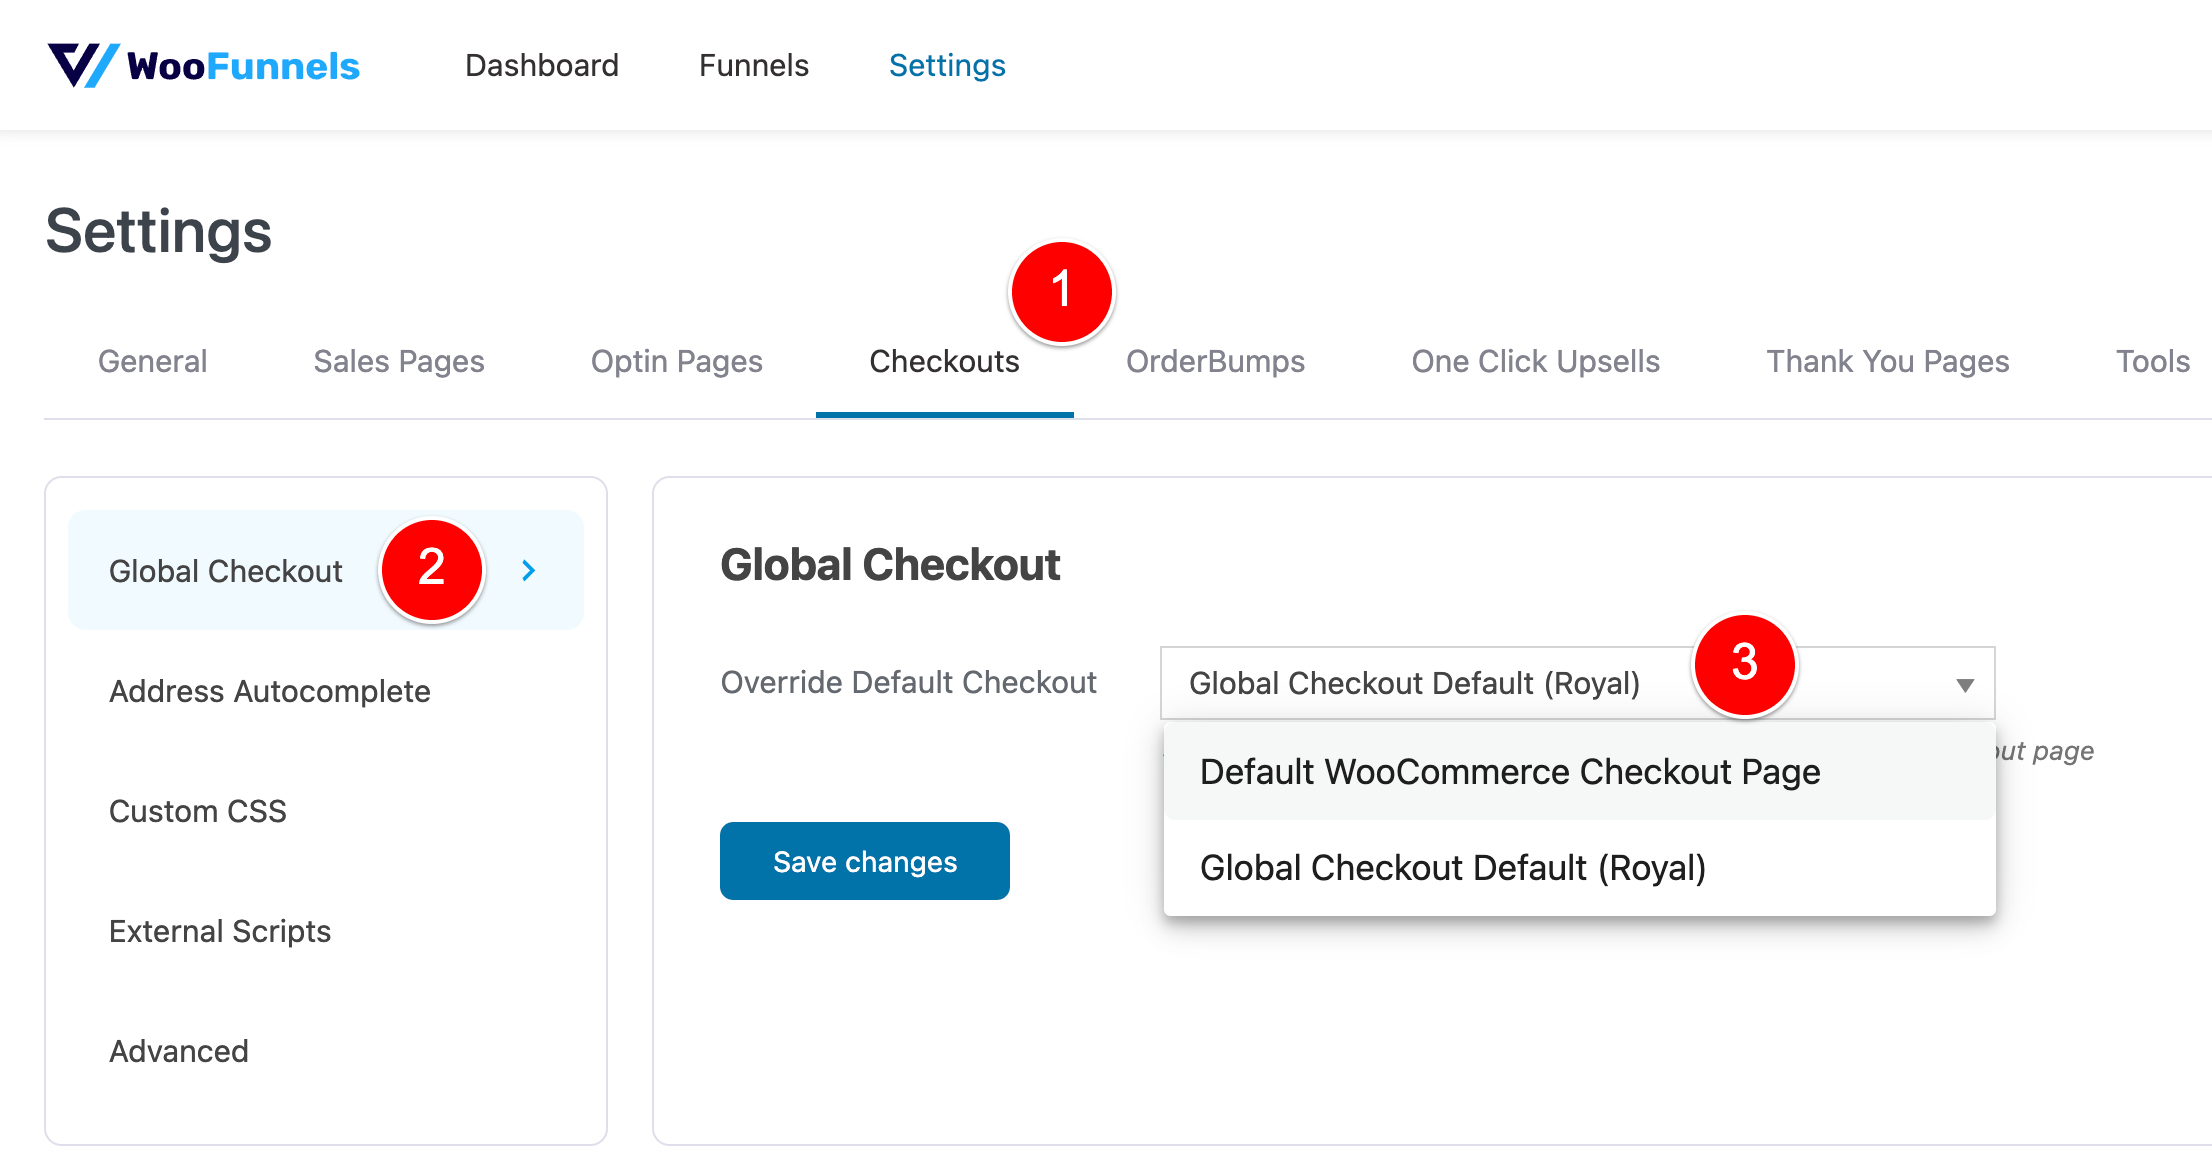
And that’s it!
Now whenever your visitor adds something to their cart and clicks “Go To Checkout” on your website, this new template you’ve just set as the Global Checkout will load for your visitor.
I.e. you have assigned your new two column checkout page template to be used when your visitor goes to https://yourwebsite.com/checkout and it is all working now.
Create a completely custom Checkout Page using FunnelKit
You can create a completely custom checkout page using any Page Builder. All you need to do is add the shortcode FunnelKit gives you to output their checkout form.
This is exactly what I do, because I use Beaver Builder and, to this date, FunnelKit have not released pre-built templates for Beaver Builder. I think they’re working on it, but it seems they’ve prioritised Elementor, Oxygen and Gutenberg templates so far.
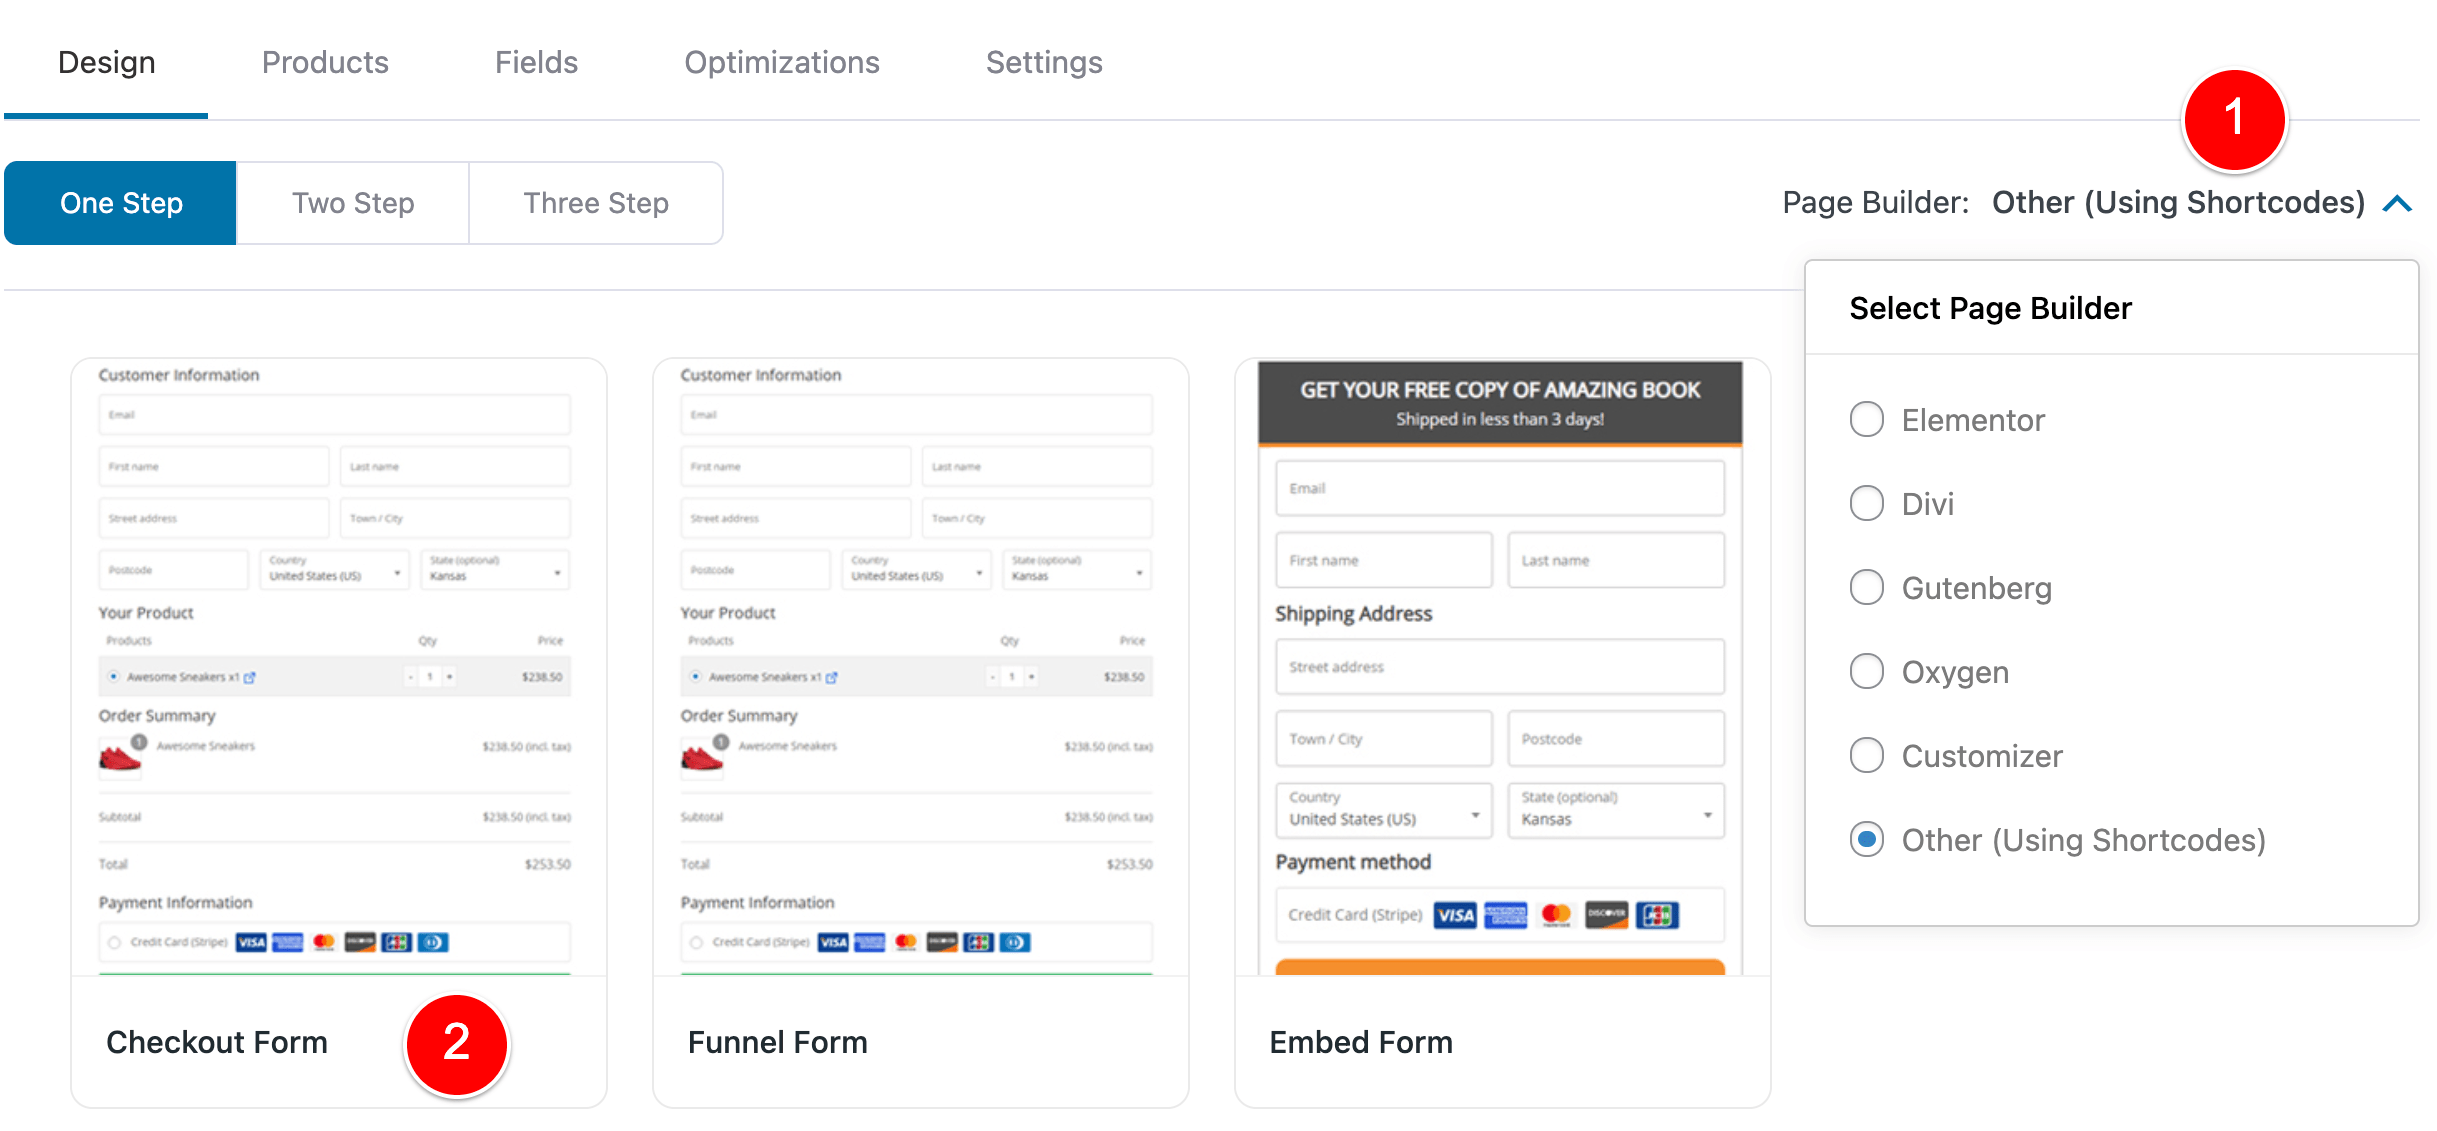
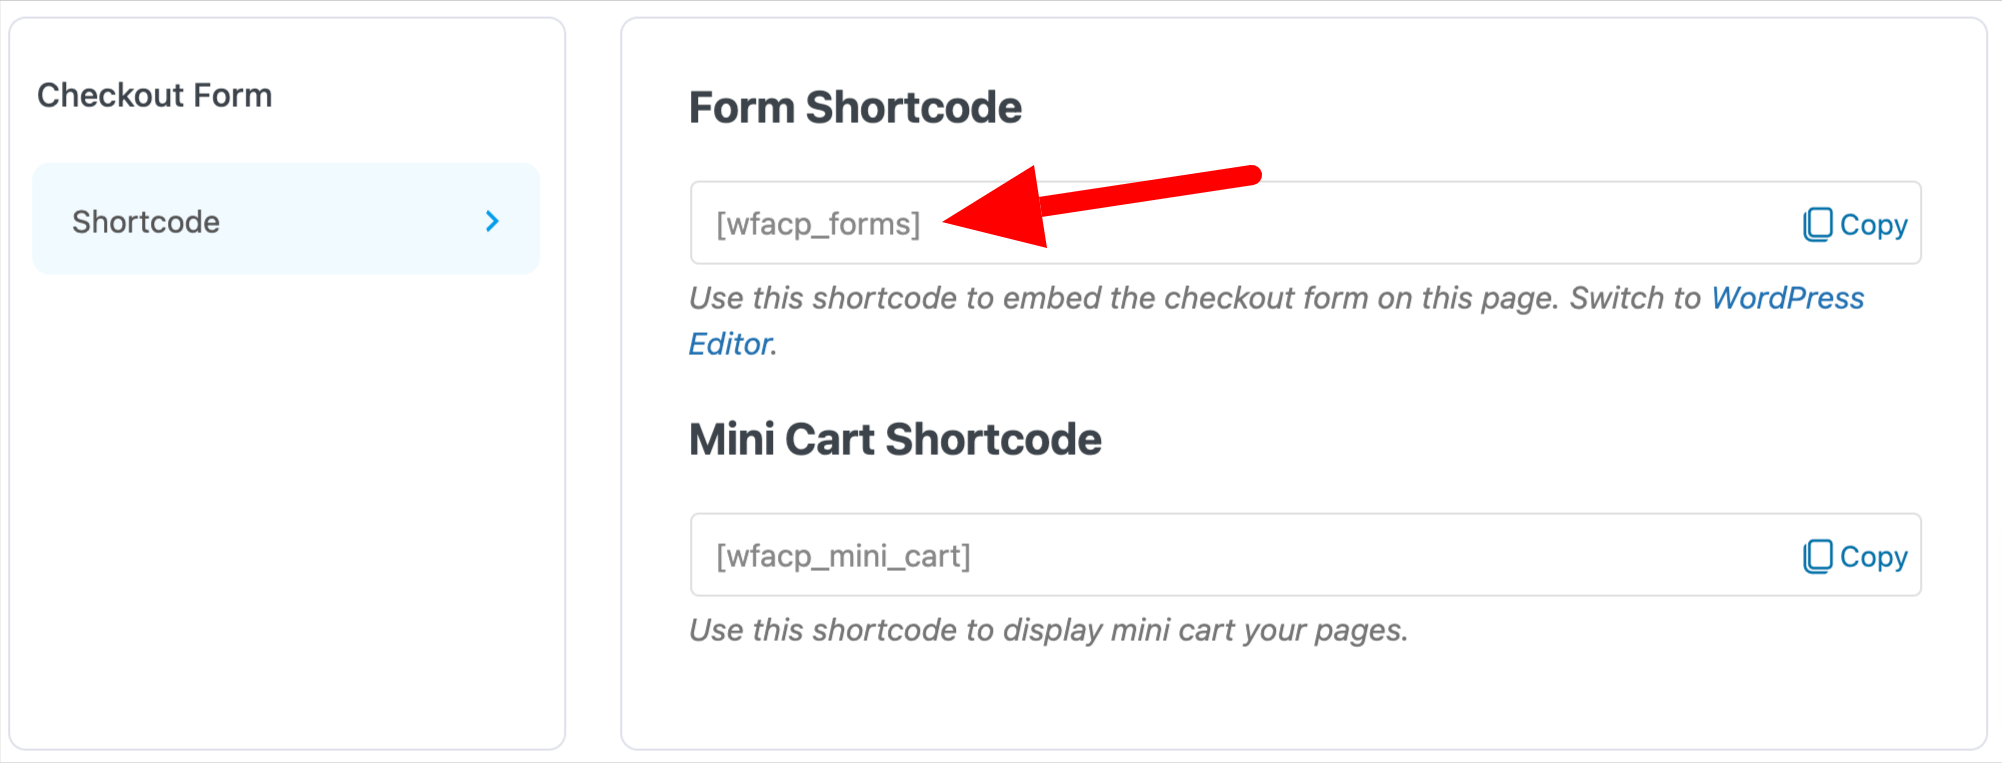
How I create my Checkout Page is by going to this screen that we looked at earlier in this tutorial and selecting Other (Using Shortcodes) at (1) and then selecting a checkout form (2).
Once you do that, you’ll see that you get the below shortcode.
So all you have to do next is design your checkout page using whatever Page Builder you use. In the below image I chose one of the pre-made templates you get when you purchase Beaver Builder.
And then I just insert the shortcode wherever you want the Checkout Form to show.
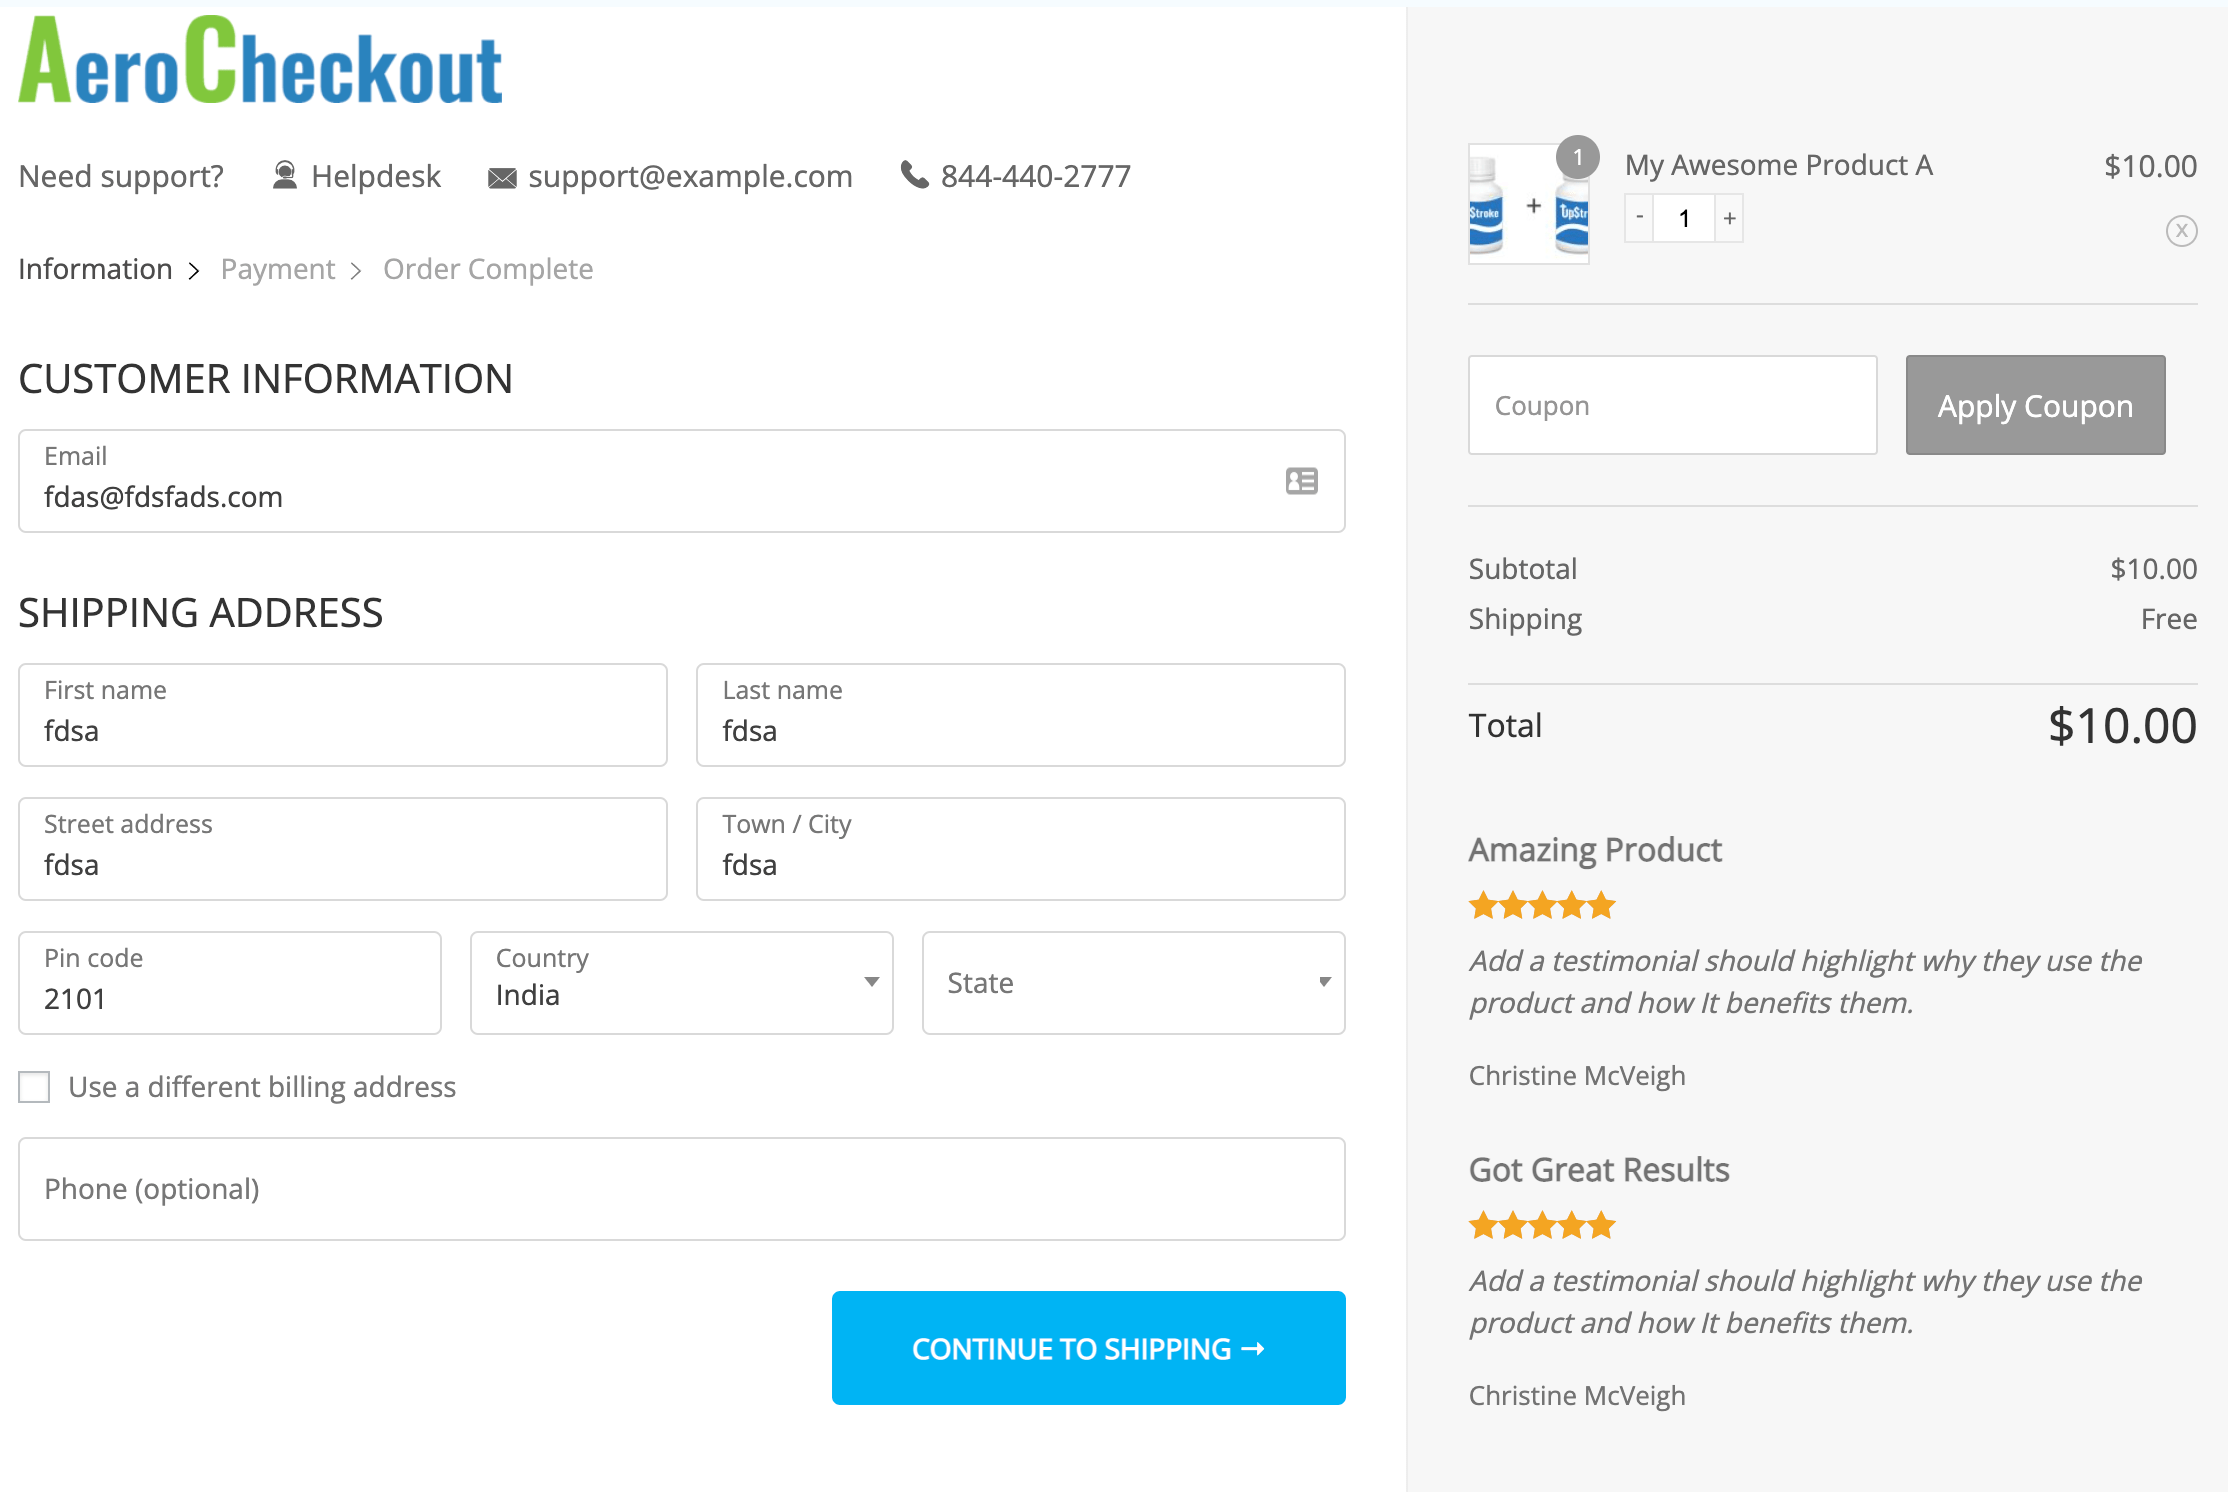
Here is a checkout page template I built using Beaver Builder. I added the shortcode into an HTML module and it outputs the form like this.
This page is now the global checkout page on my demo website.
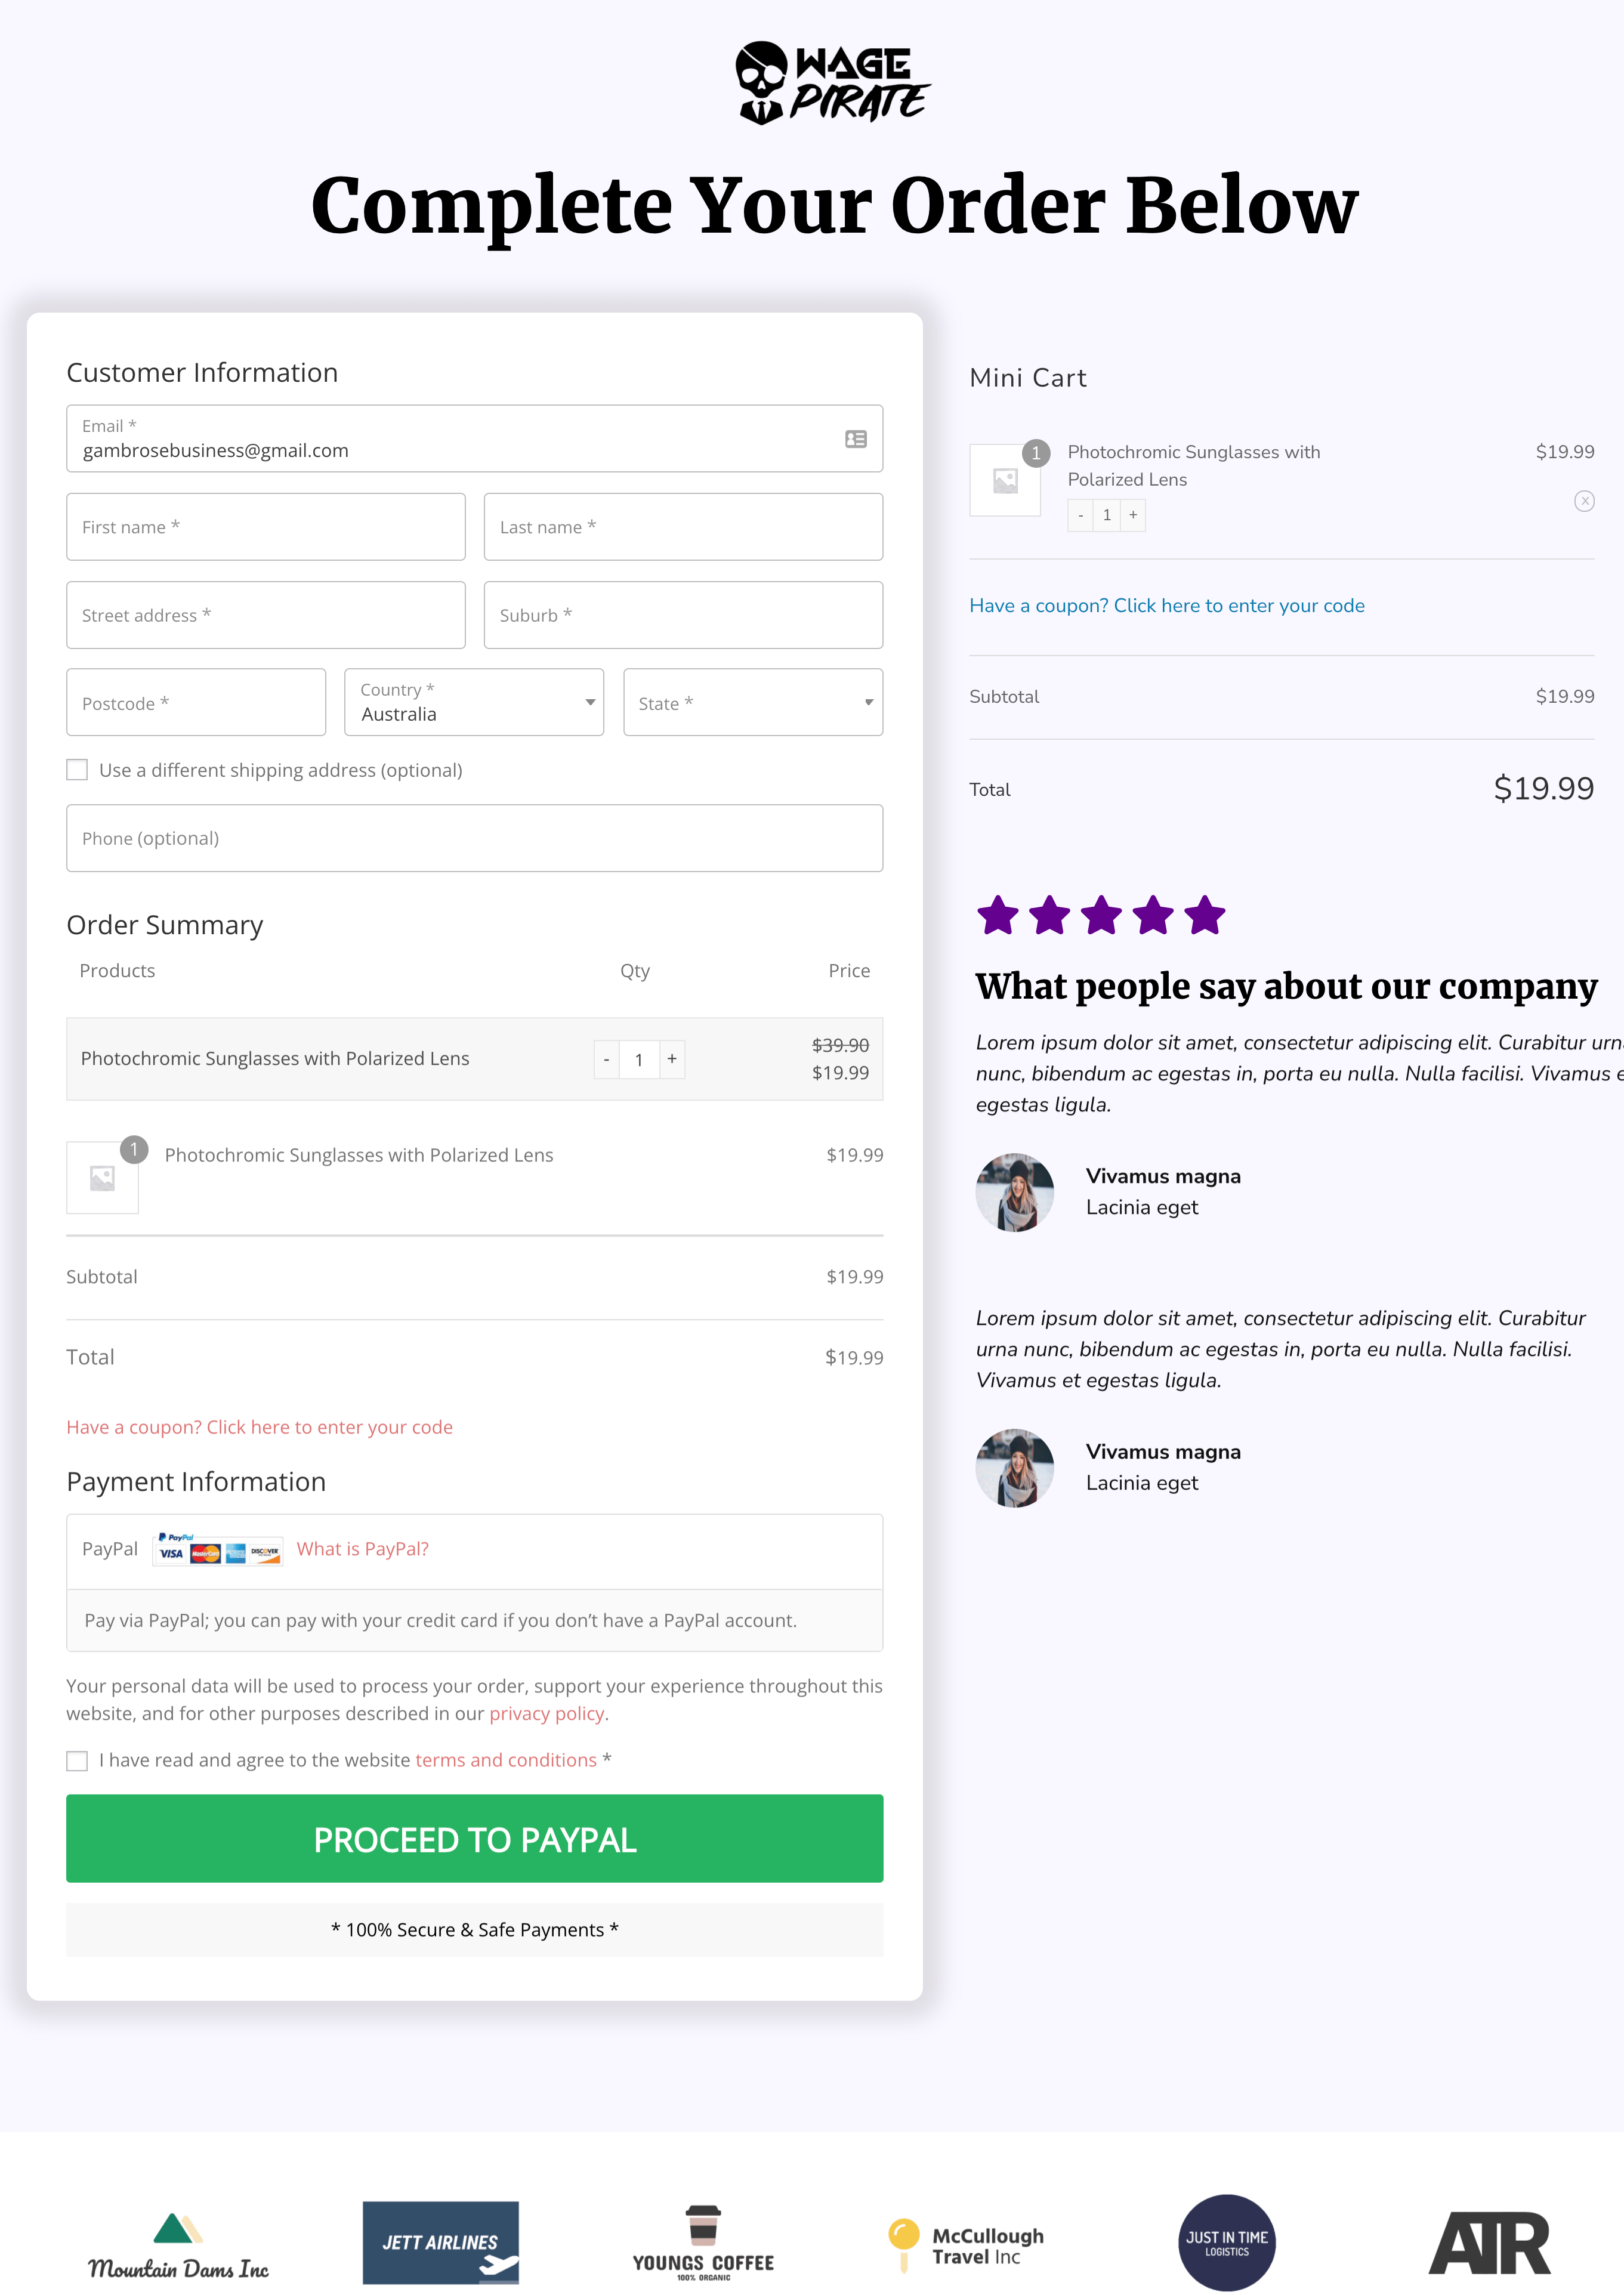
I spent less than 5 minutes setting this one up and designing it – but I think you get the point 🙂
If you’d like more information on FunnelKit, I would suggest checking out my FunnelKit Review here to learn more.
I know you probably searched specifically for how to do a two column checkout form with WooCommerce, but there is so much more you can do today with plugins like FunnelKit (without even knowing code) – it’s crazy.
Not only can you build two column checkout forms, but you can build multi-step checkout forms with a custom design that you’ve made using a drag-and-drop page builder.
None of this existed when I first wrote this article.
Technology is crazy 😛