To show and hide elements in Bricks Builder based on Post Type conditions, you need to combine the native WordPress get_post_type() function with the Bricks Builder “echo” feature available in the Conditional Logic builder.
Did that scare you?
Don’t worry! It’s actually extremely easy to do!
I’ll also give you the exact PHP code you can copy and paste into your website.
The Format of this article
Below is the order I have organised the content in this Blog Post to best explain how you can show and hide Bricks Builder elements based on Post Type.
- Quick and dirty step-by-step
I’ll give you the code you need to copy and I’ll show you where to paste into Bricks Builder - Show / Hide Elements based on MULTIPLE Post Type conditions
Next, I’ll run you through how you could show an element or section etc in Bricks Builder for more than one Post Type condition, such as showing a Section in your Footer only if the Post Type is “Post” or “Page”. - A PHP Function to make your life easier
After we run through the above, you’ll be able to recognise that this solution isn’t the best if your site contains lots of different Post Types. I have put together a PHP Function that will make your life easier for managing a more complex site that needs to conditionally show Bricks elements based on Post Type and I’ll run you through how it all works (with an example)
Let’s begin!
VIDEO: The Video Tutorial
My video below shows you how you can show and hide elements in Bricks Builder based on Post Type conditions.
In the video, I go through a real-life example of where I needed to hide Bricks elements for specific post types on my website.
So if you have the time I would definitely recommending giving it a watch.
The content in this video is strongly tied to the content of this blog post and they compliment each other to give you the full picture of how it all works.

Continue reading to see the first method you can use to set conditions based on Post Type in Bricks…
The Quick and Dirty step-by-step
Here’s a very brief to-the-point explanation that shows you how to hide elements based on Post Type in Bricks Builder.
Step 1: Copy the below PHP Code
{echo:get_post_type}
Code language: PHP (php)
Step 2: Select your element and open the Bricks Condition Builder
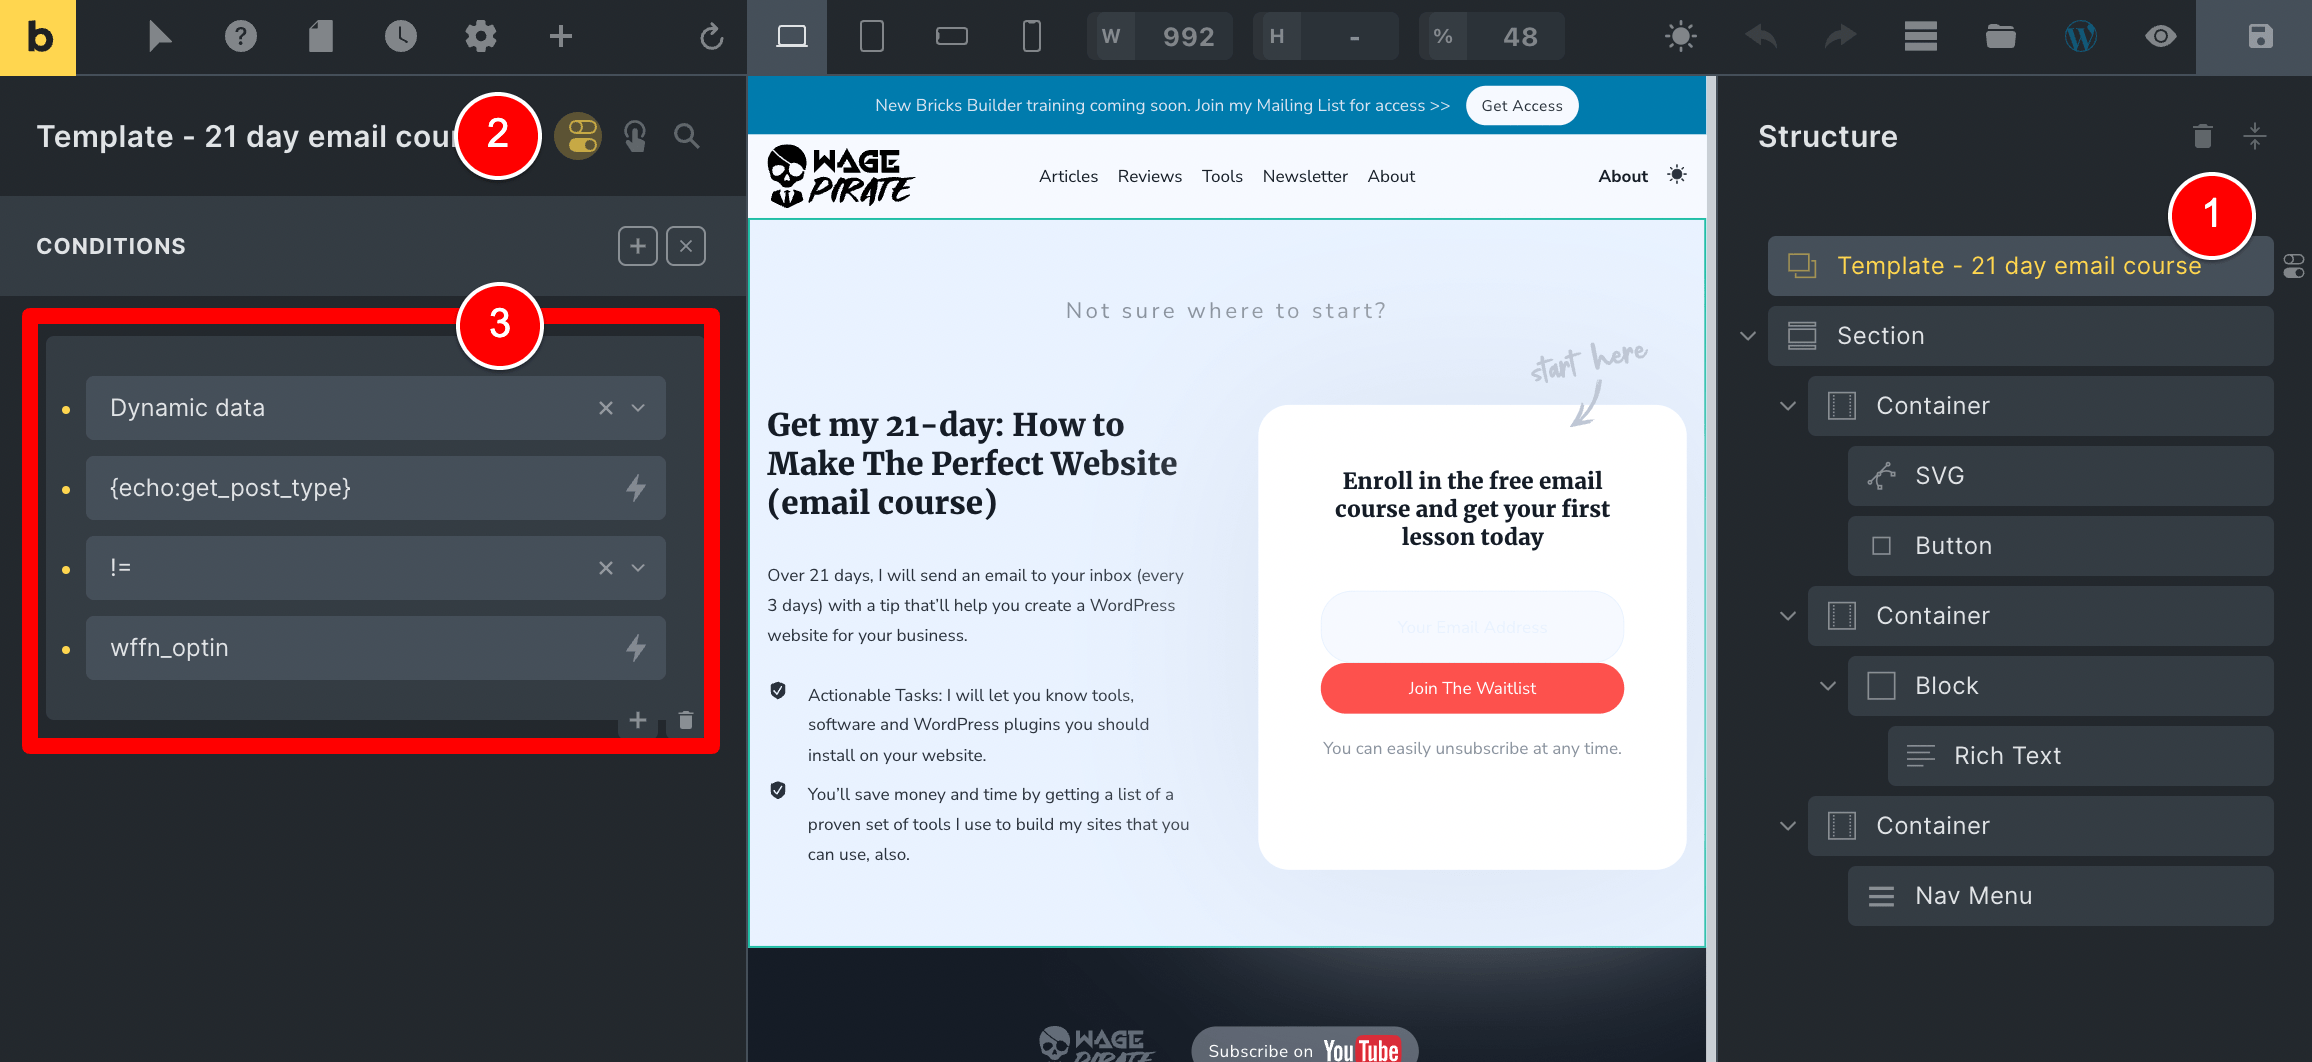
In my example, I am going to click on my Template element at (1) and then click to launch the Conditions Builder icon (2).
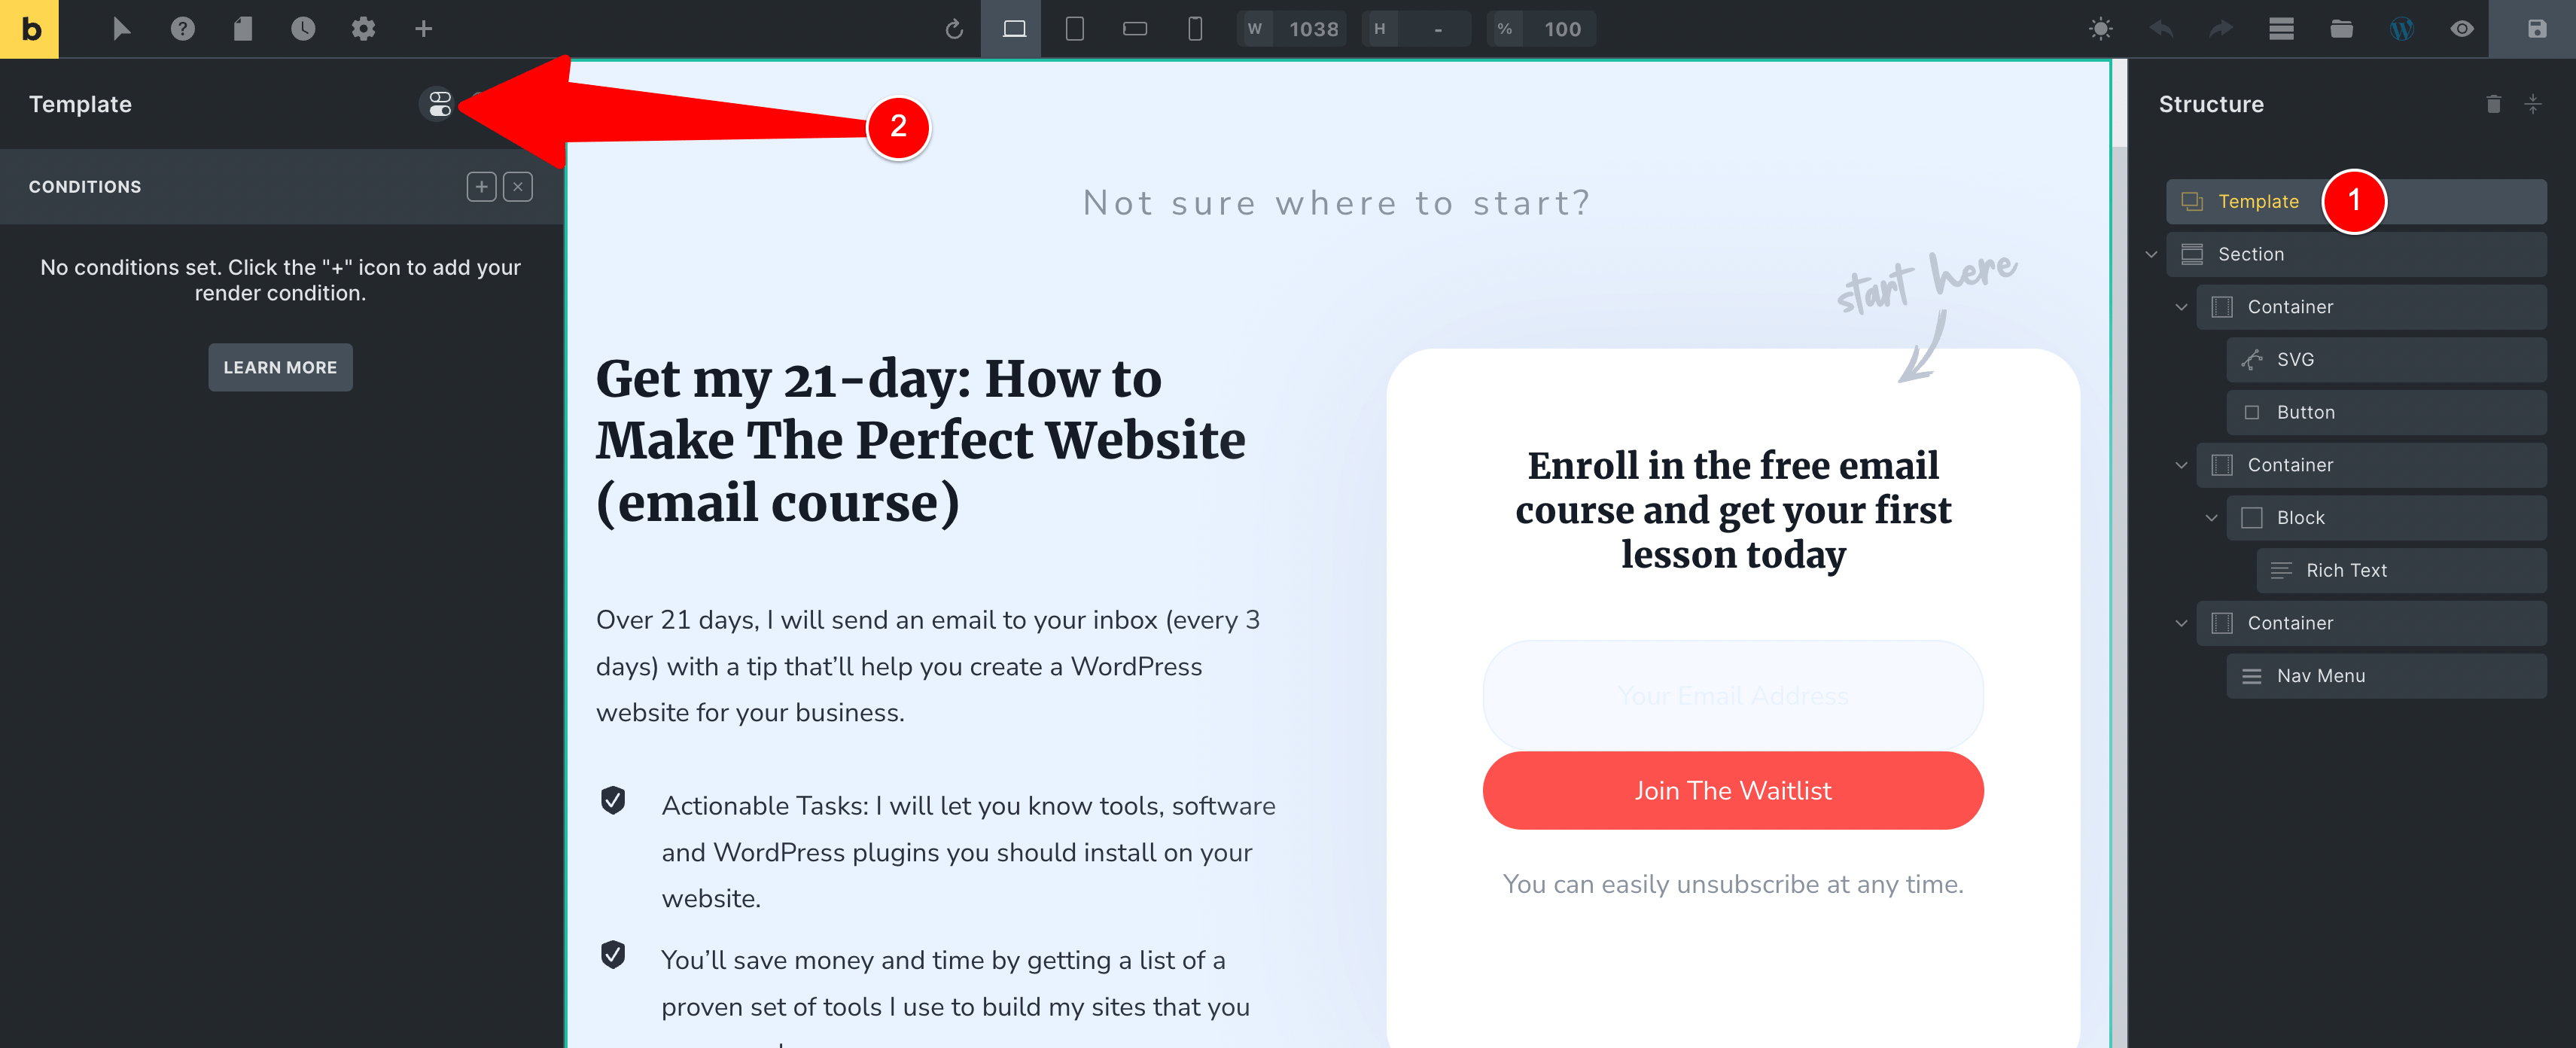
In case it isn’t quite clear, the Conditions icon is the one in the box below.
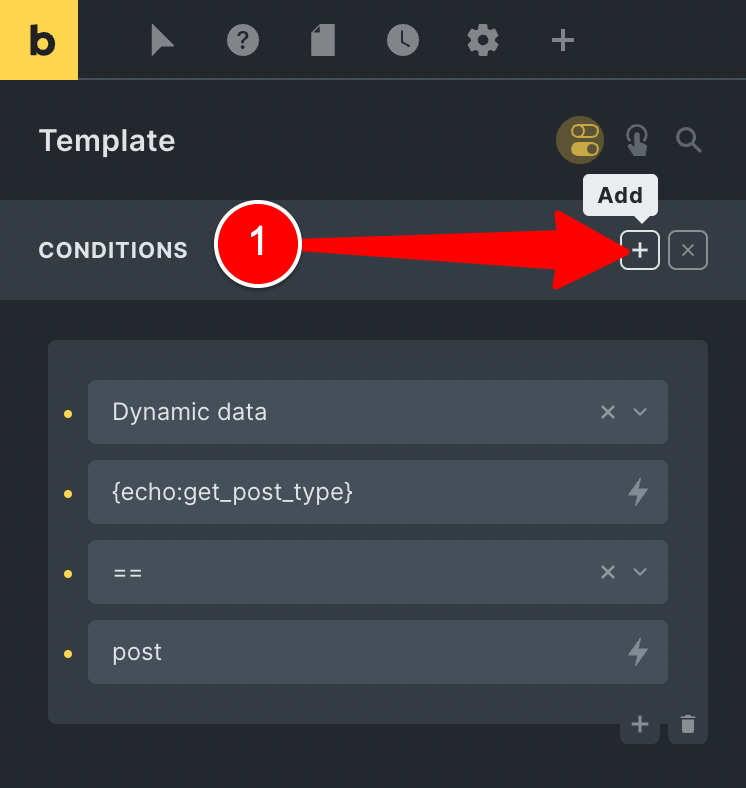
Click the plus sign to add your first condition.

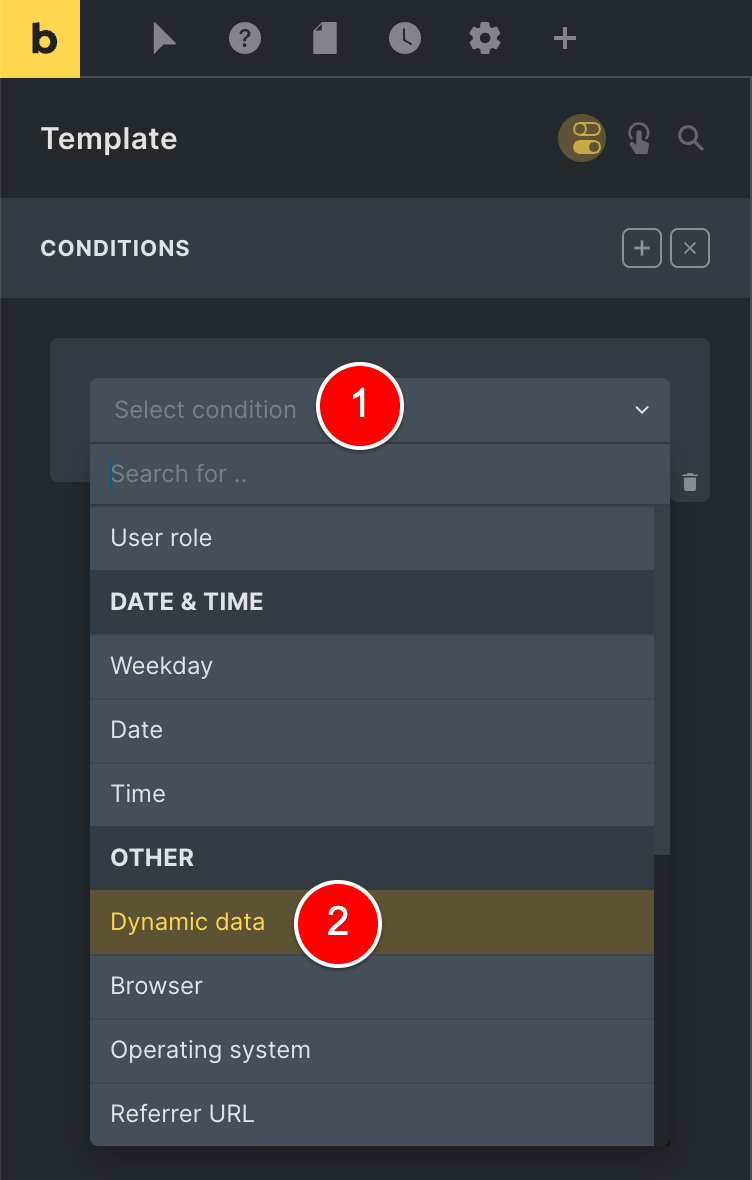
Step 3: Define your Post Type conditions
Click “Select Condition” (1) and scroll all the way down the bottom of the dropdown and select “Dynamic Data” (2).
Paste the PHP function you copied into the field at (1), select your operator at (2) and then write the name of your post type at (3).
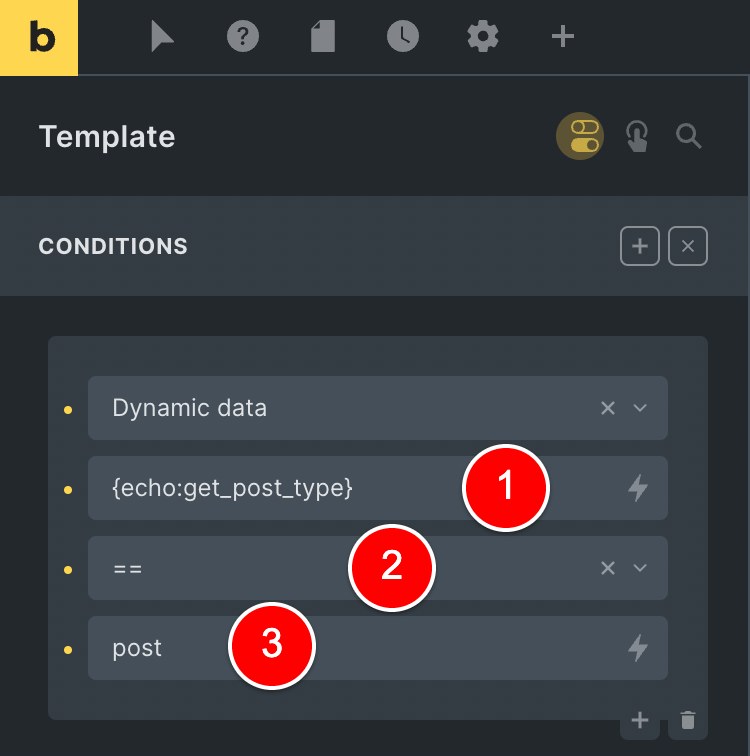
In the image above, I have defined that I want to show my selected Template element ONLY when the current Post Type is “post”.
i.e. I only want to output my template element on my Blog Posts.
And that’s all there is to it – now it’s working!
Keep on reading to see some more advanced tips and tricks that I feel you should know.
Because – while this solution might seem very straightforward, it could become a bit of a hassle in the future if you’re dealing with lots of elements conditions based on Post Types.
[bricks_template id=”72291″]Multiple Post Type Conditions
Let me show you how to show and hide Bricks Elements based on multiple post type conditions.
You can click the plus icon (1) and that will allow you to stack another condition with an OR logical operator.
And then you just repeat the process again, adding your second post type as the value (3).
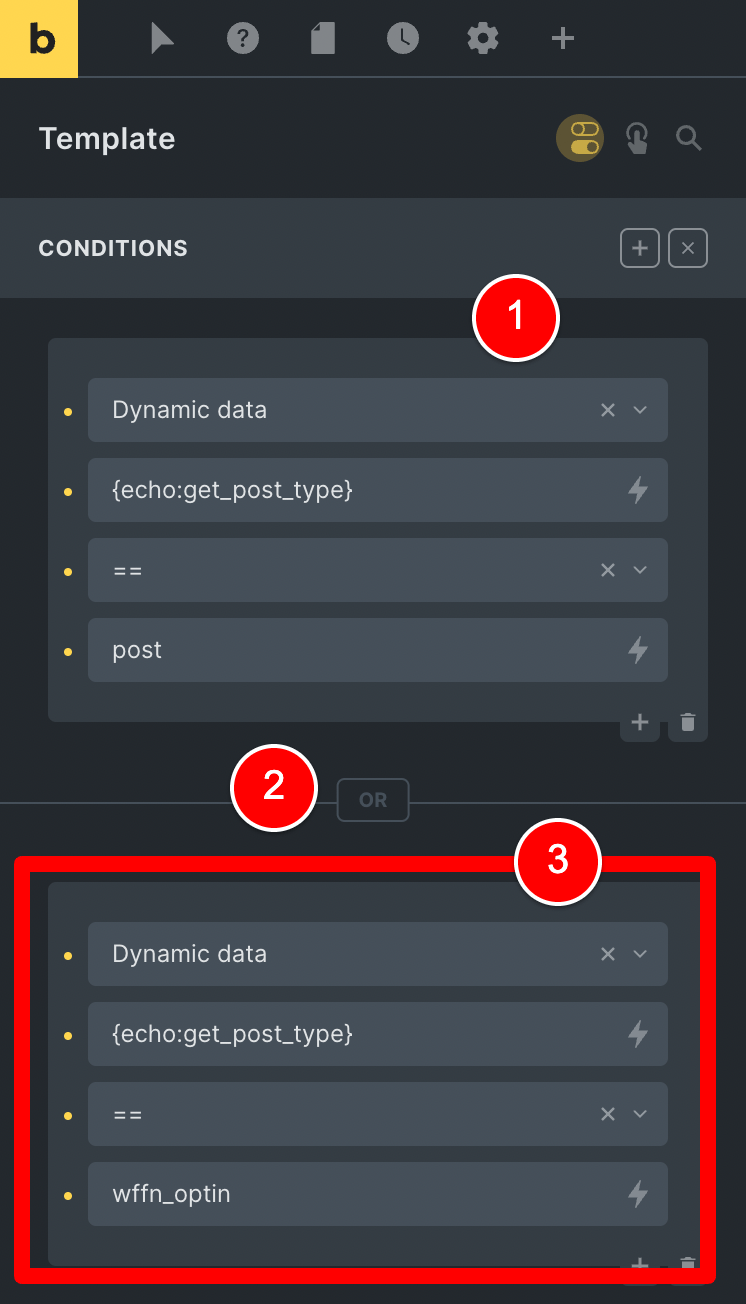
So now my Template element in Bricks will only show if the following is true for the current URL being accessed:
- The Post Type is “post” (i.e Blog Posts)
- OR the Post Type “wffn_optin” (which is the post type for my Optin Pages).
Easy enough, right?
It is!.. until it isn’t.
Read on to see what I mean…
The problem with stacking multiple Post Type conditions
The problem with stacking multiple Post Type conditions like this is that you need to add these conditions locally to EVERY element on your website, even if they share the same condition rules.
Let’s work with a real-world example…
Below is an Optin Page on my website wagepirate.com that I send people to from the description in my YouTube videos.
Because it’s an Optin Page that is asking people to get my 21 Day “How to Make The Perfect Website” email course, I don’t want to also have a call to action at the top in the blue bar (1) as it’s distracting people away from the action I want people to take.
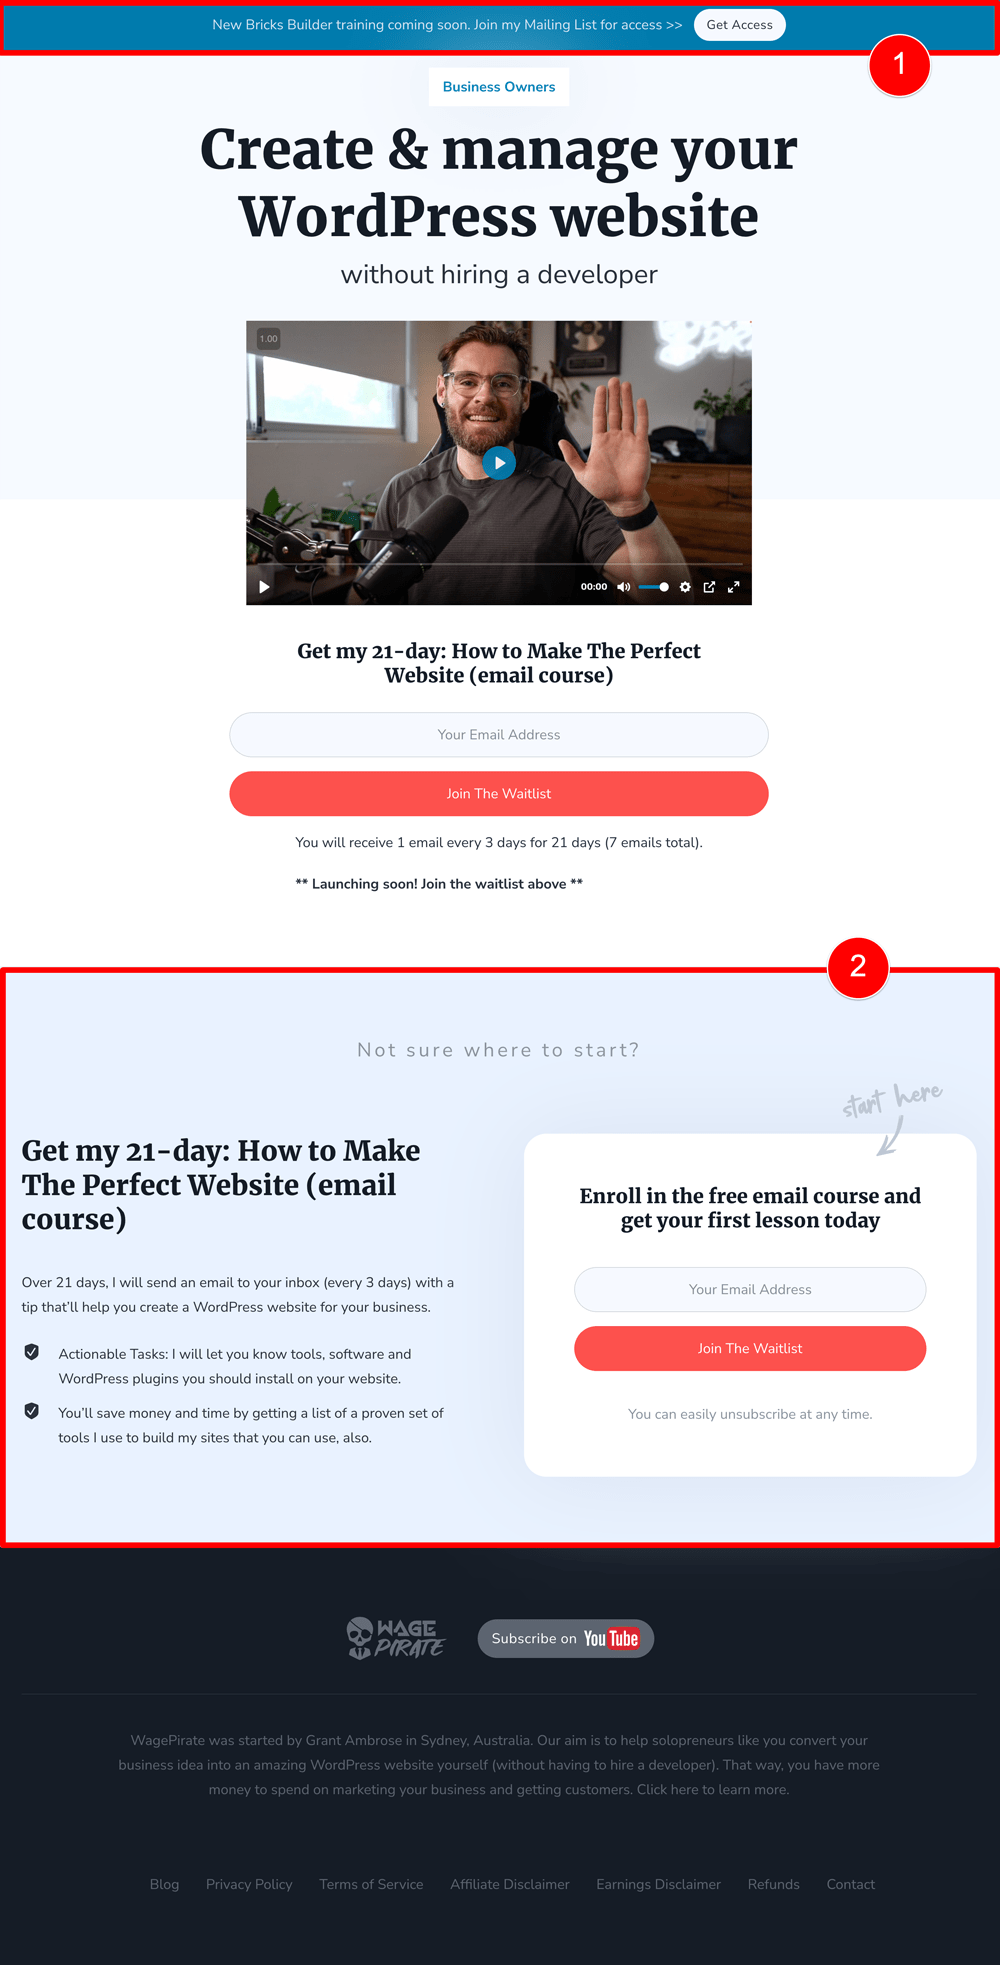
It also doesn’t make sense to have the content of this Optin Page with its form to get the 21 Day email course…
and then ANOTHER section just below it with an Optin Form for the same thing (2).
As we saw in the previous section of this article, this Optin section at (2) above is actually in our Footer template and is output on all the pages of our website.
So what we need to do now is go ahead and set the conditions for both these sections so that they output if the post type is NOT “wffn_optin” i.e. our Optin Page post type.
…and that’s fairly easy.
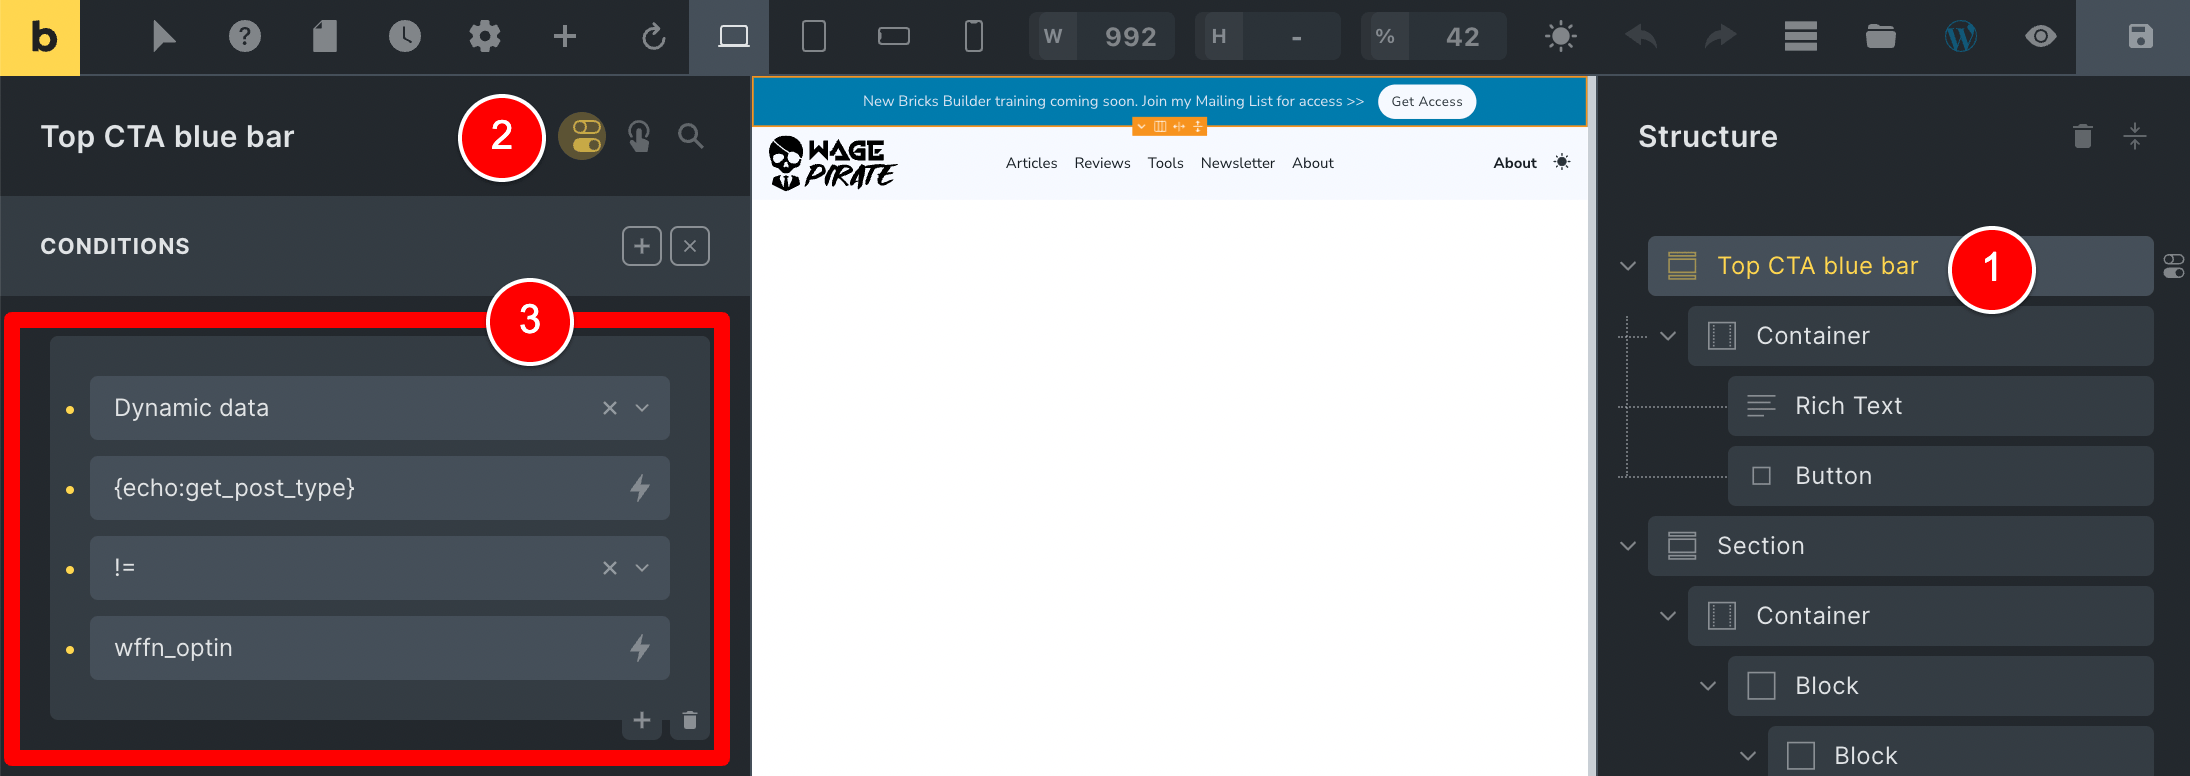
I edit my Header template, select the Blue call-to-action bar (1), click on the Condition builder (2) and define to exclude my wffn_optin post type at (3).
Next, I edit my Footer template, select my Template element (1), open the Condition builder (2) and set the same condition (3).
After doing this, we have achieved what we need to and now both these elements are not outputting on our Optin Page post type.
But wait! ….
What if we just realised there is ANOTHER post type we need to exclude outputting both these items on?
Ok sure, we can go back in and edit each of these as before and add another condition…
But over time, you can see how this can get messy and hard to maintain…
Here is an example of adding 3 conditions that excludes our blue Top bar in the header from outputting on 3 post types on my website.
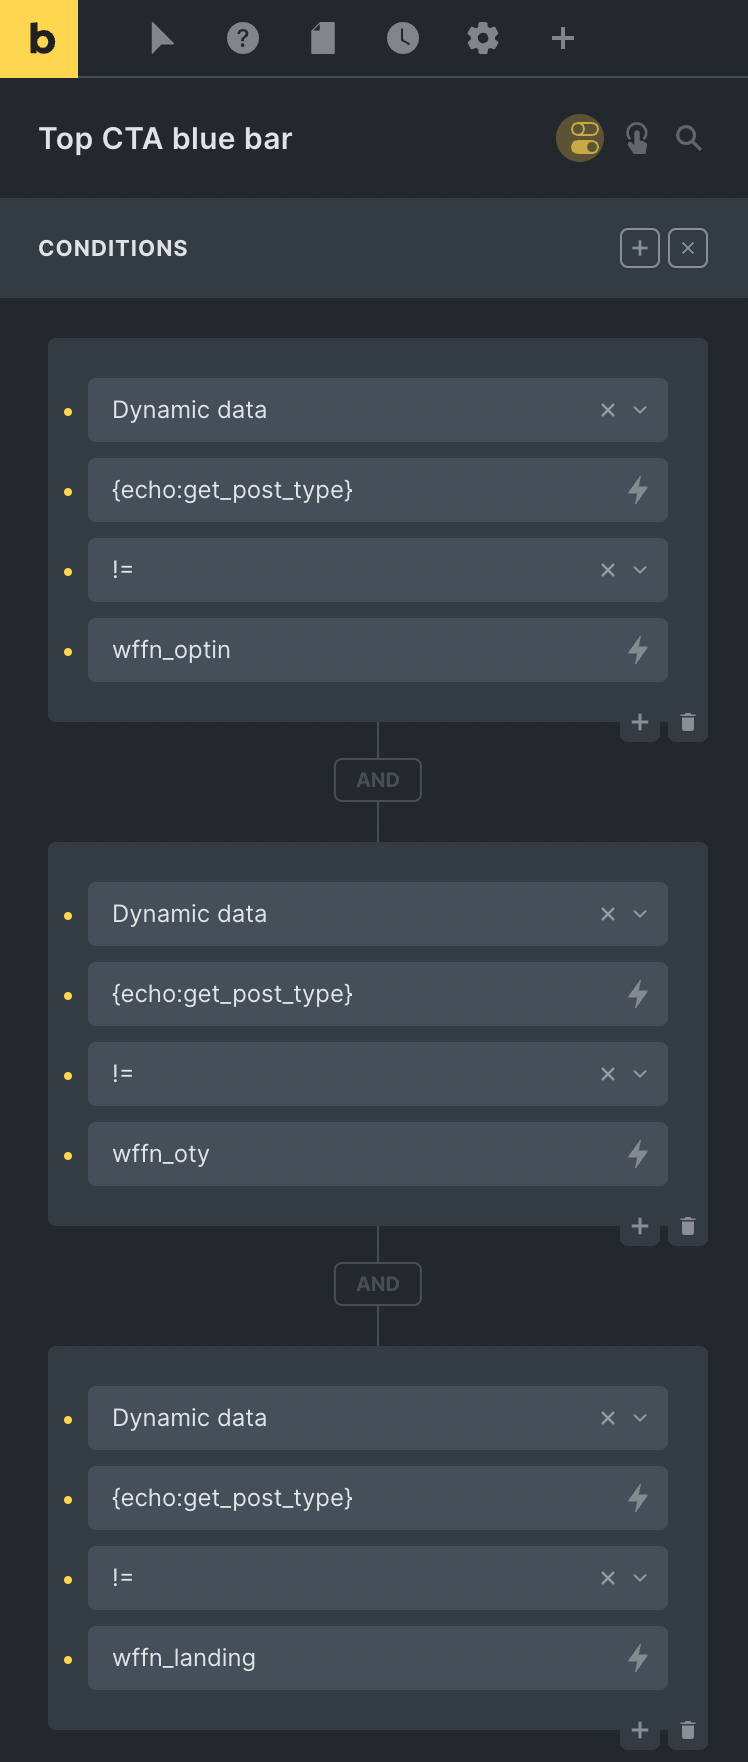
Now, imagine after adding these 3 conditions here I need to then edit the Template in my Footer with my Optin Form and apply these same 3 conditions.
See how you’re just doing a lot of unnecessary extra work?
What doesn’t work
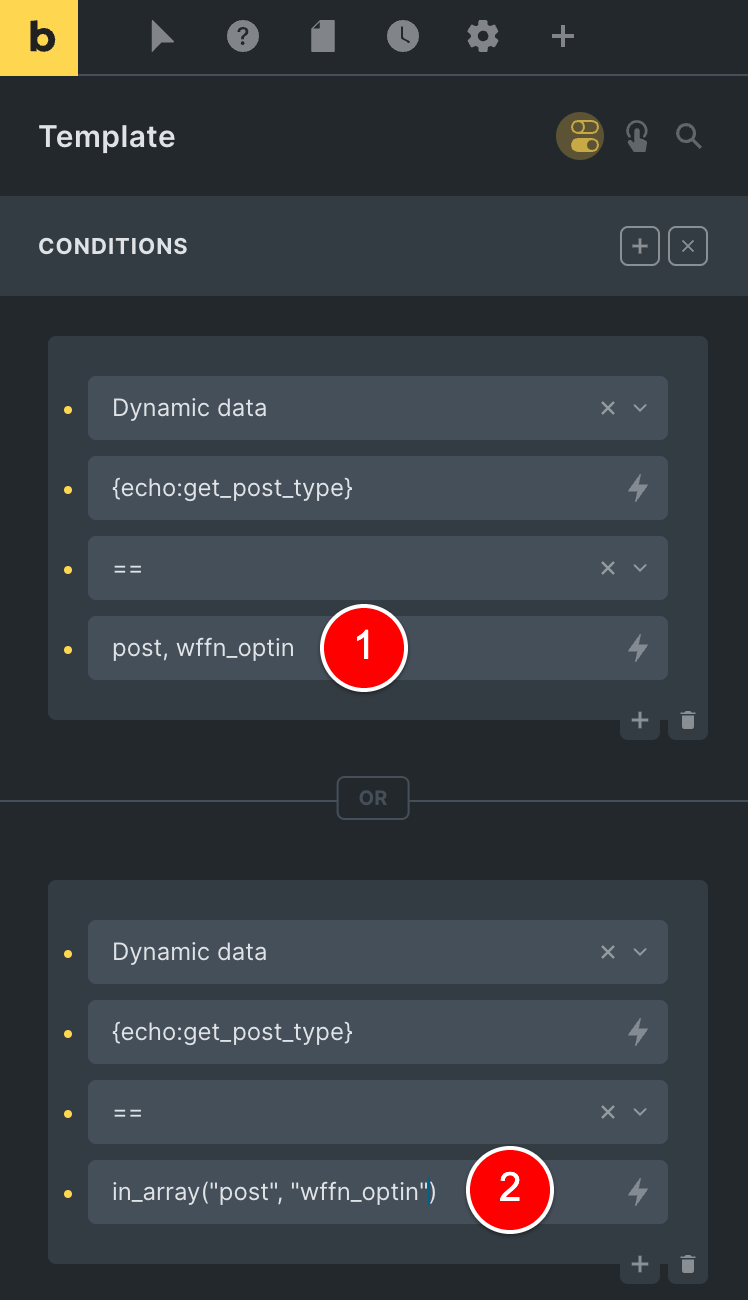
Comma-separating post types or using other PHP functions DO NOT work.
Just to get it out of the way, you might be thinking – it would be great if we could comma-separated values (1) or use the PHP function in_array() (2) but sadly that is not possible.
Note: You cannot do the below:
Let me show you a solution that you prefer to use to conditionally show elements in Bricks Builder based on Post Type…
PHP Code: Using a custom PHP function
Bricks Builder has a custom PHP Filter that we can use to manage more complex conditions and has more flexibility.
Preparation: remove the existing Conditions
I will go ahead and remove all the conditions we have previously set up in this article today using the Bricks UI.
After doing that, we are once again back to our original problem of sections (1) and (2) showing on our Optin Page post type “wffn_optin” incorrectly.
Preparation: Add CSS IDs to each element we want to target
You’ll see more about this in the next section, but we’ll basically be using code that looks like the below where we are targeting based on the HTML ID of the element:
// Get the element custom HTML ID
  $html_id = isset( $element->settings['_cssId'] ) ? $element->settings['_cssId'] : false;
Code language: PHP (php)
So let’s go ahead and add an ID to our top blue bar in the header first.
In case you’re unsure how to add an ID to an element in Bricks Builder…
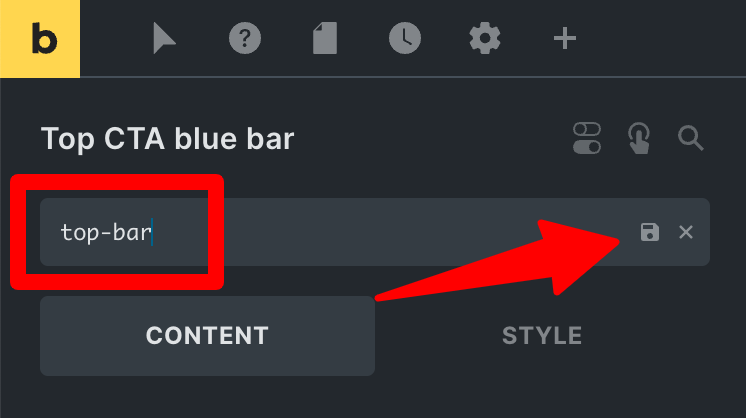
I’ll click on the top bar element (1) and then click this pencil icon at (2).
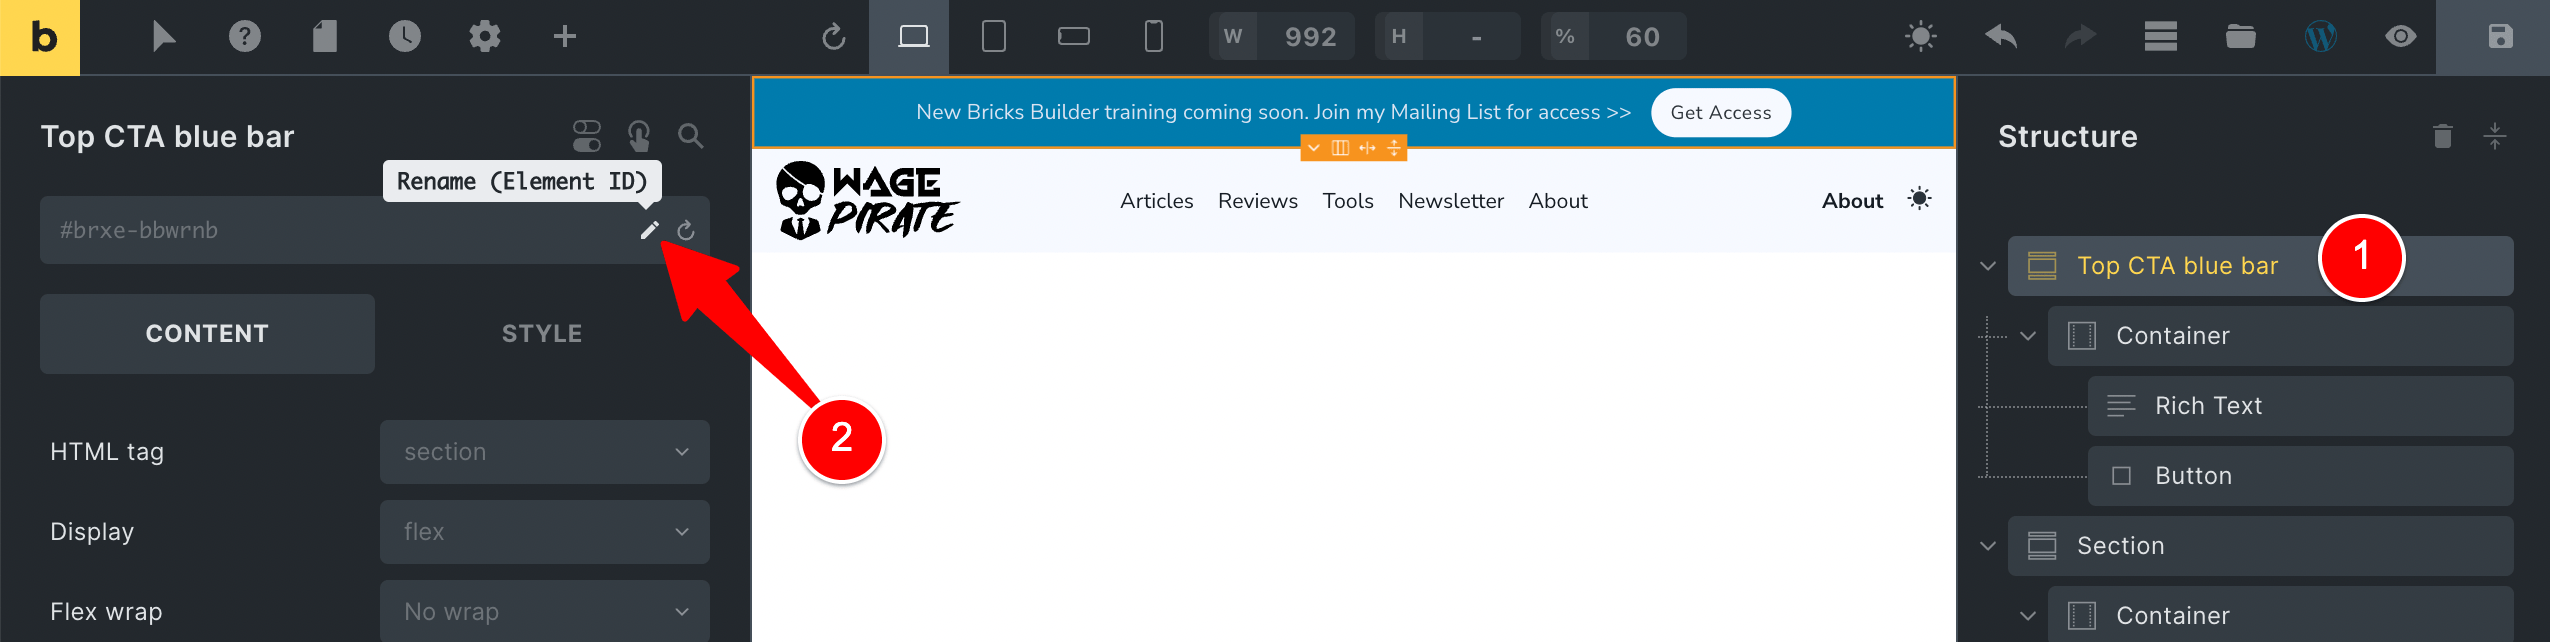
I’ll give this the ID of “top-bar” and then click the Save icon.
I’ll repeat the same process for the Optin Section in my footer template, giving it the ID of “cta-footer”.

Now the preparation is all done and we’re ready to show / hide our elements based on Post Type using PHP code.
To do this, we’ll be using the Bricks Render PHP Filter…
The Bricks Render PHP Filter
Bricks Builder has built-in functions that we can use to show and hide things on our Bricks website based on conditions.
The one we will be using today is a PHP Filter that deals with rendering elements on the page.
The Bricks Builder docs offer us the below example code to illustrate how it works:
add_filter( 'bricks/element/render', function( $render, $element ) {
  // Conditional display logic goes here:
  // $render = true to render the element
  // $render = false to skip the element render

  return $render;
}, 10, 2 );
Code language: PHP (php)
The way this PHP function works is that every time Bricks goes to render an element on your page, it passes through this filter to see if it should be output on the page (i.e. returns true) or NOT output (returns false).
And it’s important to note here that by default ALL elements WANT to be output on your page, thus $render = true by default.
So with that said, we are basically looking at adding conditions in our custom PHP code where we want to NOT render elements (again, because they’re rendered/shown by default).
Creating our PHP function
Let’s go ahead and write a little bit of PHP code to make our lives simpler for managing our multiple post type conditions.
I add all my custom CSS / JS and PHP snippets using the WPCodeBox plugin (I highly recommend it).
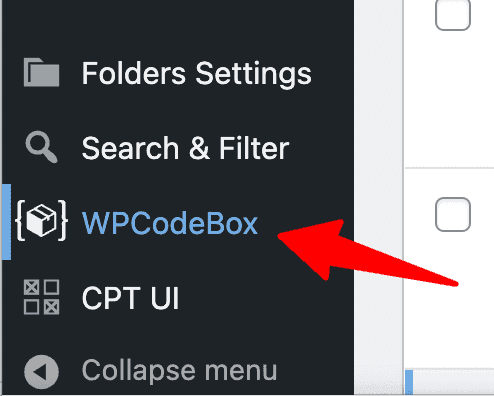
So I will go to WP Admin > WPCodeBox.
Add all your custom PHP/CSS/JS snippets in an organised, easy-to-manage manner.
I’ll then click to add a New Snippet (1), give it a name (2), click Save (3) and now I am ready to add my custom PHP function at (4) in the code editor.
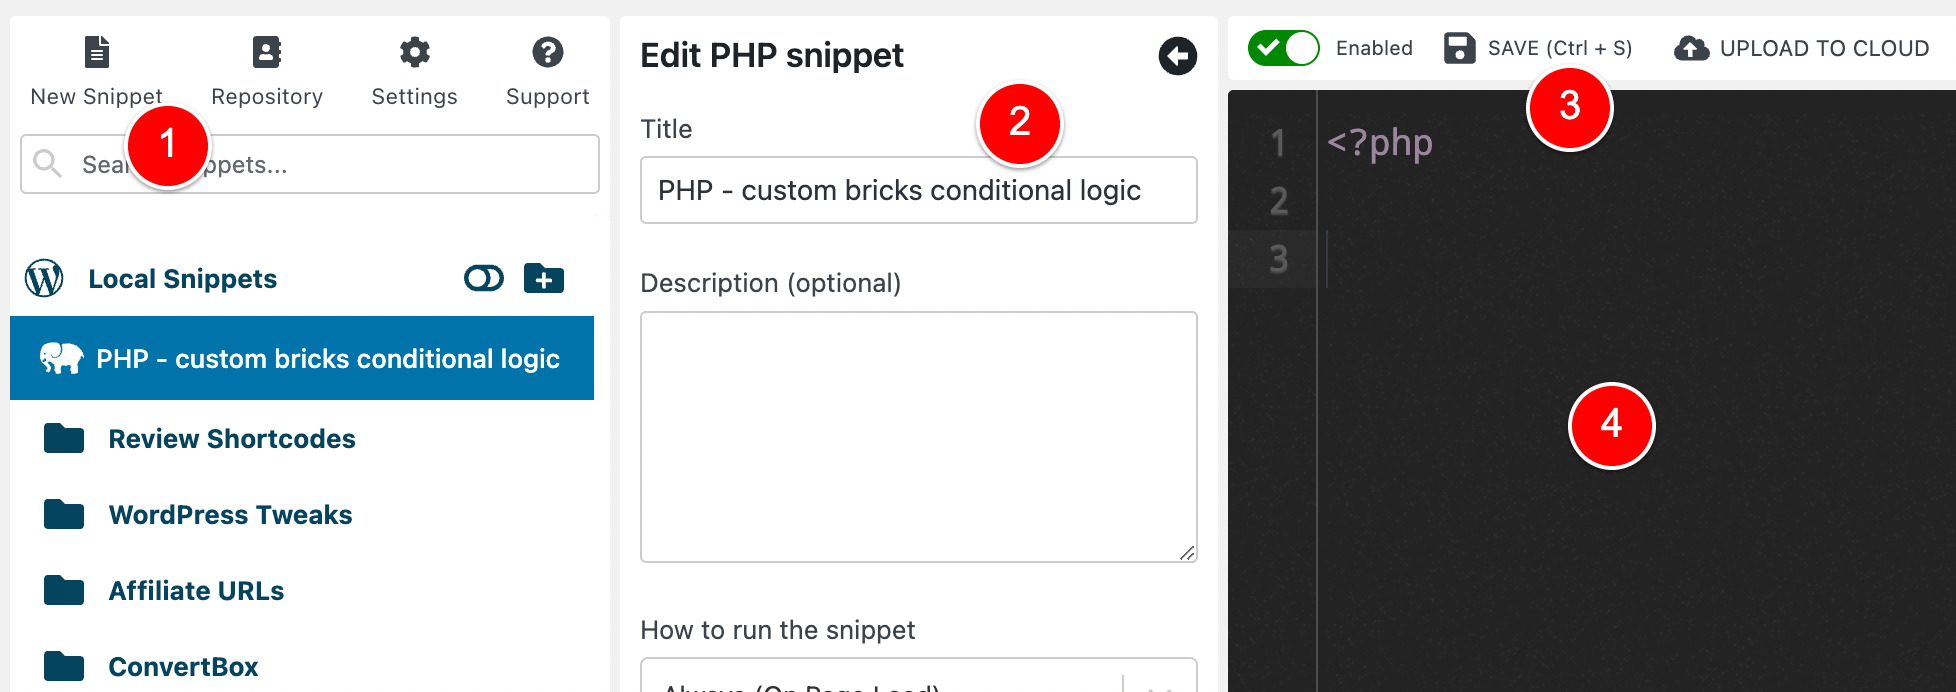
If you are not using a Code Snippets plugin, you can add this code in your Child Theme’s functions.php file under Appearance > Theme File Editor > functions.php or wherever else you normally add your custom PHP code.
Here is the PHP code I wrote for my specific example that we’ve been looking at in this article (I’ll explain it more below).
<?php

// show / hide elements based on Post Type
add_filter( 'bricks/element/render', function( $render, $element ) {
  // SECTION A
  // Here we define the post types we want to run our conditions on
  if ( !is_singular( array('wffn_optin', 'wffn_oty', 'wffn_landing') ) ) {
    return $render;
  }

  // If there is an ID set in Bricks Builder for this element
  // set its ID to the variable $html_id
  $html_id = false;
  if( isset( $element->settings['_cssId'] ) ){
      $html_id = $element->settings['_cssId'];
  }

  // add the ID of the elements you want to hide
  // on the post types defined in SECTION A above in this code
  $elements_to_hide = array('top-bar', 'cta-footer');
  if ( $html_id && in_array($html_id, $elements_to_hide, true) ) {
    return false; // i.e. do NOT output this element on the page
  }

  return $render;
}, 10, 2 );
Code language: PHP (php)
Let’s go through the above code so you can see what it’s doing so you can tweak it for yourself:
- Firstly, in SECTION A in the code, we check to see if the current page being rendered is a single post of the post type wffn_optin (our optin page post type) OR wffn_oty (our optin page thank you post type) OR wffn_landing (our landing page post type).
- NOTE: There are obviously specific to my website, so to use this in your own website you’d just put in your post types here.
- Next, we get the ID of the current element in Bricks and save it to the $html_id element
- We create a new variable named $elements_to_hide and put the IDs of all the elements we want to NOT output on the page for these post types.
- This is where you add the IDs of your own elements you wish to hide
- The line in_array($html_id, $elements_to_hide, true) is checking to see if the ID of the current element that Bricks is trying to render is one of the IDs we specified to hide in our $elements_to_hide variable.
- If the current element’s ID is found to be one of the ones we want to HIDE (i.e. not render on the page) then our function returns $render = false (i.e. do not show it on the page)
That’s it!
The PHP Render Filter VS the Bricks UI
Writing your own PHP code like this gives you more flexibility and options for conditions than you create using the Conditions builder inside the Bricks UI.
But that doesn’t mean you should never consider using the Bricks UI to add your conditions.
Here’s how I approach it on my website…
If I am in there designing a page in Bricks Builder and I need a simple condition to show / hide something, I use the Bricks UI to add the condition.
Over time as my website grows in complexity, I might find that it’s easier for me to maintain things if I move conditions out of the Bricks UI and into a PHP Render Filter function – so I do it.
You can always swap and change these things as you grow your site so there’s no need to stress over these things too much as you can’t plan everything out.
But one specific use case I do find myself always using PHP vs the Bricks UI is for what we discussed in today’s article…
Showing and hiding things based on Post Type.
As you can imagine, you often need to show / hide things based on MULTIPLE post type conditions…
and I just find it much faster and easier to manage using PHP than creating all these stacked conditions in Bricks and doing this for many elements in my website.
If you found the article useful today, let me know if the comments below.