This page will show you how to set up a double opt-in using FunnelKit Automations, Link Triggers and Automations.
For the skim readers out there, here is a quick outline of what we will be setting up throughout this tutorial.
How to set up your double opt-in in 3 easy steps:
- Add some PHP code to
functions.phpso that Link Triggers execute actions more than one time (more on this below). - Create a new Link Trigger that, when clicked, updates the Contact’s status TO Subscribed.
- Create a new Automation with an action Send Email that contains the Link Trigger inside.
I HIGHLY suggest you read the entire article below so that you don’t make the mistake I made while setting this up.
Firstly, let’s look at Link Triggers and a setting you will need to change…
Allow Link Triggers to execute multiple times
By default, if a Contact in your FunnelKit Automations install clicks a Link Trigger for a second / third / fourth time (i.e. any time after the first time), the actions assigned to that Link Trigger DO NOT run again.
That’s why this notice means below. You’ll see this when you are setting up a Link Trigger inside FunnelKit Automations.
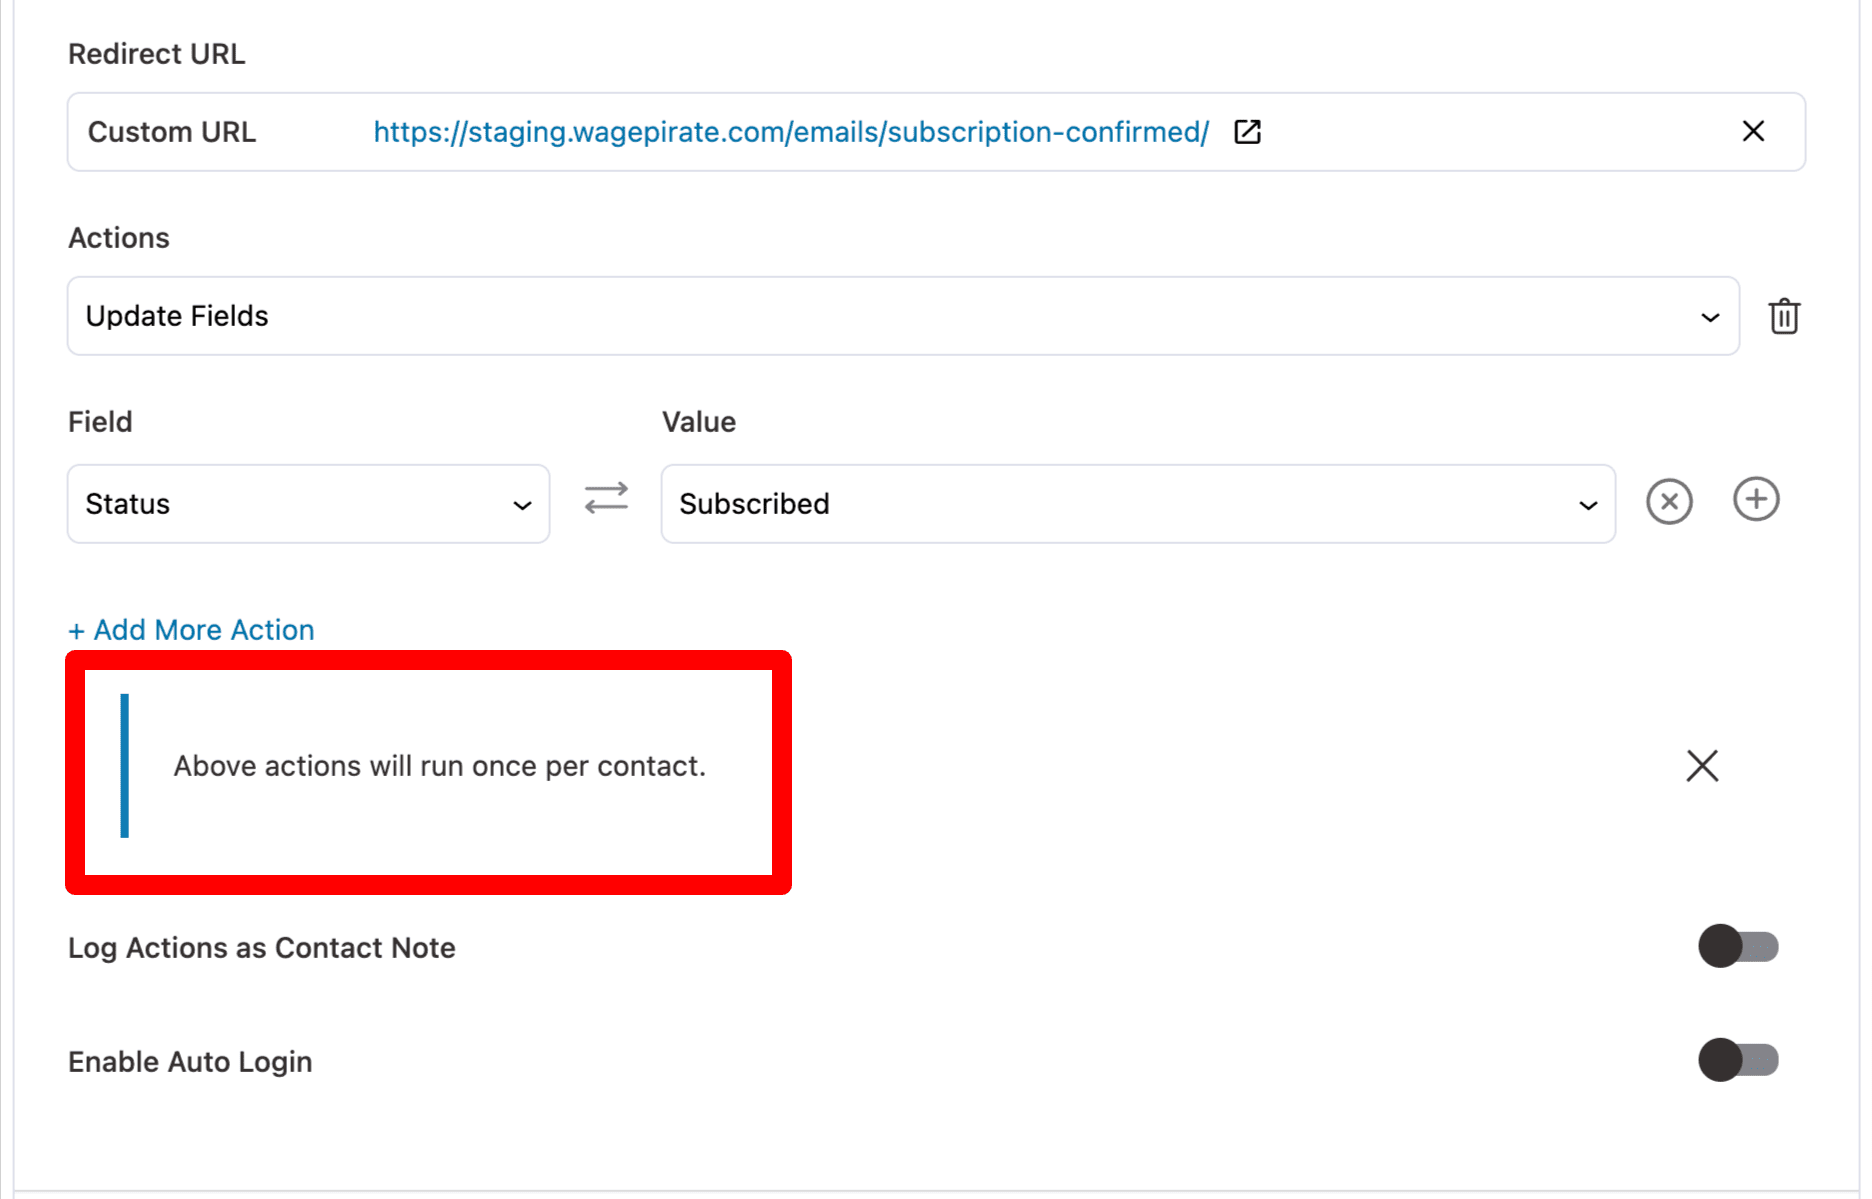
This here lies the first problem. If people subscribe to our mailing list by clicking this link trigger, then they unsubscribe… if they then come back to our website, fill in an opt-in form and then get an email with this same link trigger to subscribe – when they click on it the second time, no actions will run.
“Above actions will run once per contact” = user will not have their status changed from unsubscribed to subscribed after they try to resubscribe.
Related: I wrote a separate article that explains in more detail why we need Link Triggers to fire multiple times for a double opt-in. For that reason, I won’t explain it all again in this article, but I suggest you read that article to understand it better (it’s a short article).
Article: Why we need Link Triggers to run every time someone clicks on them
Luckily, the awesome BuildWooFunnels team (the developers of FunnelKit Automations) have a filter available for us.
Copy this PHP code into your WordPress site
Add the below PHP code into your WordPress website. If you’re unsure where to add it, just add it into /wp-content/themes/yourtheme/functions.php at the end of the functions.php file.
// run FunnelKit Automations Link Trigger multiple times
add_filter('bwfan_link_trigger_multi_execution', function(){
	return true;
} );Code language: JavaScript (javascript)
With this PHP code added, the actions attached to your Link Trigger will run every time your contact clicks the Link Trigger.
If you’re not a developer – don’t worry, that is the only code we’re touching in this tutorial.
The rest of this article is very straight-forward.
Create a new Link Trigger that subscribes your contact when clicked
Go to the Link Triggers section of FunnelKit Automations…
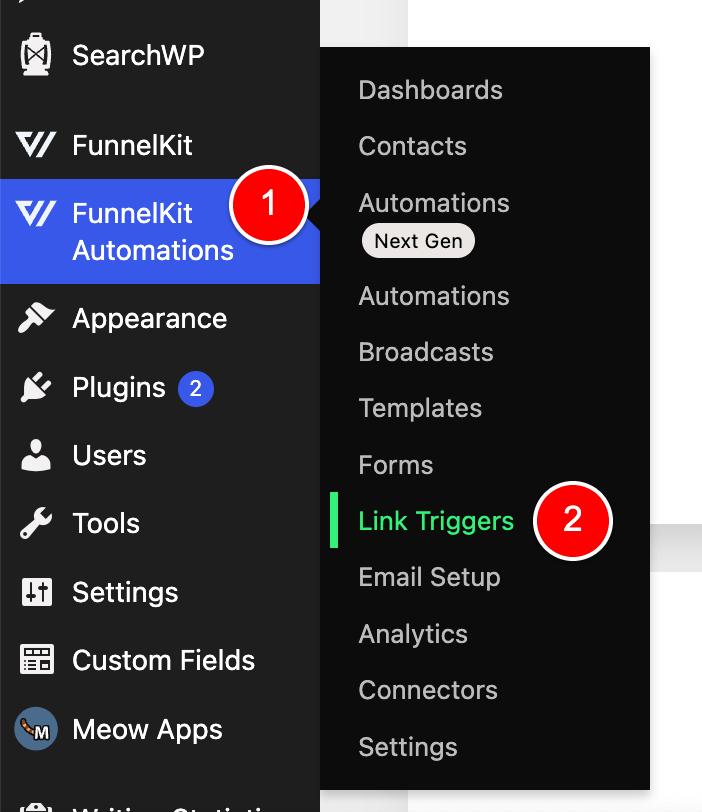
Then click Add New.
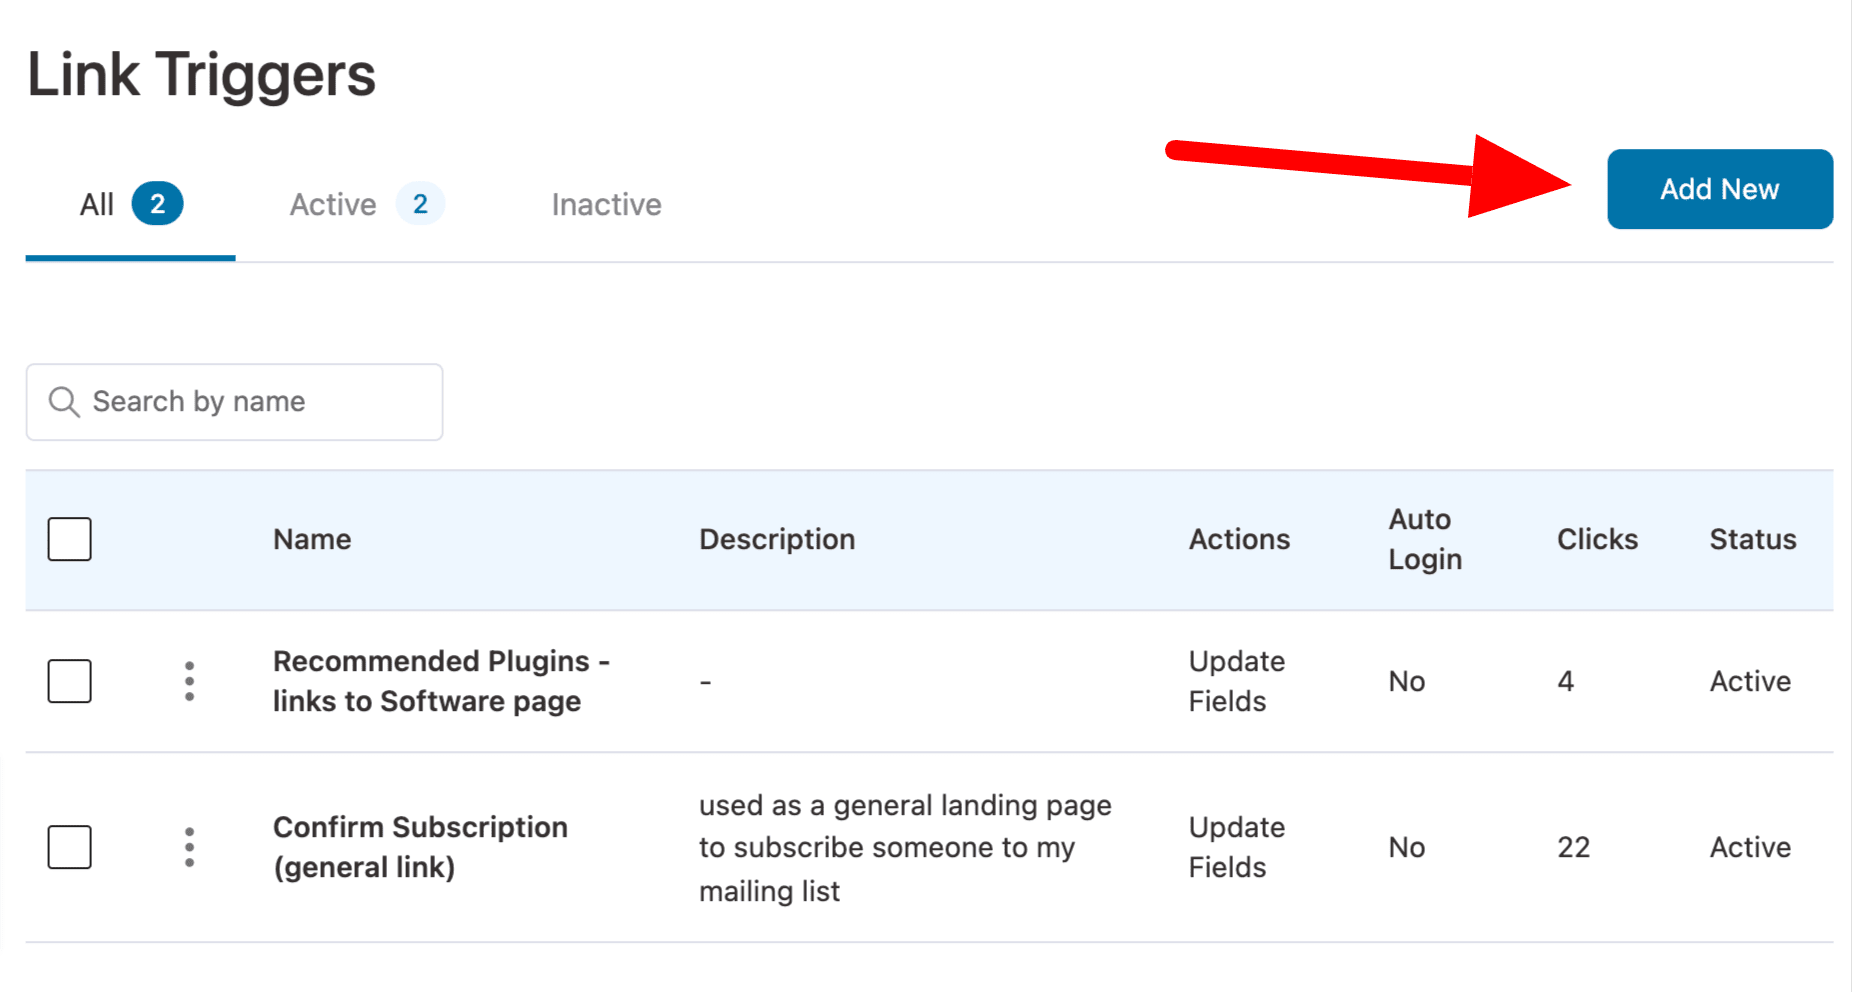
Name your Link Trigger as normal and put in the URL you want people to go to when they click this Link Trigger in your email.
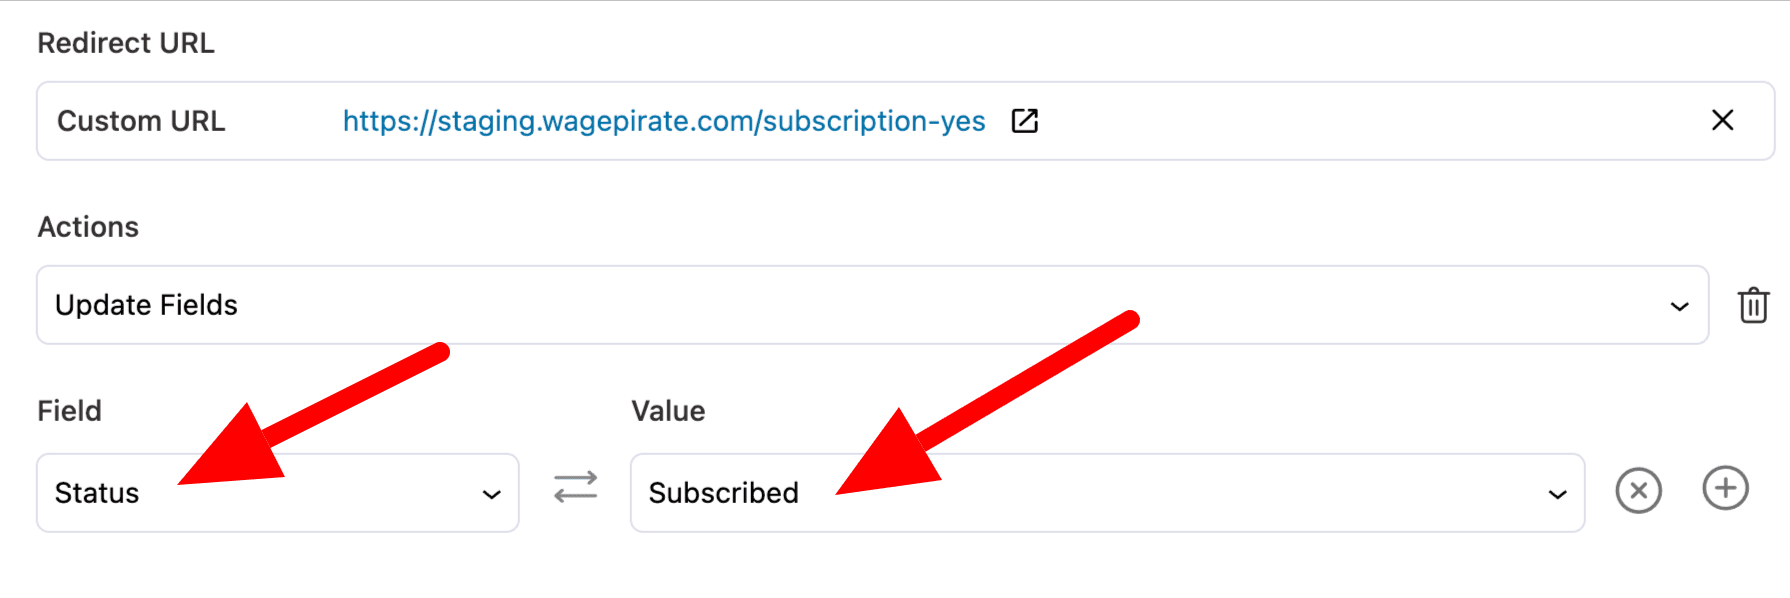
In my case, I’ll send them to the URL shown at (1) in the image below.
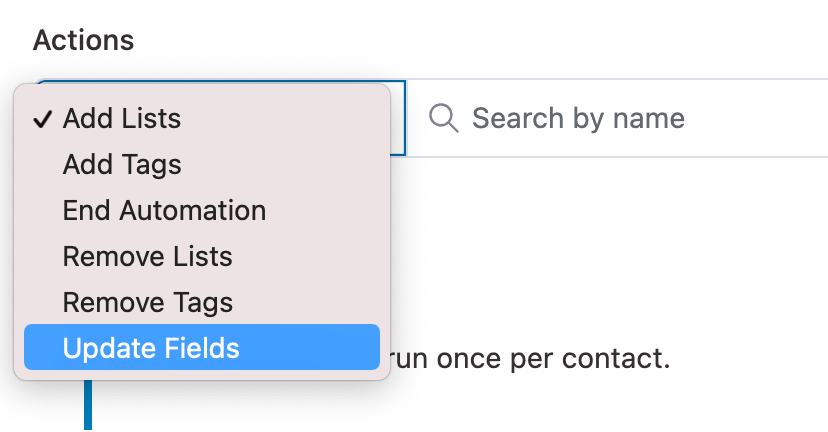
Next, under actions (2) in the image below…
Select Update Fields.
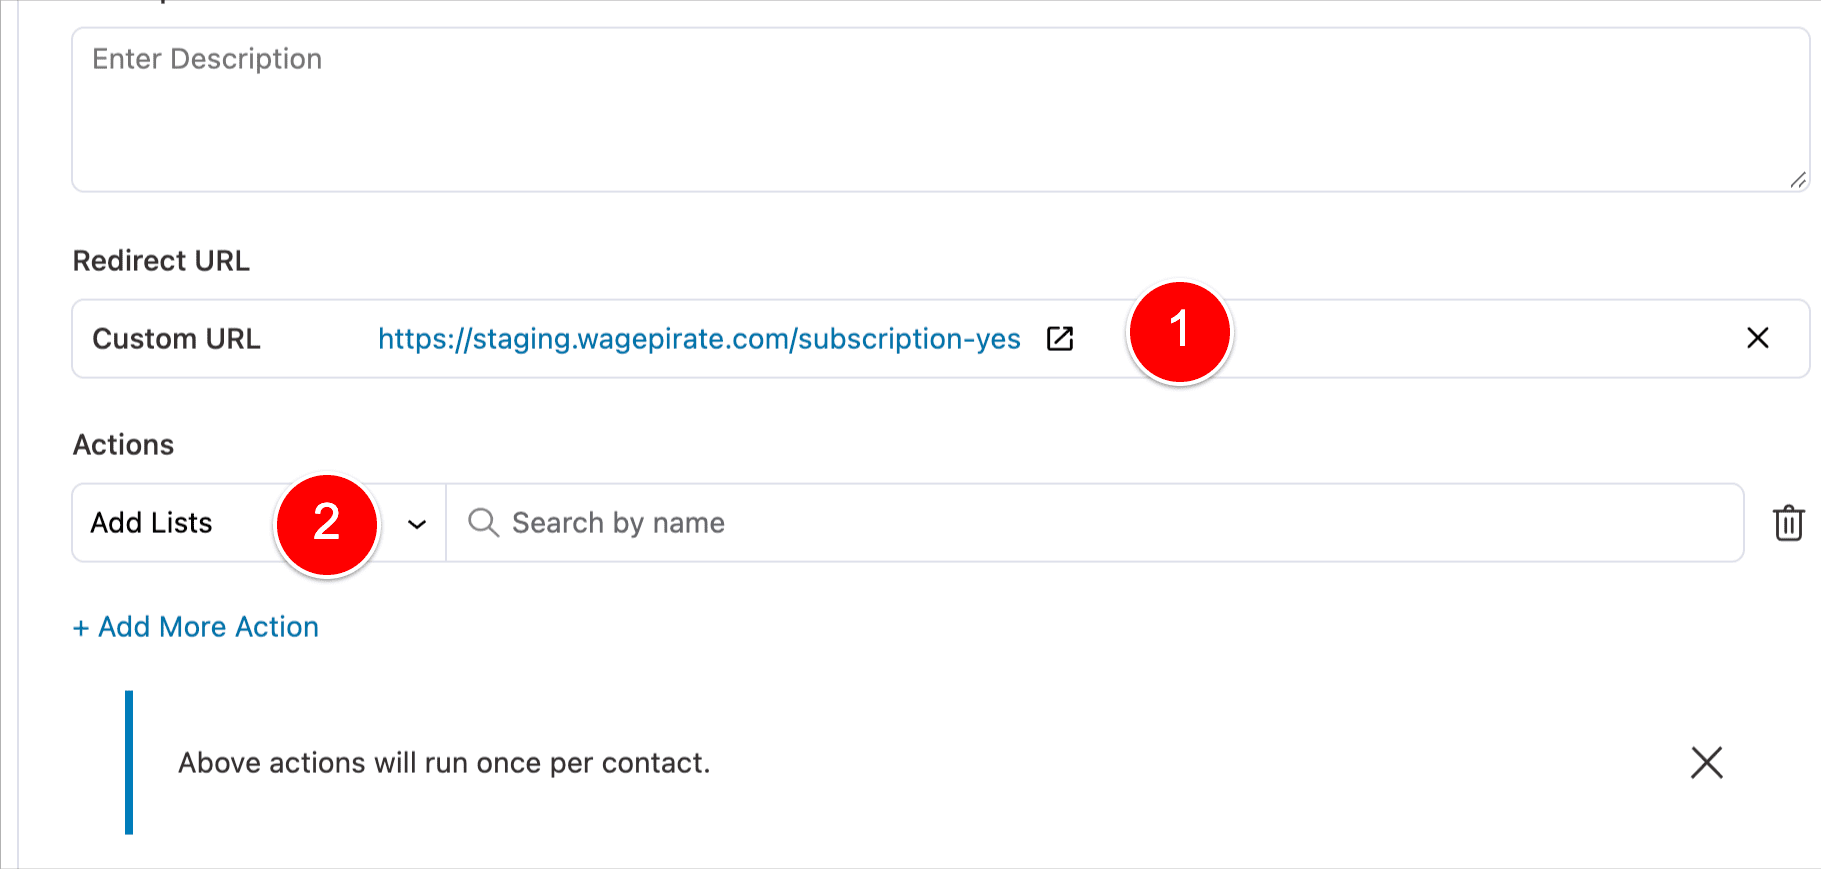
And then set it up as per the below image where field Status updates to value Subscribed.
The save your Link Trigger – we’re all done here.
Add the Link Trigger into an email in your opt-in Automation
Go to the Automation you’ve set up for your double opt-in and edit the Email that will contain your opt-in link.
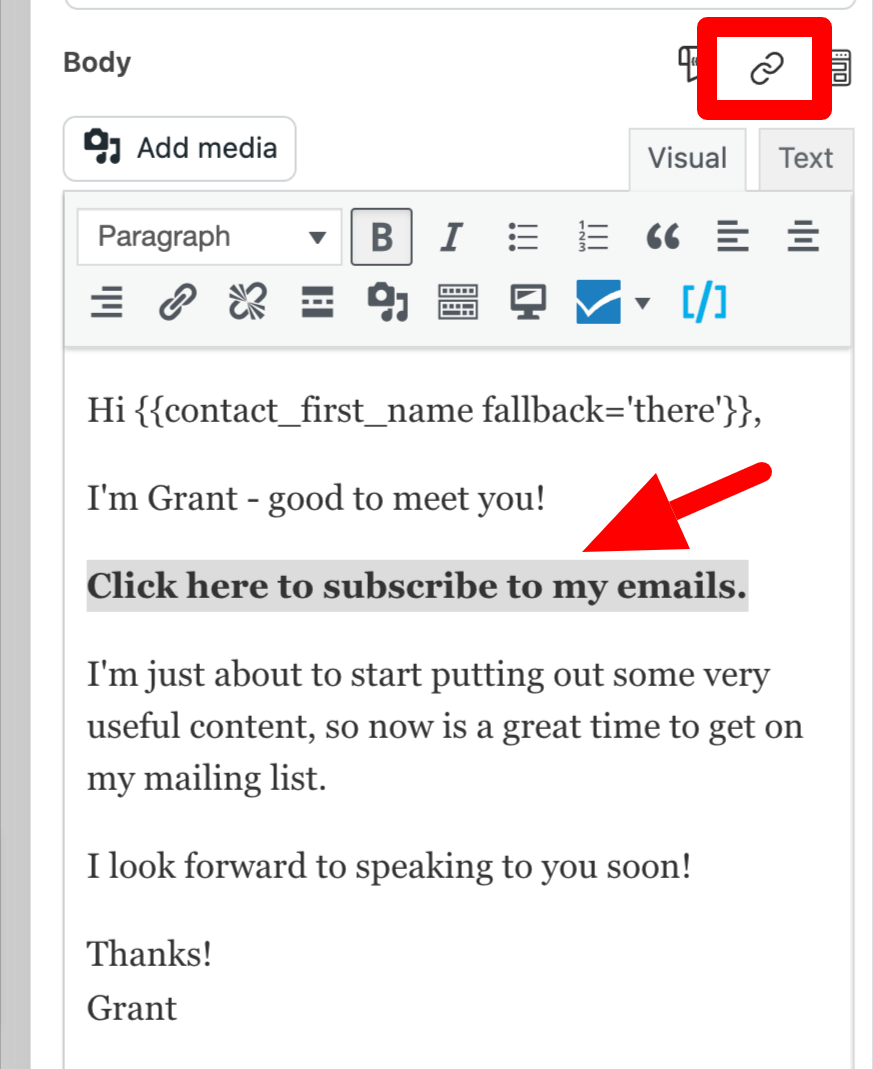
Highlight the text you want to link and then click the Link Trigger icon, as shown below.
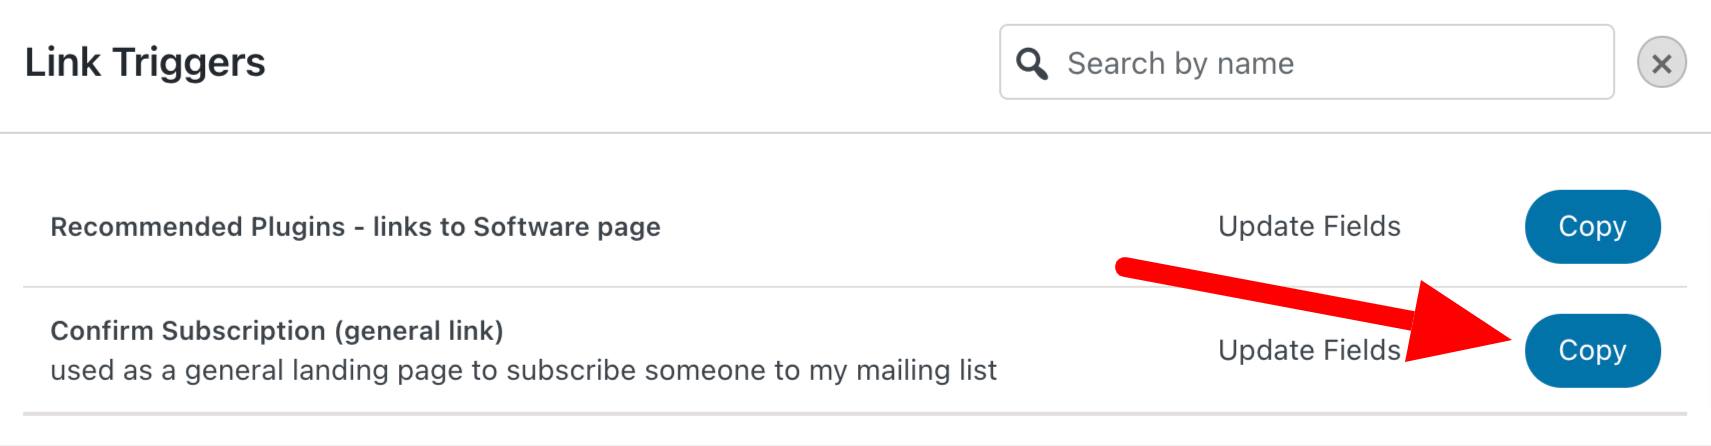
Then click Copy…
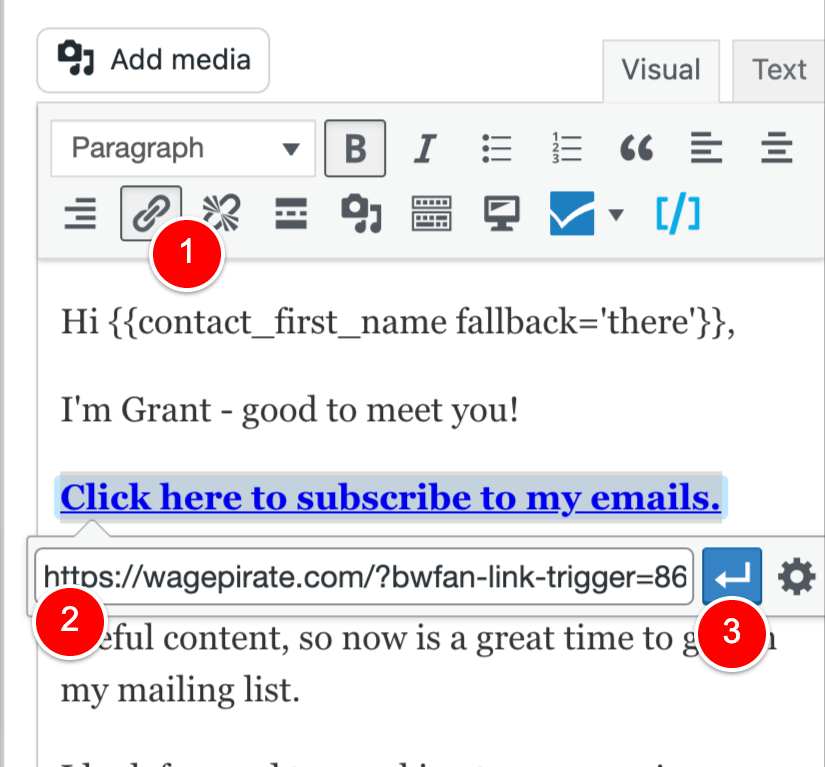
Then click the Link Icon (1), paste the copied Link Trigger url (2) and Save (3), as shown below.
And now you’ve set up your double opt-in!
Advanced: How to set up a complex Double Opt-in that handles subscribers VS non-subscribers differently
By following this tutorial so far, you have achieved the following:
- A user enters your Automation after completing a form on your website
- You send them an email with your Link Trigger
- The user clicks this Link Trigger and they are subscribed to your list inside FunnelKit Automations
- If the user unsubscribes but wants to subscribe later, they can now do so, as we added our PHP code to allow Link Trigger actions to run every time the Link Trigger is clicked
But let’s take this one step further.
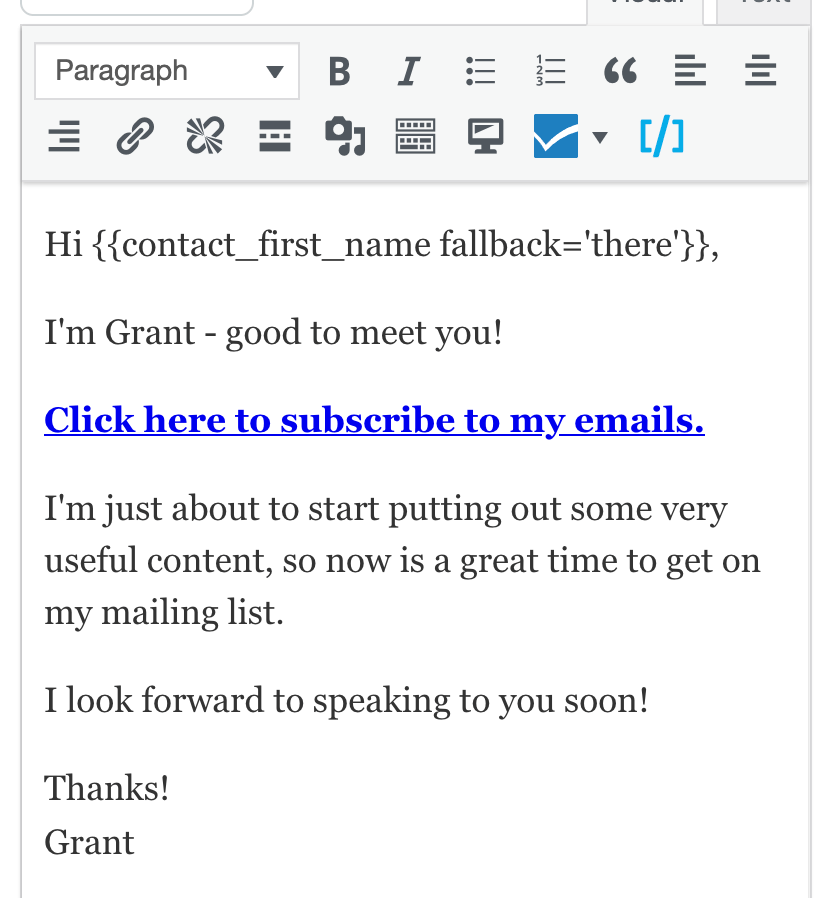
Currently, in my example, if someone completes my opt-in form and enters the Automation, they’ll get this email below.
And that works well if our opt-in form is specifically asking this person to enter their details to subscribe to our list, like the below:
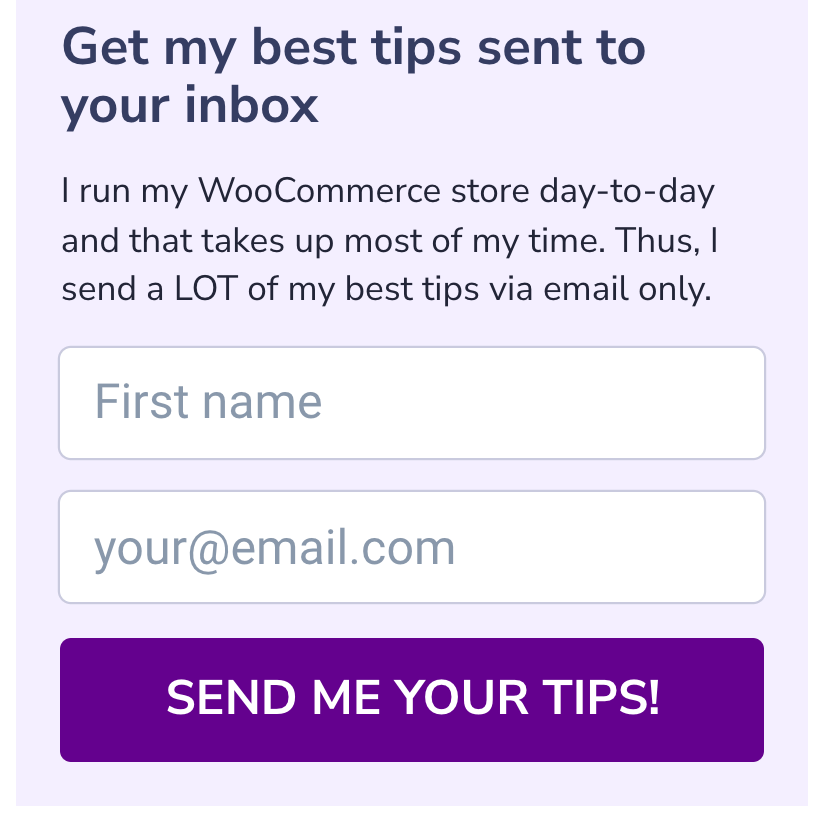
Because people who are already subscribed to our FunnelKit Automations list won’t fill out this form.
But here comes a bit of complexity:
What if we have a form for a Lead Magnet, like the one I have below (I’ll use this as an example for the remainder of this post to help make everything clear).
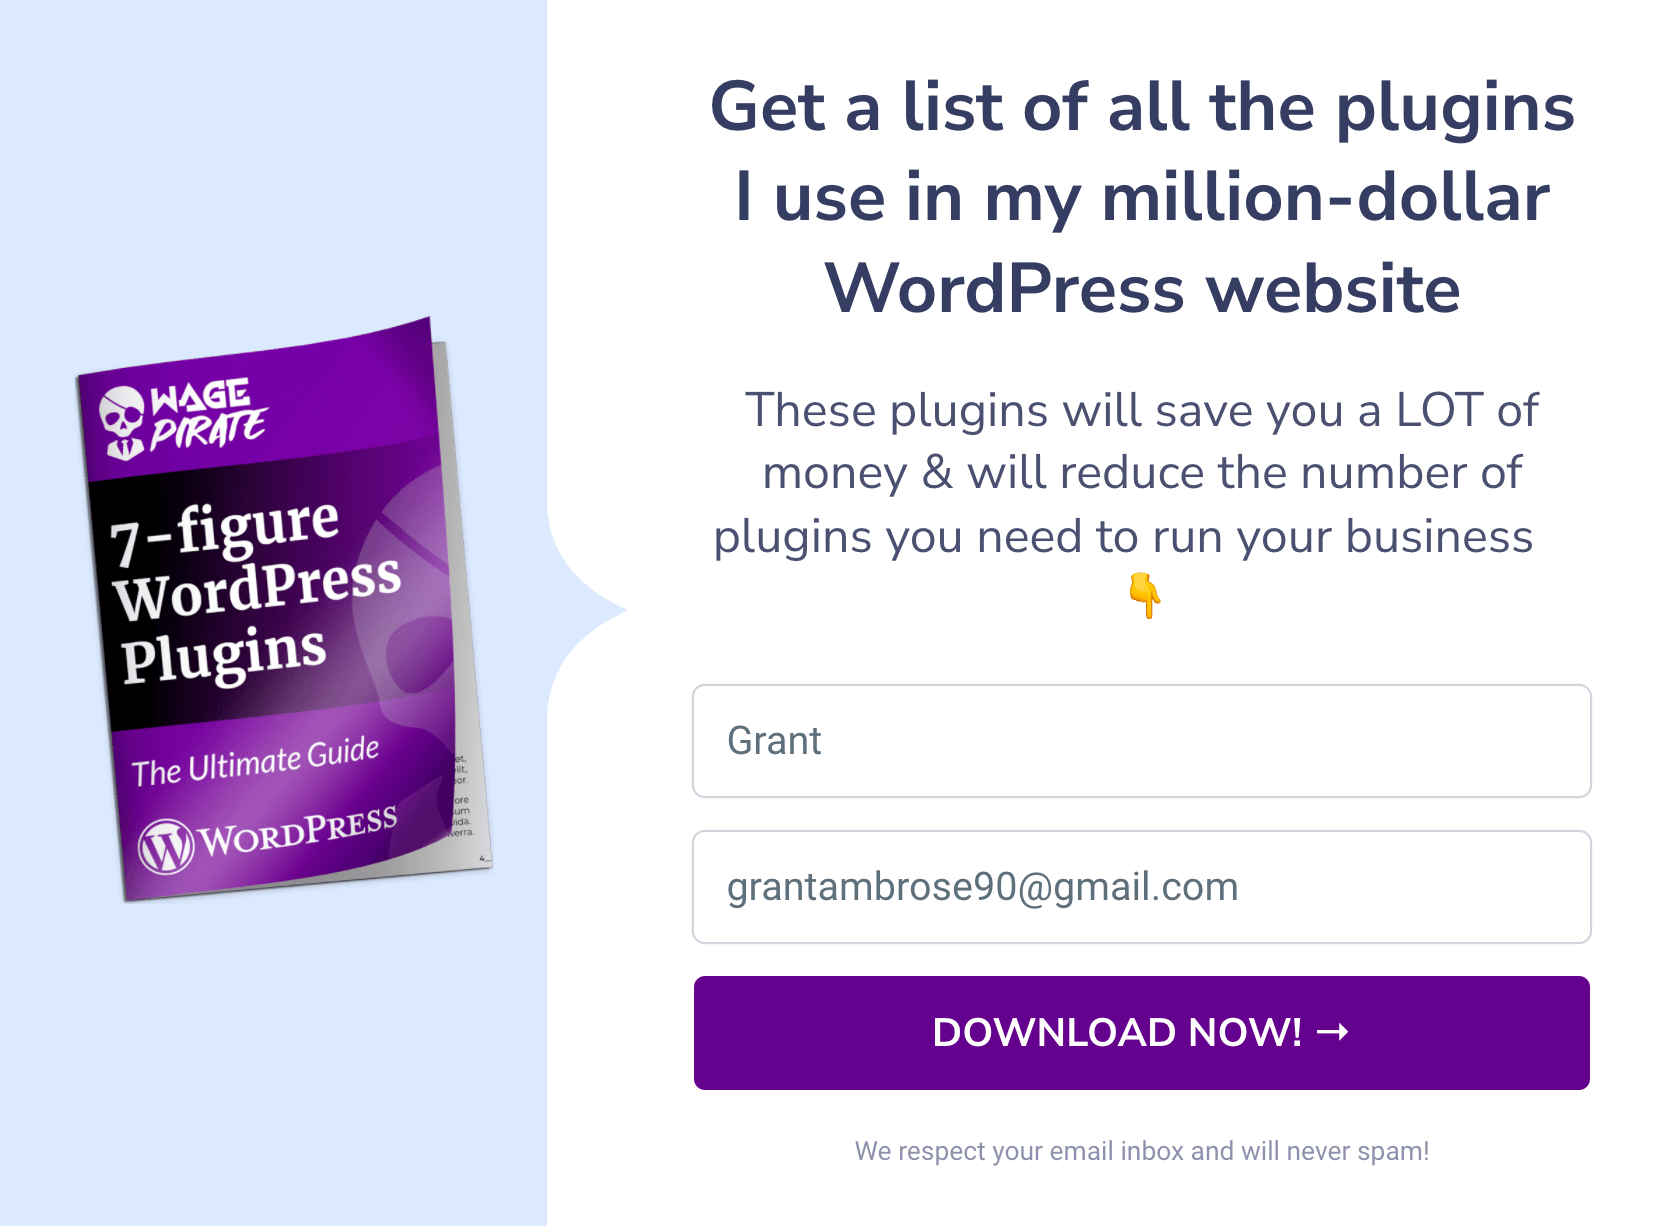
The people who are filling out this form want to see the list of plugins I have in my main WordPress website.
The people who are completing this form will be people who:
- Are already subscribed to our mailing list in FunnelKit Automations
- Are NOT subscribed (so they have never been a contact in FunnelKit Automations, or they exist in FunnelKit Automations but they have the status of Unsubscribed or Bounced)
So I want to treat them a bit differently and make the emails they get relevant to them and their subscriber status.
I don’t want to send an email that asks someone to “Click here to download my list of WordPress plugins and subscribe to my mailing list” if this user is already subscribed. It’s confusing and unnecessary.
And so I came up with the below Automation to do this:
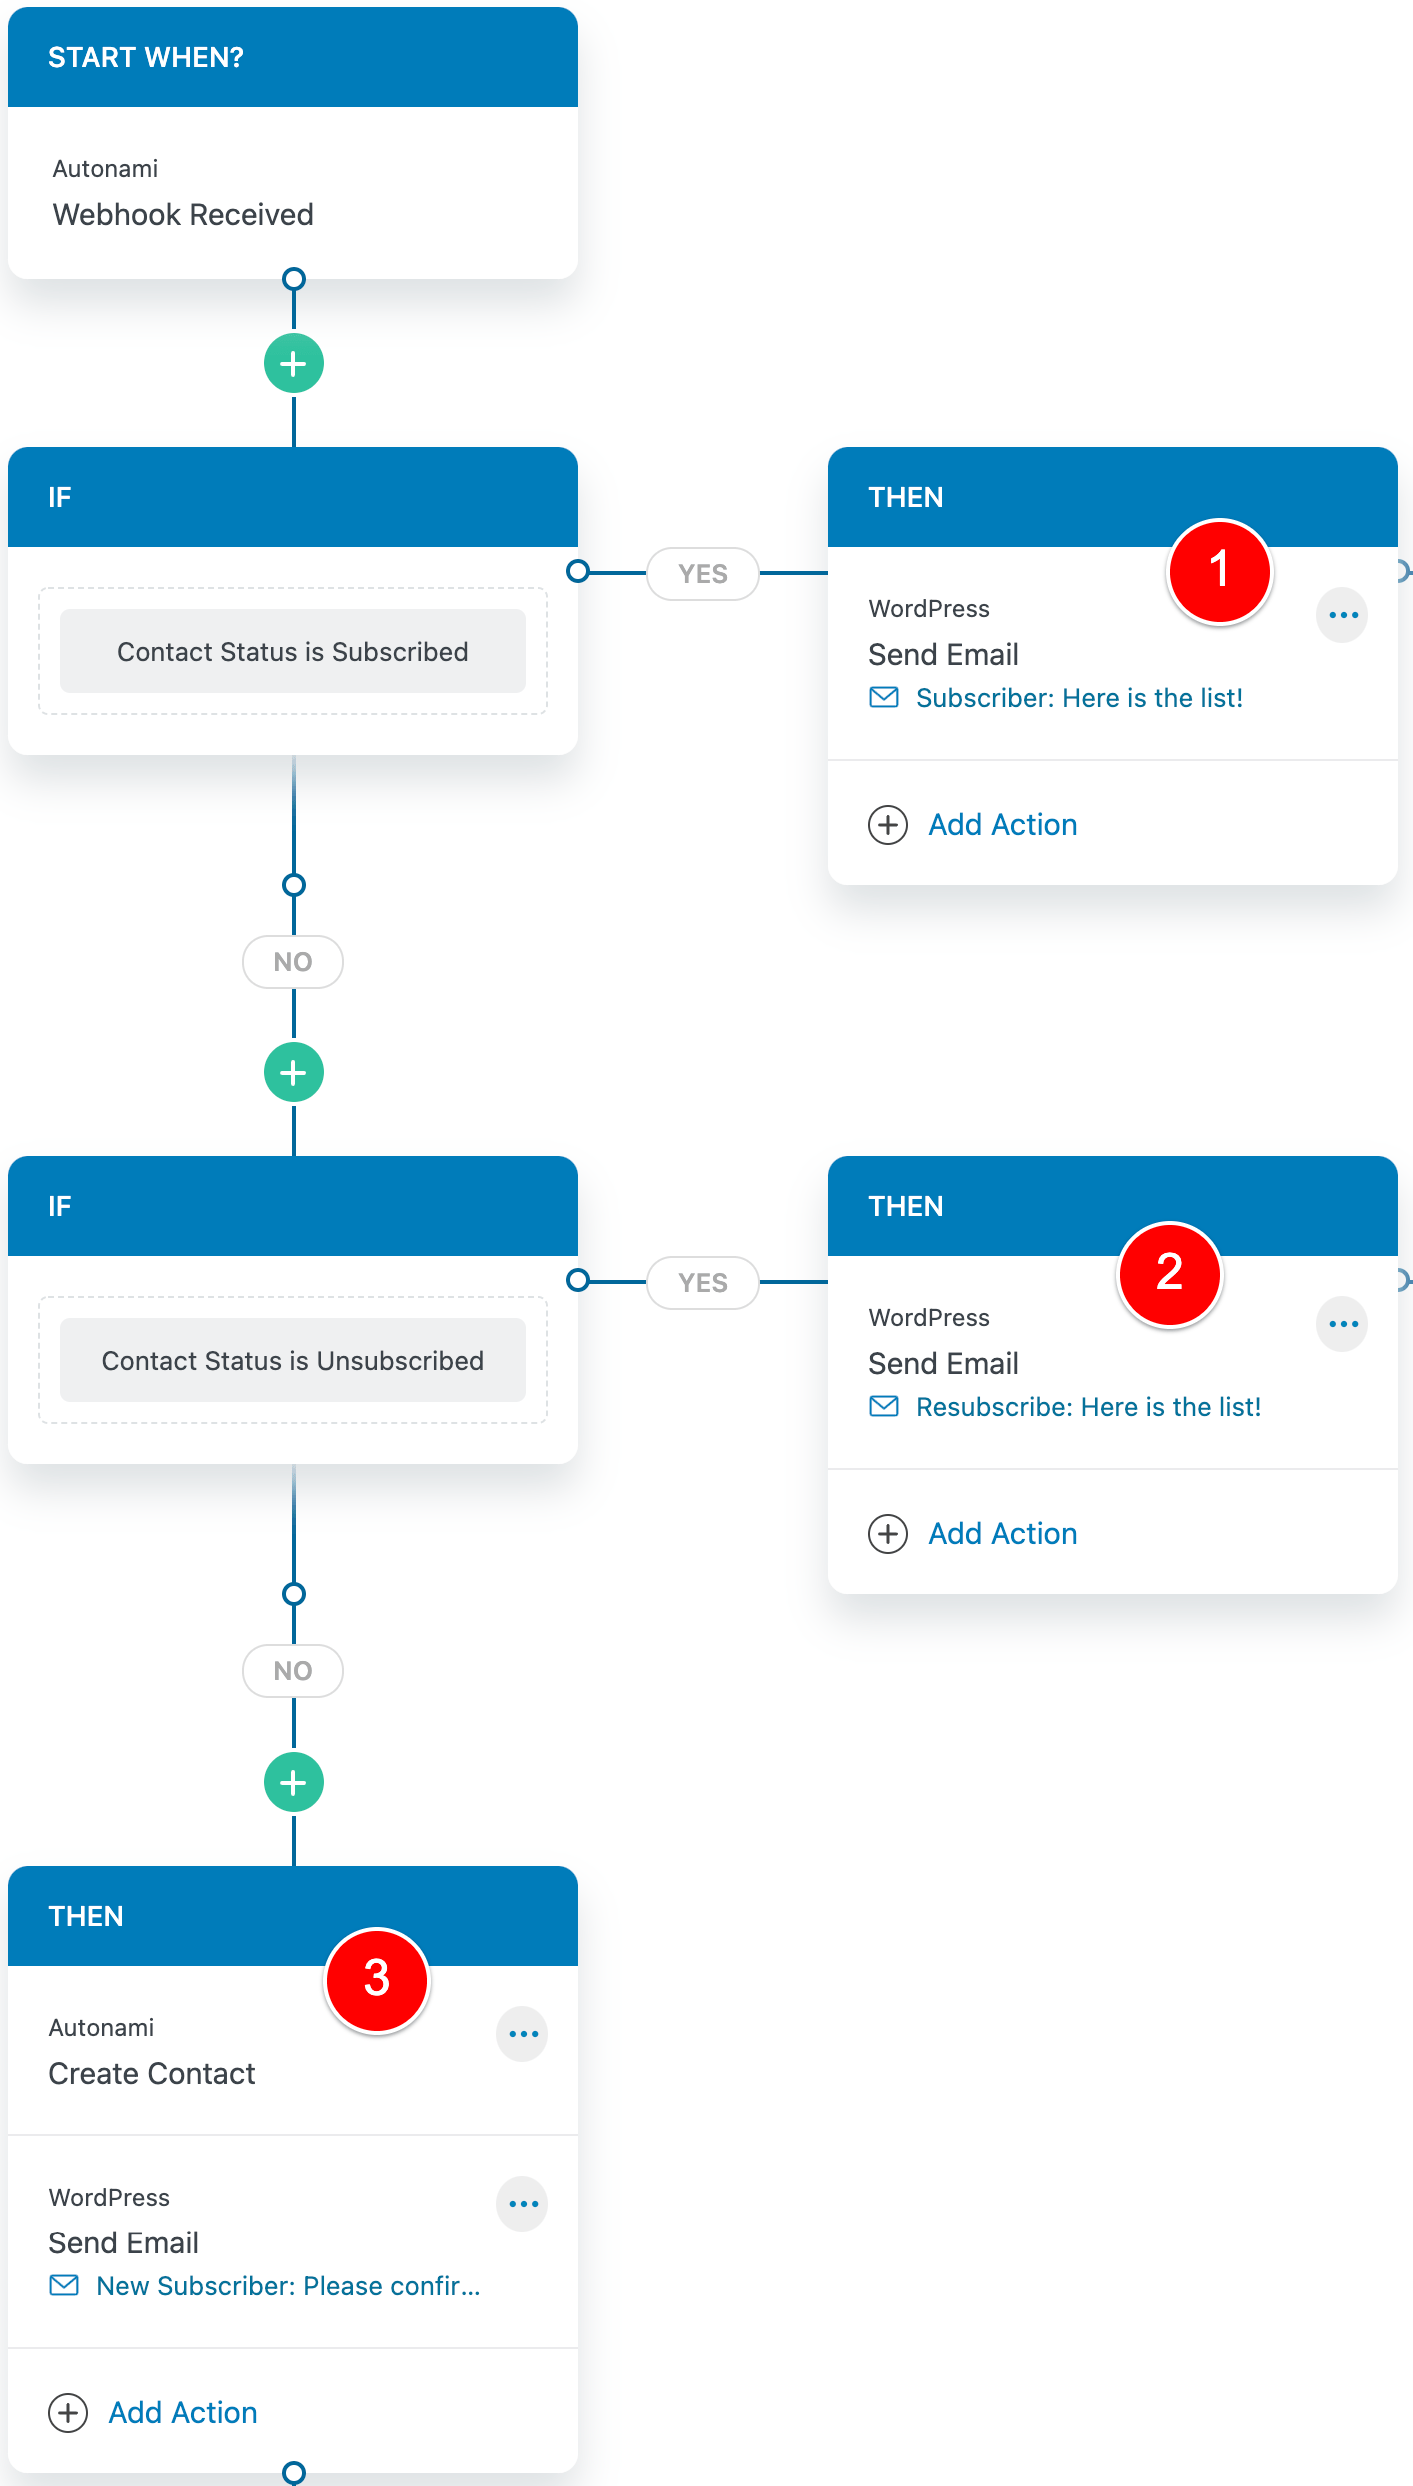
And I’ll break down what is happening at each part of the Automation.
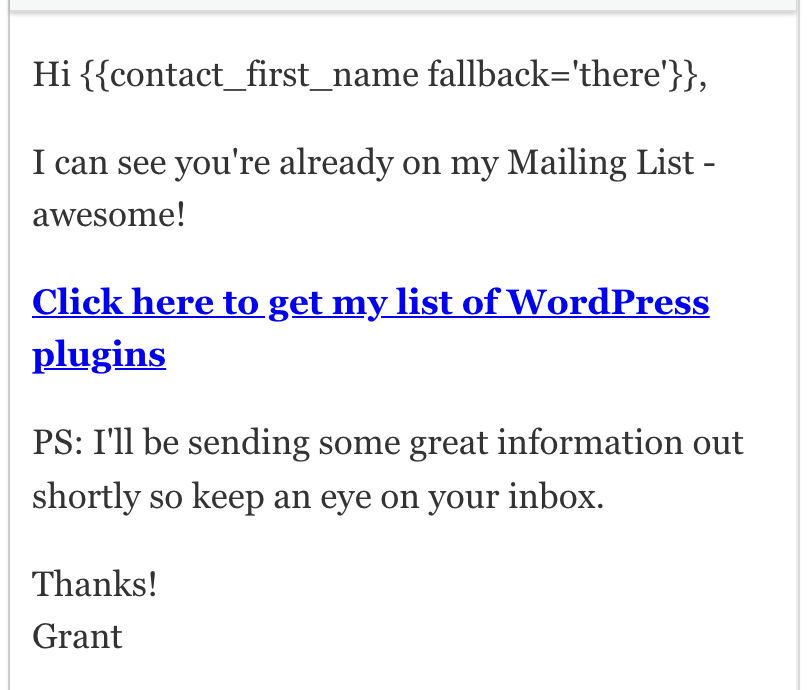
(1) If the contact is already subscribed in FunnelKit Automations, send them a direct link to download the lead magnet.
These subscribers get the email below. Notice how it is tailored to acknowledging that I know they’re already on my mailing list and then I give them a link to download the list – no messing about.
In (2), if the contact is Unsubscribed in FunnelKit Automations, I want to acknowledge that maybe they didn’t get what they wanted the first time they subscribed, but I am glad they’re back. Here is the email they get:
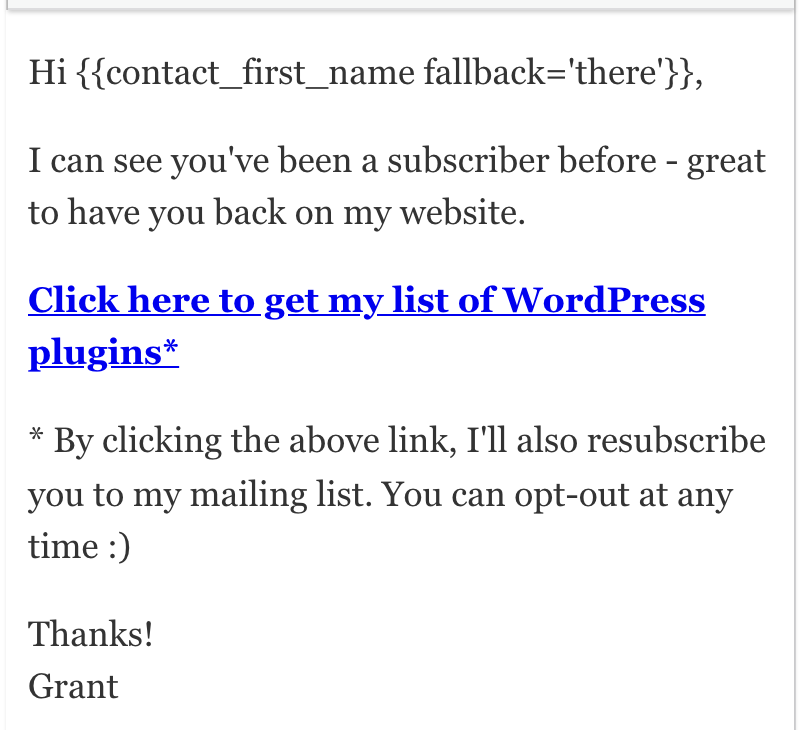
I made this very simple for this tutorial, but if this was a live Automation, I would probably add more to this email – maybe after the link I would add resources that I think will help them, that I have added recently and thus they have not seen since they last subscribed.
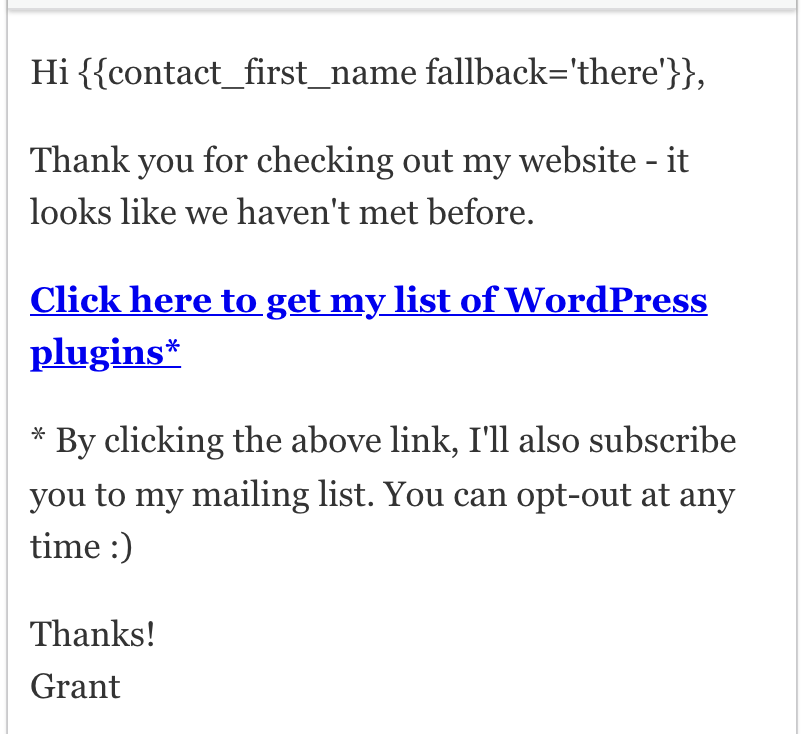
And lastly… (3) – New contacts.
As they are not currently a contact, we have the Create Contact action to create them in FunnelKit Automations, and then I send them this email. Again, I would flesh this one out a bit more, but you get the point 😛
That’s the power of FunnelKit Automations
The possibilities are endless with this plugin and that why it’s fast becoming my favourite WordPress plugin.
It just allows you to do so much with so much complexity.
If you found this article helpful – please let me know in the comments below.
Leave a Reply