I want to show you how I create my forms in Bricks Builder and then insert these forms into the content I write using Gutenberg.
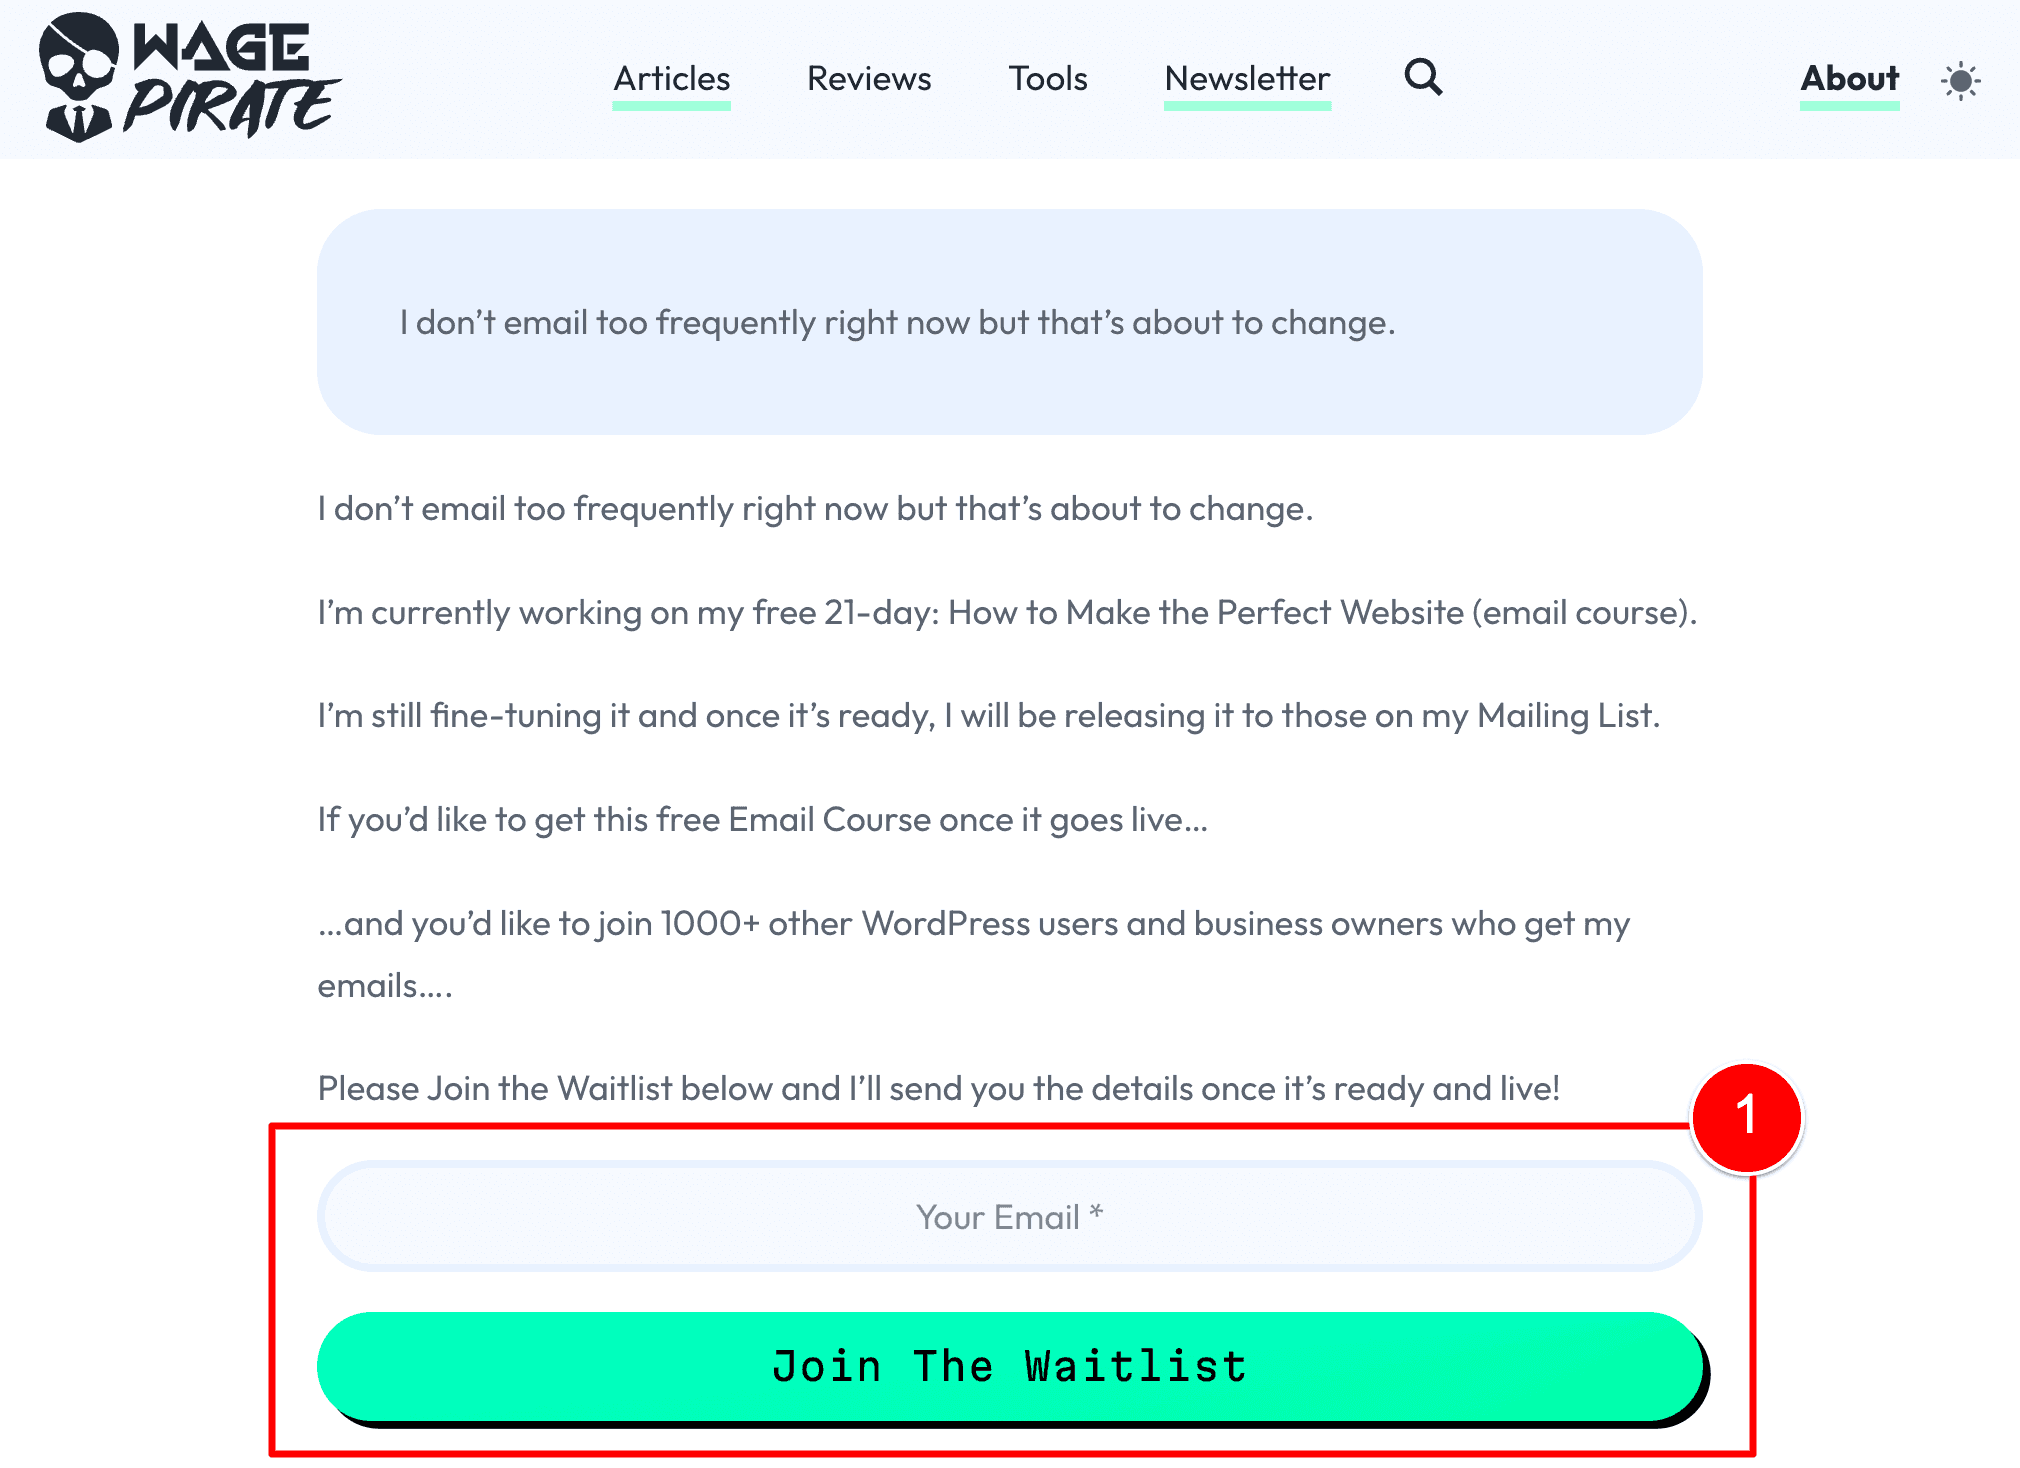
An example of where I do this on my website is my Newsletter page.
On this page, I have a form (1) where users (like you 😛 ) can opt-in to my Mailing List.
If I click to edit this Newsletter page, you can see how I have this set up in Gutenberg.
And inside that big red box at (1) is the key to making all of this work – a Shortcode!
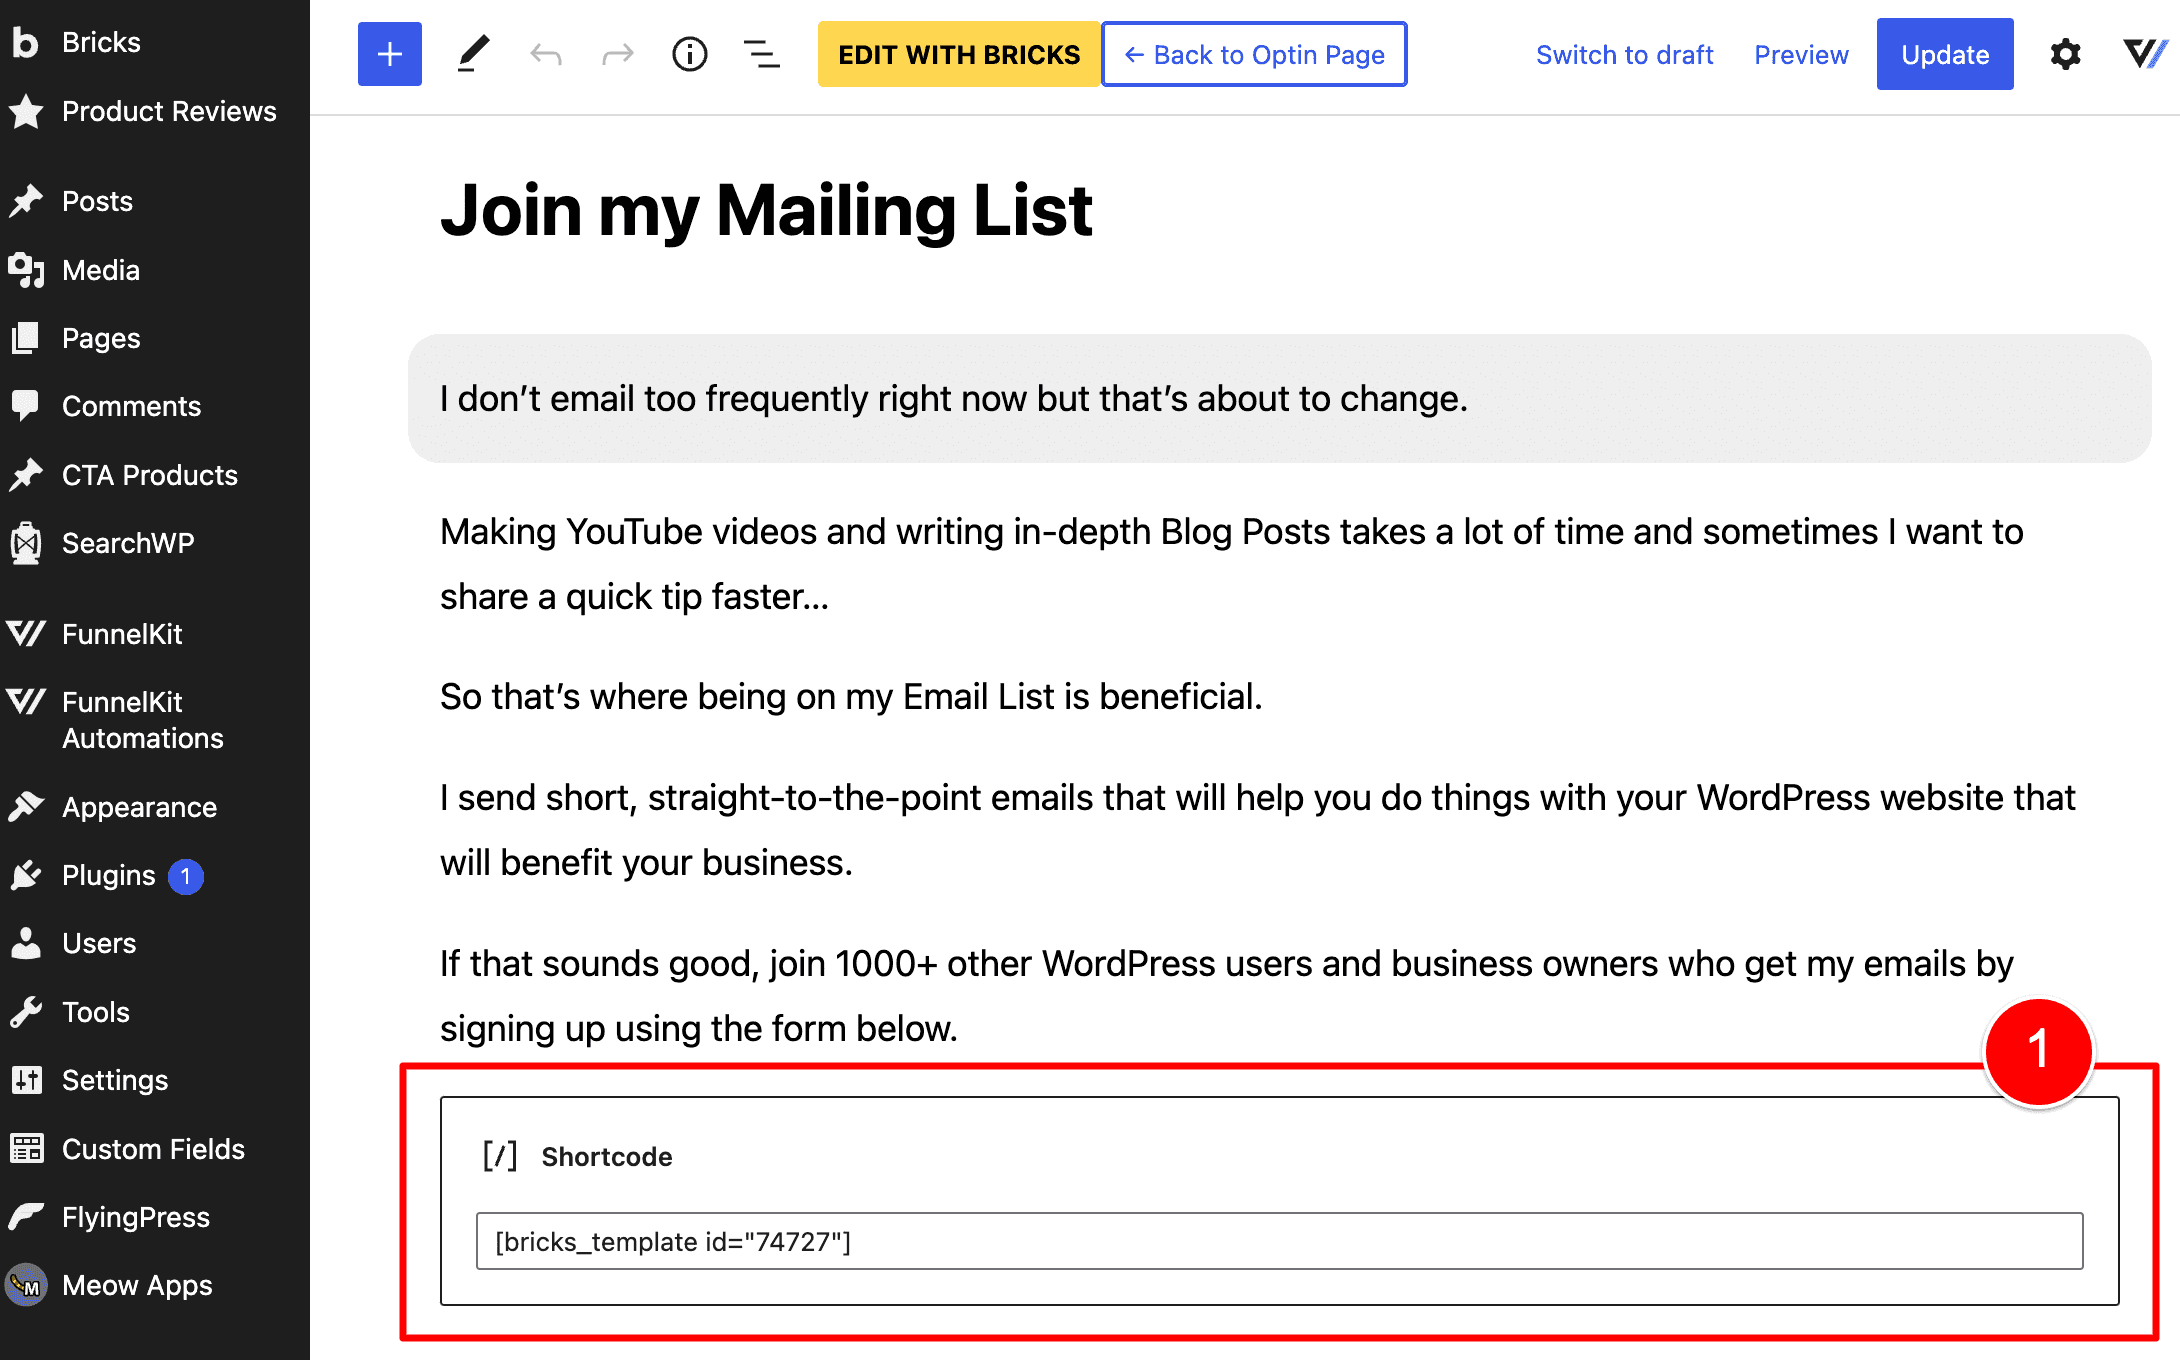
In case you’re reading on your phone and the Shortcode is too small to read, the Shortcode is as follows:
[bricks_template id="74727"]Code language: JSON / JSON with Comments (json)- This Shortcode on my website is outputting a Bricks Template.
- Inside this Bricks Template is 1 element ONLY – a Form element.
It’s a bit confusing to explain in words…
So let me show you how you can easily do this on your own website…
By recounting the steps I took to set up this form on my website.
Starting with the first step – creating the Bricks Template.
The Video Tutorial
Here is a video that explains how you can go and implement this in your own website.
Step 1: Create a Template in Bricks
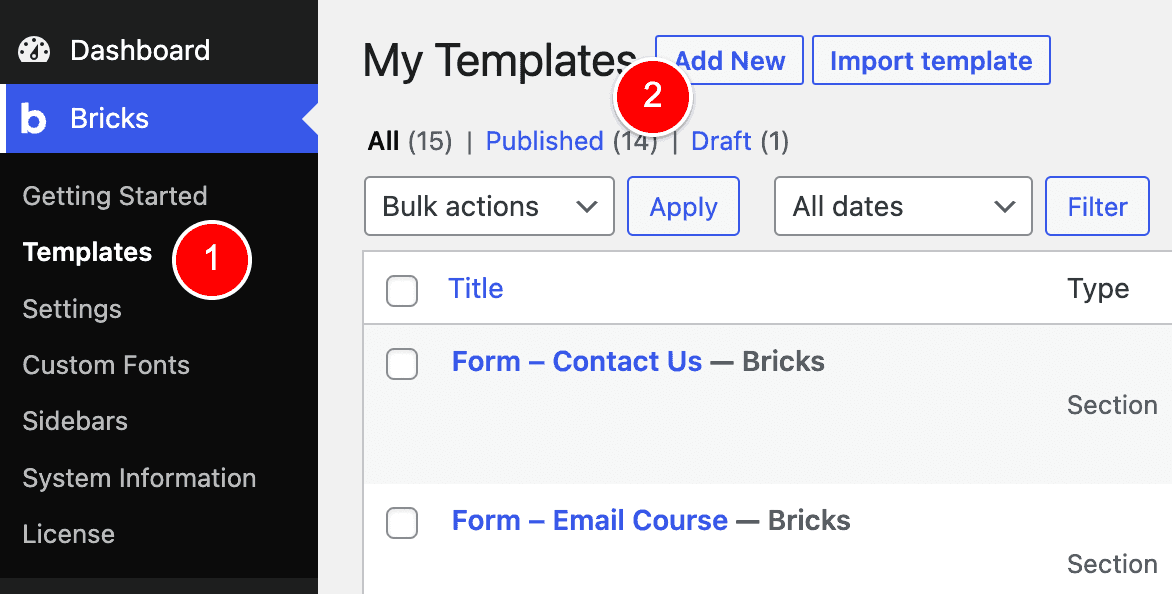
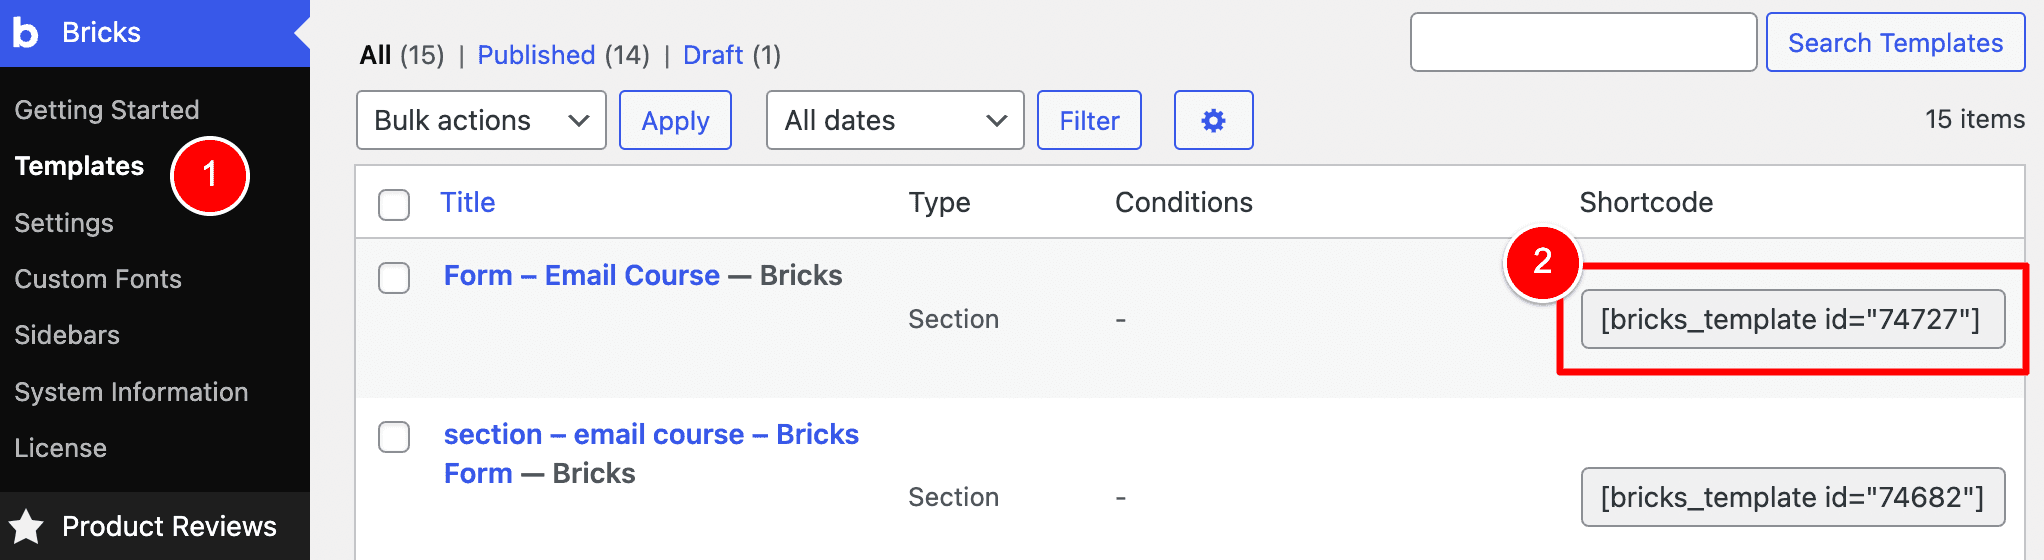
To create the Bricks Template, I went to Bricks > Templates > Add New (2).
At this point, I need to point out that for my Newsletter page, I’m not asking people to sign up for a general Mailing List.
On this page, the actual call-to-action is for people to join my Mailing List by showing interest in my 21-day Email Course.
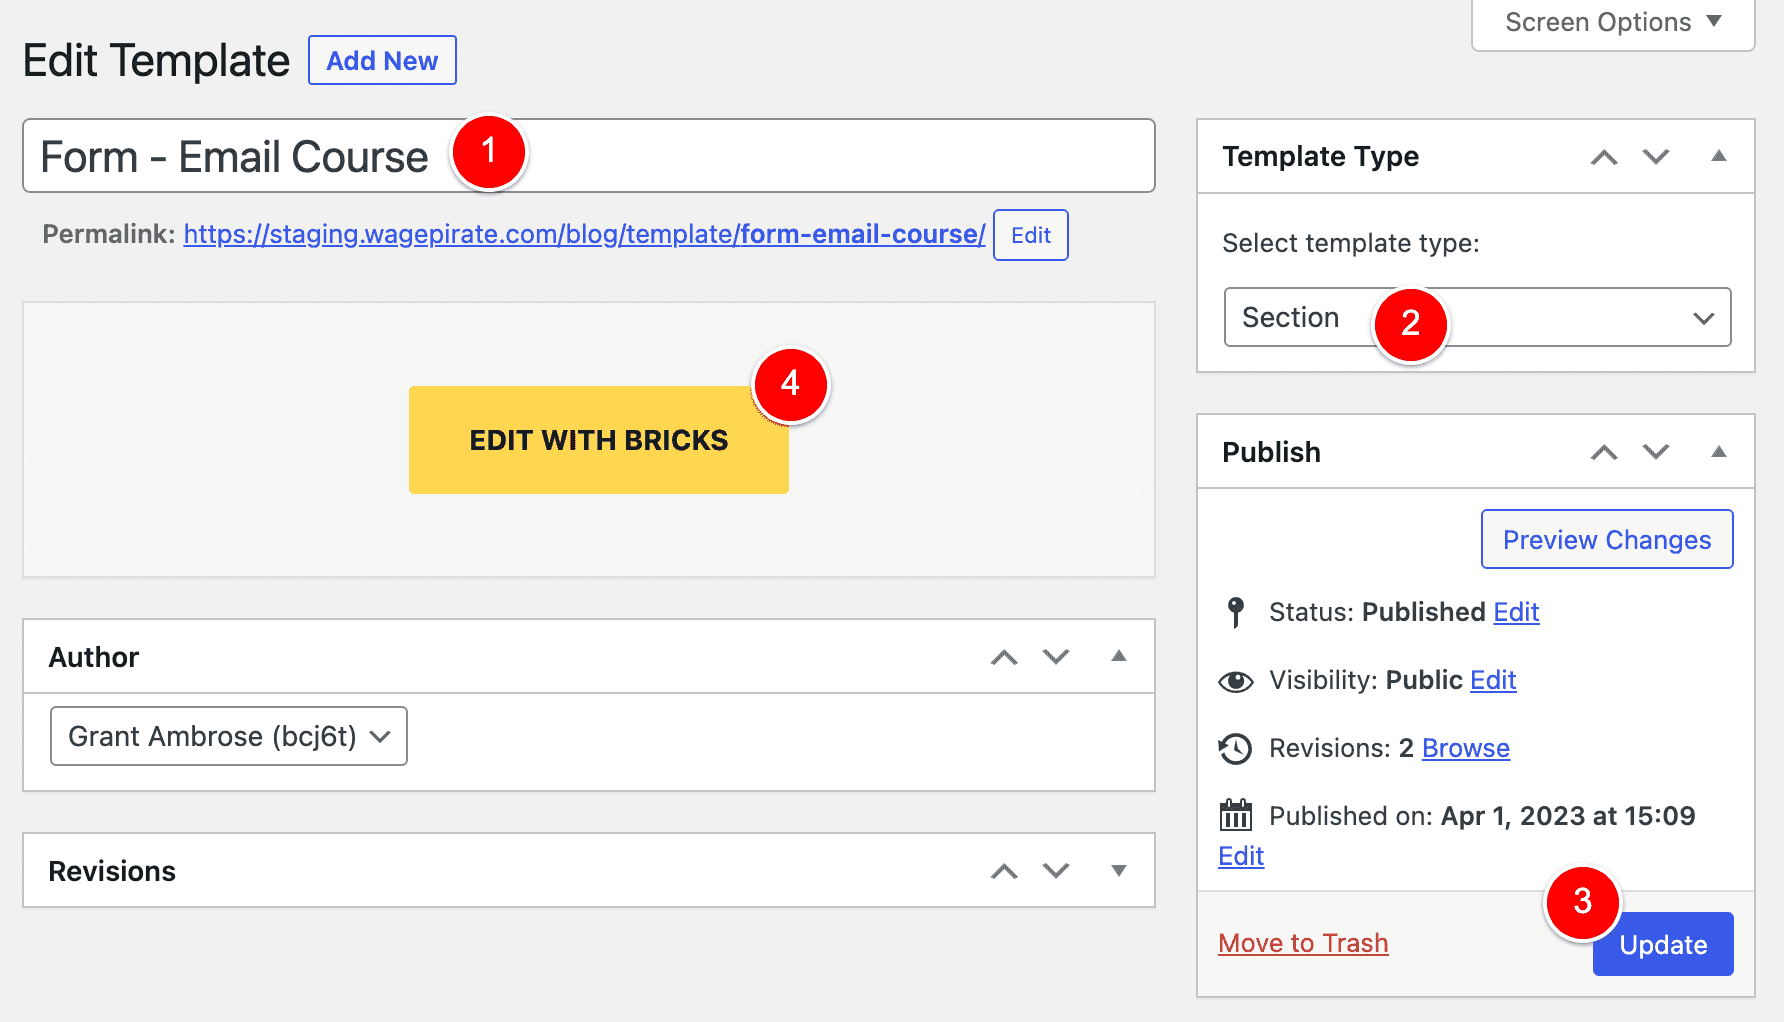
So, for this Bricks Template, I named it “Form – Email Course” (1), set its Template Type to Section (2), saved the template (3) and then clicked Edit with Bricks (4).
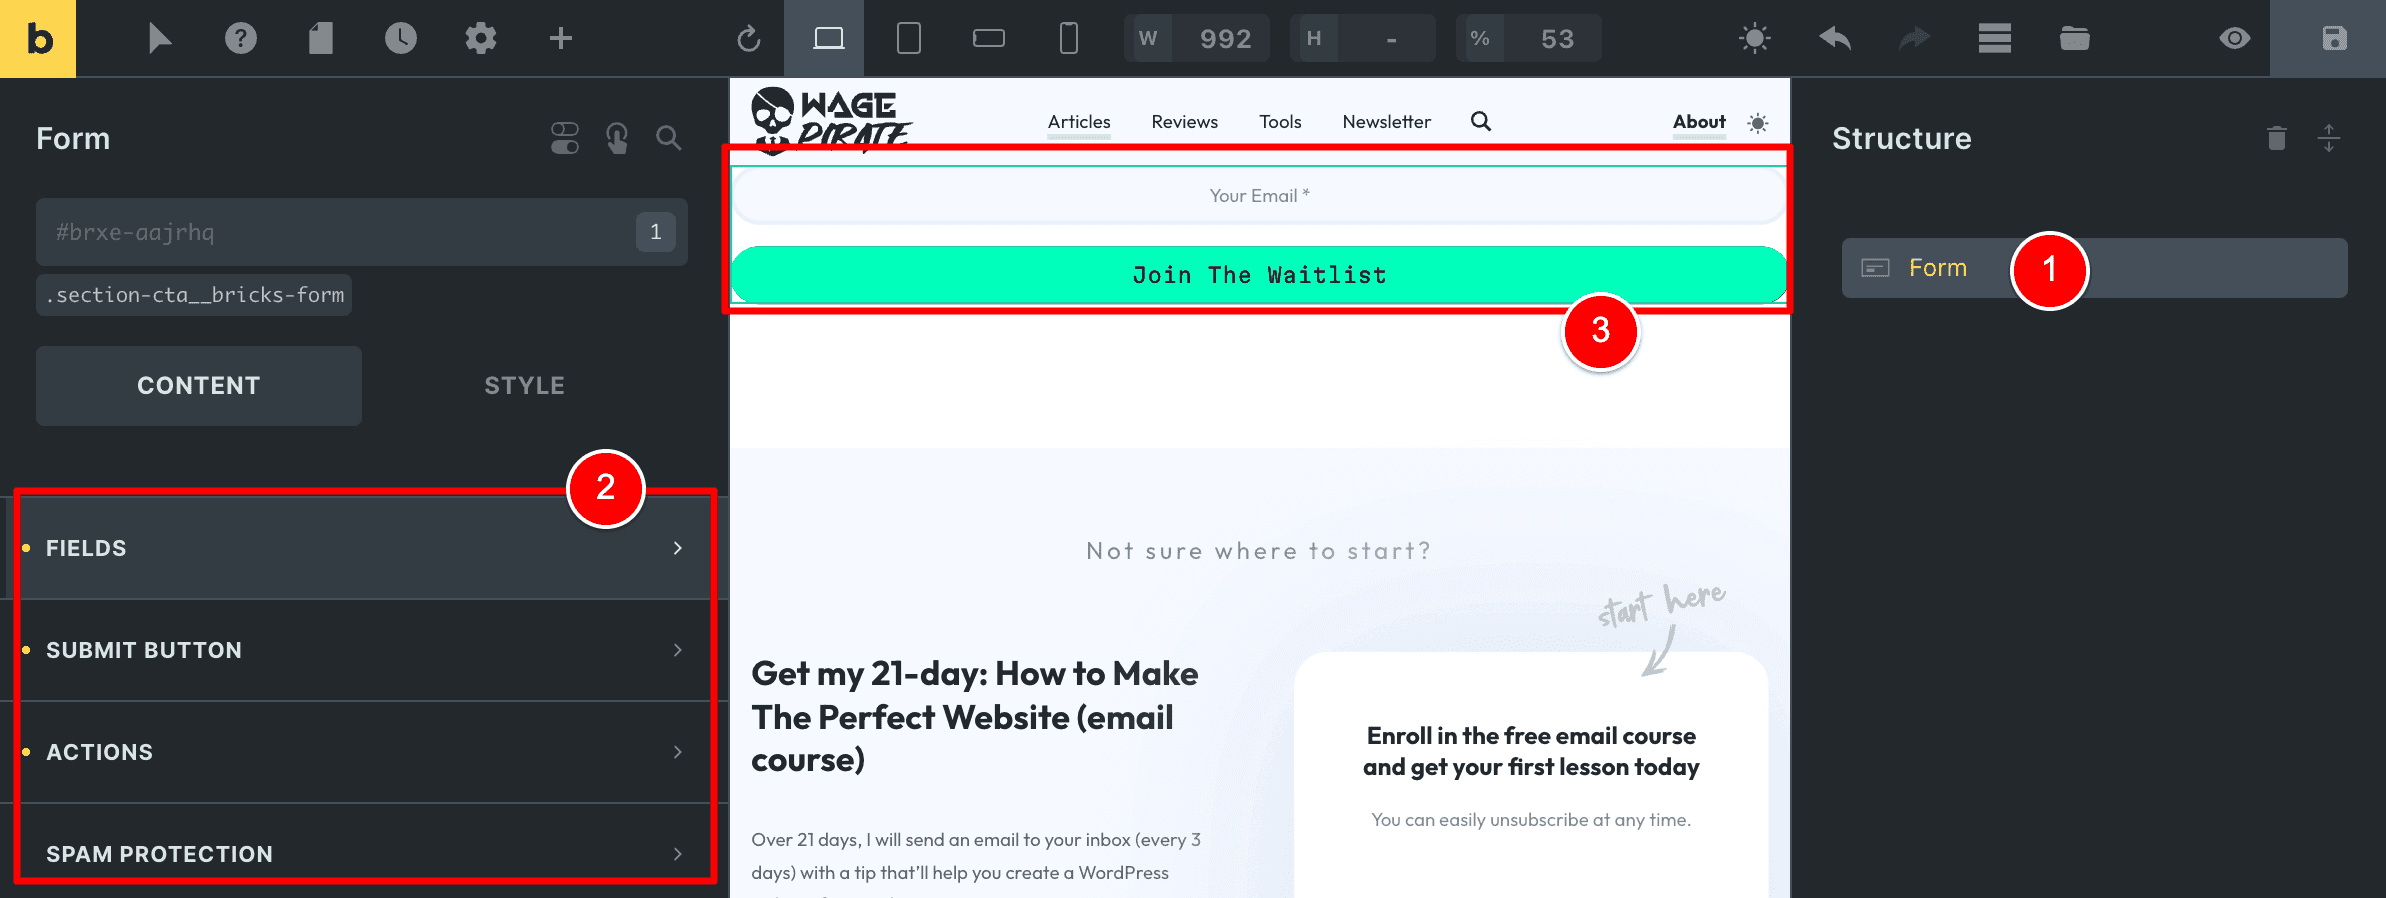
Step 2: Add a Bricks Form element
I then searched for a Form element and added it to the Template.

Below, at (1) you can see that the only element inside this template is my Form element (this is important!).
The other things are as you’d imagine – I customized my form (2) and it looks like it does at (3).
If you do this, you could have weird padding issues and margin problems – so I definitely recommend just sticking to having the form on its own taking up the full-width like I’ve done on my website here.
With that done, I saved this template.
Step 3: Add your Bricks Template’s Shortcode to Gutenberg
Now, if we go back to Bricks > Templates (1), you’ll notice we now have a Shortcode on the right (2) that we can use to output our template wherever we want on our website.
So all that was left to do was copy this Shortcode…
Go to my Newsletter Page, add a Shortcode Block and paste in the Bricks Template Shortcode.

And that’s it!
Our Bricks Form is now outputting in our Gutenberg content.
But wait! (seriously)…
There’s a trick you can use to manage your Bricks Forms
There is one more thing I think you’re going to love about what we set up here today.
Because we now have a Bricks Form inside a Bricks Template…
We can now add this Form ANYWHERE in our website.
In this article today I showed you how you can add this form to Gutenberg…
But you could now go and add this form to any page built with Bricks Builder, too!
To learn more, I would highly recommend checking out the article below.
In it, I take what we covered here today and go deeper into some of the more complex things you could do with your Bricks Forms (and how to keep things simple to manage long-term as your website grows).
Leave a Reply