Same Bricks Builder Form on multiple Pages
This article will show you how to add the same Bricks Builder Form to more than one page on your website.
The benefit of doing what I will show you in a second is that you can edit your Form in one place and it will update everywhere on your website.
This makes managing your website MUCH easier and reduced your chance of mistakes (which I’ll touch on later on).
And there is another MASSIVE benefit that I want to show you today that is a very important consideration for Form creation inside Bricks.
I recently had to do this on my website.
(I love numbering things, so let’s stick to that and call this Form #1)…
The Video Tutorial
In the video below, I go show you step-by-step how to set up what I discuss in this Blog Post (but I also share some other extra tips and tricks that you will need to know).
Example: The same Bricks Form in 3 locations on my website
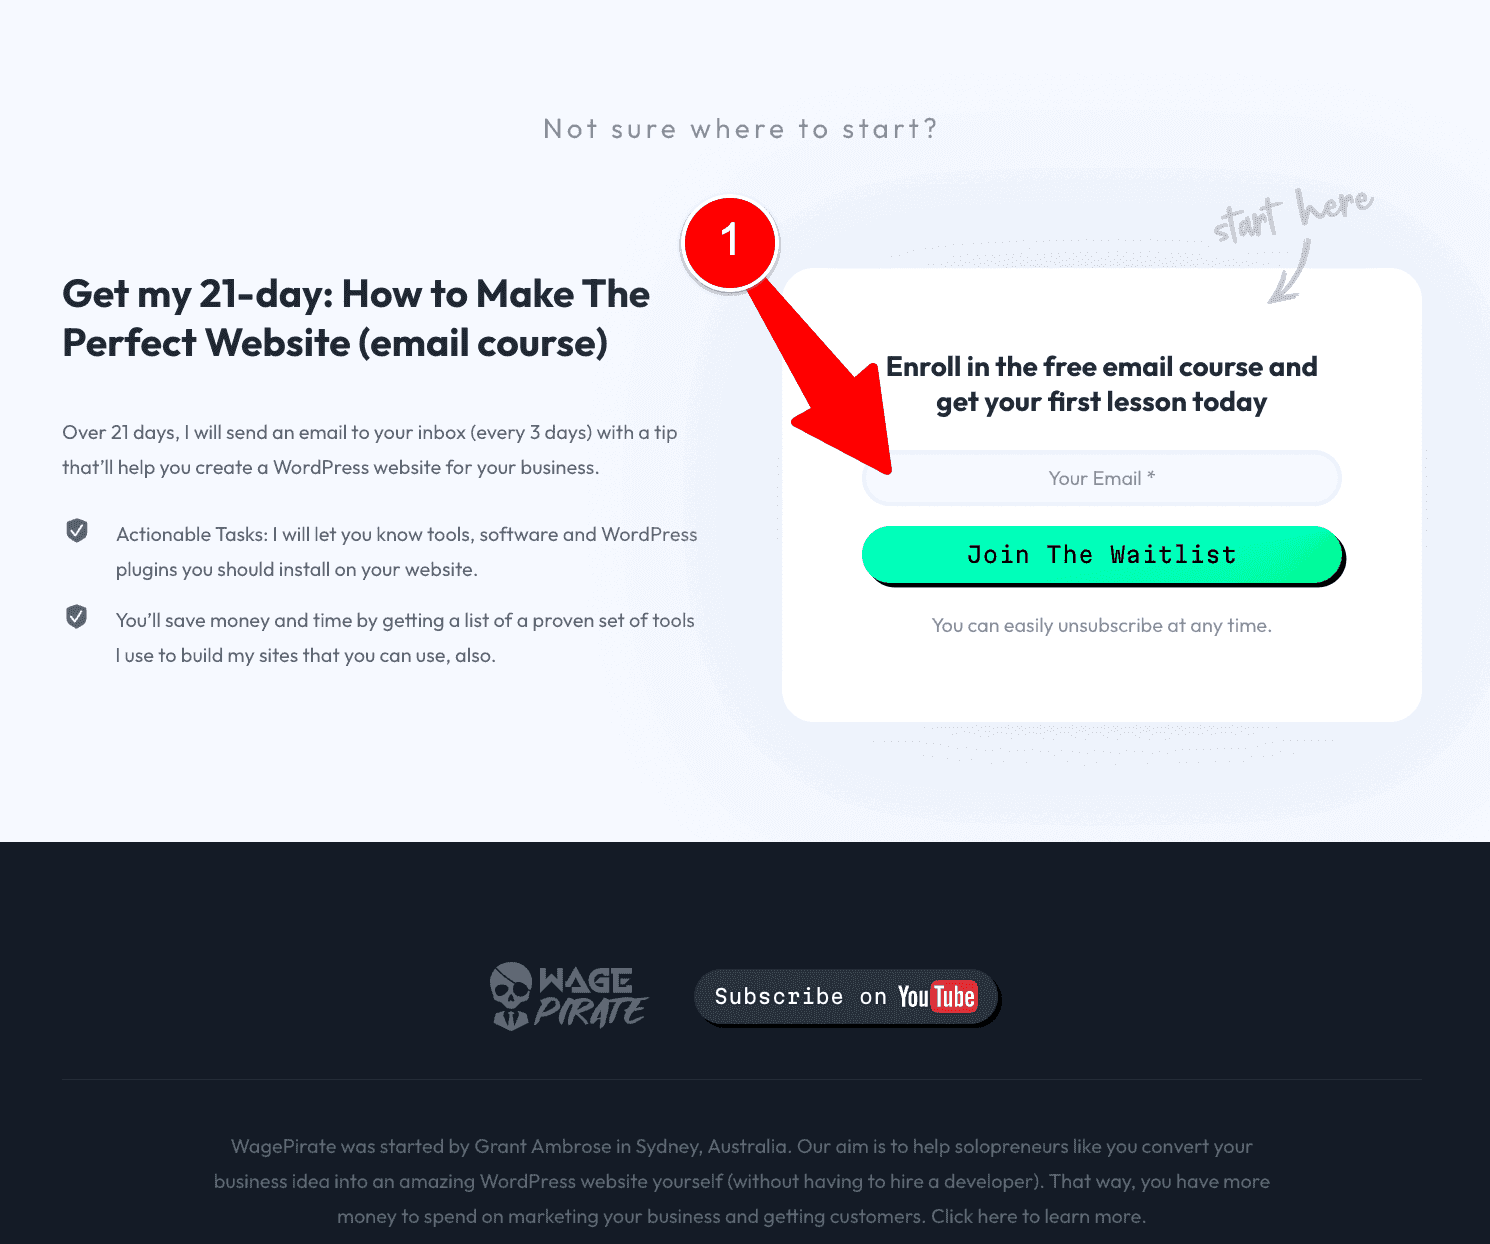
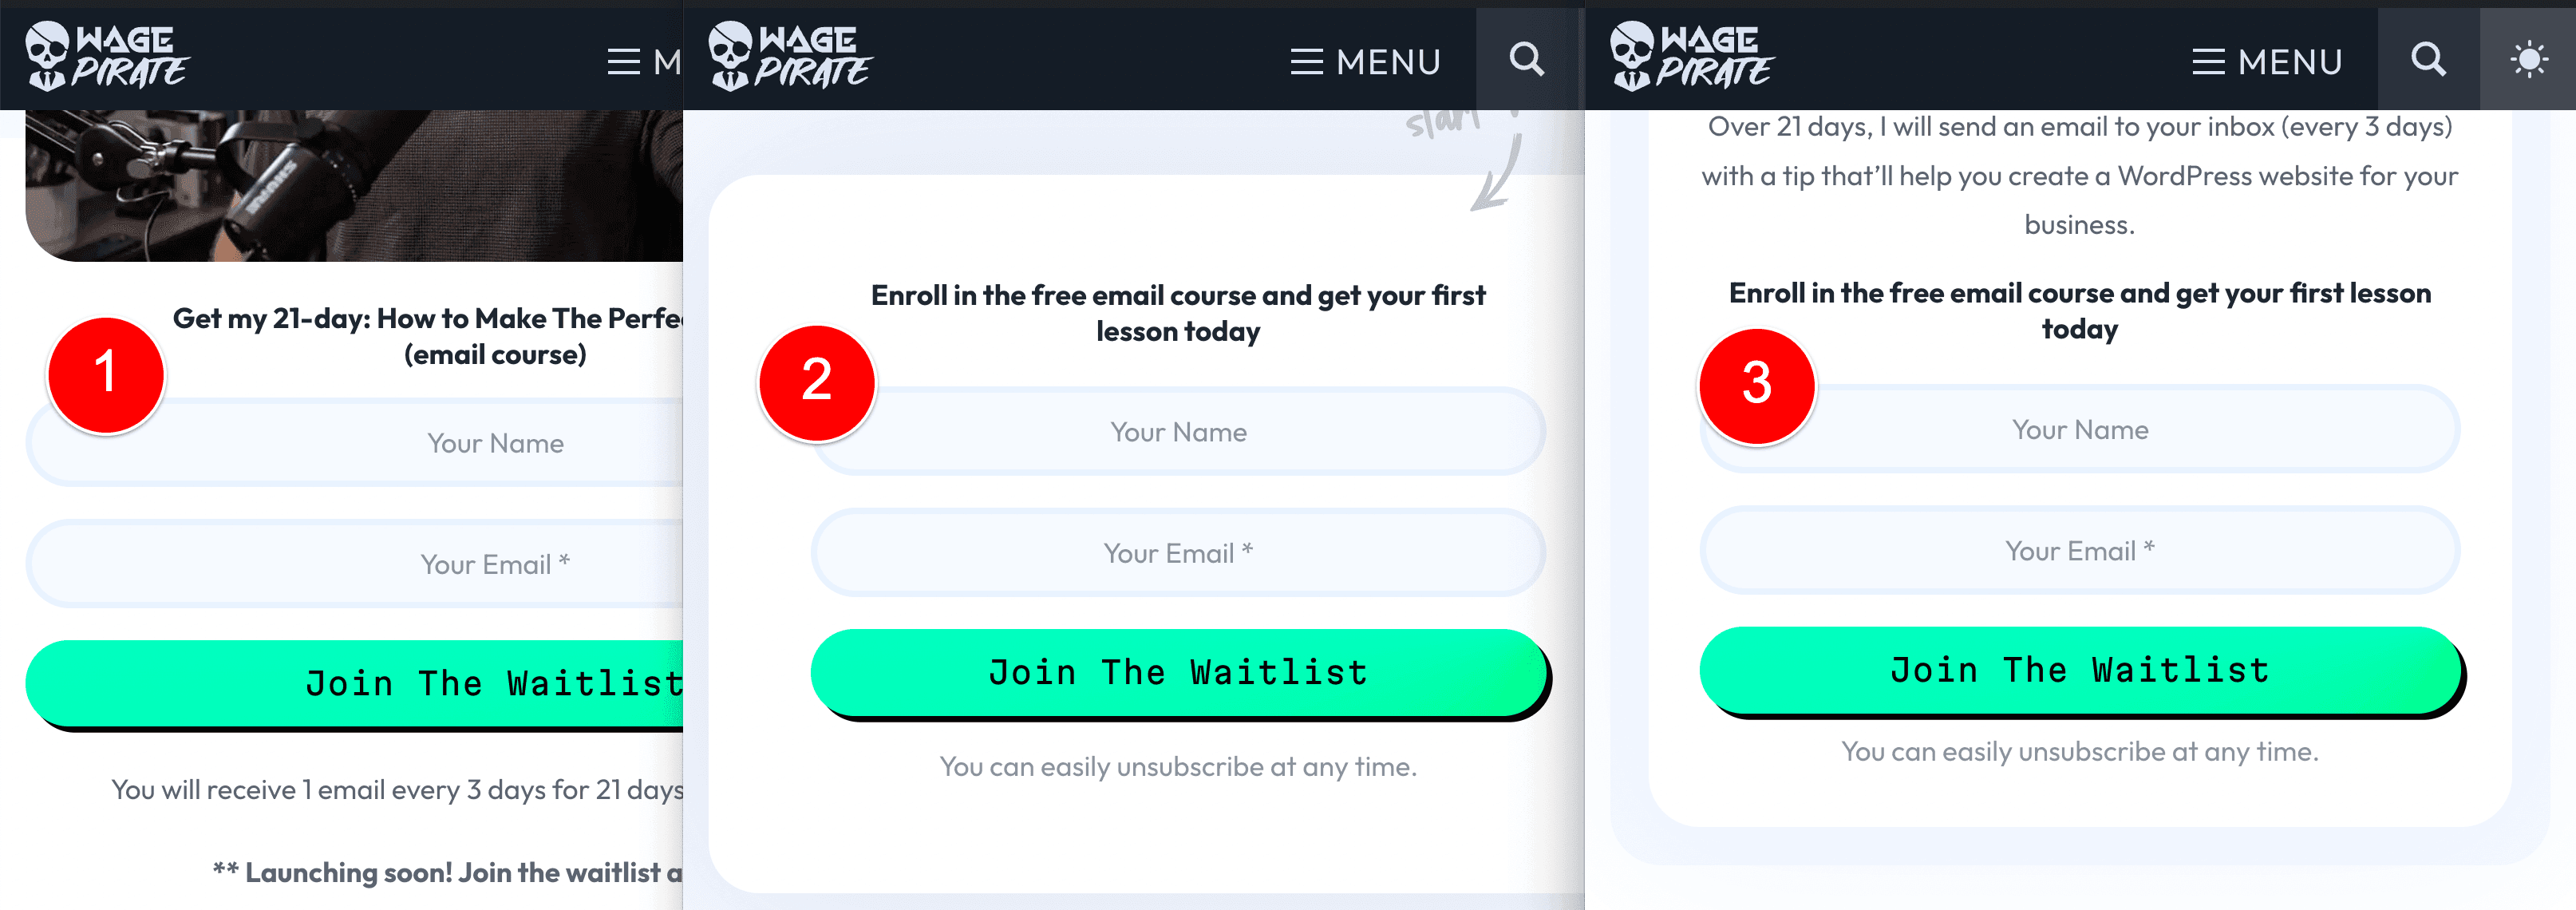
Form #1 is on my Homepage and it is where my readers can Opt-in to receive my 21-Day: How to make the Perfect Website email course.

The second Bricks Form on my website (AKA Form #2) is a form I have in the Footer of my website that shows across all pages (1)
Form #2’s purpose is the same as Form #1’s; to get lovely people like yourself 😉 to Optin into my 21-Day Email Course.
Then I have Form #3 – AKA my in-post Call-to-action Form.
This is the form that shows midway through my Blog Posts to give the reader a chance to Optin to my Email course if they are liking the content they’ve read so far and want to learn more.

Considering the above, we can conclude that:
- I have 3 locations on my website where I want to add my Email Course Optin form.
- The forms in all 3 locations have the same form fields
- When someone completes any of these 3 forms, they will be added to my Mailing List in FunnelKit Automations (the WordPress CRM plugin I use and recommend) and will enter the same email automation series.
So it just makes sense that these forms are the EXACT SAME Bricks Form.
The Lazy Method & why it causes issues
I mean… sure – I could have done the do-now-regret-later approach of:
- Creating the form on my Home page
- Copy and Paste the form into my footer (creating a completely new form)
- Then Copy and Paste the form a third time into my in-post CTA (creating a completely new form again).
But then imagine if – in the future – I want to add a Name field to my form to start collecting a user’s First Name.
I now have to edit 3 different forms.
It’s cumbersome and the management of your Bricks Forms does not have to be that convoluted.
Here’s how I went ahead and set up this Optin Form in Bricks so that I could edit it in one place and have it update in all locations of my website.
Step 1: Created a new Bricks Template
Firstly, I created a new Bricks Template.
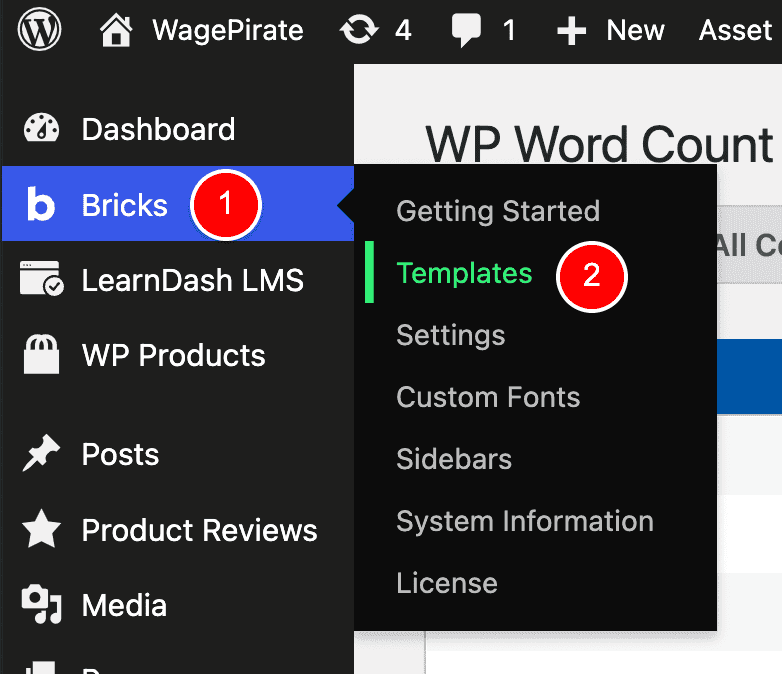
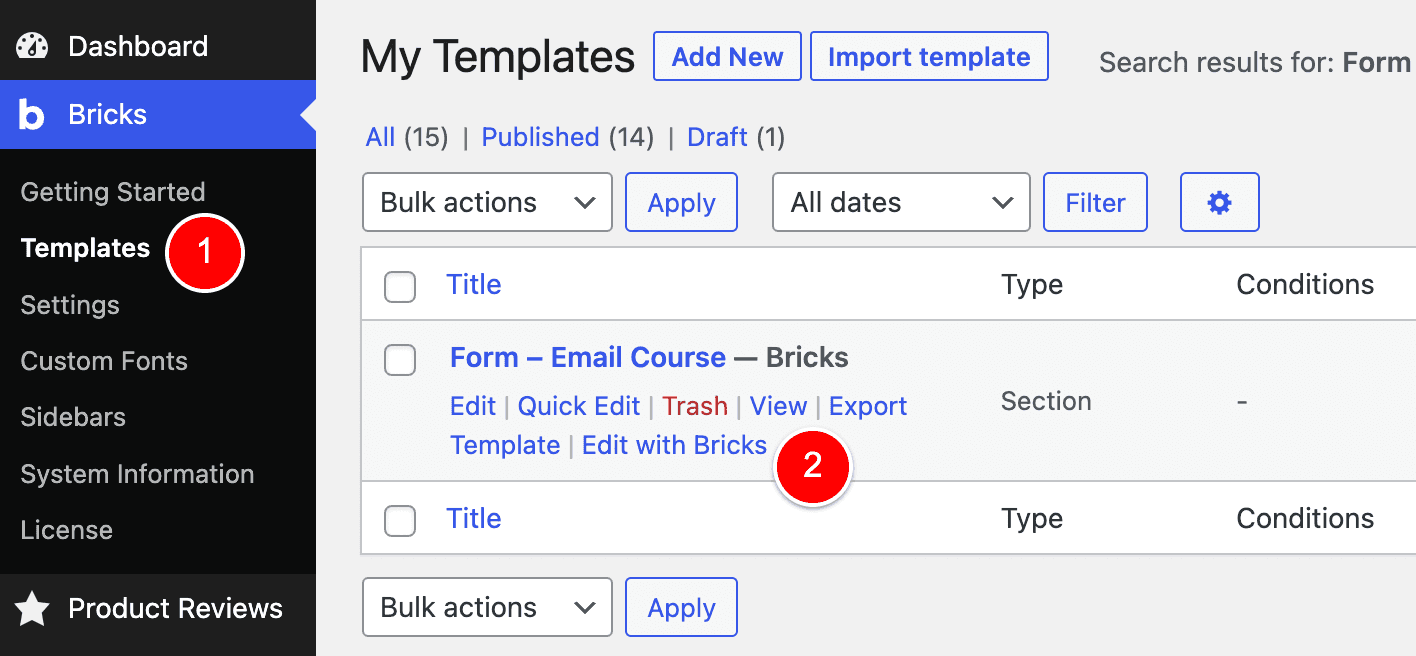
To do that, I went to Bricks (1) > Templates (2) and clicked Add New.
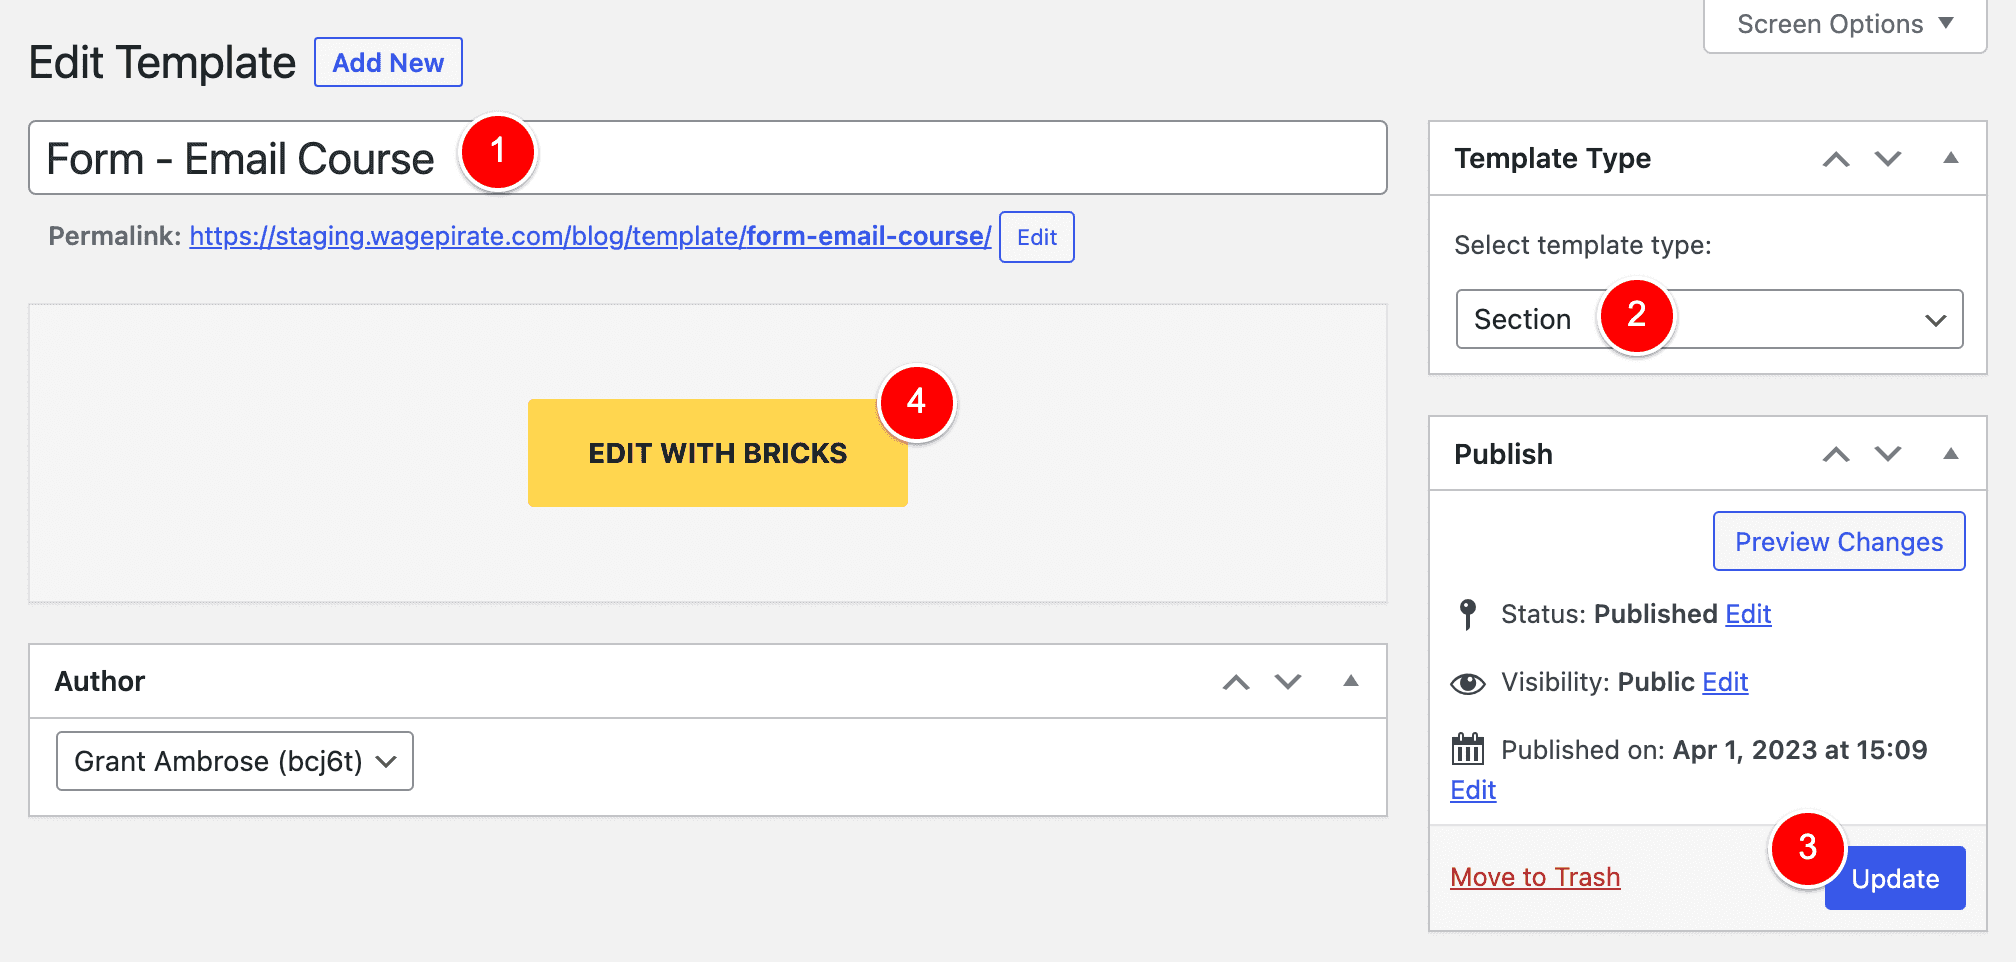
I named the template “Form – Email Course” (1), set its Template Type to Section (2), saved the Template (3) and then clicked Edit with Bricks (4).
And here’s the trick!
Step 2: Added ONLY a Form Element
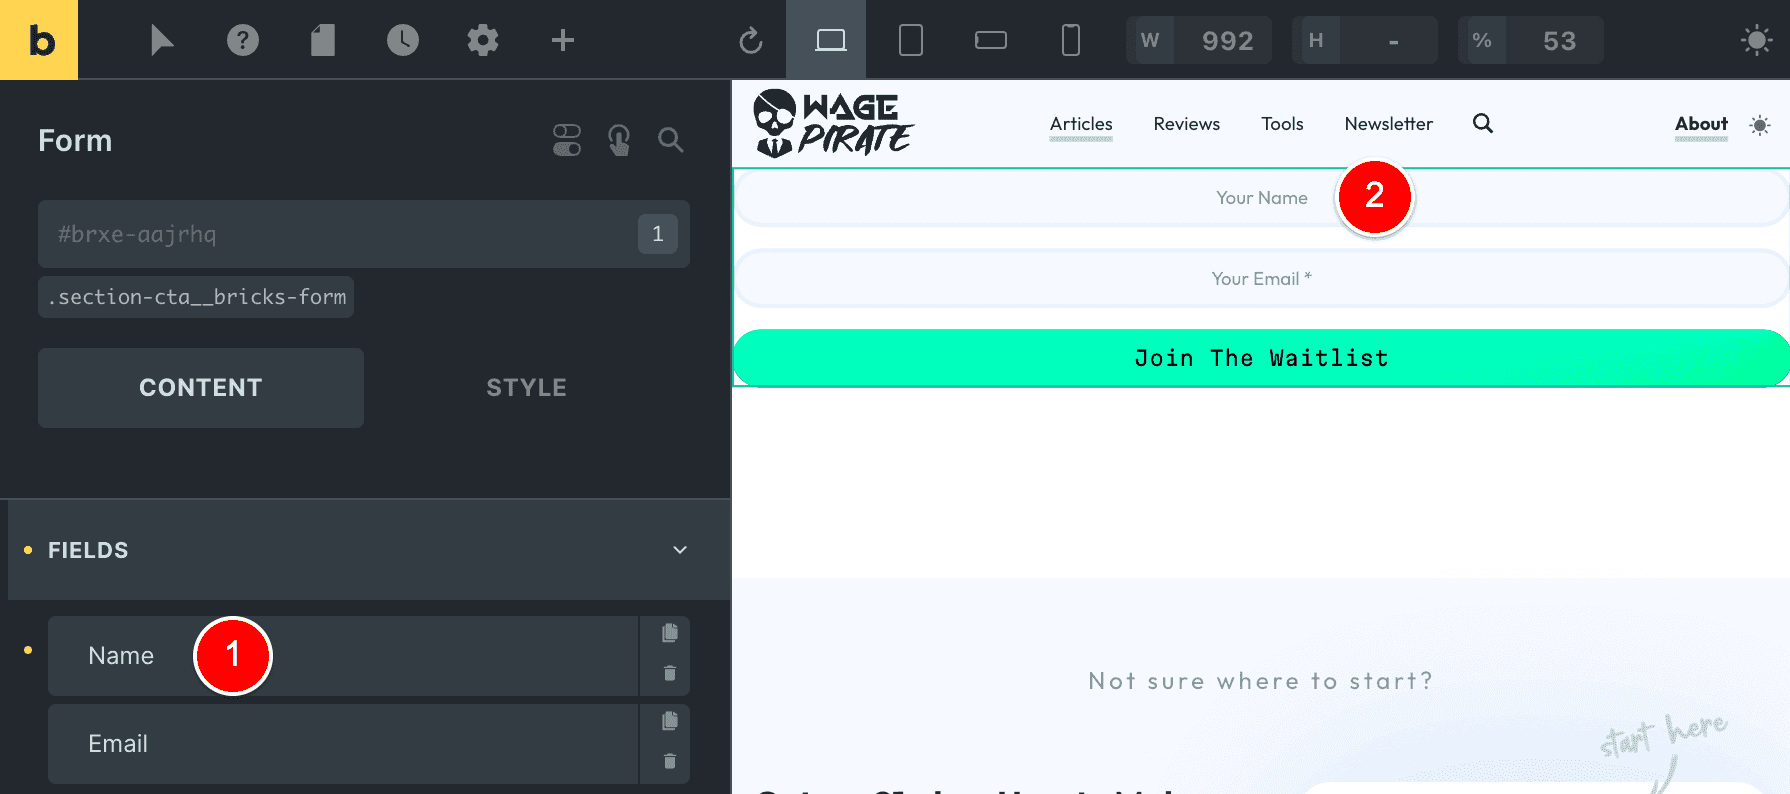
Inside this template, I ONLY added a Form Element (1) and then proceeded to set my form fields (2).
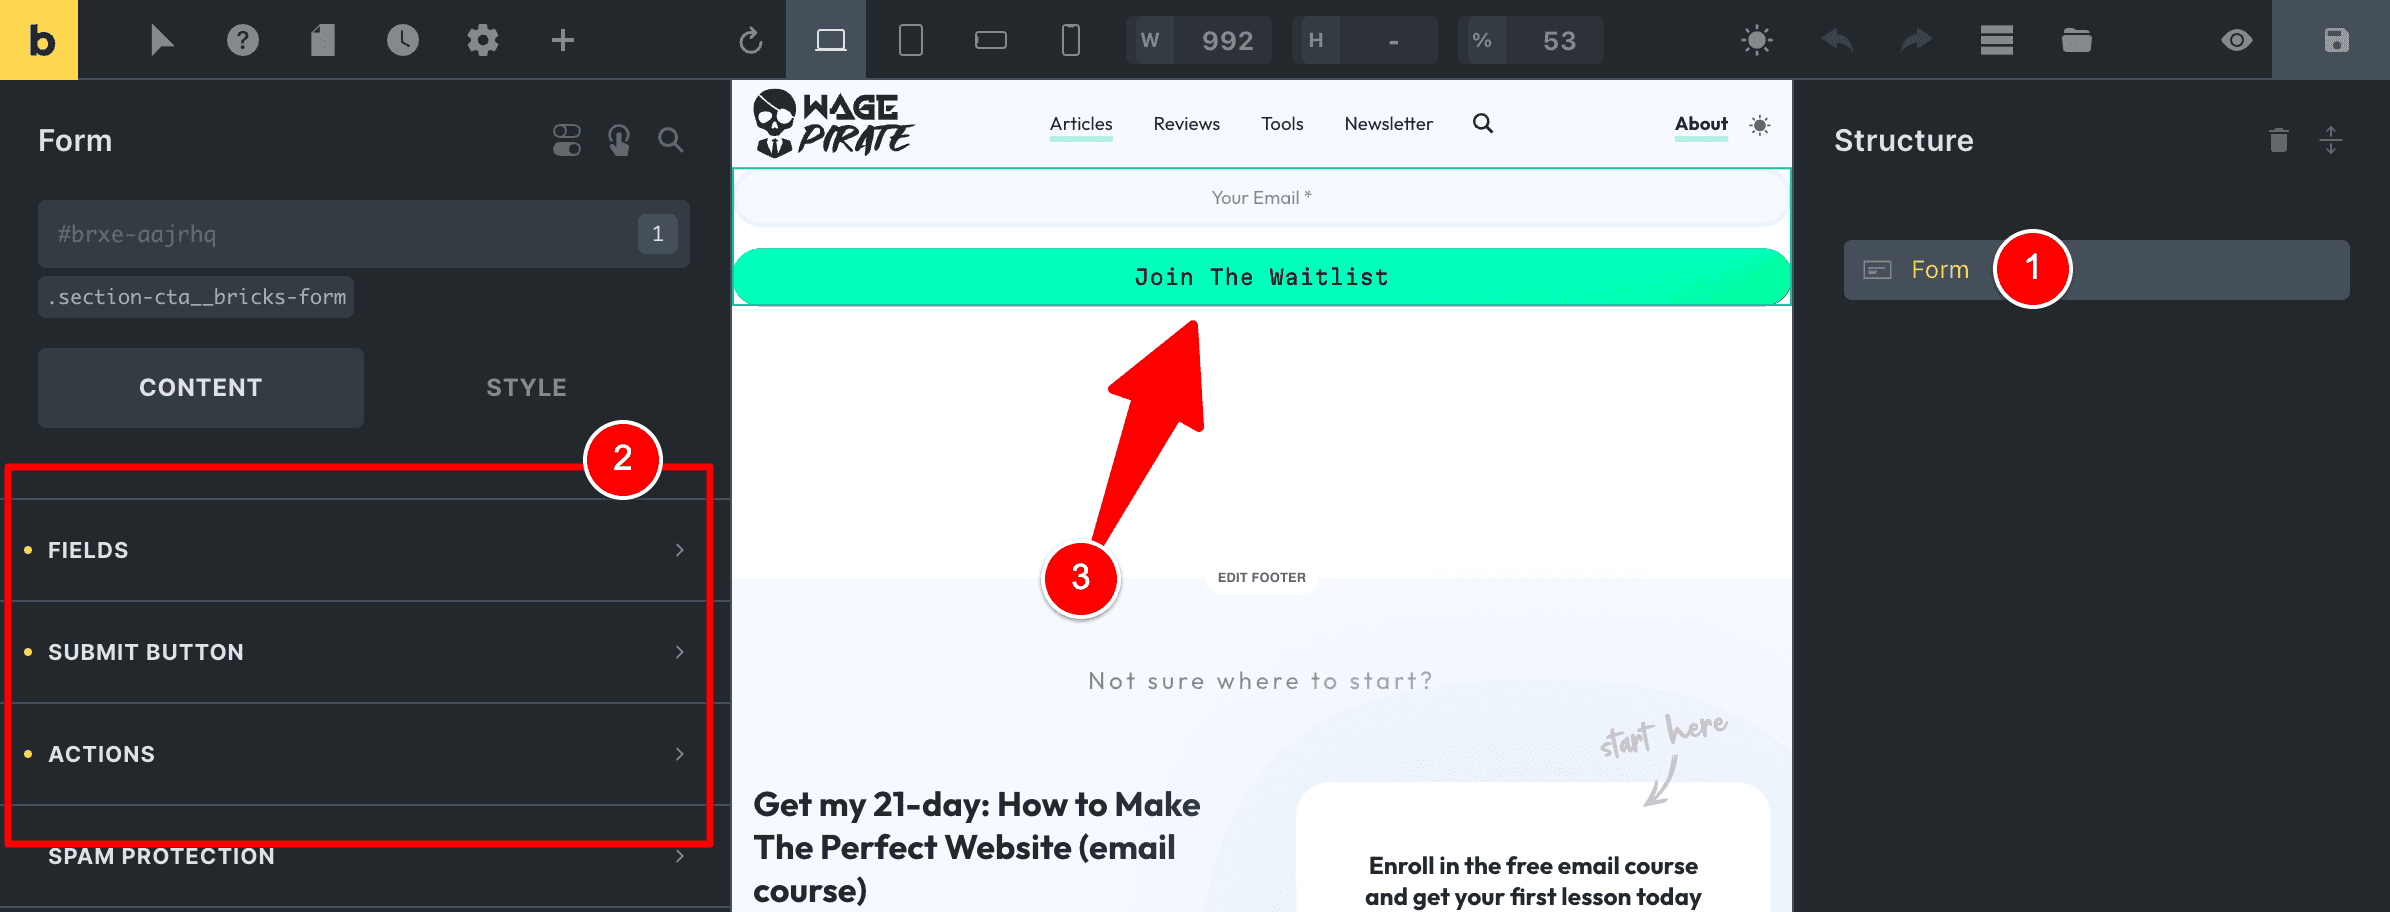
NOTE that this Form element is NOT in a Section or Container – this is important.
With that done, I saved the template (1).
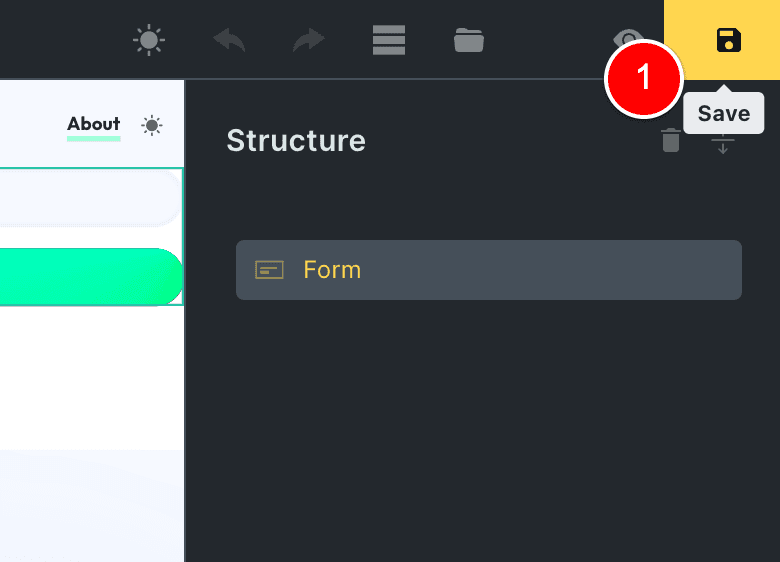
Step 3: Inserted this Bricks Template where needed
Then I just added this Template to the 3 locations on my website.
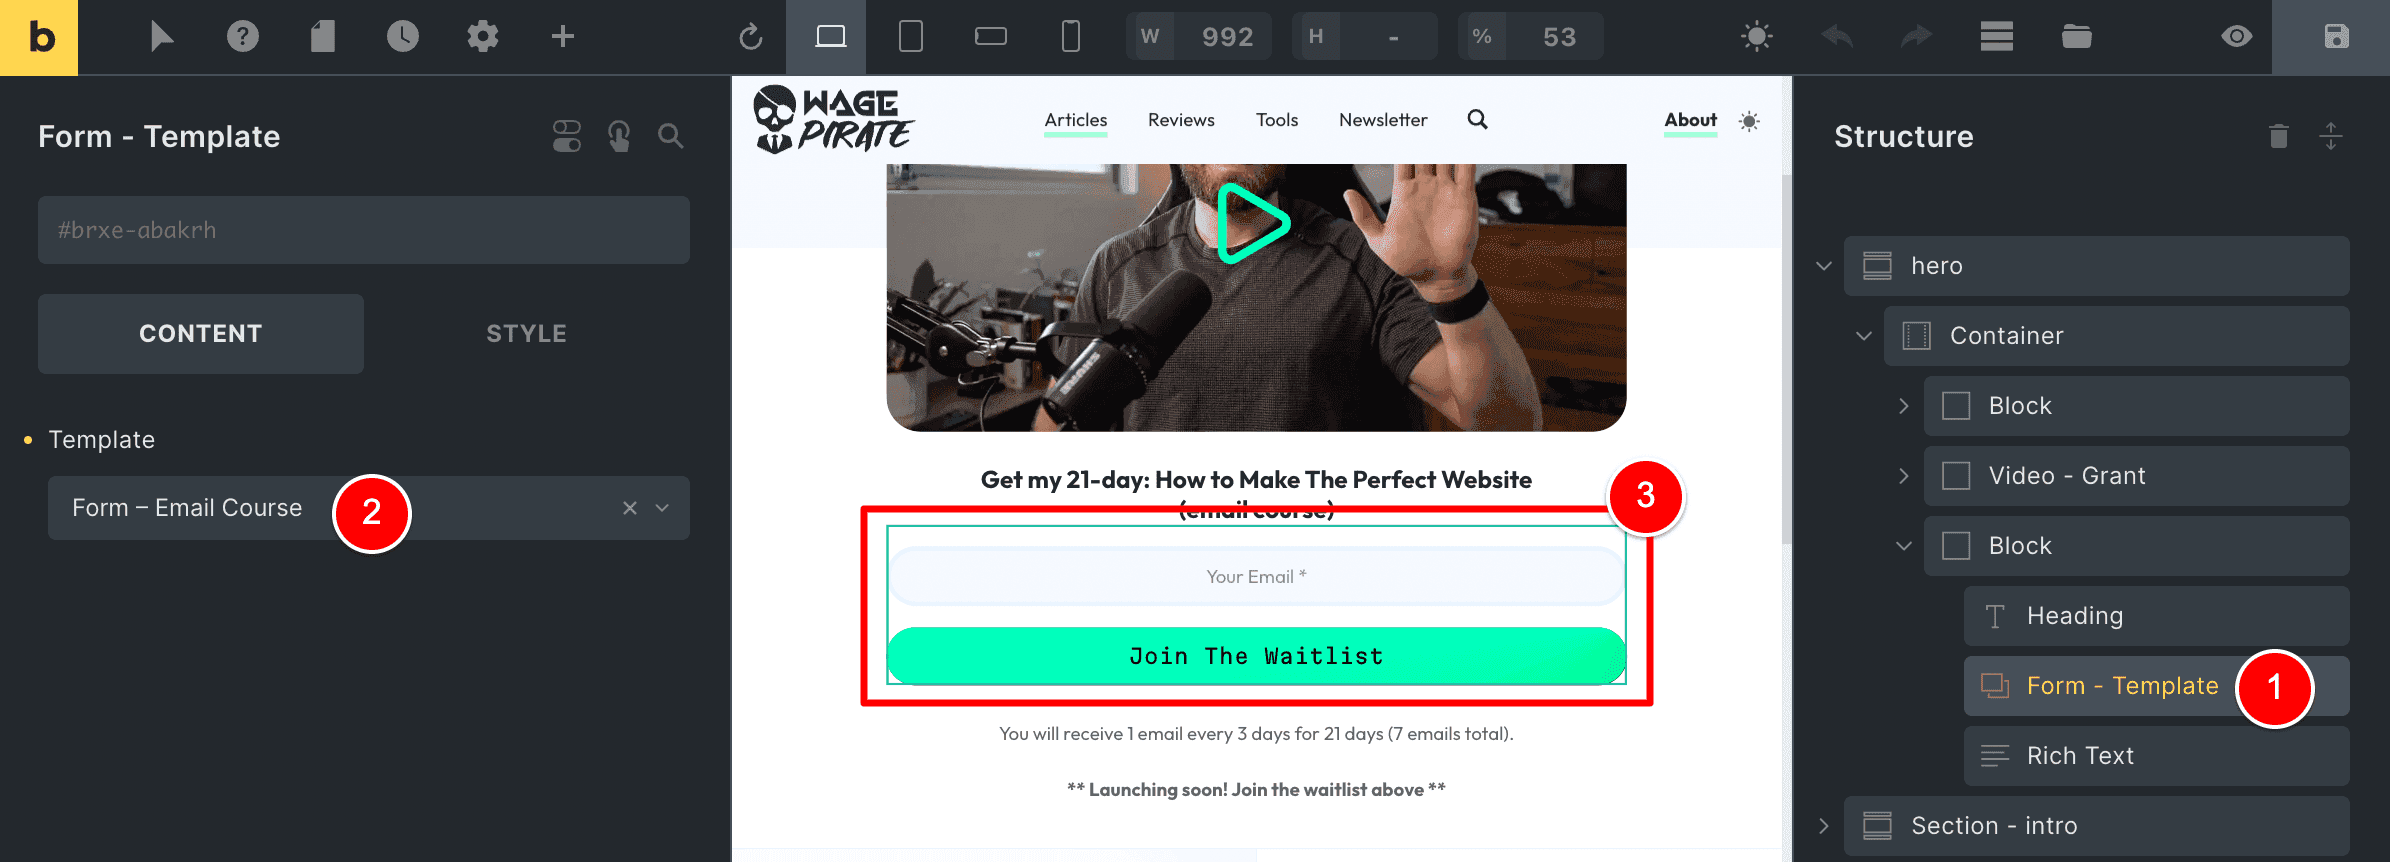
Firstly, I edited my Homepage with Bricks, searched for the Template element (1)(2) and added one to my design.
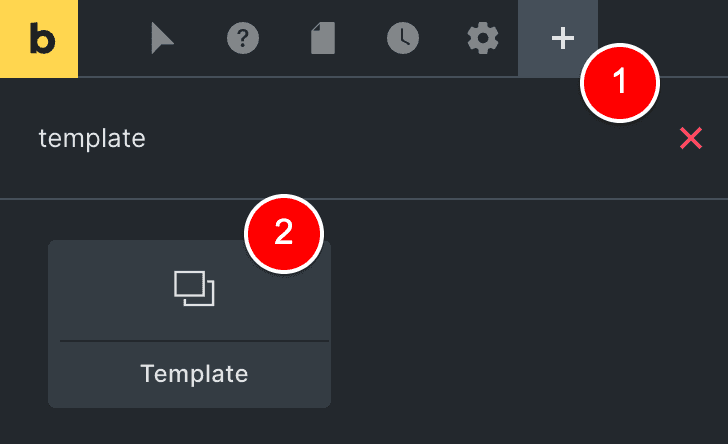
For the Template element (1), I selected chose my template named Form – Email Course (2) which is the Bricks Template we created previously with just the 1 form element inside.
You can see its output at (3).
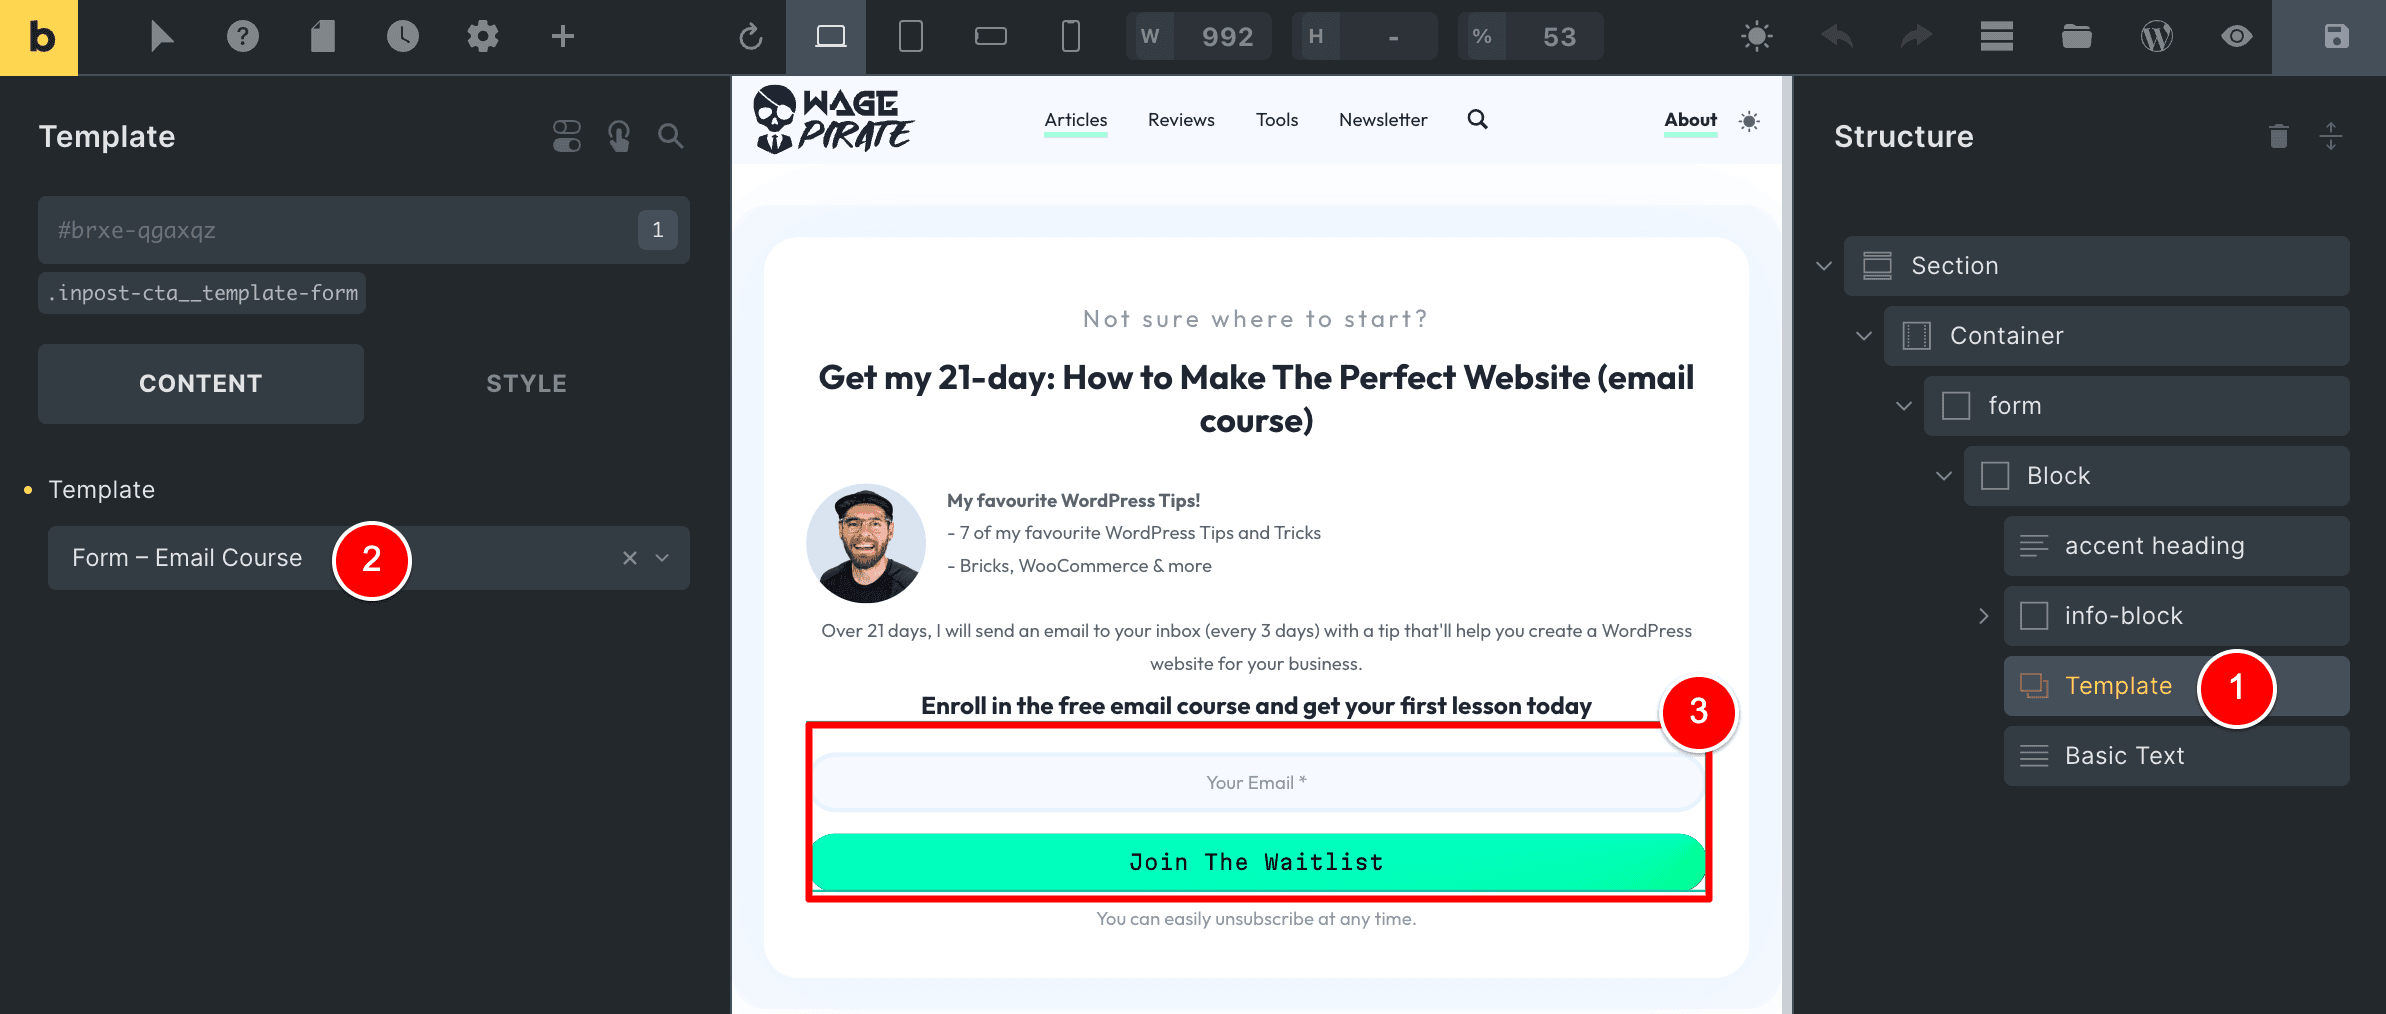
I then edited my Footer Template with the Call-to-action section and repeated the process.

And lastly, I edited my In-post Call-to-action template and did the same thing.
In the future, if I ever want to edit this Bricks Form, I can just go to Bricks > Templates (1) and edit this Template (2).
Edit the Form element.
Say for example – I want to add a Name field to my form.
I go ahead and do that (1)(2) and then save this Bricks Template.
And then all 3 places I have inserted this Bricks Template get updated!
Super simple to set up and so much easier to manage!
So that’s how we set it all up.
You can add a Bricks Form multiple times on the same Page
The next thing I want to cover is a question I had before I went ahead and tried this for myself…
I remember when I was using a WordPress Forms plugin (I can’t remember which one it was).
But – having the same Form on the page multiple times caused errors.
I just want to confirm here that you can have the same Bricks Form on the page more than once and it doesn’t cause errors.
In my example on my website, I have the Form up the top of my Home Page and also in the Footer area of my website.
Submitting one of the forms with an error doesn’t cause the other form to do anything weird.
It all just… works!
You can add a Bricks form inside the Gutenberg editor, too!
And what was even cooler after doing all of this is that I was eventually able to 100% replace my forms created with FluentForms…
…with Bricks Builder forms!
Part of this process was working out how to add my Bricks Forms to my Blog Posts that I write using the Gutenberg editor.
Click here to see how to add a Bricks Form inside the Gutenberg editor.