After many years of using WooCommerce for my online store I have finally found the BEST way to customize the WooCommerce Thank You page so that I can easily create the design I want, upsell products on it after checkout and a whole lot more…
ALSO! …
I want to show you why using the default WooCommerce Thank You page is HURTING the potential of your store.
The Final Result
By the end of this tutorial, I will show you everything you need to know about your WooCommerce Thank You page.
In this article, I will show you:
- How to find the URL of your WooCommerce Thank You page
- How to change the URL of your Thank You page in WooCommerce
- How to design a custom Thank You page using your favourite page builder (all Pages Builders work with this method)
- BONUS! How to design a custom Checkout Page using your favourite page builder and redirect it to your custom Thank You page
Here is a video that shows you the final result of this tutorial today…
And here is an animation of our custom Checkout Page going to our custom Thank You page URL…
BEST OF ALL – We will use the FREE VERSION of the FunnelKit plugin to achieve everything today.
It’s going to be an EPIC tutorial because I cover a lot of stuff I wish I knew was possible in regards to customising a Thank You page in WooCommerce…
Firstly, let’s look at the default Thank You page URL that comes with WooCommerce…
The Default WooCommerce Thank You Page URL
The default WooCommerce Thank You page URL is “yourwebsite.com/checkout/order-received/XXXXXXXXX”.
On my website, I did a quick test order for you and below is a screenshot of the URL on my thank you page.
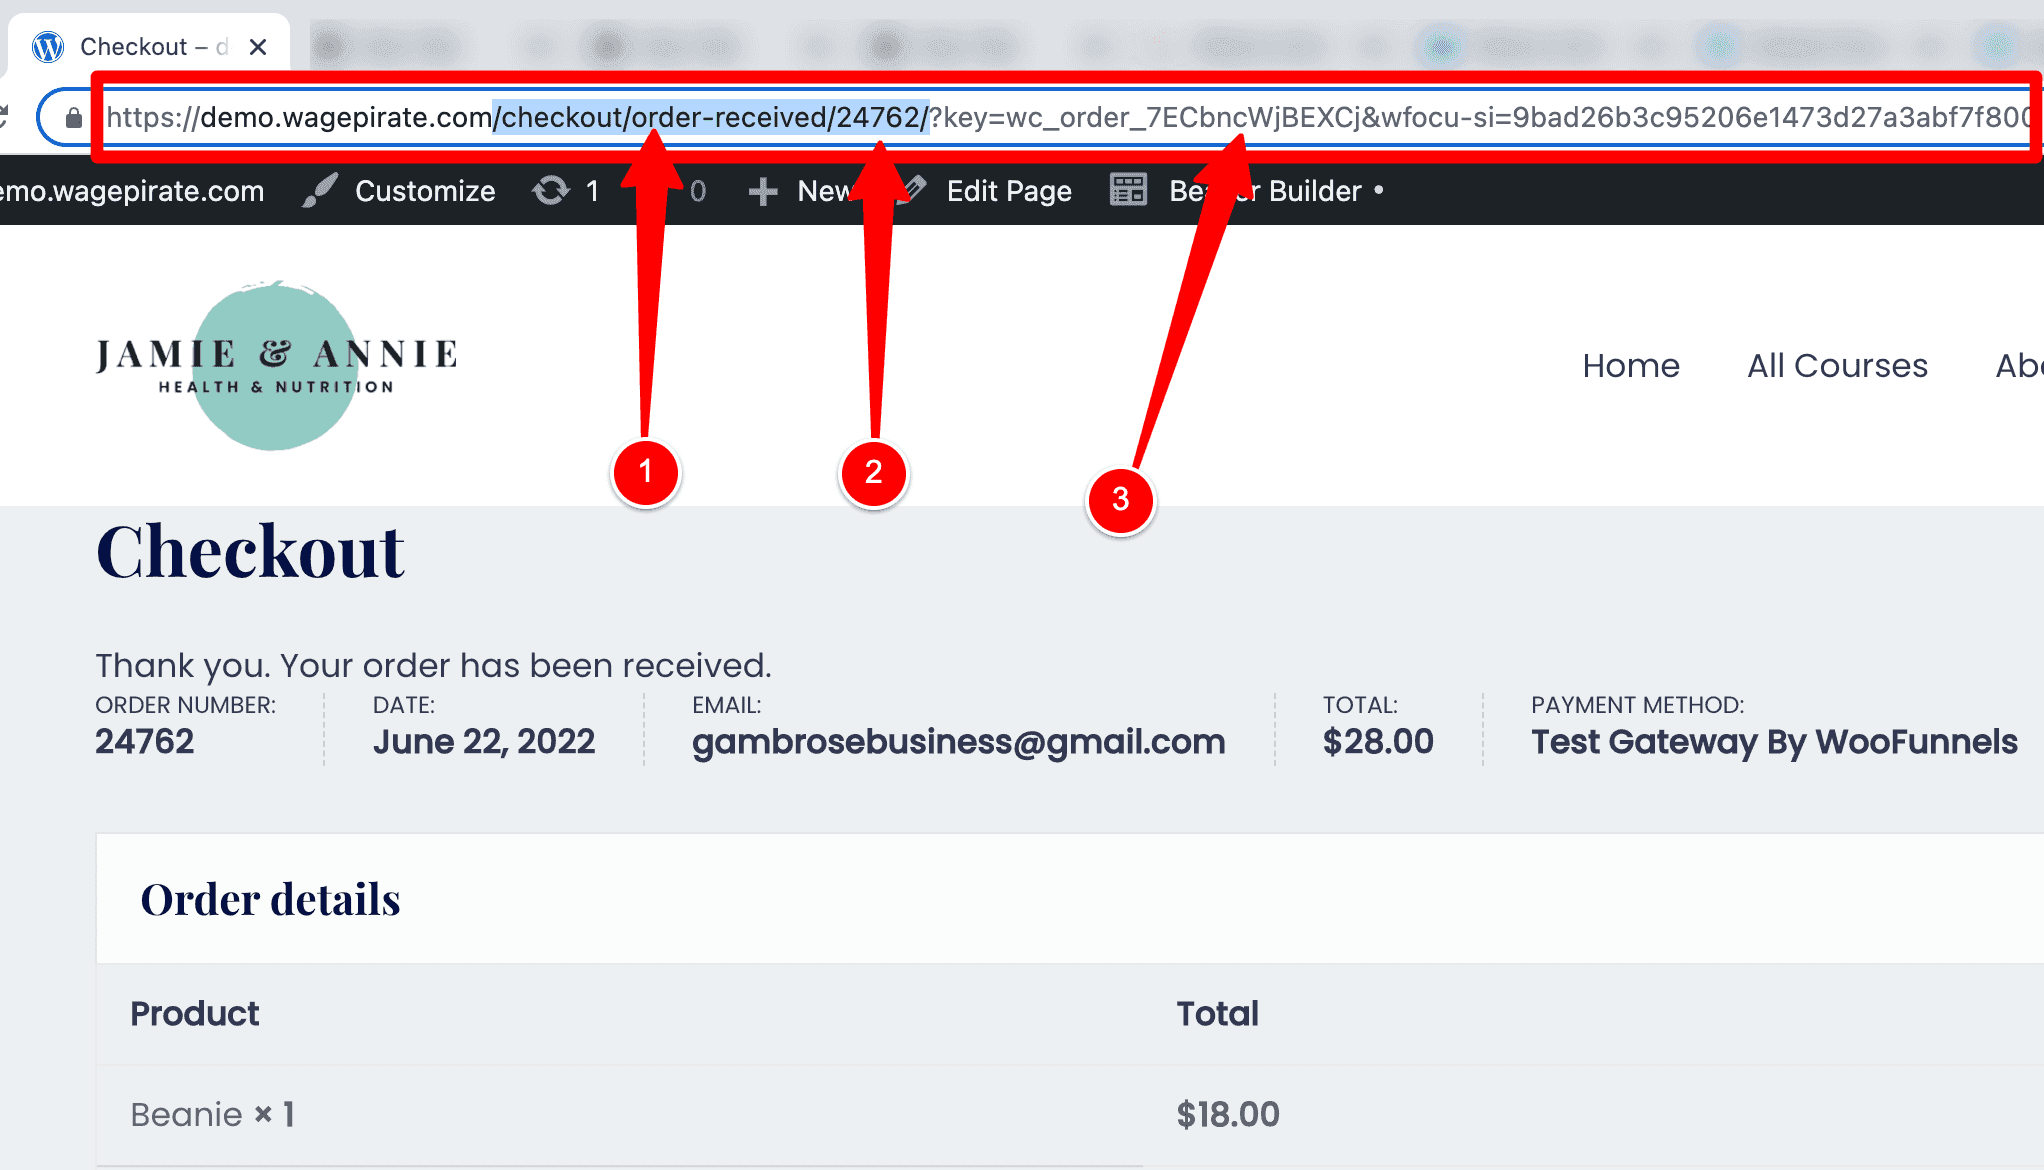
As I point out above, there are three main parts to the Thank You Page URL in WooCommerce and I’ll discuss (2) and (3) later in this article, but I want to focus specifically on (1) next and go through why this is NOT the Thank You Page URL you should use.
What is the default Thank You Page URL?
This part at (1) is your actual URL to the Thank You page in WooCommerce.
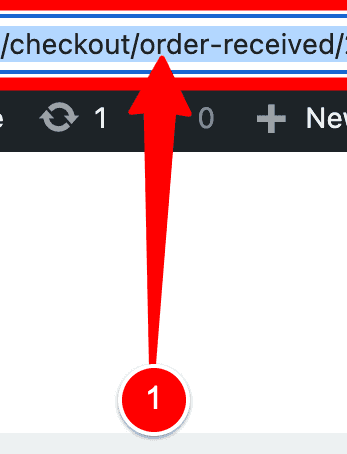
Thus, it is /checkout/order-received/.
For my website wagepirate.com, my Thank You page URL would be
https://wagepirate.com/checkout/order-received/Code language: JavaScript (javascript)(But, it isn’t this and I’ll explain why it isn’t later in this article).
How to change the default URL of your Thank You page in WooCommerce
It’s very easy to change this default URL if you’re wanting something a bit more custom.
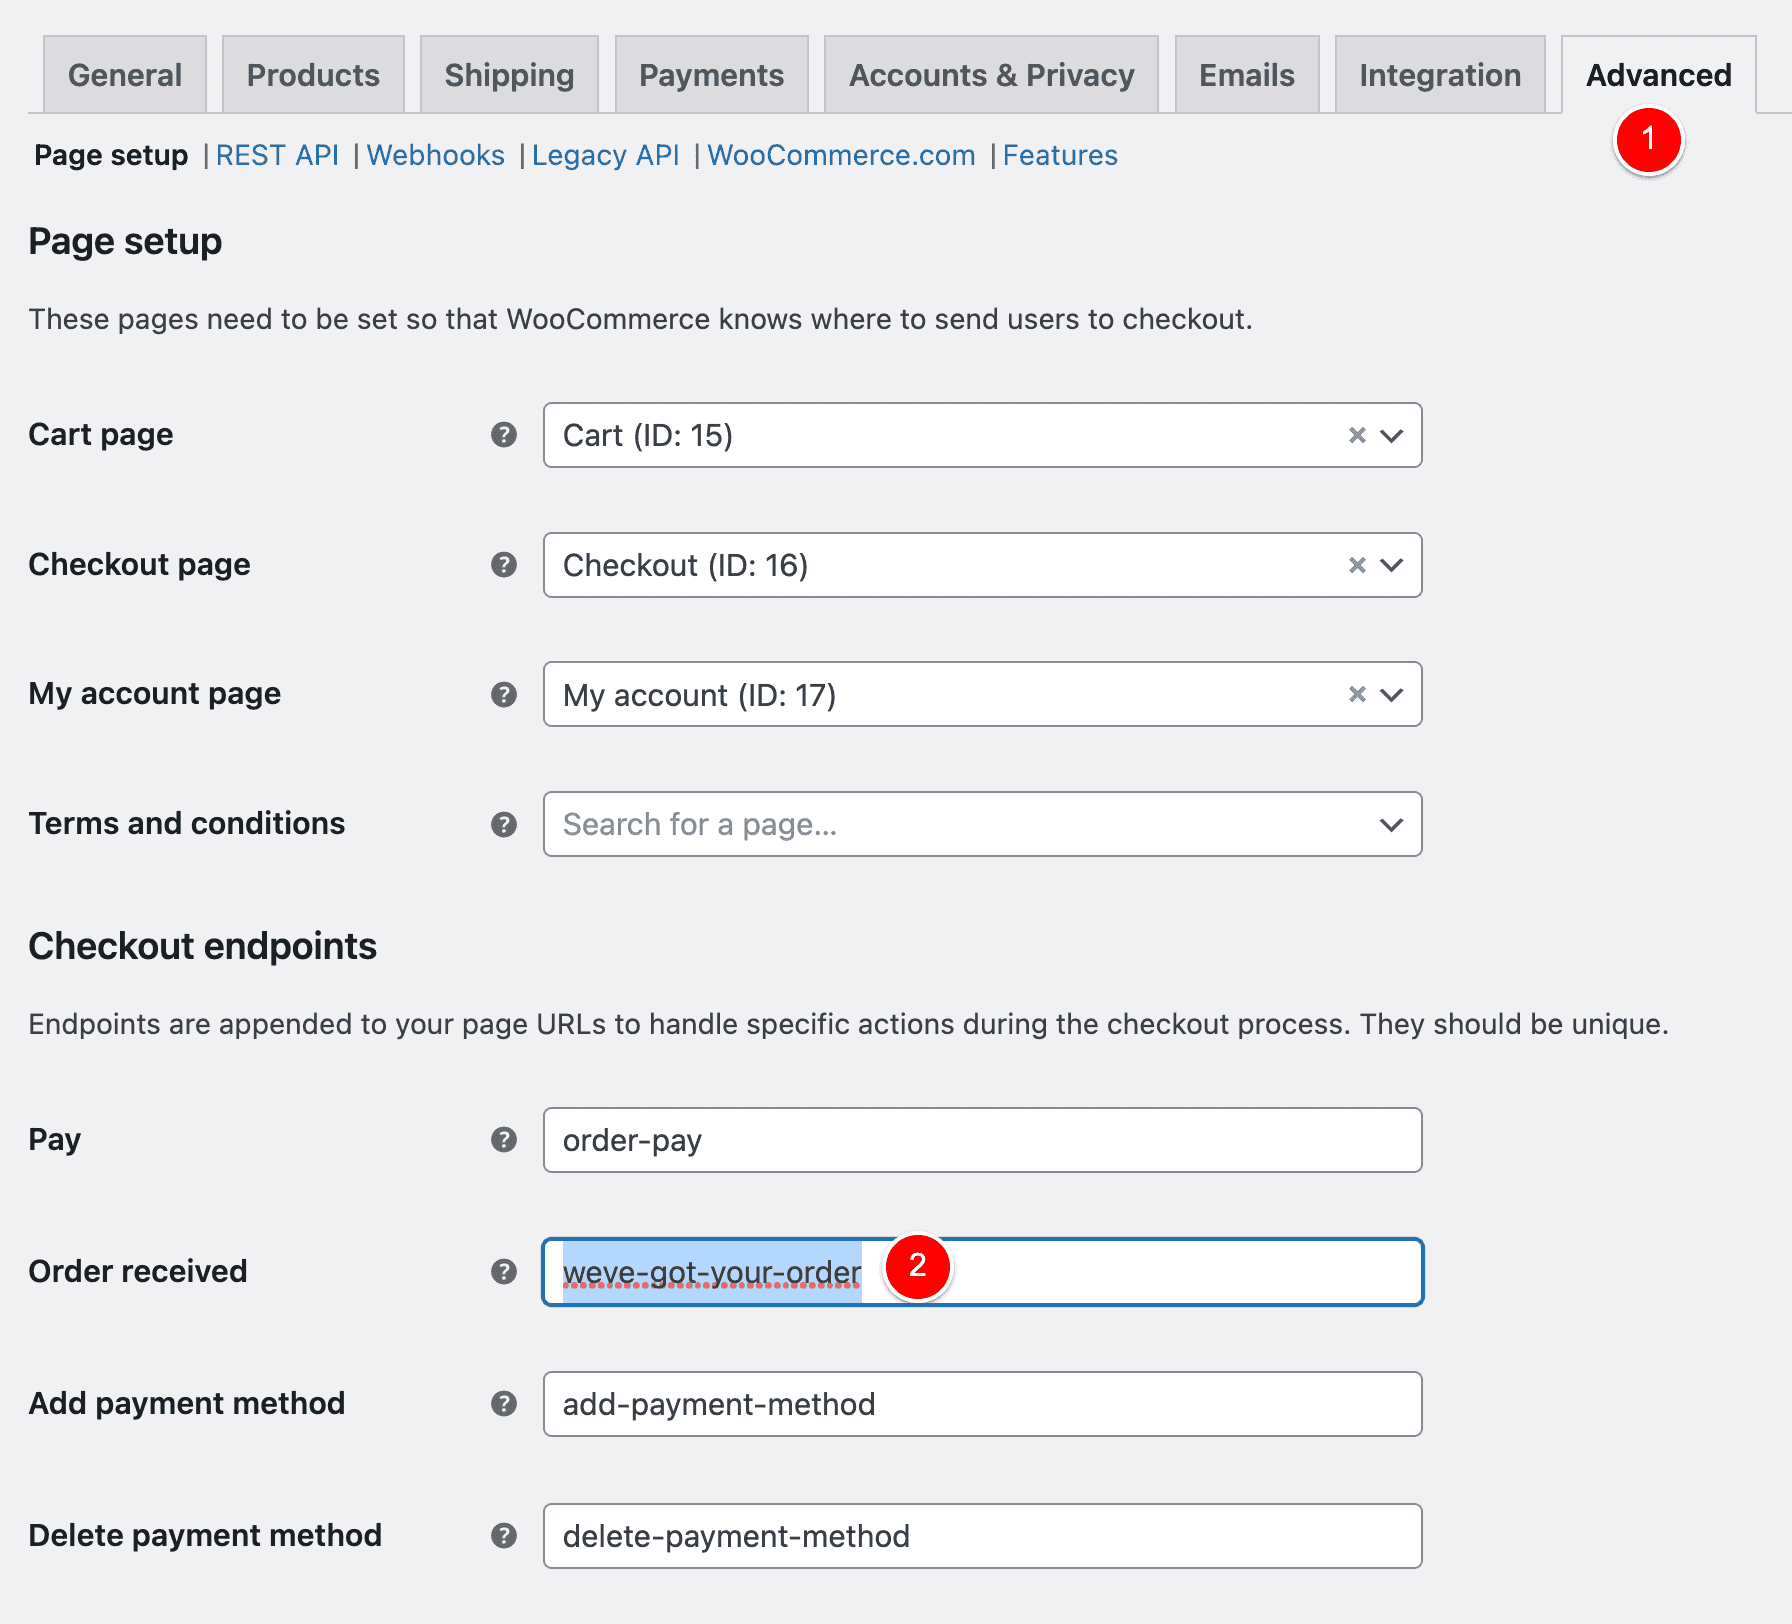
To change the default URL of your Thank You page, head to WooCommerce > Settings.
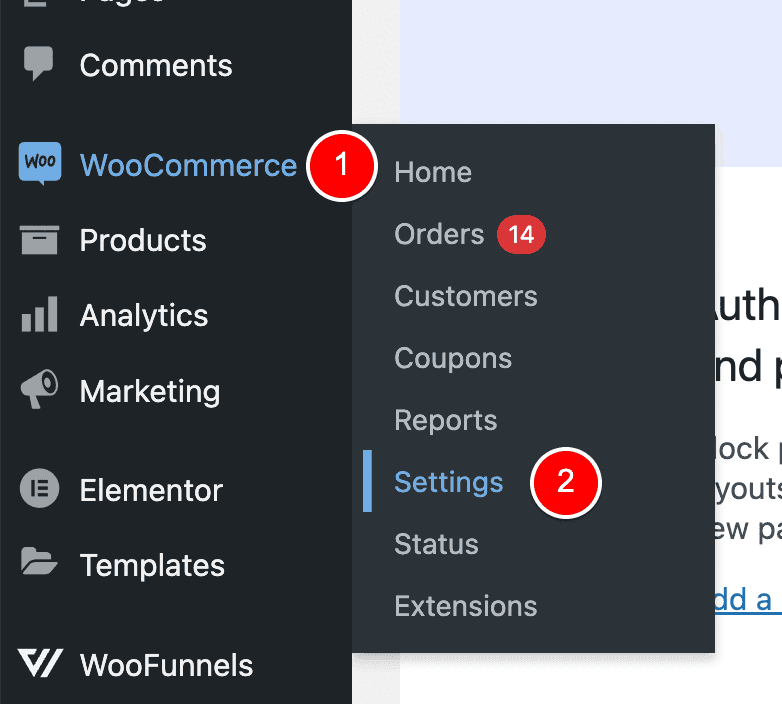
Then click on the Advanced tab (1) and edit the field named “Order received” (2) to whatever you’d like.
In my example below, I have adjusted it to be weve-got-your-order.
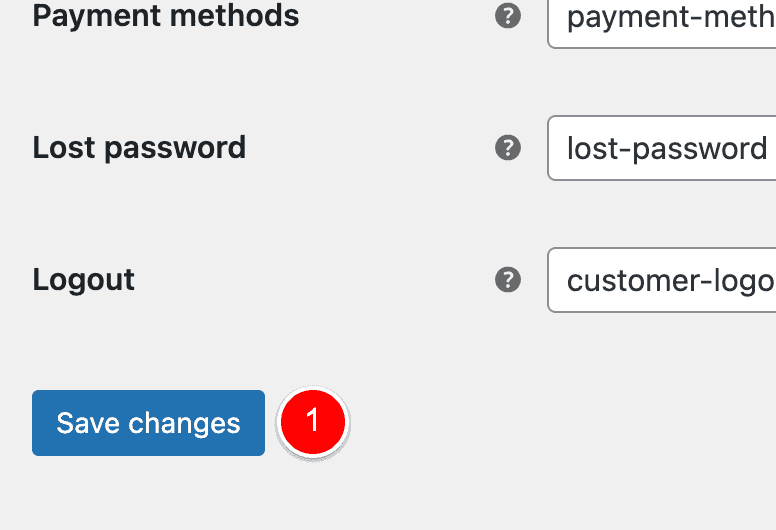
Then, save these changes (1).
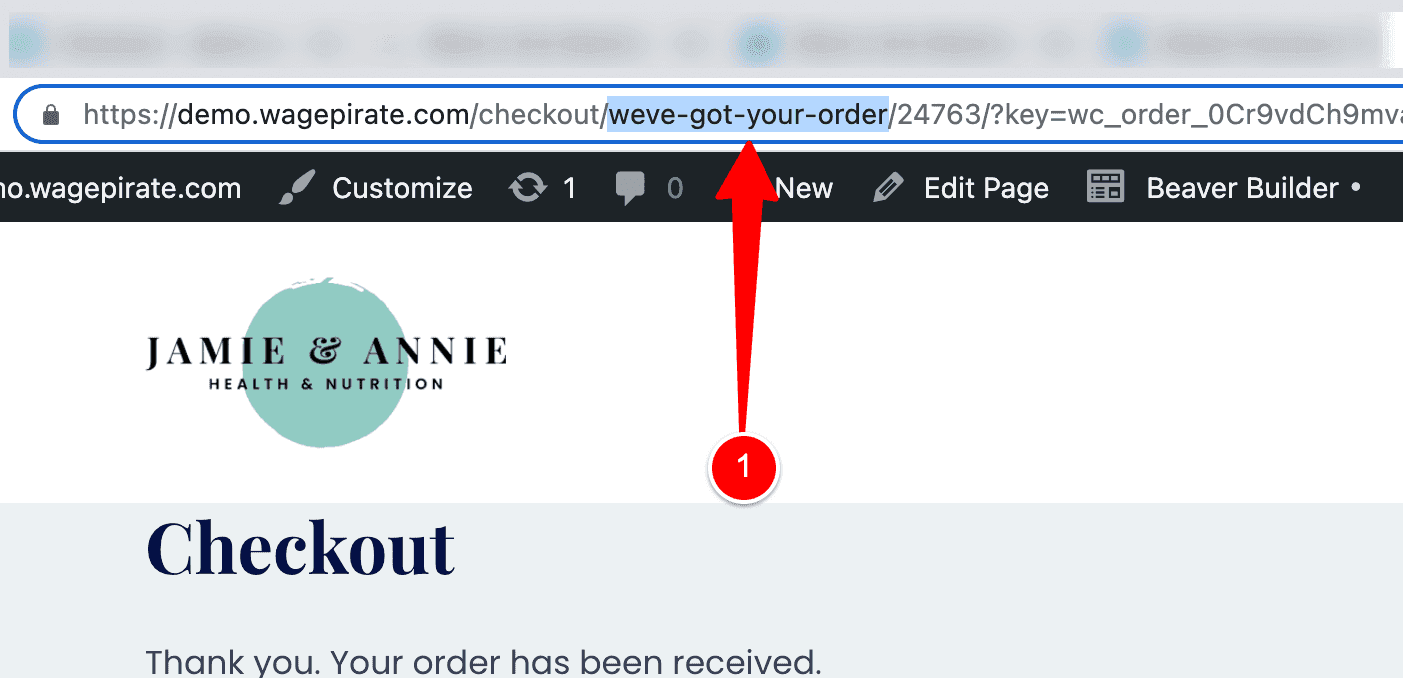
To confirm this is all working, I have gone ahead and completed another test purchase and my URL has changed to the below:
Why I DO NOT RECOMMEND using the Default URL
As you can see, WooCommerce is set up to give you the option to customize your Thank You page URL to whatever you like using a built-in setting and, well…
it works.
So, you might be wondering – why don’t I recommend you use this method?
To answer simply, it’s because I don’t use it myself and I can’t recommend stuff I don’t to myself.
In the next part of this article, I’ll go through how I customize my Thank You page URL and a whole lot more (that you’re probably going to want to do, too)…
The BEST way to set up your Thank You page URL
The best way to change your Thank You page URL in WooCommerce is to create a separate page using your favourite page builder and then redirect your users to this page after checkout.
By doing this:
- You are able to completely customize the WooCommerce Thank You page URL to be whatever you want…
- You can design your entire Thank You page using your favourite Page Builder that you’re used to using for all the other pages on your website
Now, one option to achieve this is to create a new page under Pages > Add New…
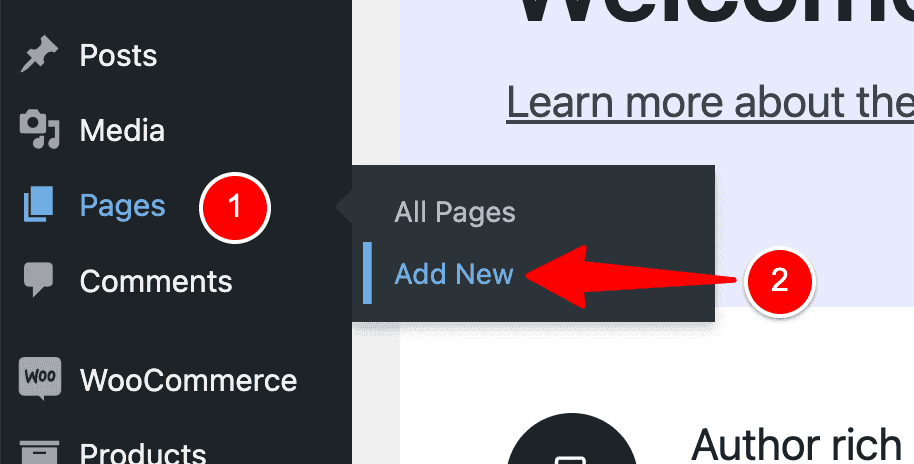
And then use some PHP code to redirect to this page after checkout.
RELATED: If you want to do this, you can get this redirect PHP Code from my article here – Redirect WooCommerce to a custom Thank You Page after Checkout
But!…
There is a MUCH BETTER way to do this that is faster, easier, more powerful and FREE!
So, what is this magic method?…
It is by using a plugin called FunnelKit.
FunnelKit: Using a plugin to create a custom Thank You page
I use a plugin called FunnelKit to handle everything regarding my WooCommerce Thank You page and the entire WooCommerce checkout experience.
The FunnelKit plugin allows you to:
- Design your Thank You Page using your favourite WordPress page builder
- Redirect WooCommerce to this custom Thank You page after checkout
- BONUS! It has advanced logic, so you can redirect to different Thank You pages based on what your customer buys in their cart + much more
And in the PAID VERSION of FunnelKit you can add One-click Upsells after the WooCommerce Checkout, build Optin Forms to grow your email list and a whole lot more I can’t cover in this short guide today.
RELATED: FunnelKit Review 2022: This, CartFlows, ClickFunnels or…
For the purposes of this tutorial, we will specifically focus on how you can use the FREE version of FunnelKit to set up a custom Thank You page with a custom URL and how you can design it using your favourite page builder.
Let’s go ahead and set all this up…
Install FunnelKit
NOTE: There is a PAID version of FunnelKit but you just need the free version for this feature.
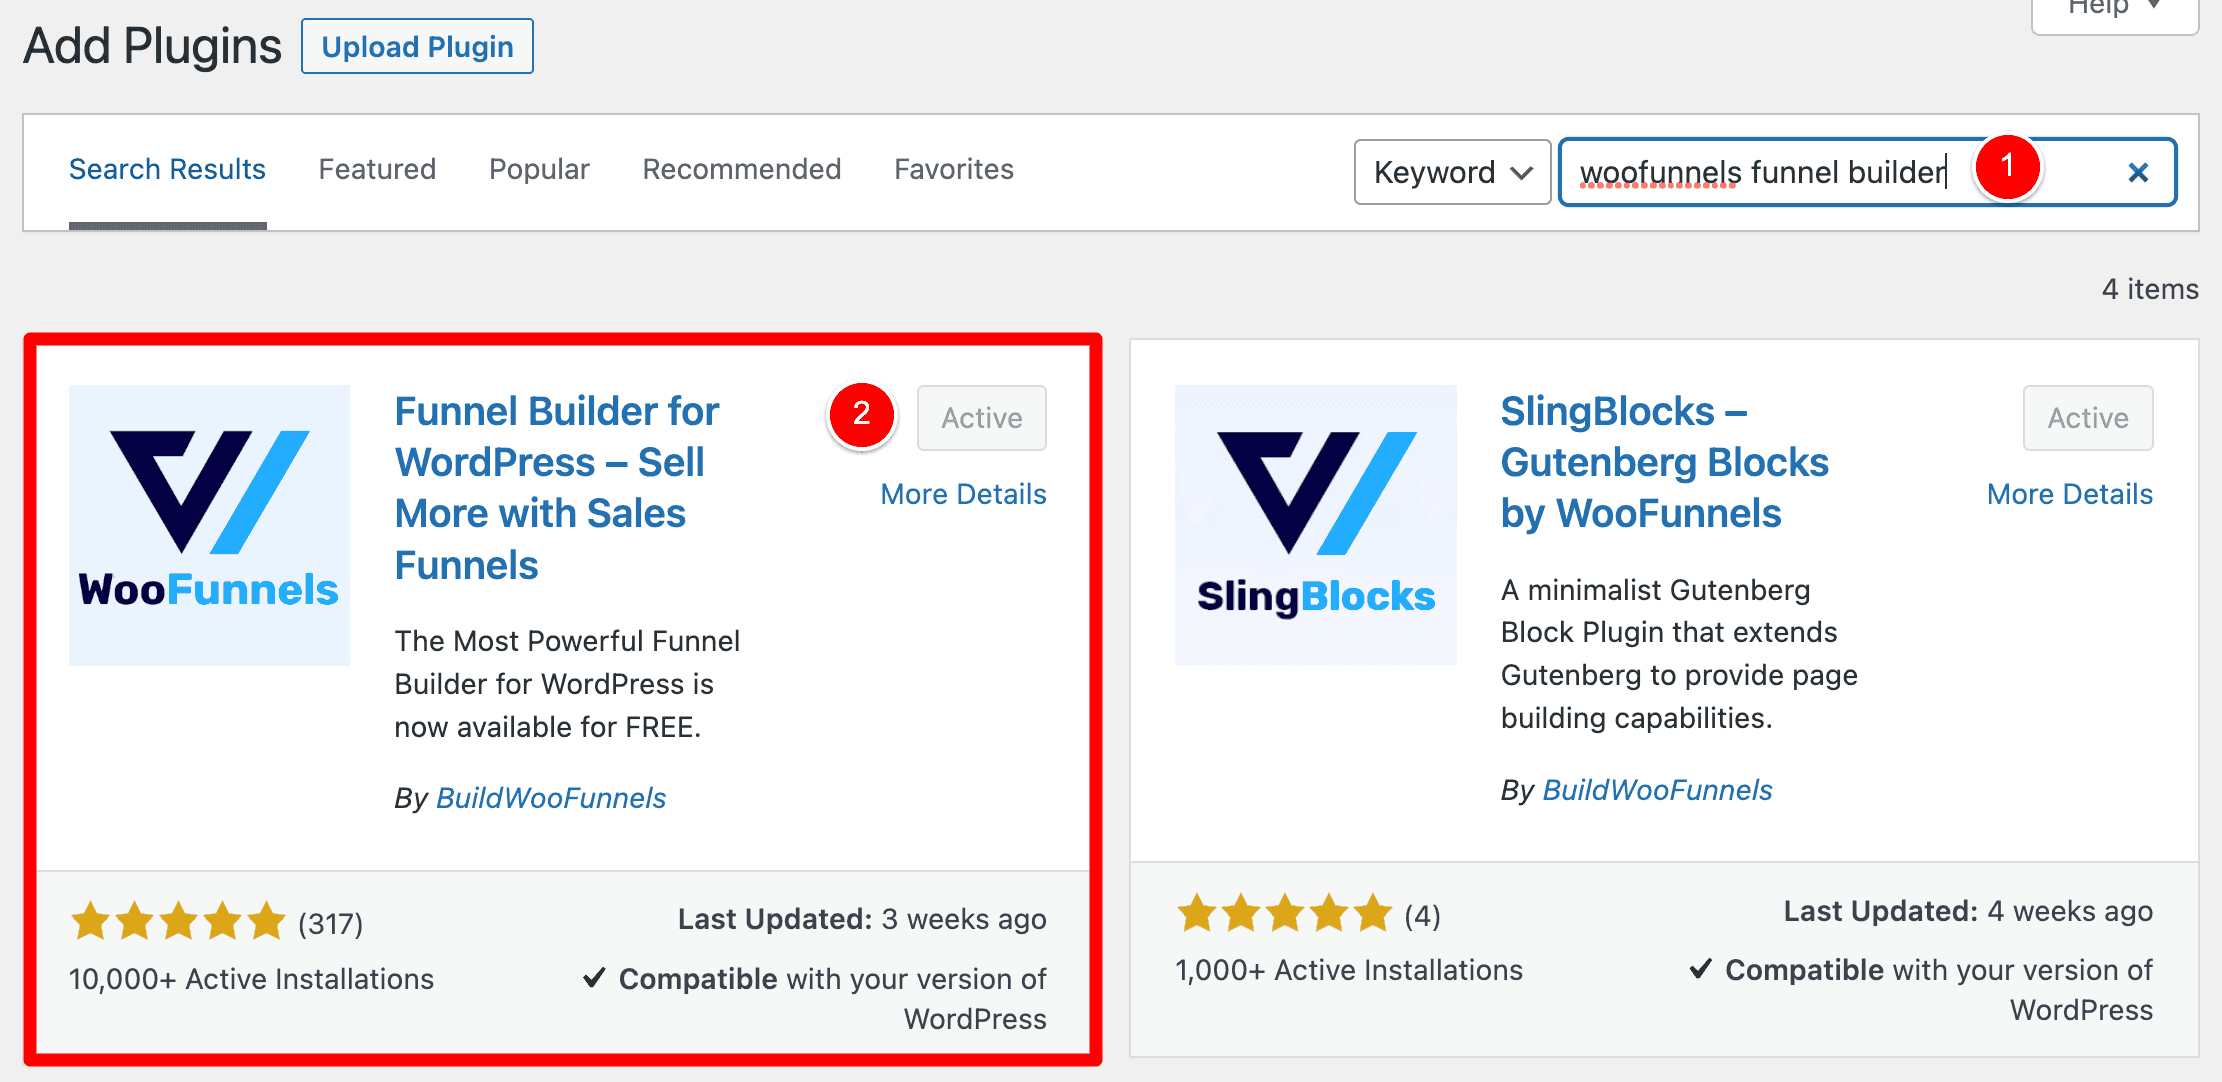
Thus, head over to the WordPress repository and search / install FunnelKit.
NOTE: Understanding what a Sales Funnel is before we proceed…
You may have heard of the term Sales Funnel before and I want to quickly cover what they are before we head into the next section.
A Sales Funnel is a series of steps that you take your user / customer through.
For example, a common Sales Funnel for a WooCommerce store could be taking a user through the following steps from top to bottom:
- Checkout Page
- Upsell 1
- Upsell 2
- Downsell 1
- Thank You Page
FunnelKit is the best WordPress plugin for building Sales Funnels using WordPress…
And if you think about WooCommerce in its default form, WooCommerce has the following Sales Funnel set up out-of-the-box:
- Checkout Page
- Thank You Page
Using FunnelKit, let’s create a new Sales Funnel with:
- Checkout Page
- Thank You Page
and then we will set this new Checkout Page to be the default Checkout Page for our WooCommerce store…
THUS – users will add products to their cart, then proceed to our new Checkout Page in FunnelKit and when they buy, they are then taken to our custom Thank You page in our sales funnel.
If this is a bit over your head right now – keep reading because it is really really REALLY easy to set up (as you’ll see)…
So let’s go ahead and set up our Checkout Sales Funnel in FunnelKit…
Create a Checkout Funnel
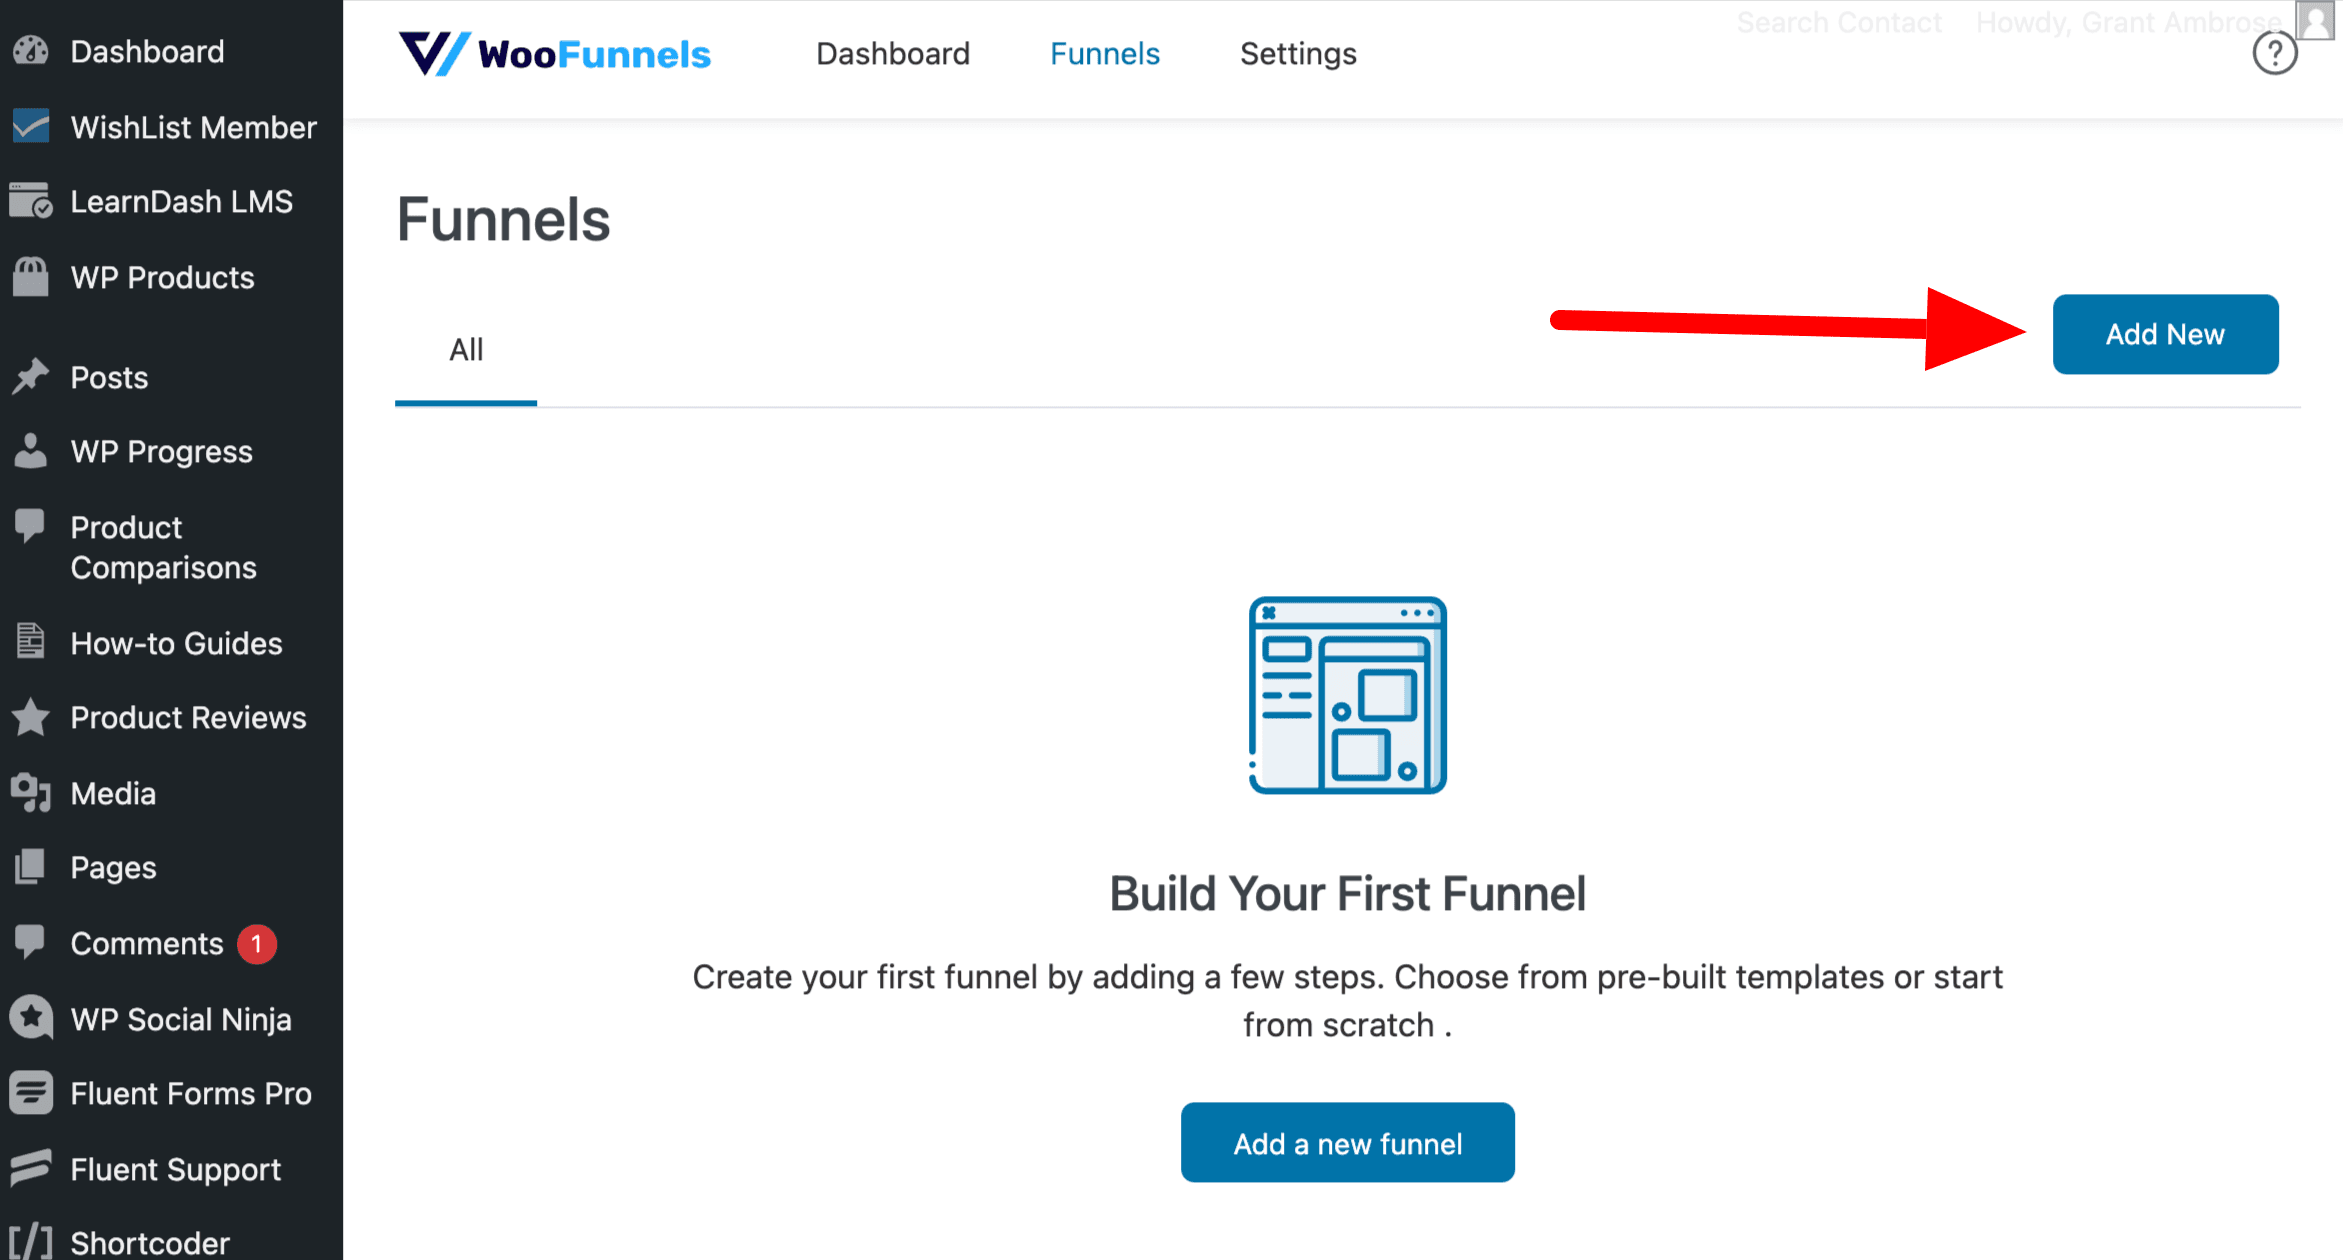
Once FunnelKit is installed, go to FunnelKit > Funnels and click Add New.
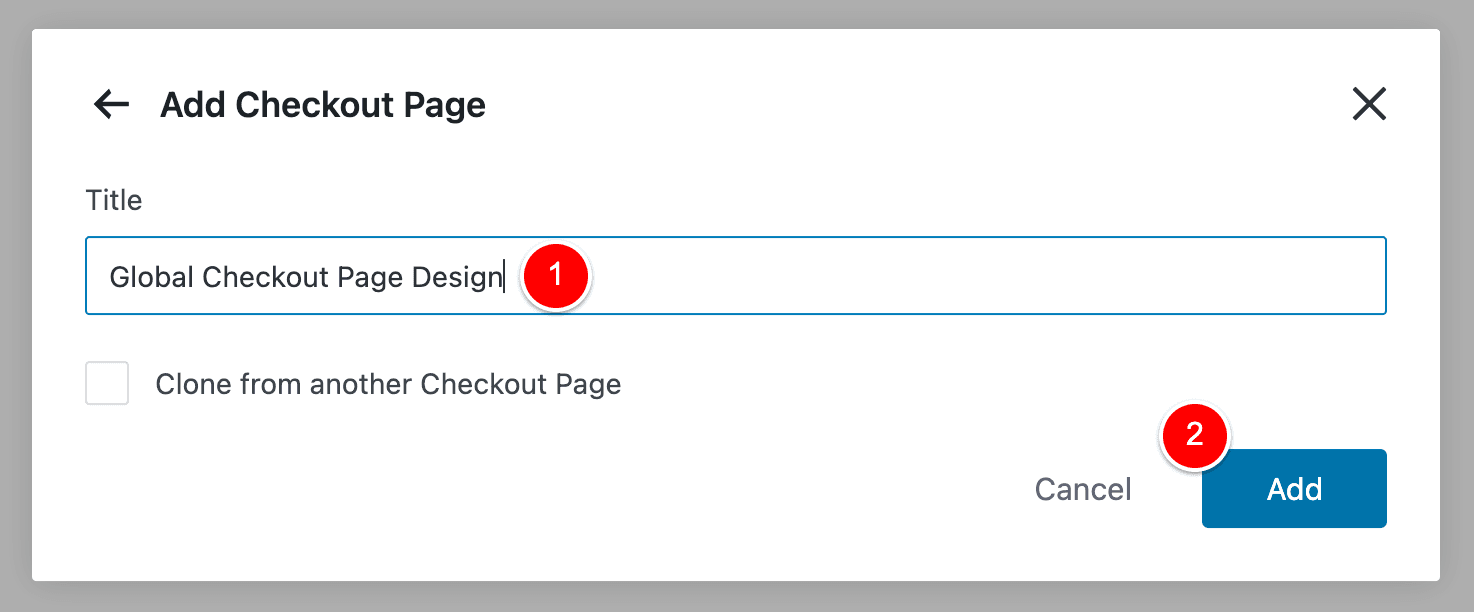
Give your new Checkout funnel a name like the below and click Add.
Perfect!
Our Checkout funnel is created.
Now, let’s add a Checkout Page as the first step in this funnel…
Create a Checkout Page Funnel step
After you click Add in the image above, you’ll be taken to a screen that looks like the one below where you are able to choose the type of page you want to create in your new funnel.
Here, we will choose Checkout and then choose from one of the pre-made templates that are available for your Page Builder (3).
For this demo, I’ll select Elementor and then choose the Checkout design at (4) to apply that template to my checkout page.
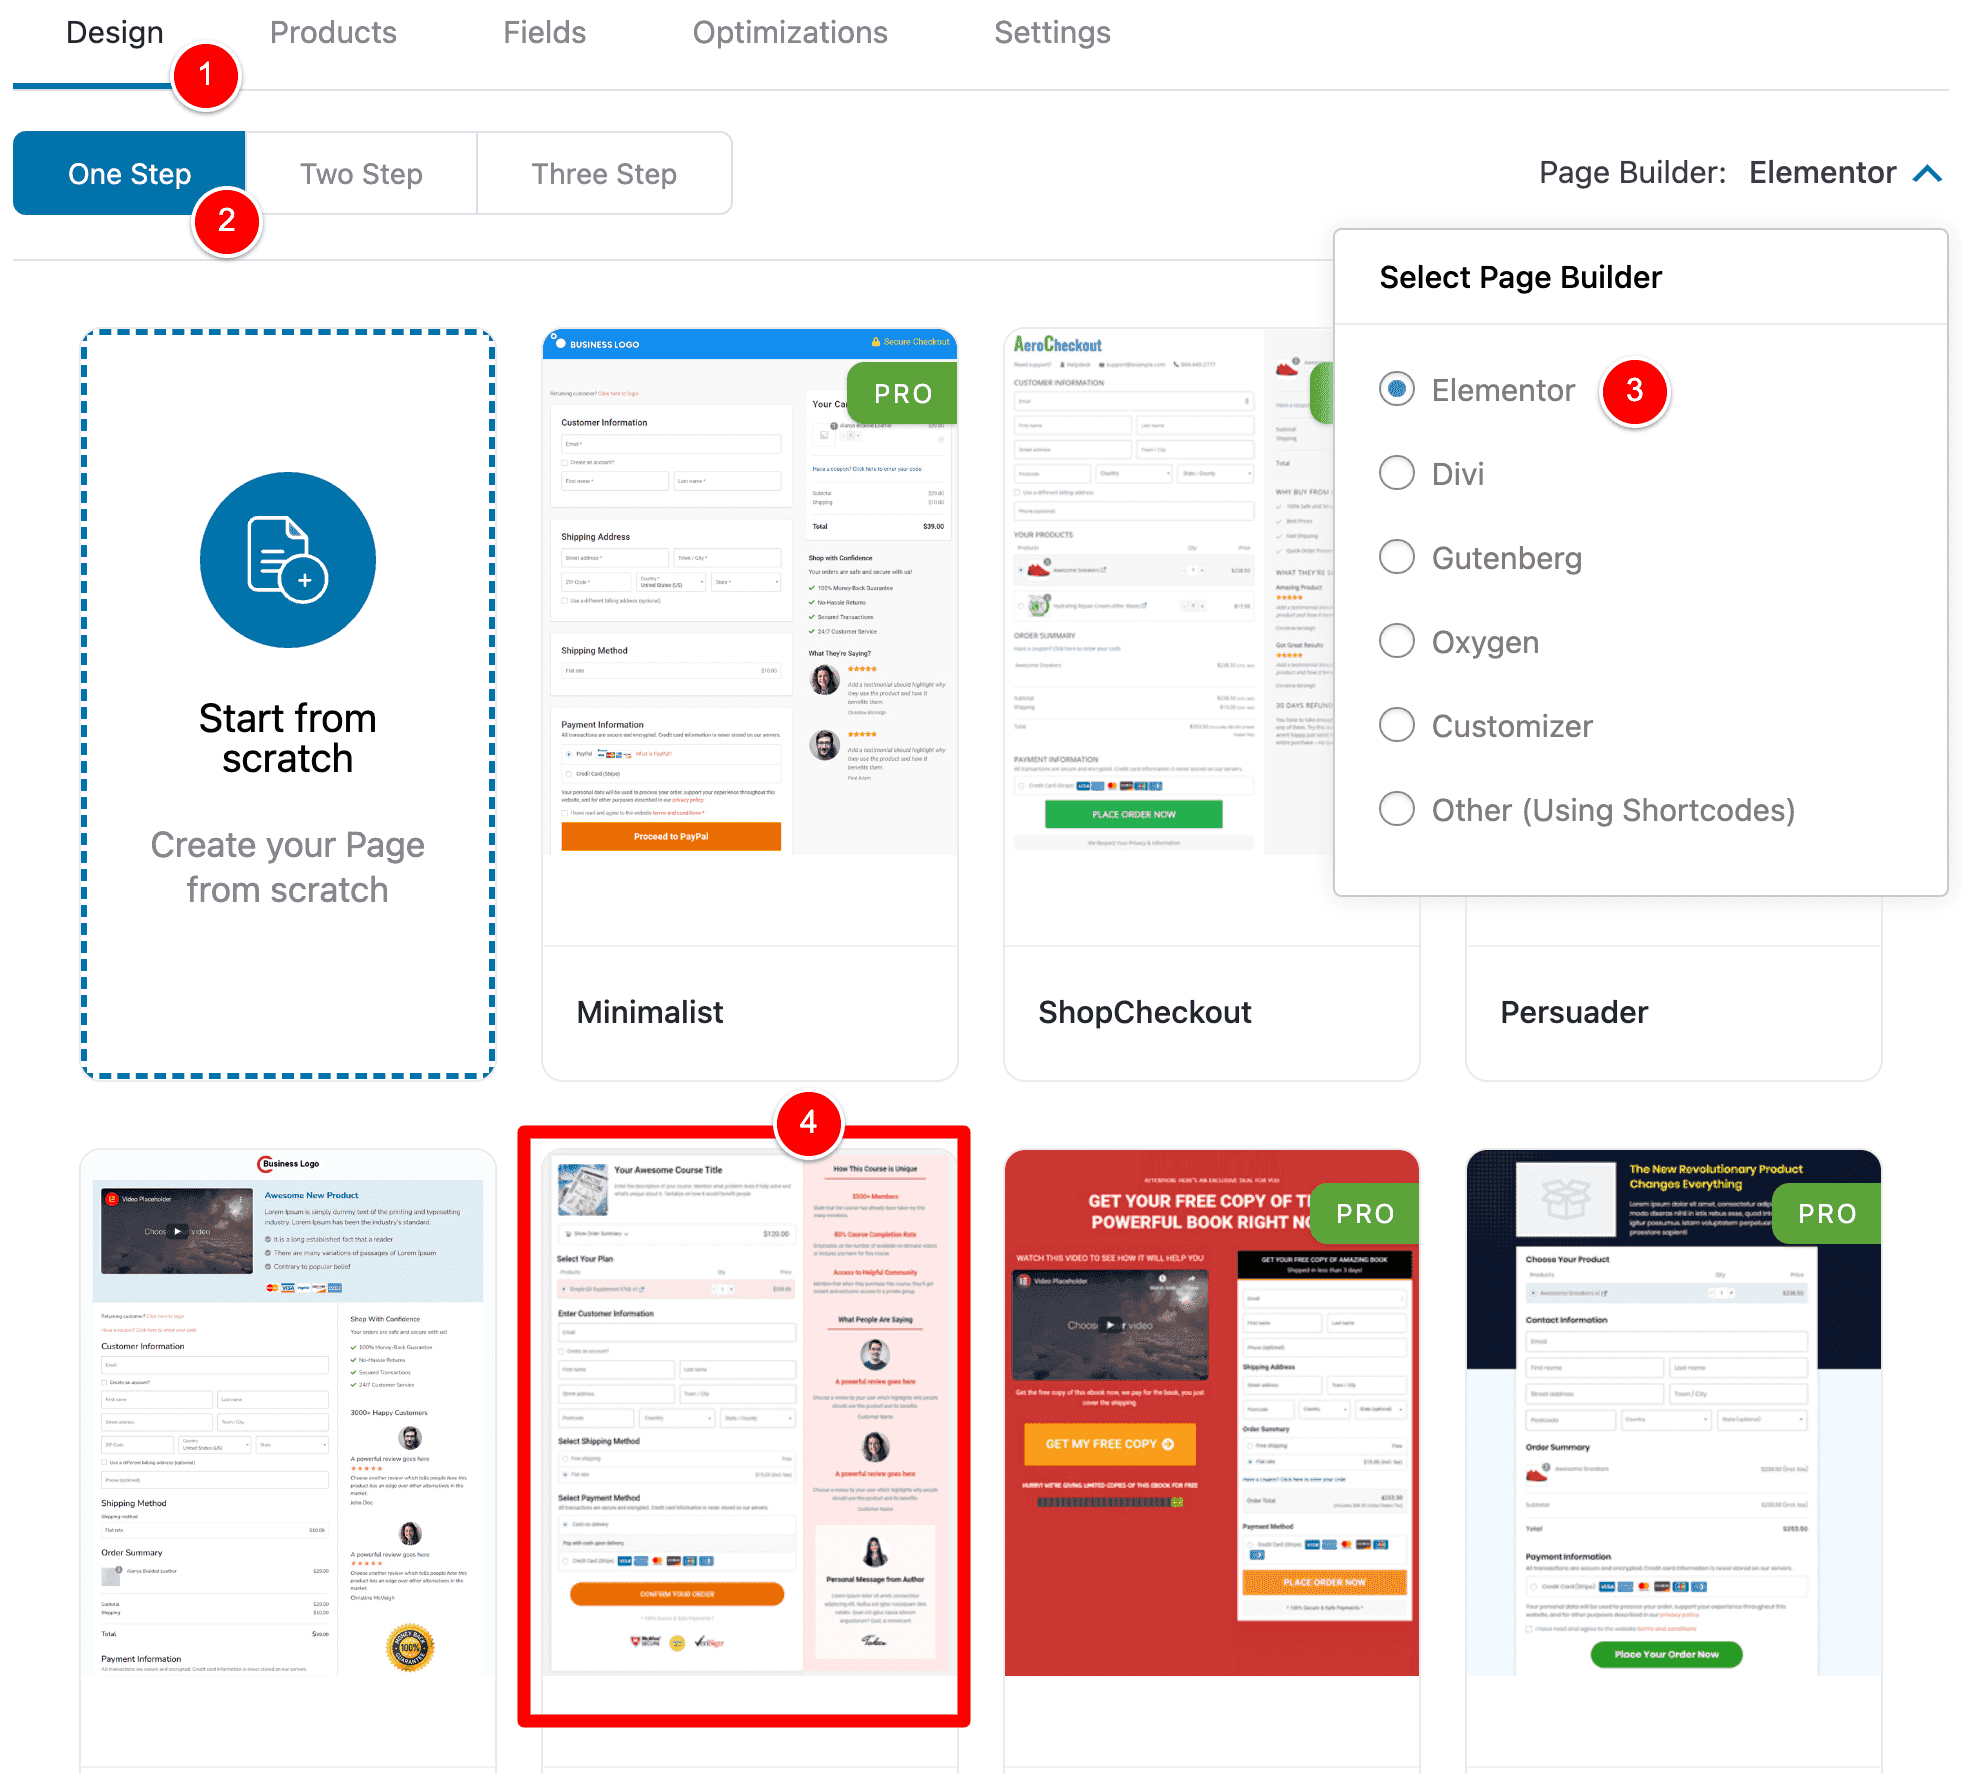
NOTE: FunnelKit works will all Page Builders. If your page builder is not listed, select “Other (using Shortcodes) from the dropdown at (4) ).
Once we do that, we have our first step in our funnel for the Checkout Page (1)…
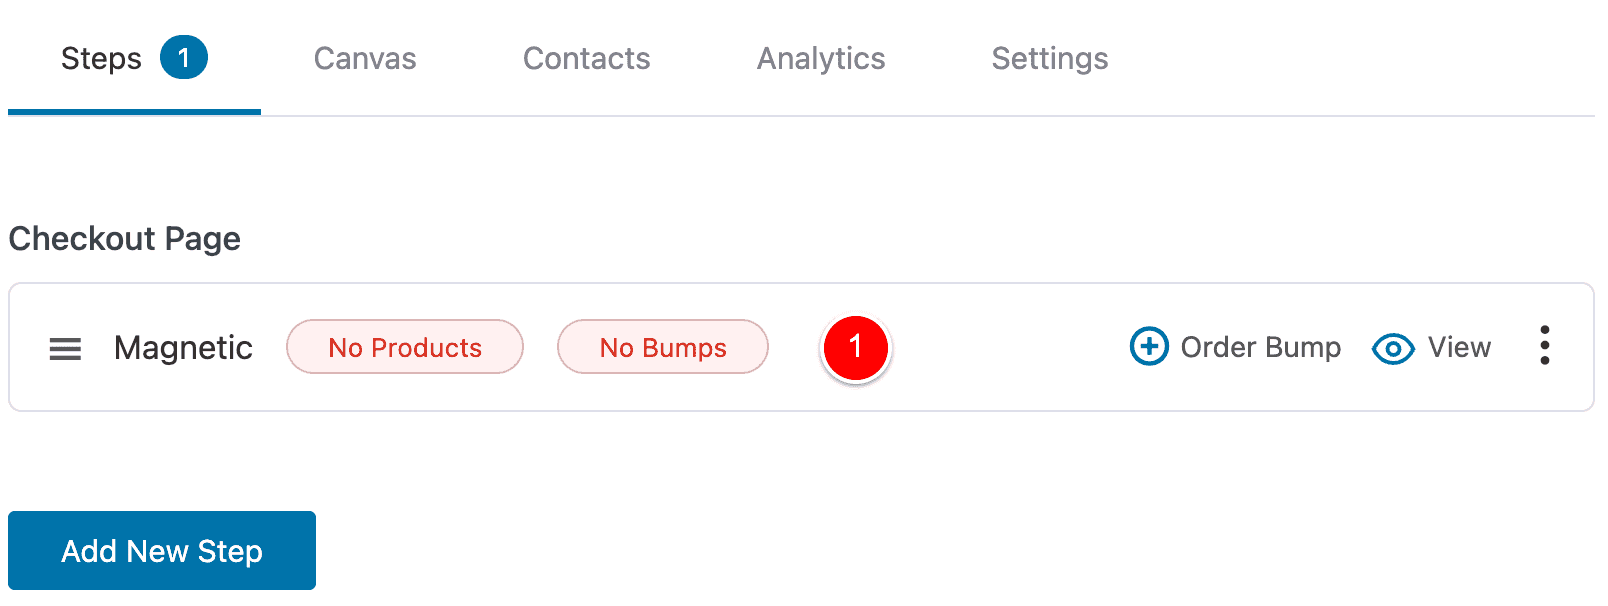
and it is using our new template I chose at (4) above.
You can easily edit this template as you would any other page using your Page Builder.
Below I would just click Edit with Elementor to start customizing my new WooCommerce Checkout Page with Elementor.
RELATED: If you want to learn more about how you can use FunnelKit to customize the WooCommerce Checkout Page, I would recommend you check out this article: Two Column WooCommerce Checkout Page In 30 Seconds (With Code)
Now that we’ve created our custom WooCommerce Checkout page, let’s create our custom Thank You page.
Create a Custom WooCommerce Thank You page funnel step
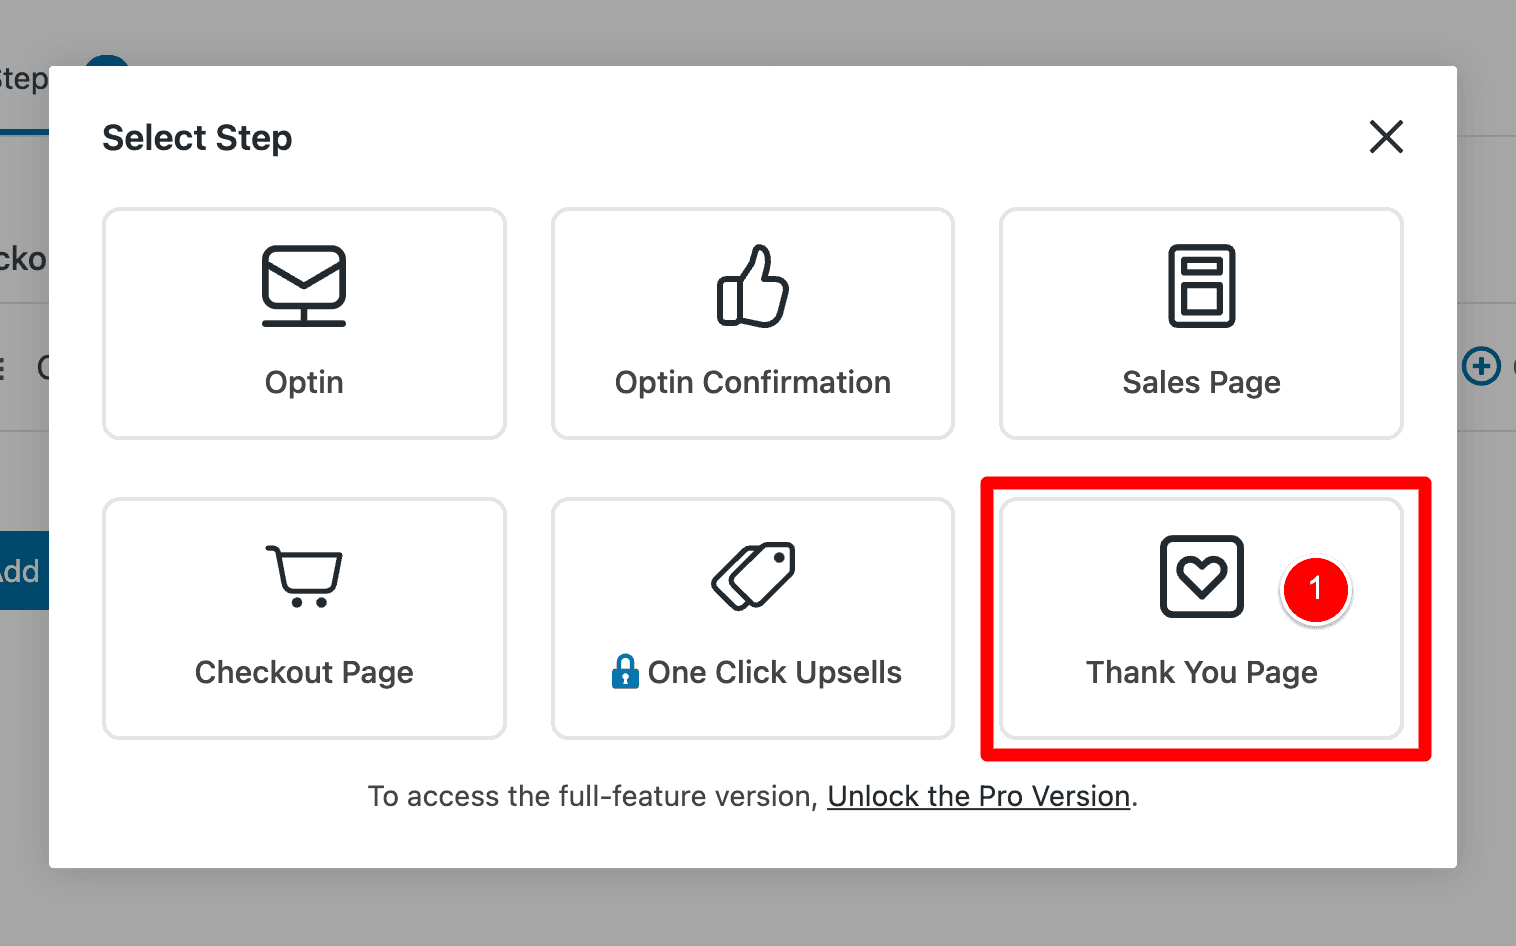
In our new funnel, we’ll click Add New Step.
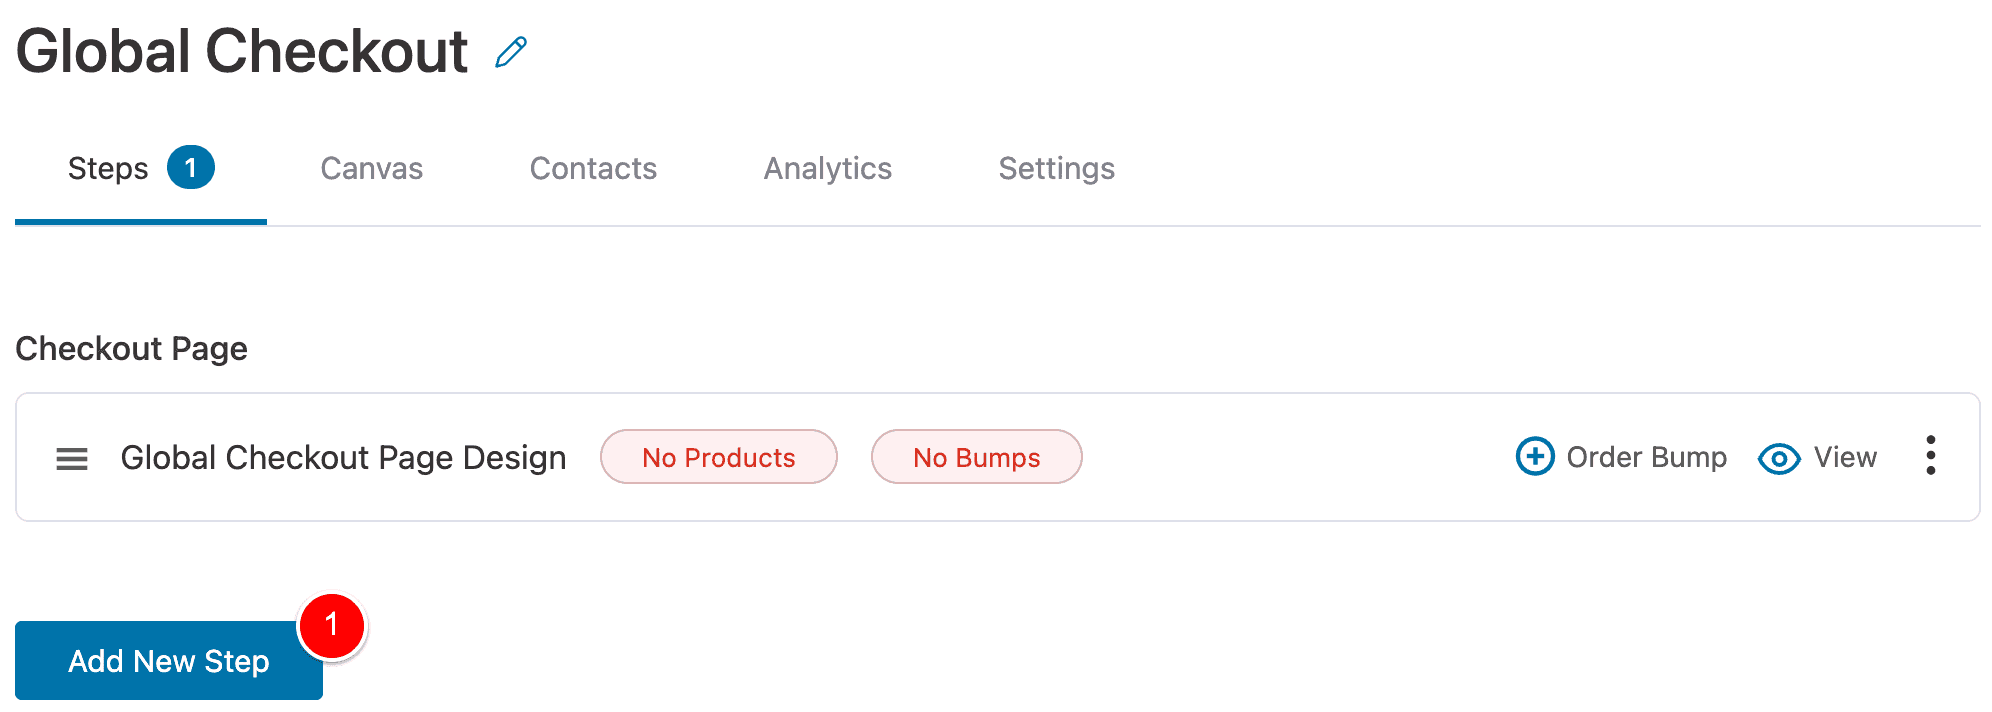
And then we’ll set this page type to Thank You Page (1).
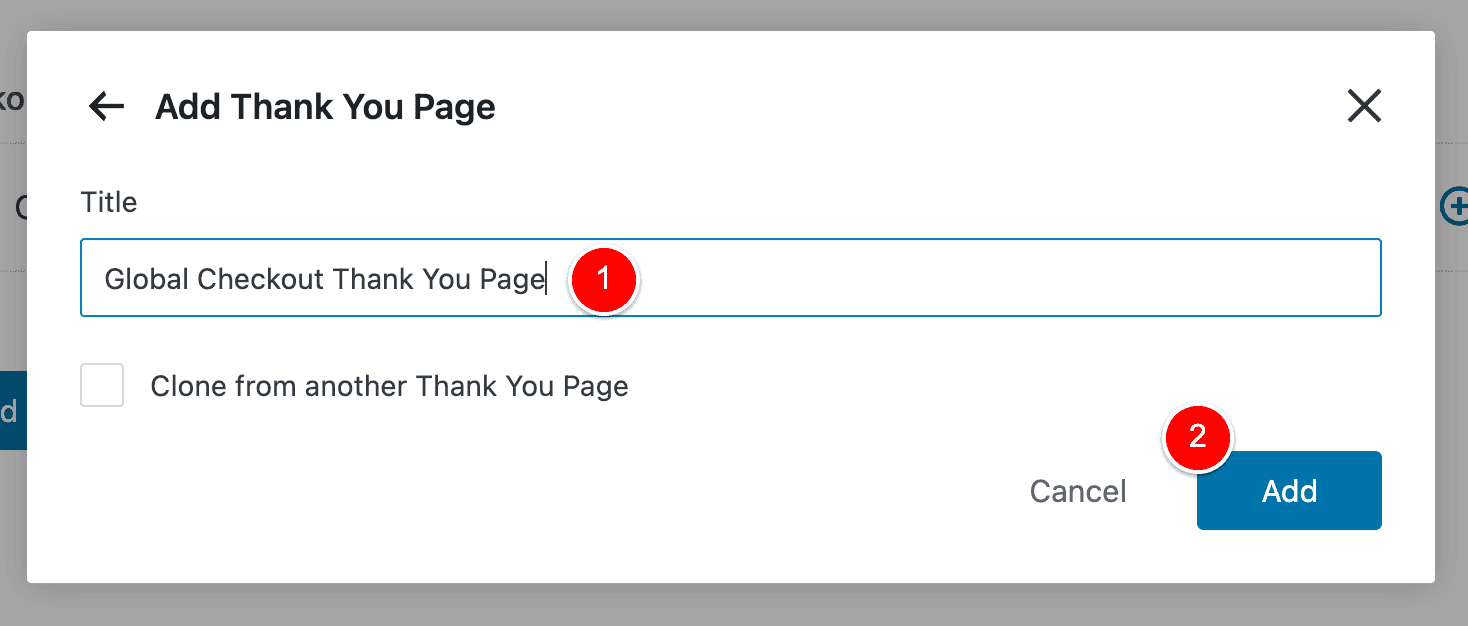
Give it any name you’d like – something like Global Checkout Thank You Page (1) and then click Add (2).
Now our funnel has two steps in it as we set out to do with (1) our Checkout Page and (2) our Thank You page (2) as shown at (3) where it says there are two steps in our funnel.
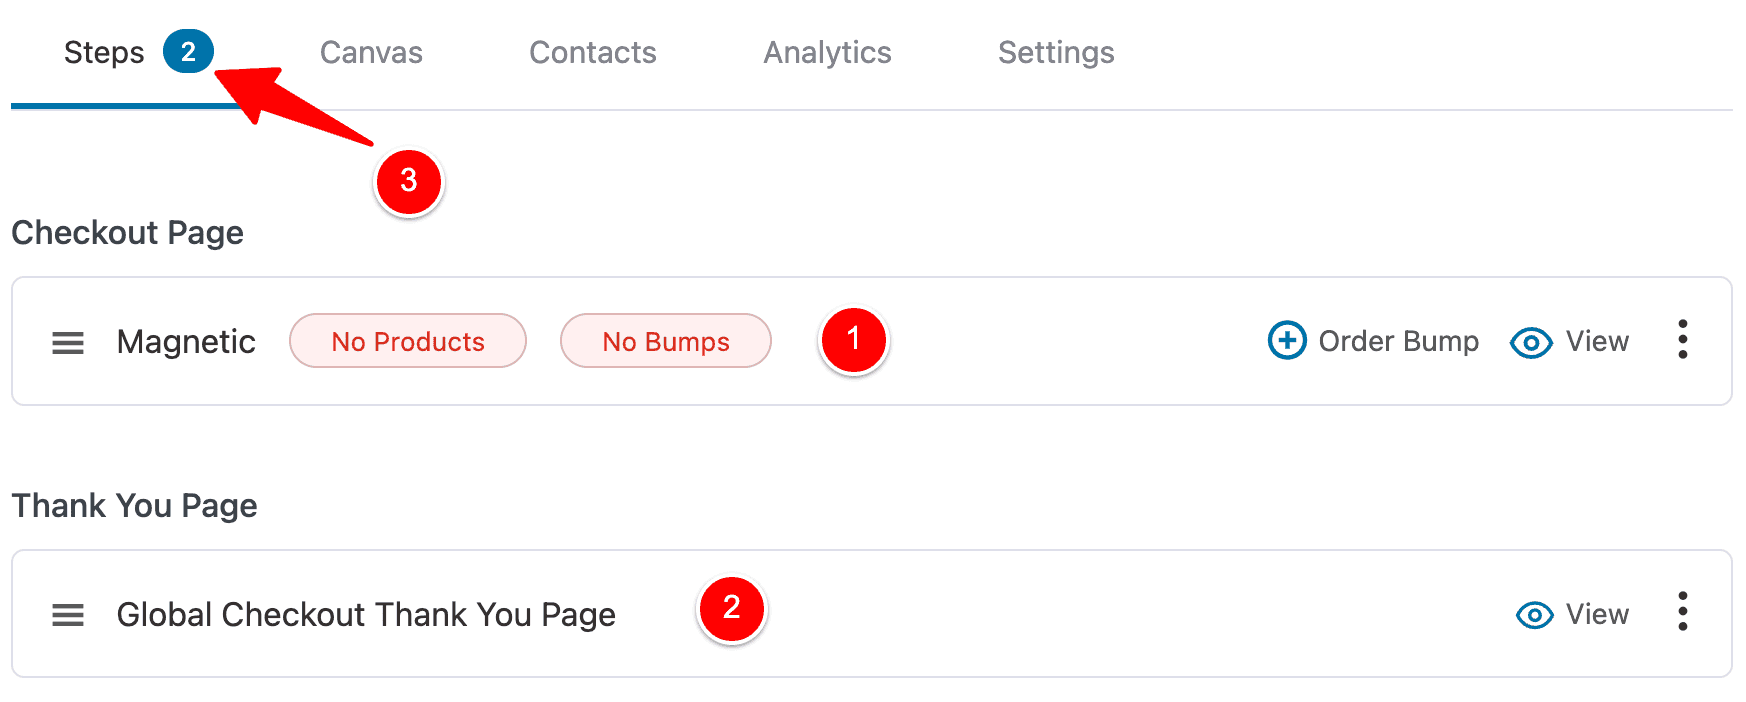
We’re so close!
Now, let’s go ahead and edit our Thank You page and design it using our page builder.
Change the URL of your WooCommerce Thank You Page
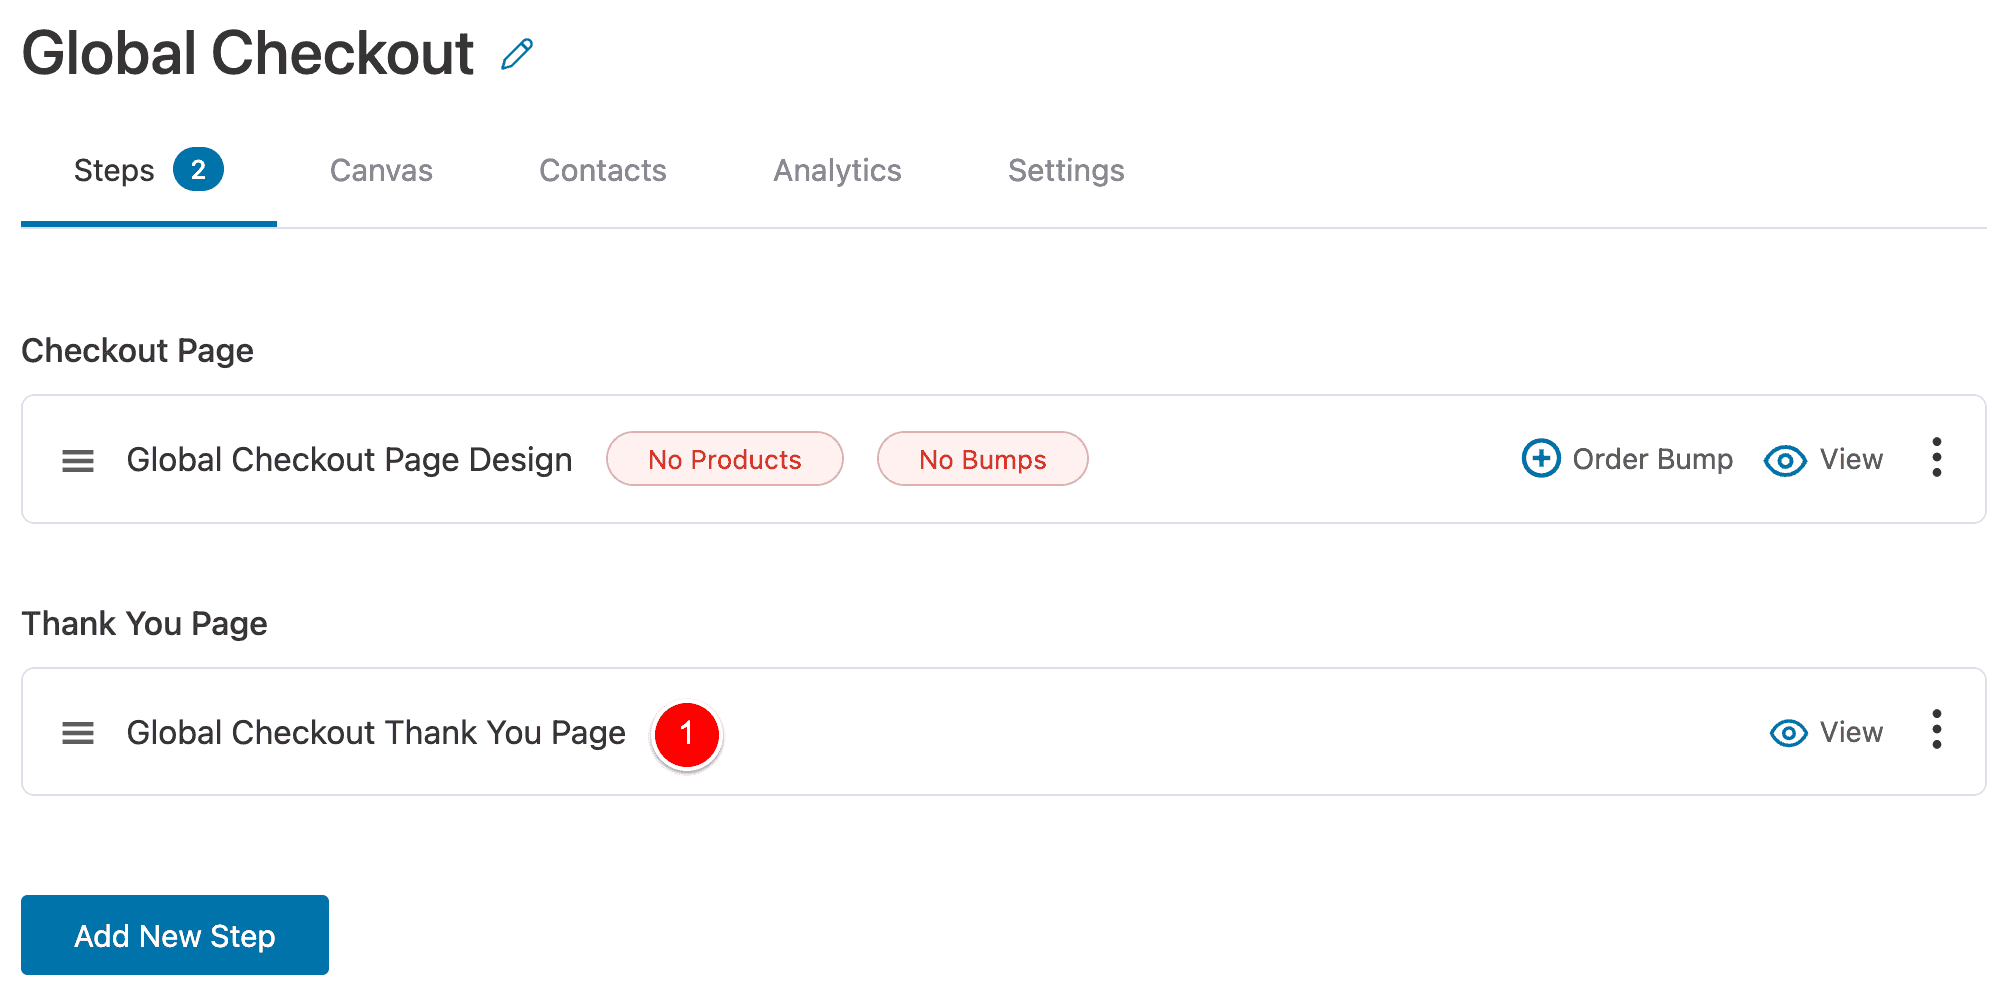
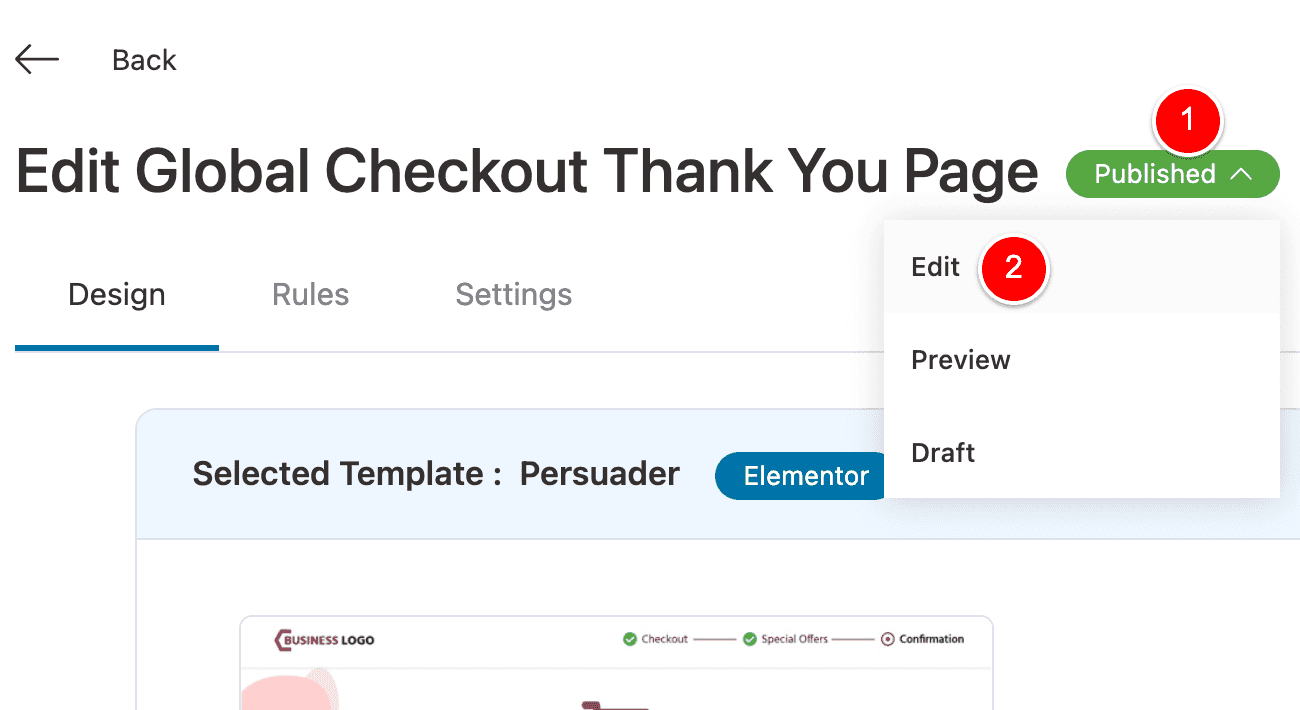
Click to edit your Thank You page step in your funnel (1).
Then click on Published > Edit.
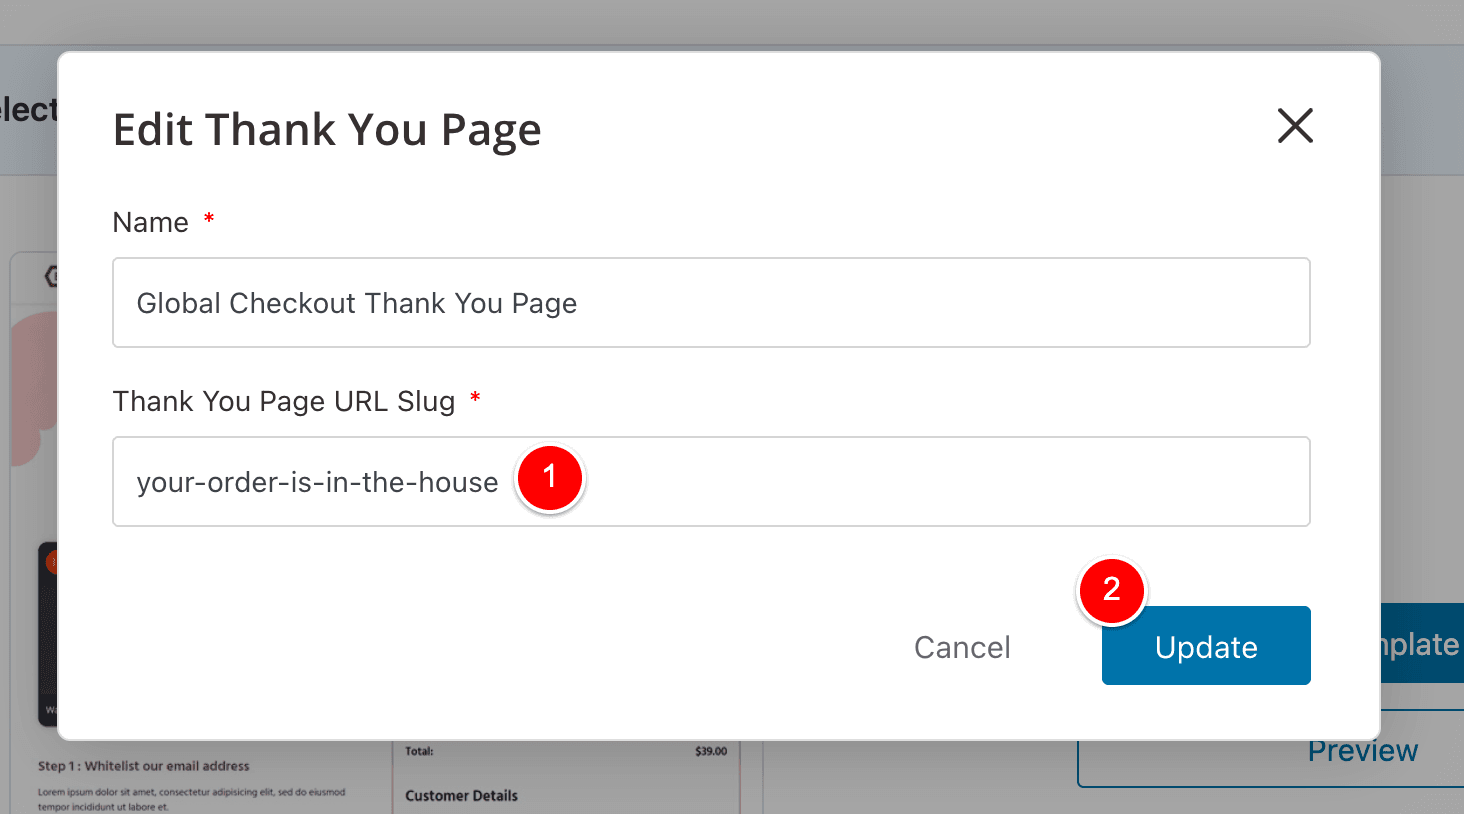
At (1) enter whatever you want the URL For your custom Thank You page to be and click Update (2).
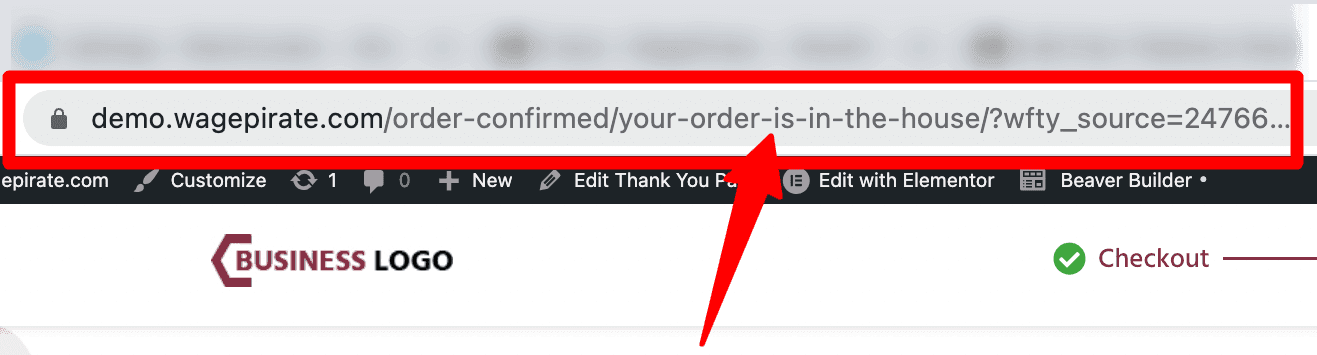
I’m getting a bit ahead of myself here, but when I show you the final result at the end of this tutorial, this is what our Thank You page URL will look like below.
You can see that our recent change is in effect and our thank you page correctly is /order-confirmed/your-order-is-in-the-house/
FunnelKit also has a setting that allows you to change the /order-confirmed/ part of the URL, too!
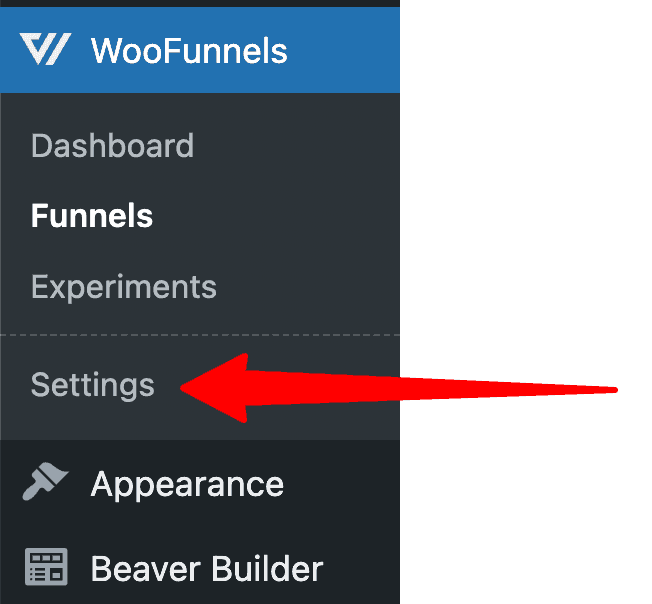
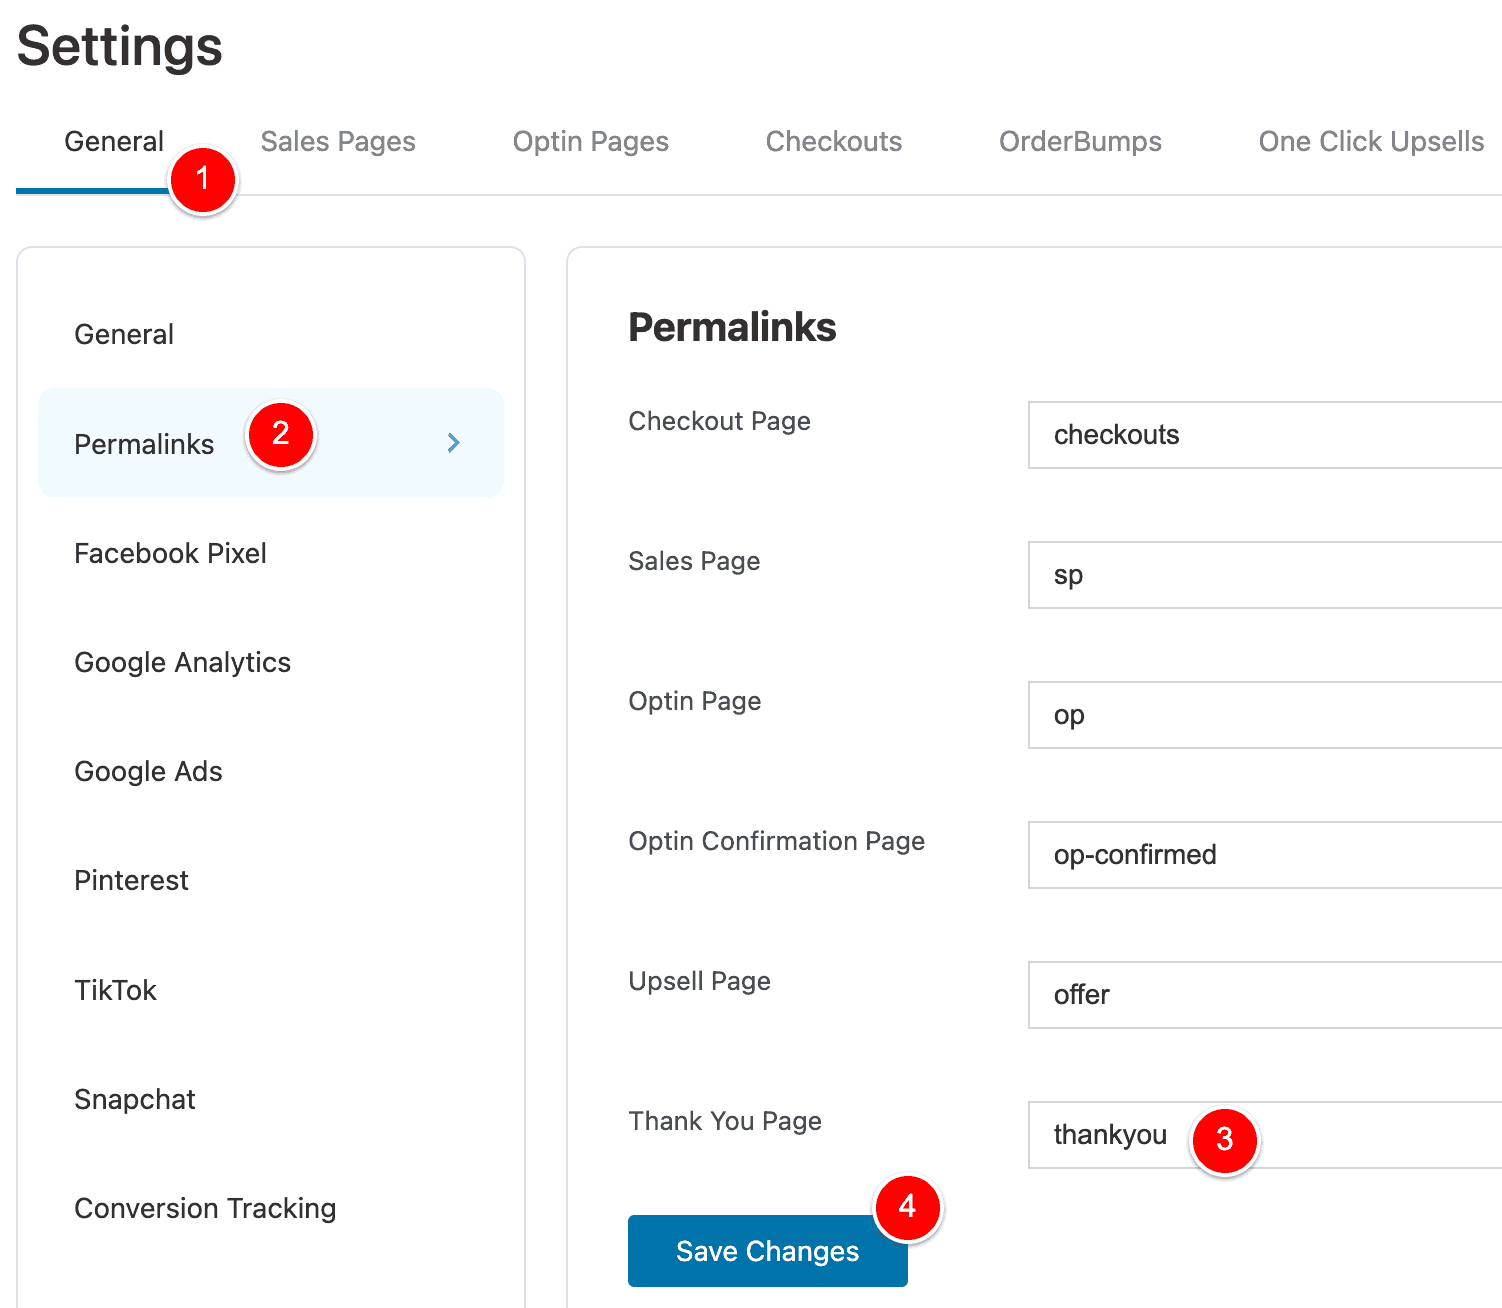
To change that, go to FunnelKit > Settings.
Then General > Permalinks and edit the Thank You Page setting at (3) and click Save Changes (4).
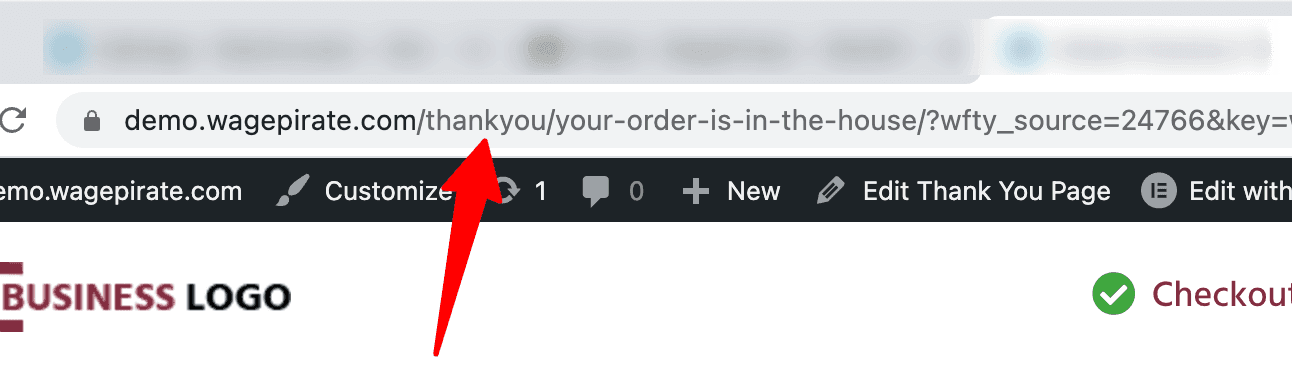
Now if I do a test order on this demo website, the Thank You page URL looks like the below…
Now, you might be wondering why you need to have both (1) and (2) in the URL as per the image below…
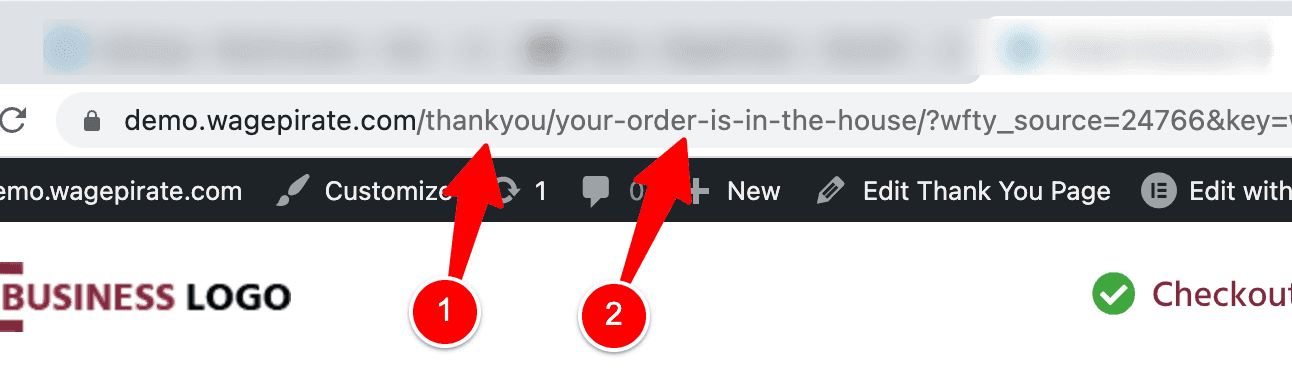
…and I will explain why you need both of these (and not just 1) later in this article.
Back to setting up this funnel, the next thing is to…
Design a custom Thank you page
We need to design our Thank You page now that we’ve added it into our funnel and set its custom URL.
To design our Thank You page, we will click at (1) to edit the Thank You page step in the funnel.
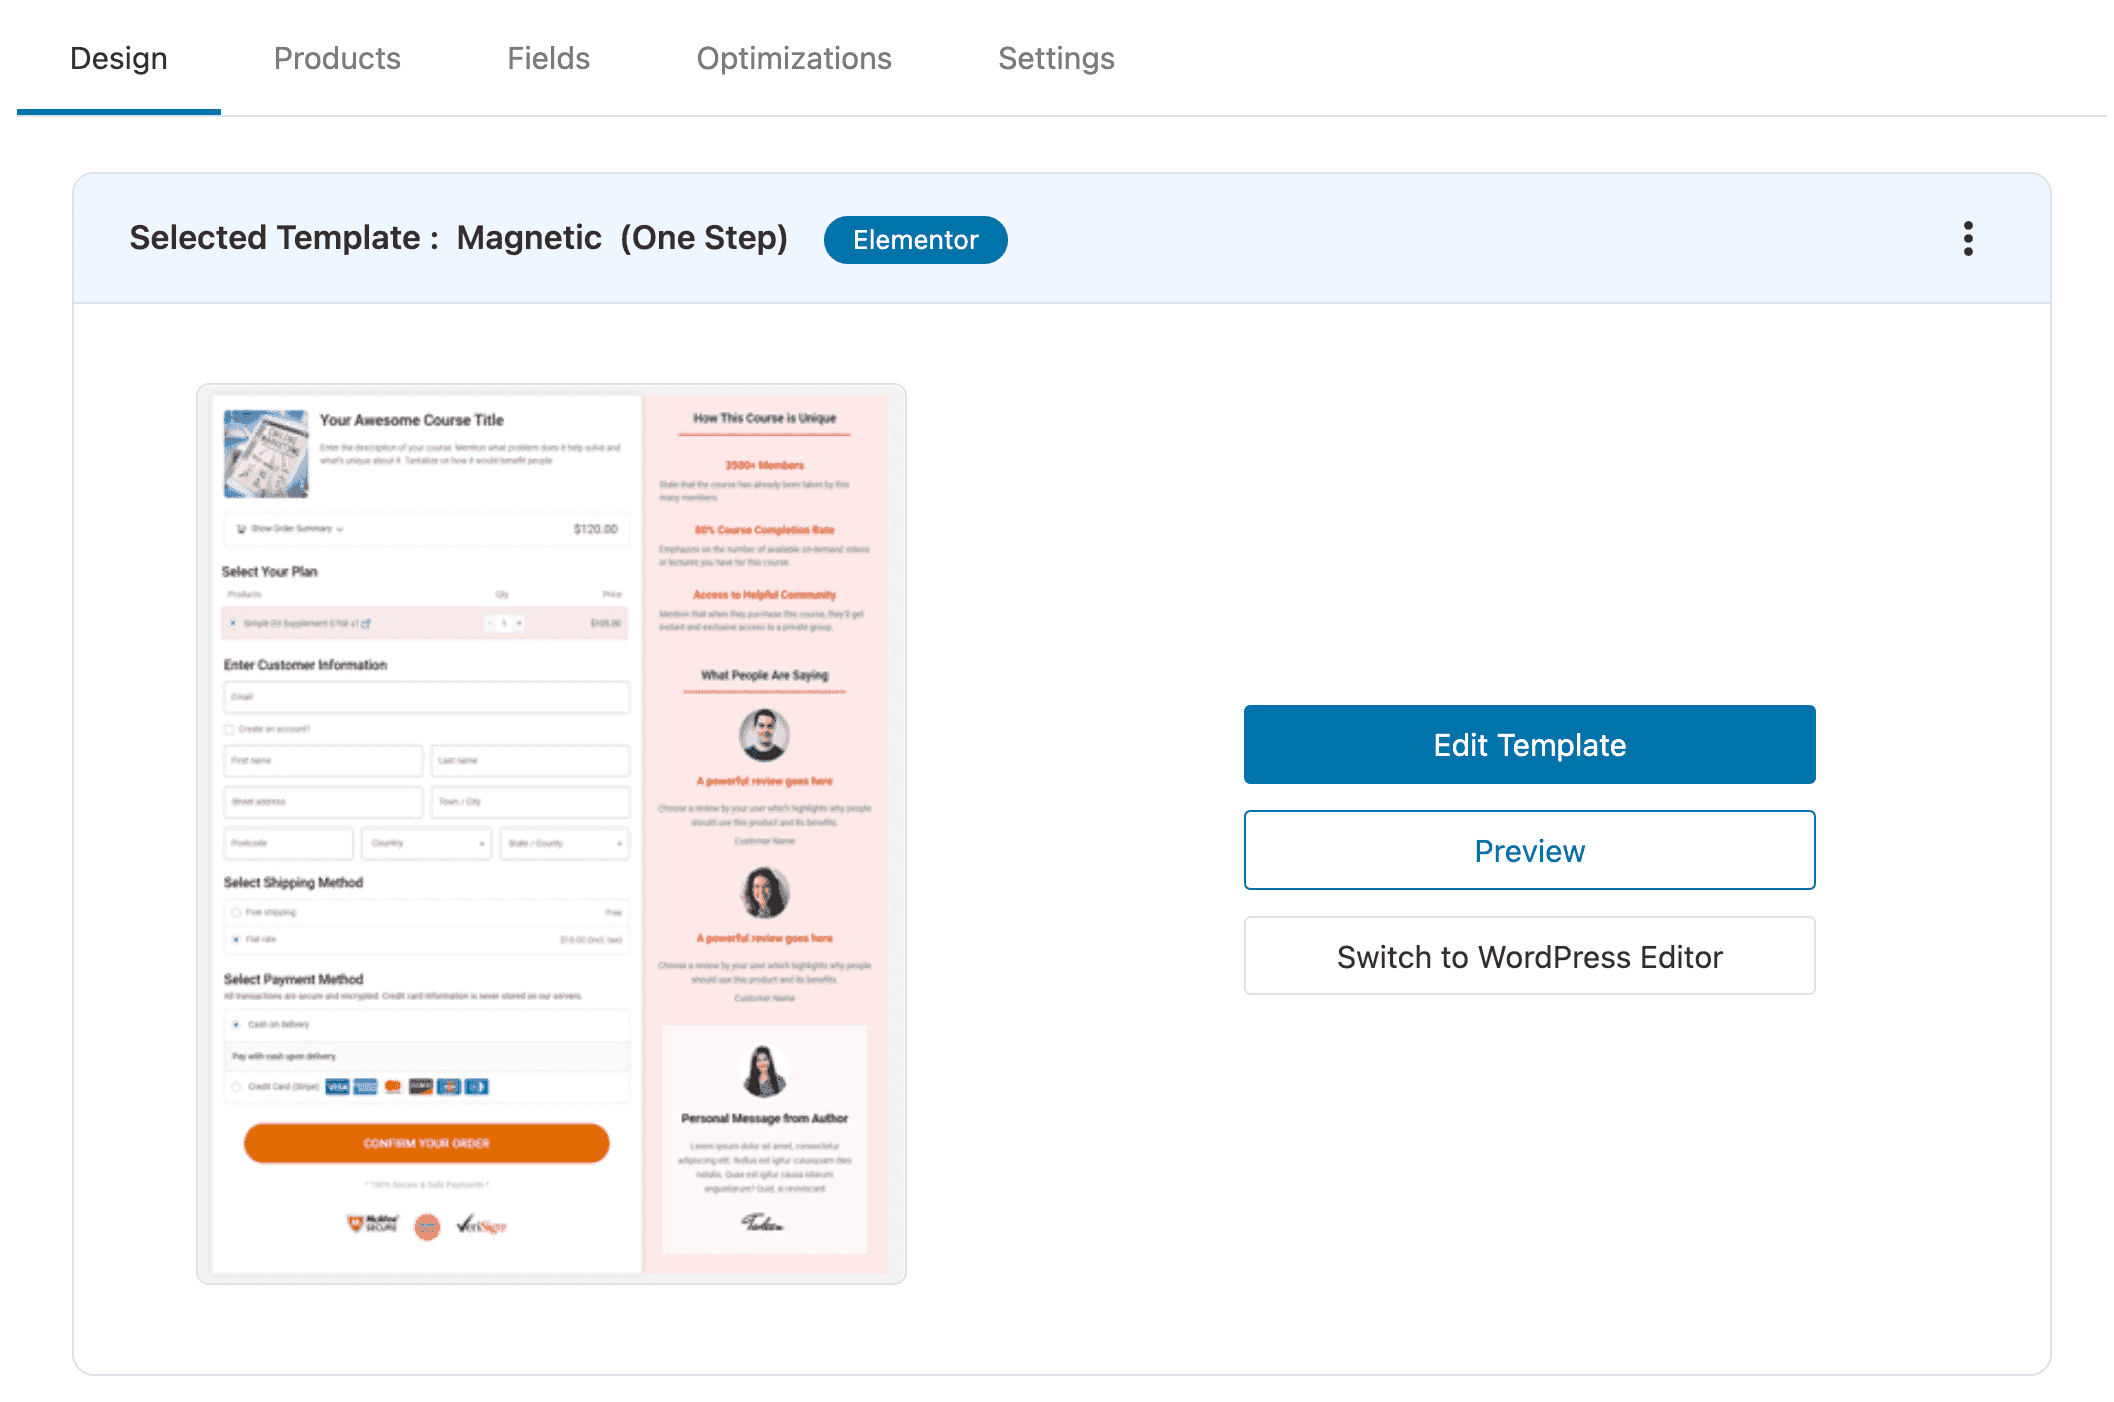
Then, under the Design tab (1) I’ll select Elementor again as my page builder (2) and choose the design template at (3).
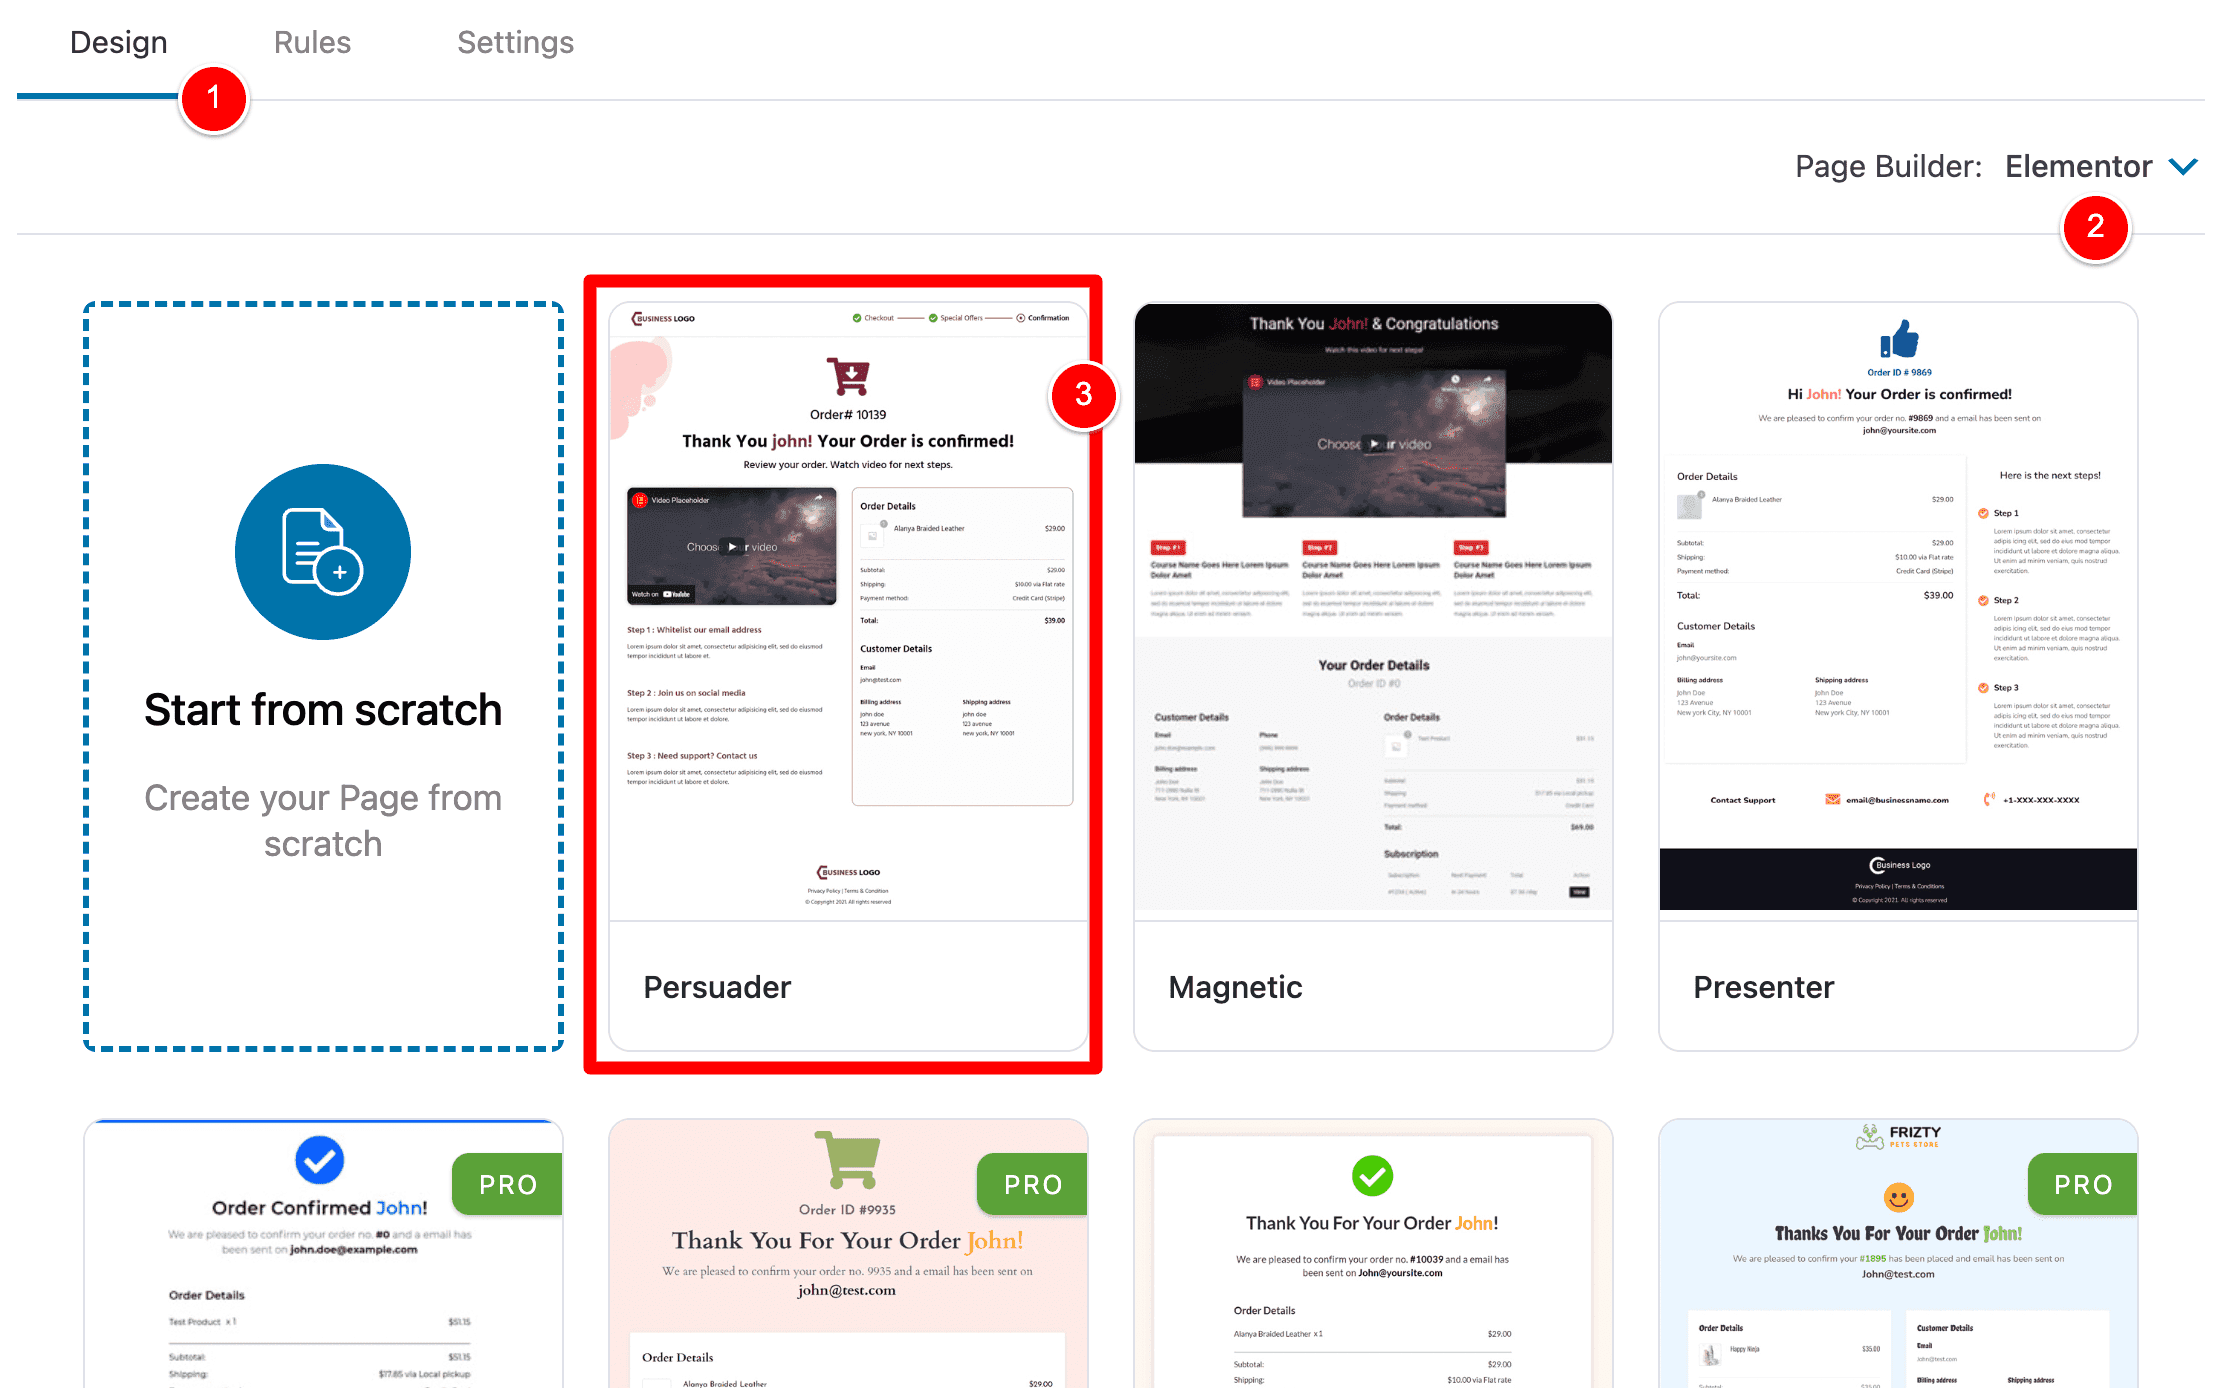
Click Edit Template (1) to launch the Page Builder.
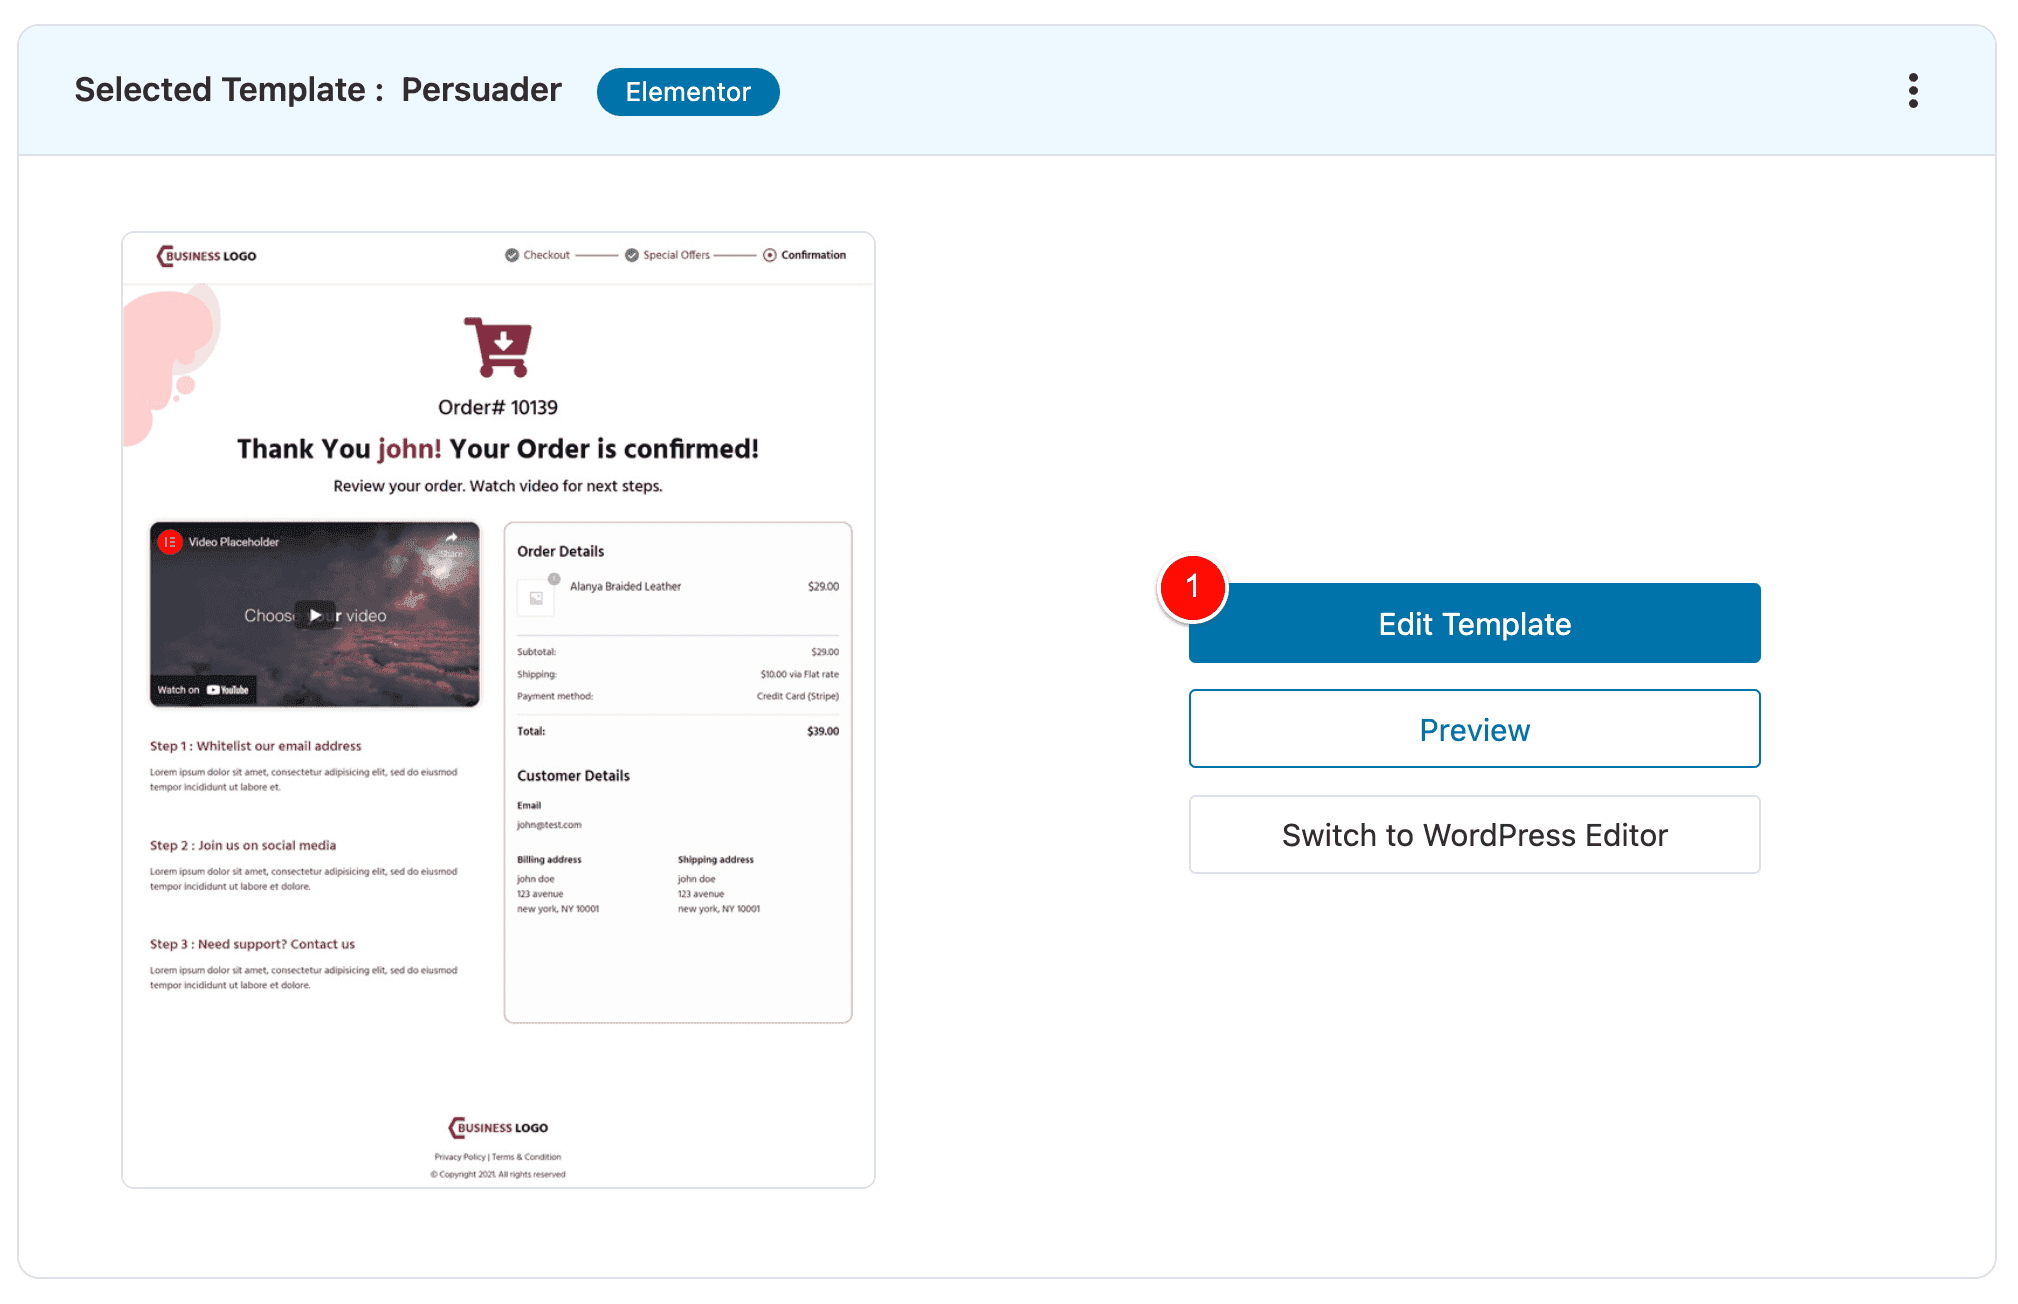
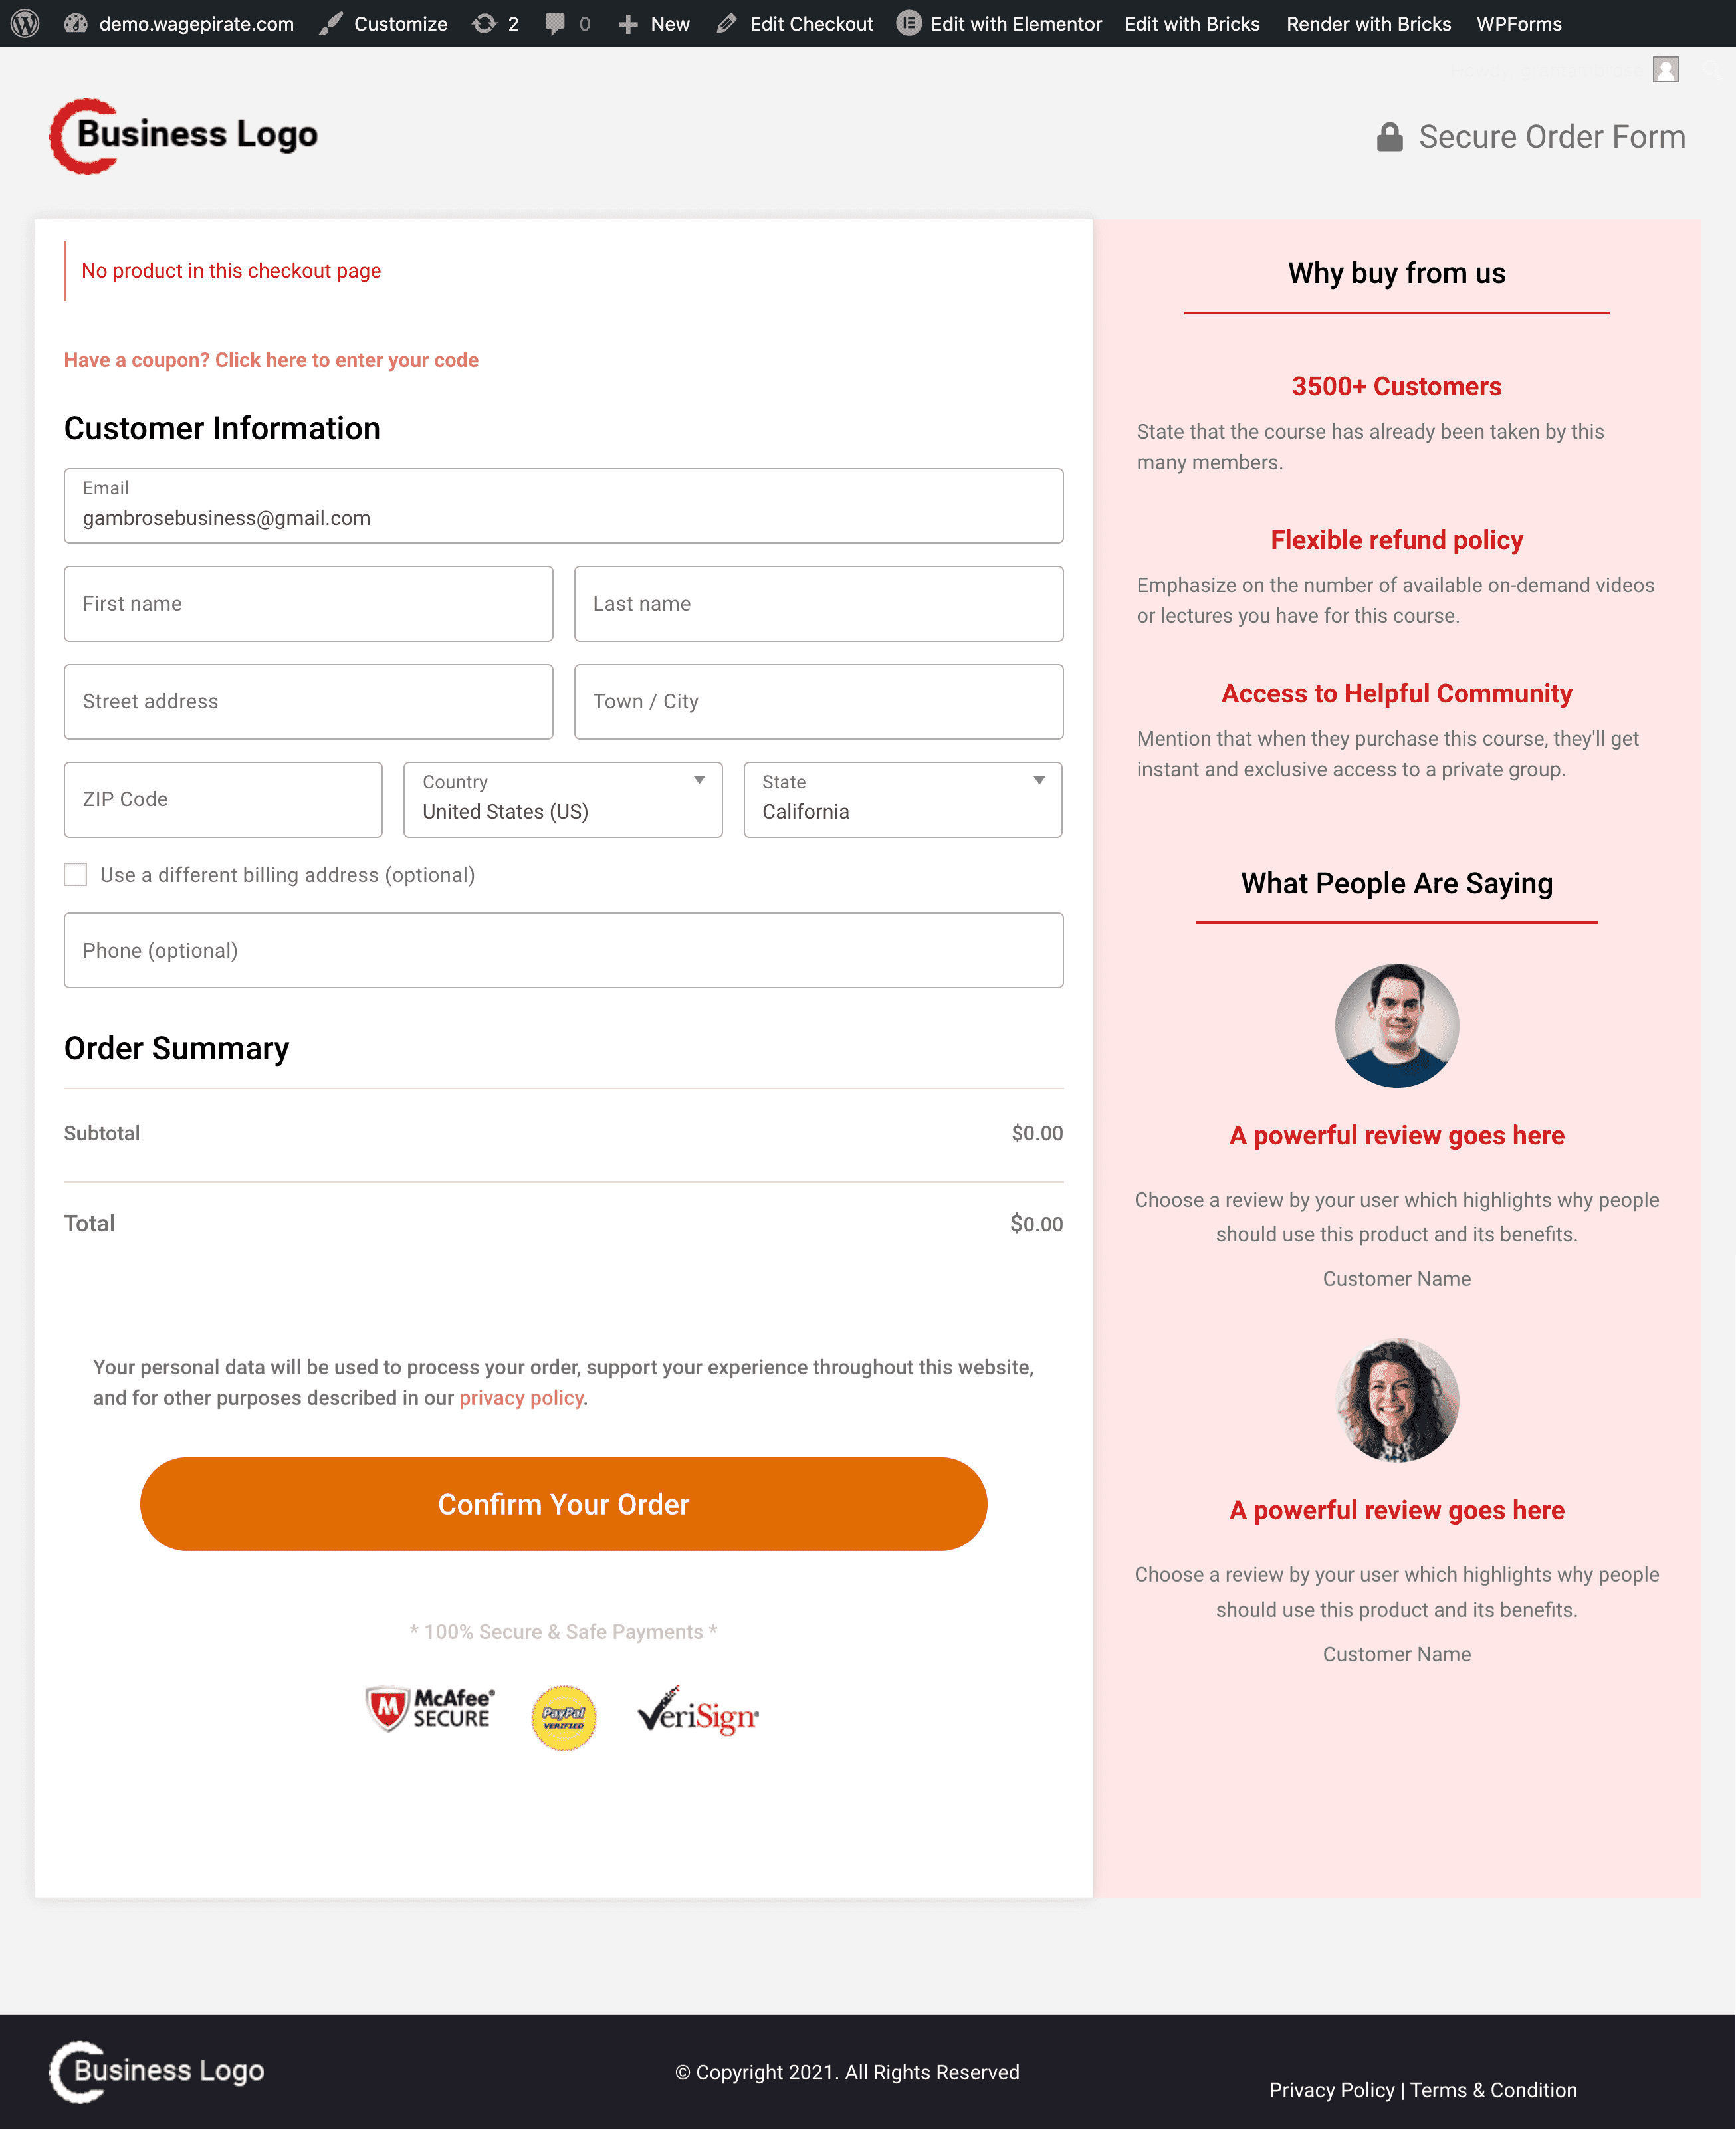
And that will allow you to customize your Thank You page using your page builder, which in my case is using Elementor in this demo.
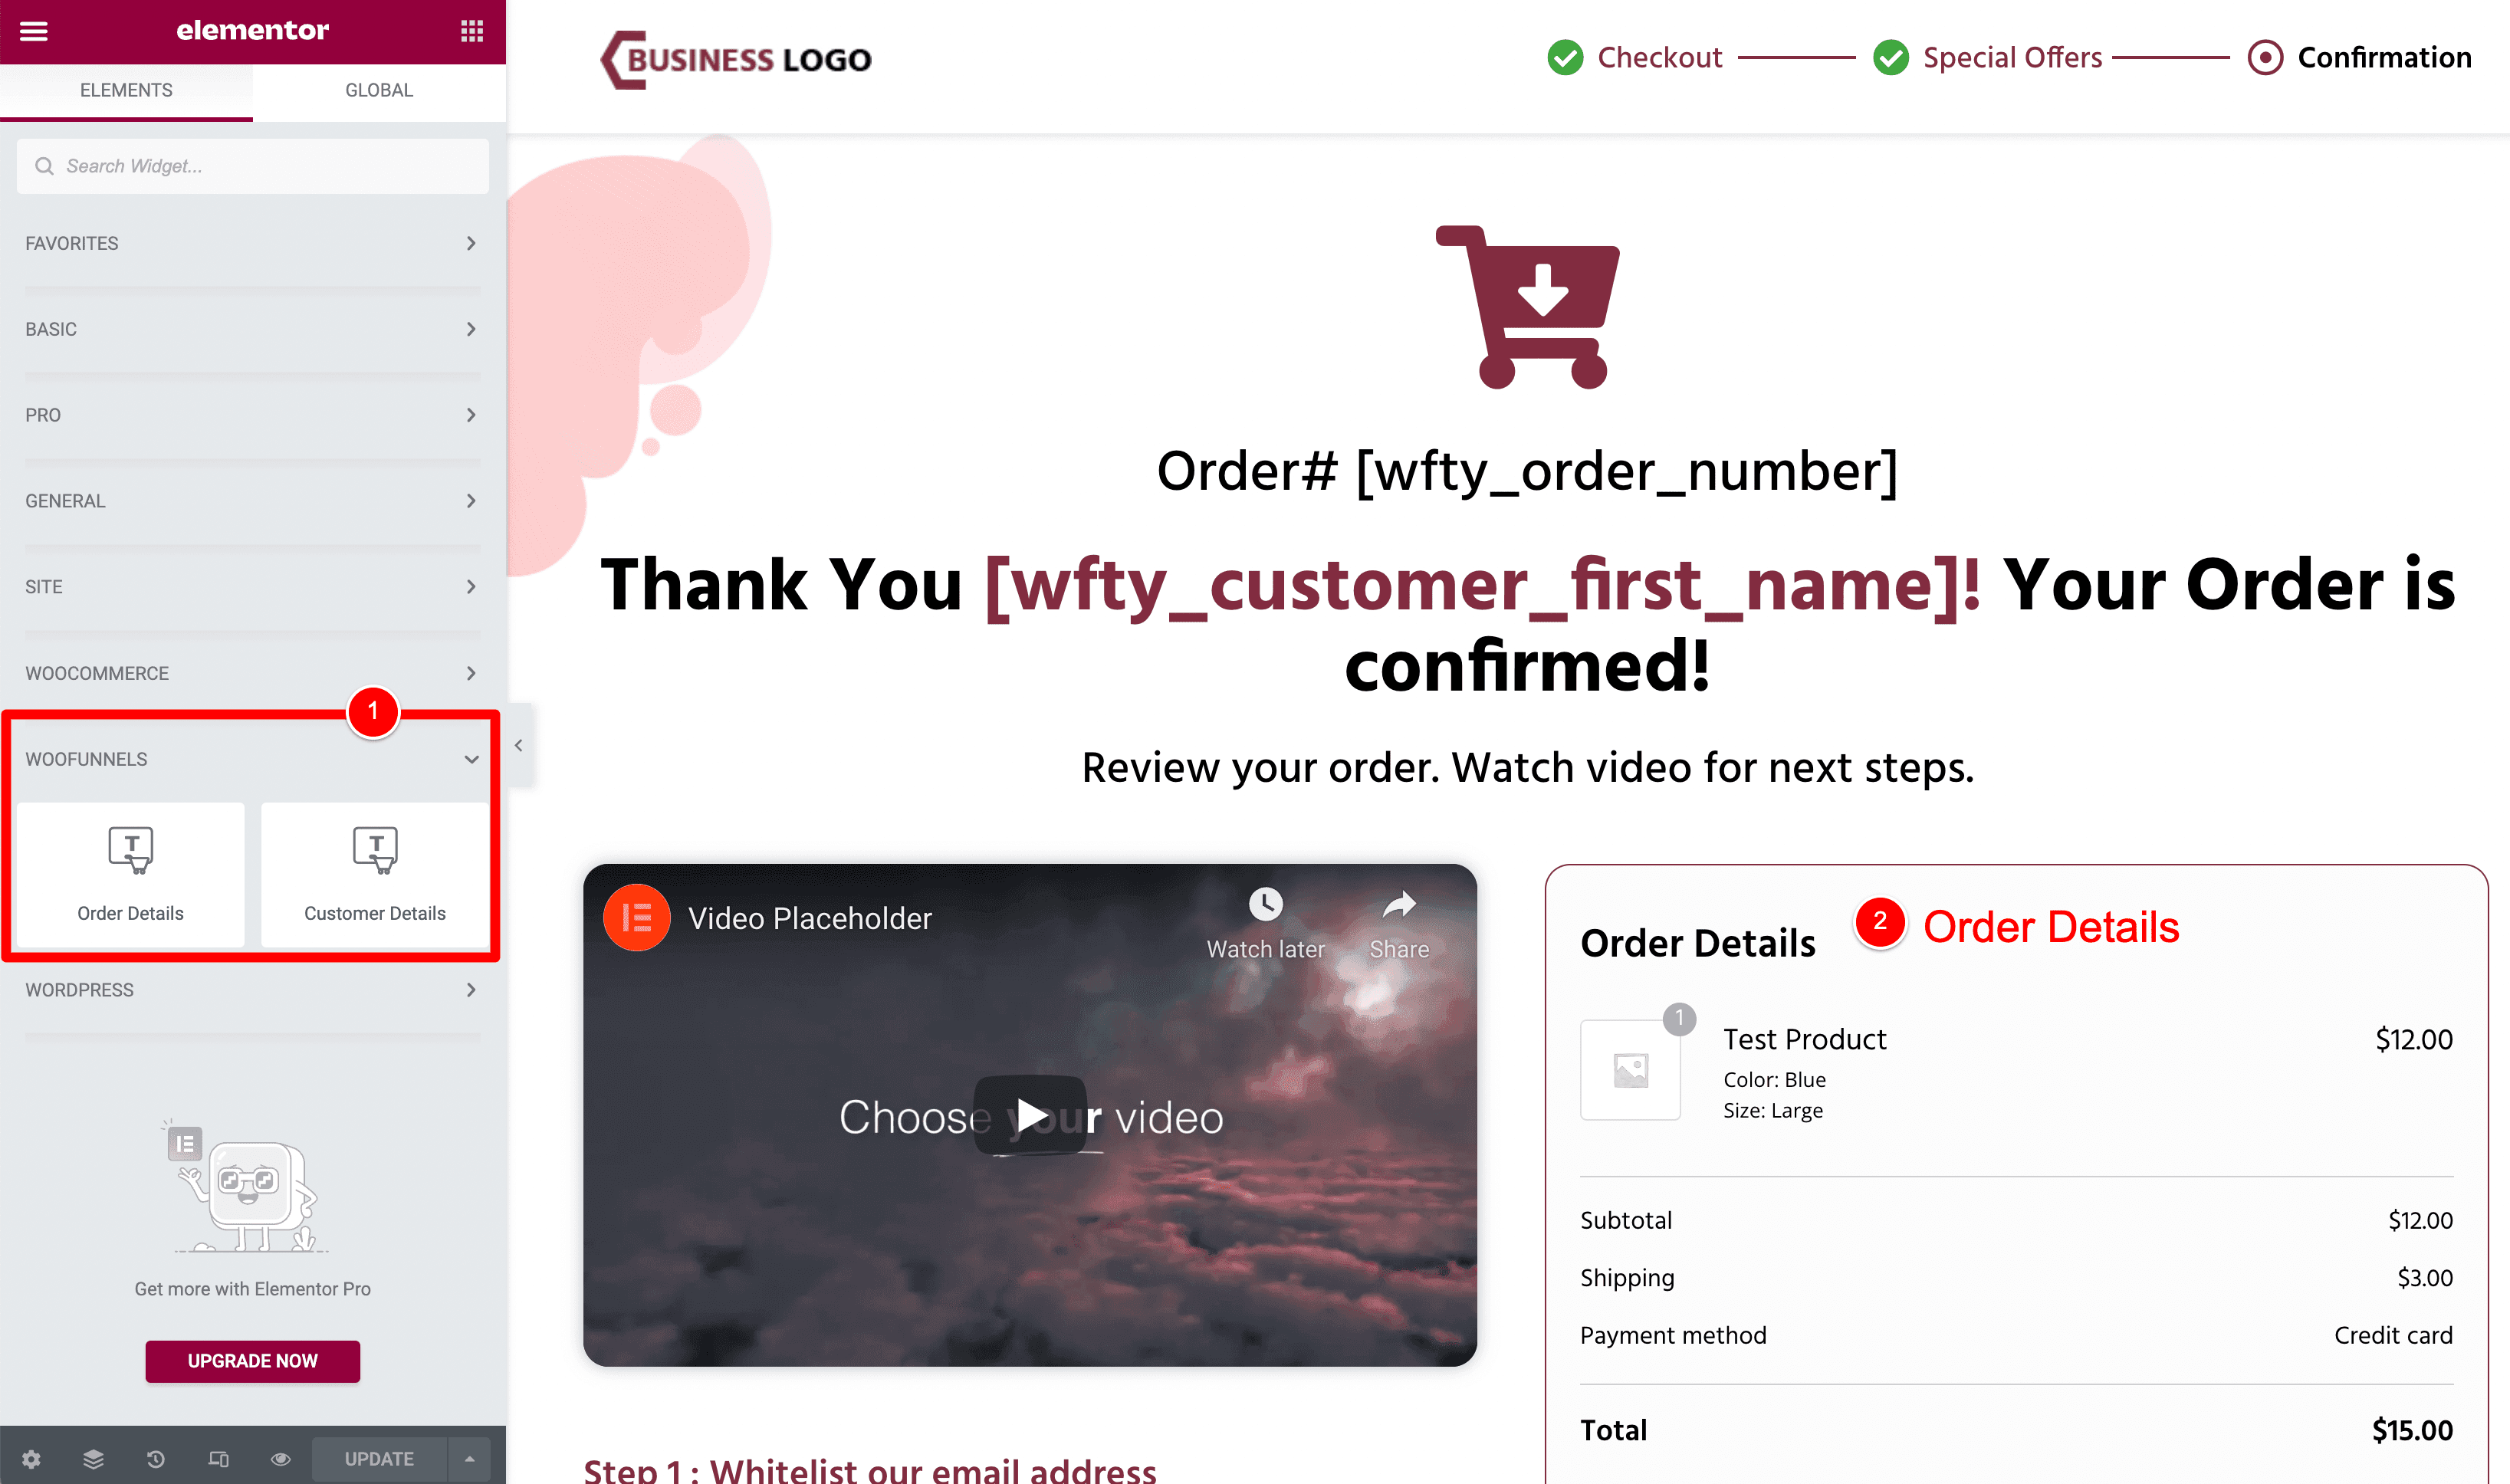
In the above example, the FunnelKit team have coded into their plugin these custom page builder modules for Elementor and I just drag them into the Thank You page wherever I want to output the Order Details or Customer Details.
NOTE: This is the same for the Checkout Page.
In Elementor I have these two elements for Checkout Form and Mini Cart (1) that I drag into my Elementor page wherever I want them to show.
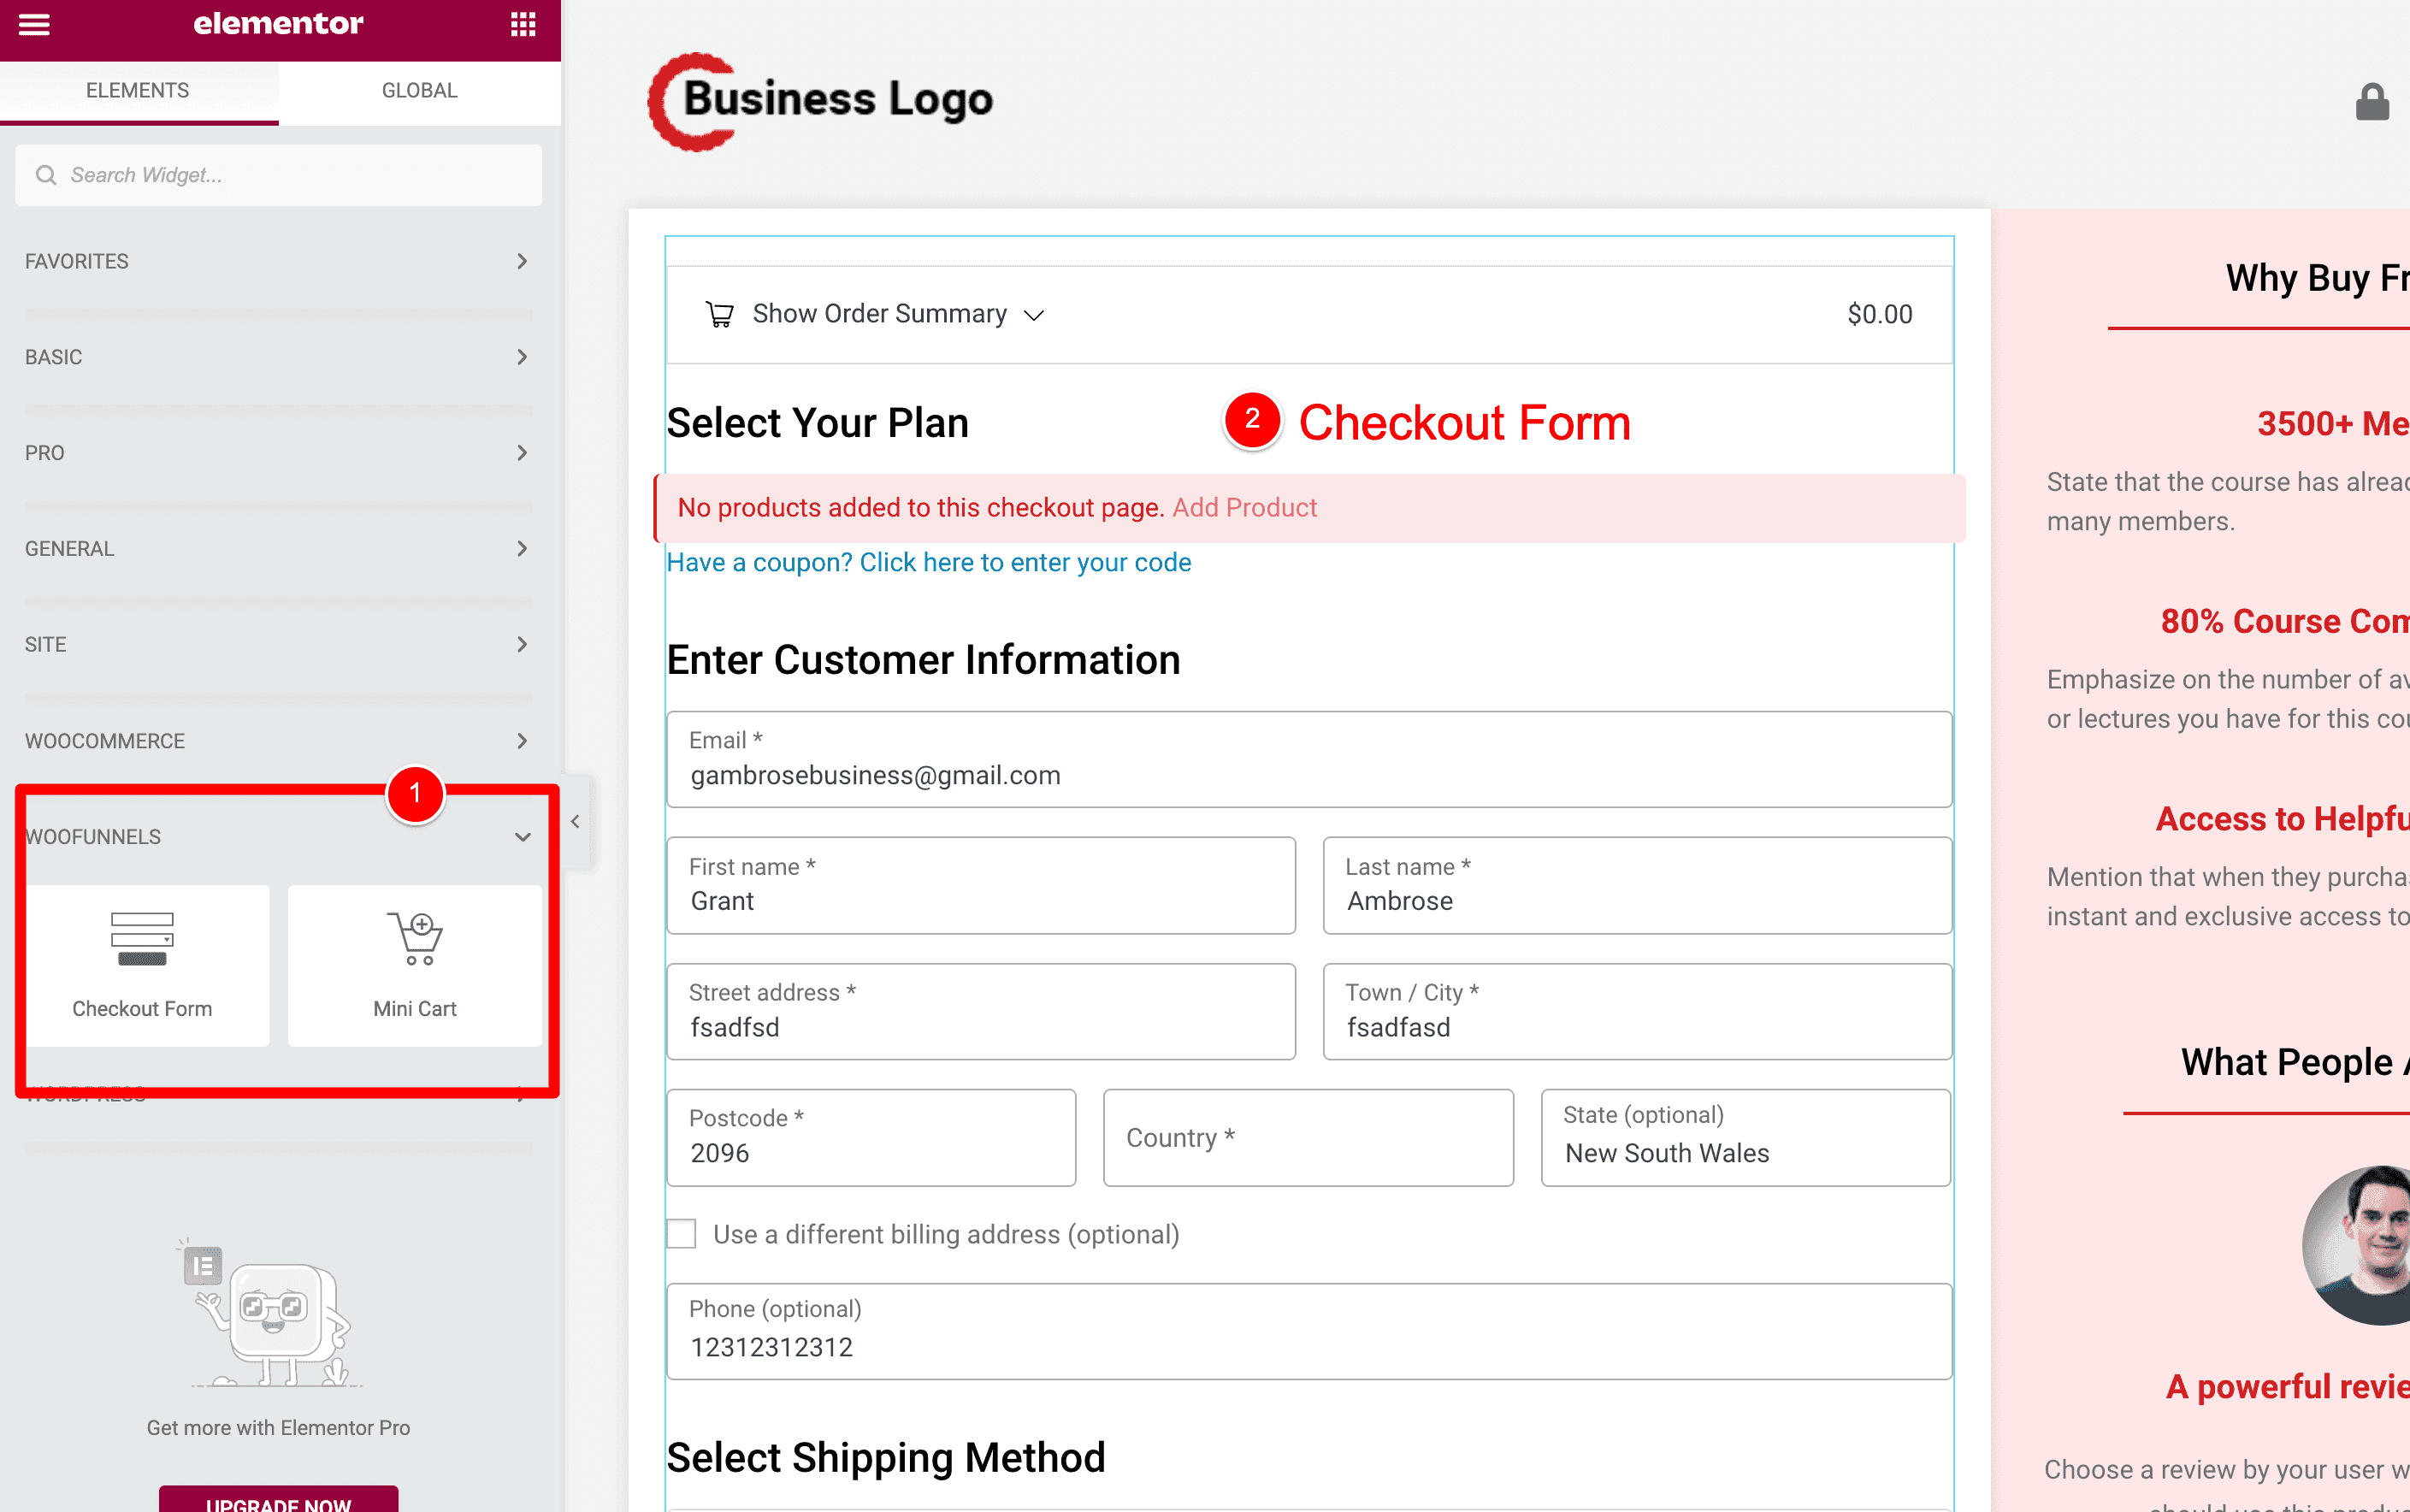
These are custom modules for the Elementor plugin that the FunnelKit team have coded into their plugin.
NOTE: How our funnel redirects from Checkout Page to Thank You Page
See this image below…
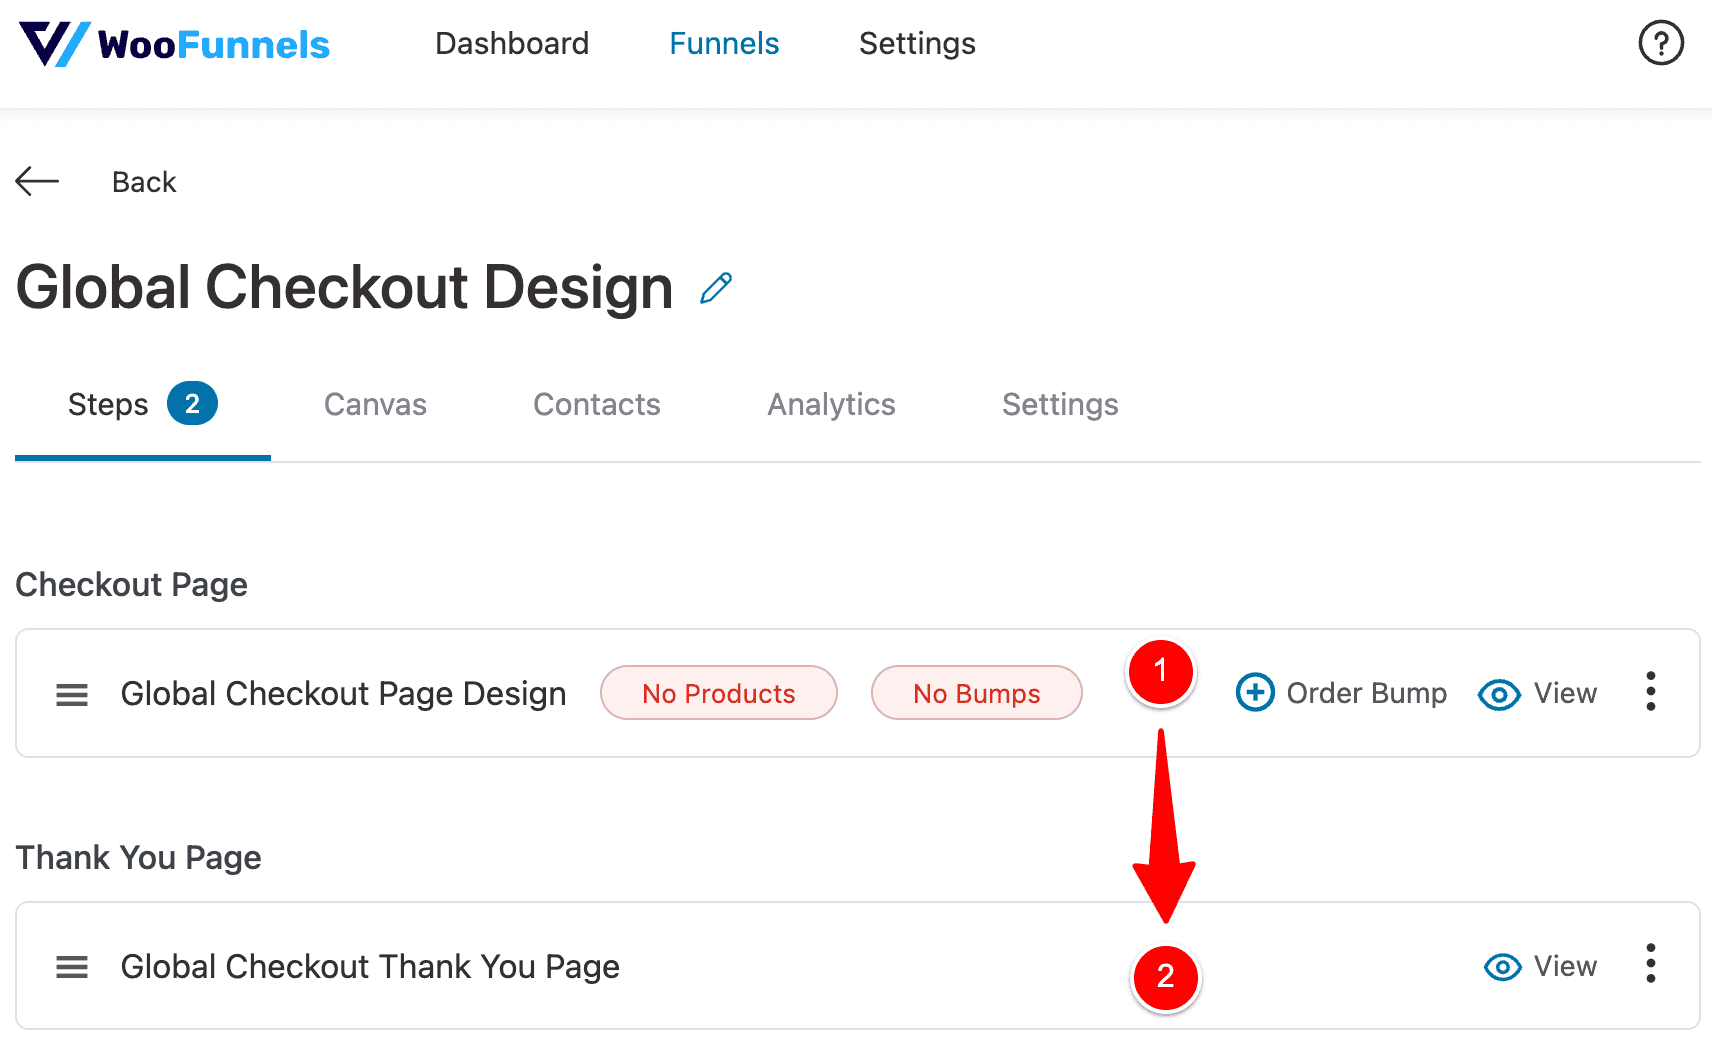
FunnelKit already knows that once people buy from the Checkout Page at (1) they should be redirected to the Thank You Page at (2).
How?….
Set WooCommerce to use the new Checkout Funnel
The LAST thing we need to do here is set this Checkout Page step in our funnel to be our main checkout page WooCommerce uses.
To do this, go to FunnelKit > Settings.
Then Checkouts (1), Global Checkout (2), select the new Checkout Page you created in the dropdown at (3) and then click Save Changes (4).
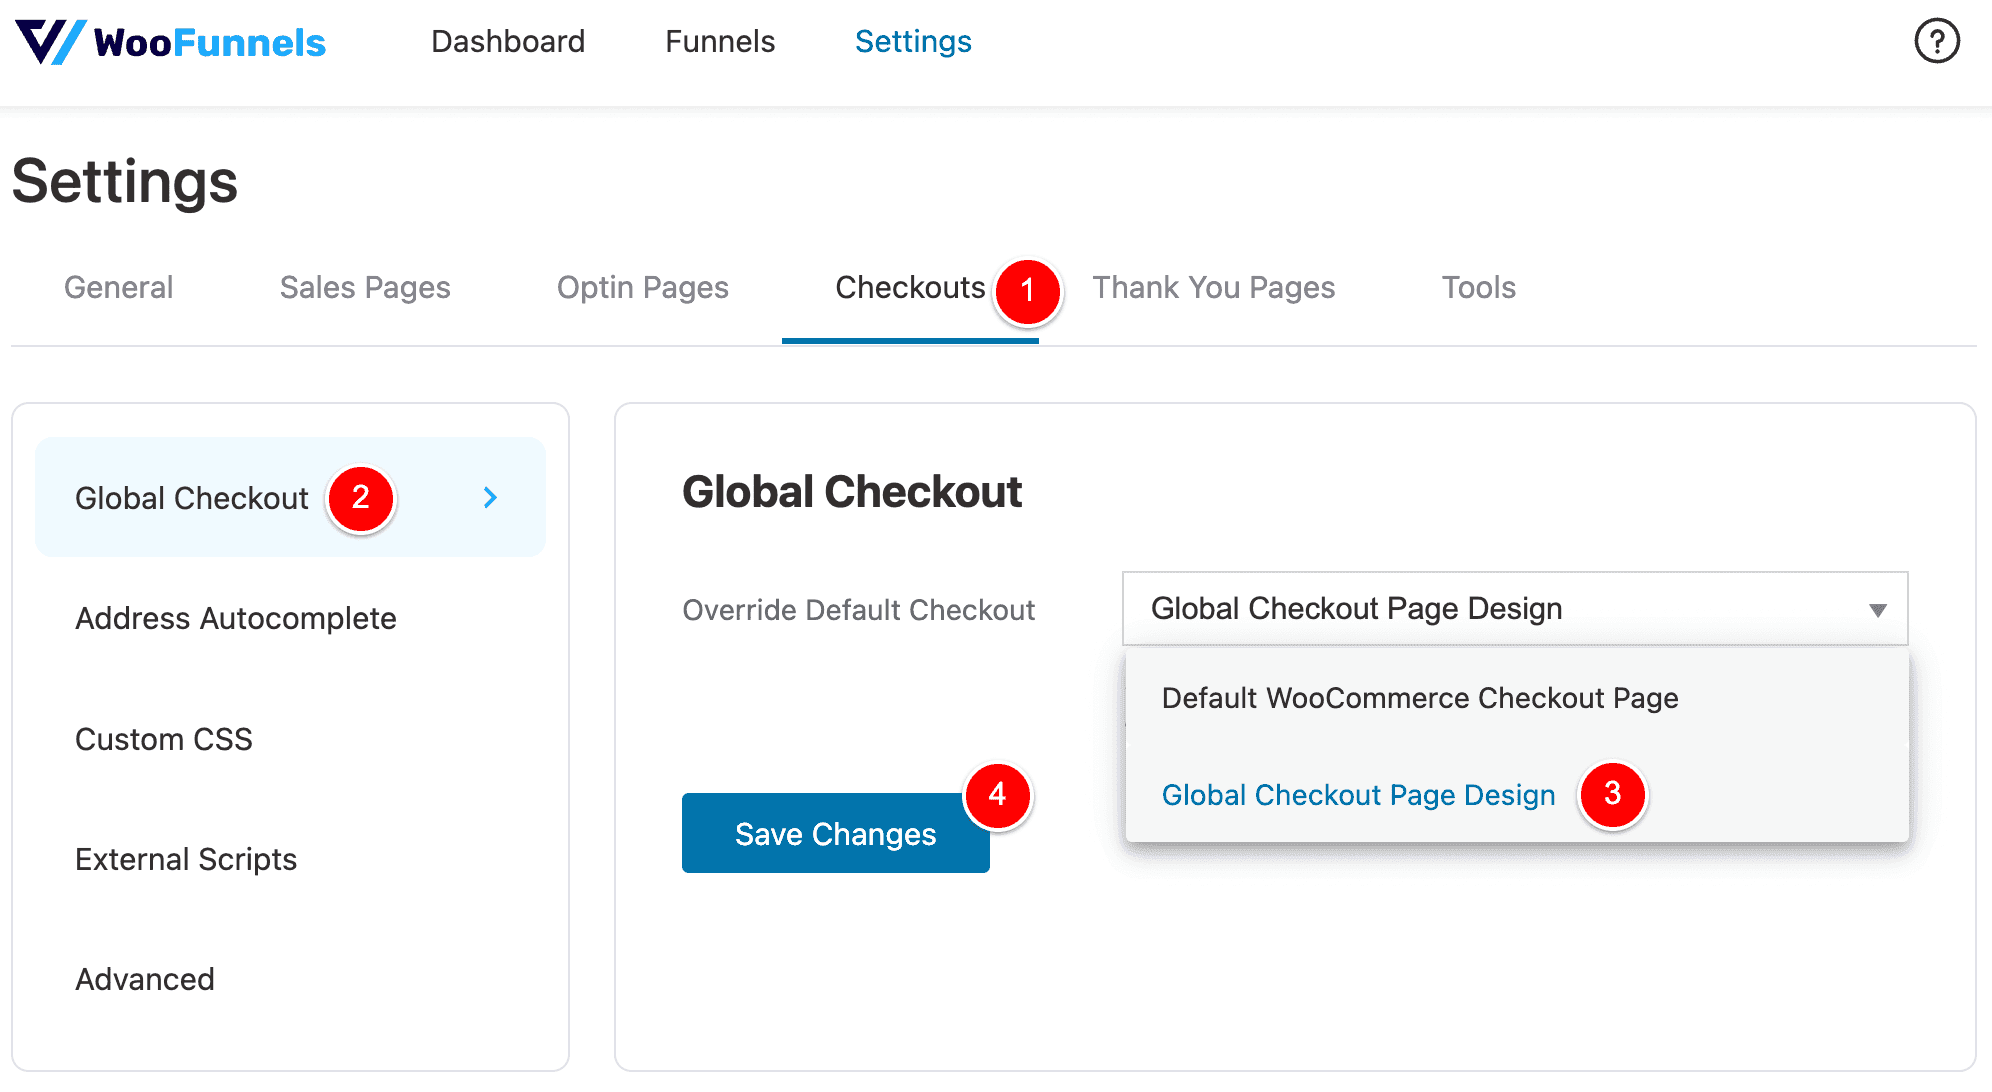
NOTE: When your customers add products to their cart and then click Proceed to Checkout, they are taken to what FunnelKit calls the Global Checkout.
Thus, the Global Checkout is the main checkout page your WooCommerce website uses.
And now we’re all done!
FunnelKit: Testing our custom Thank You Page
Let’s test everything we just set up using the FunnelKit plugin and (in doing so) I’ll be able to show you the final result.
Here is the video version…
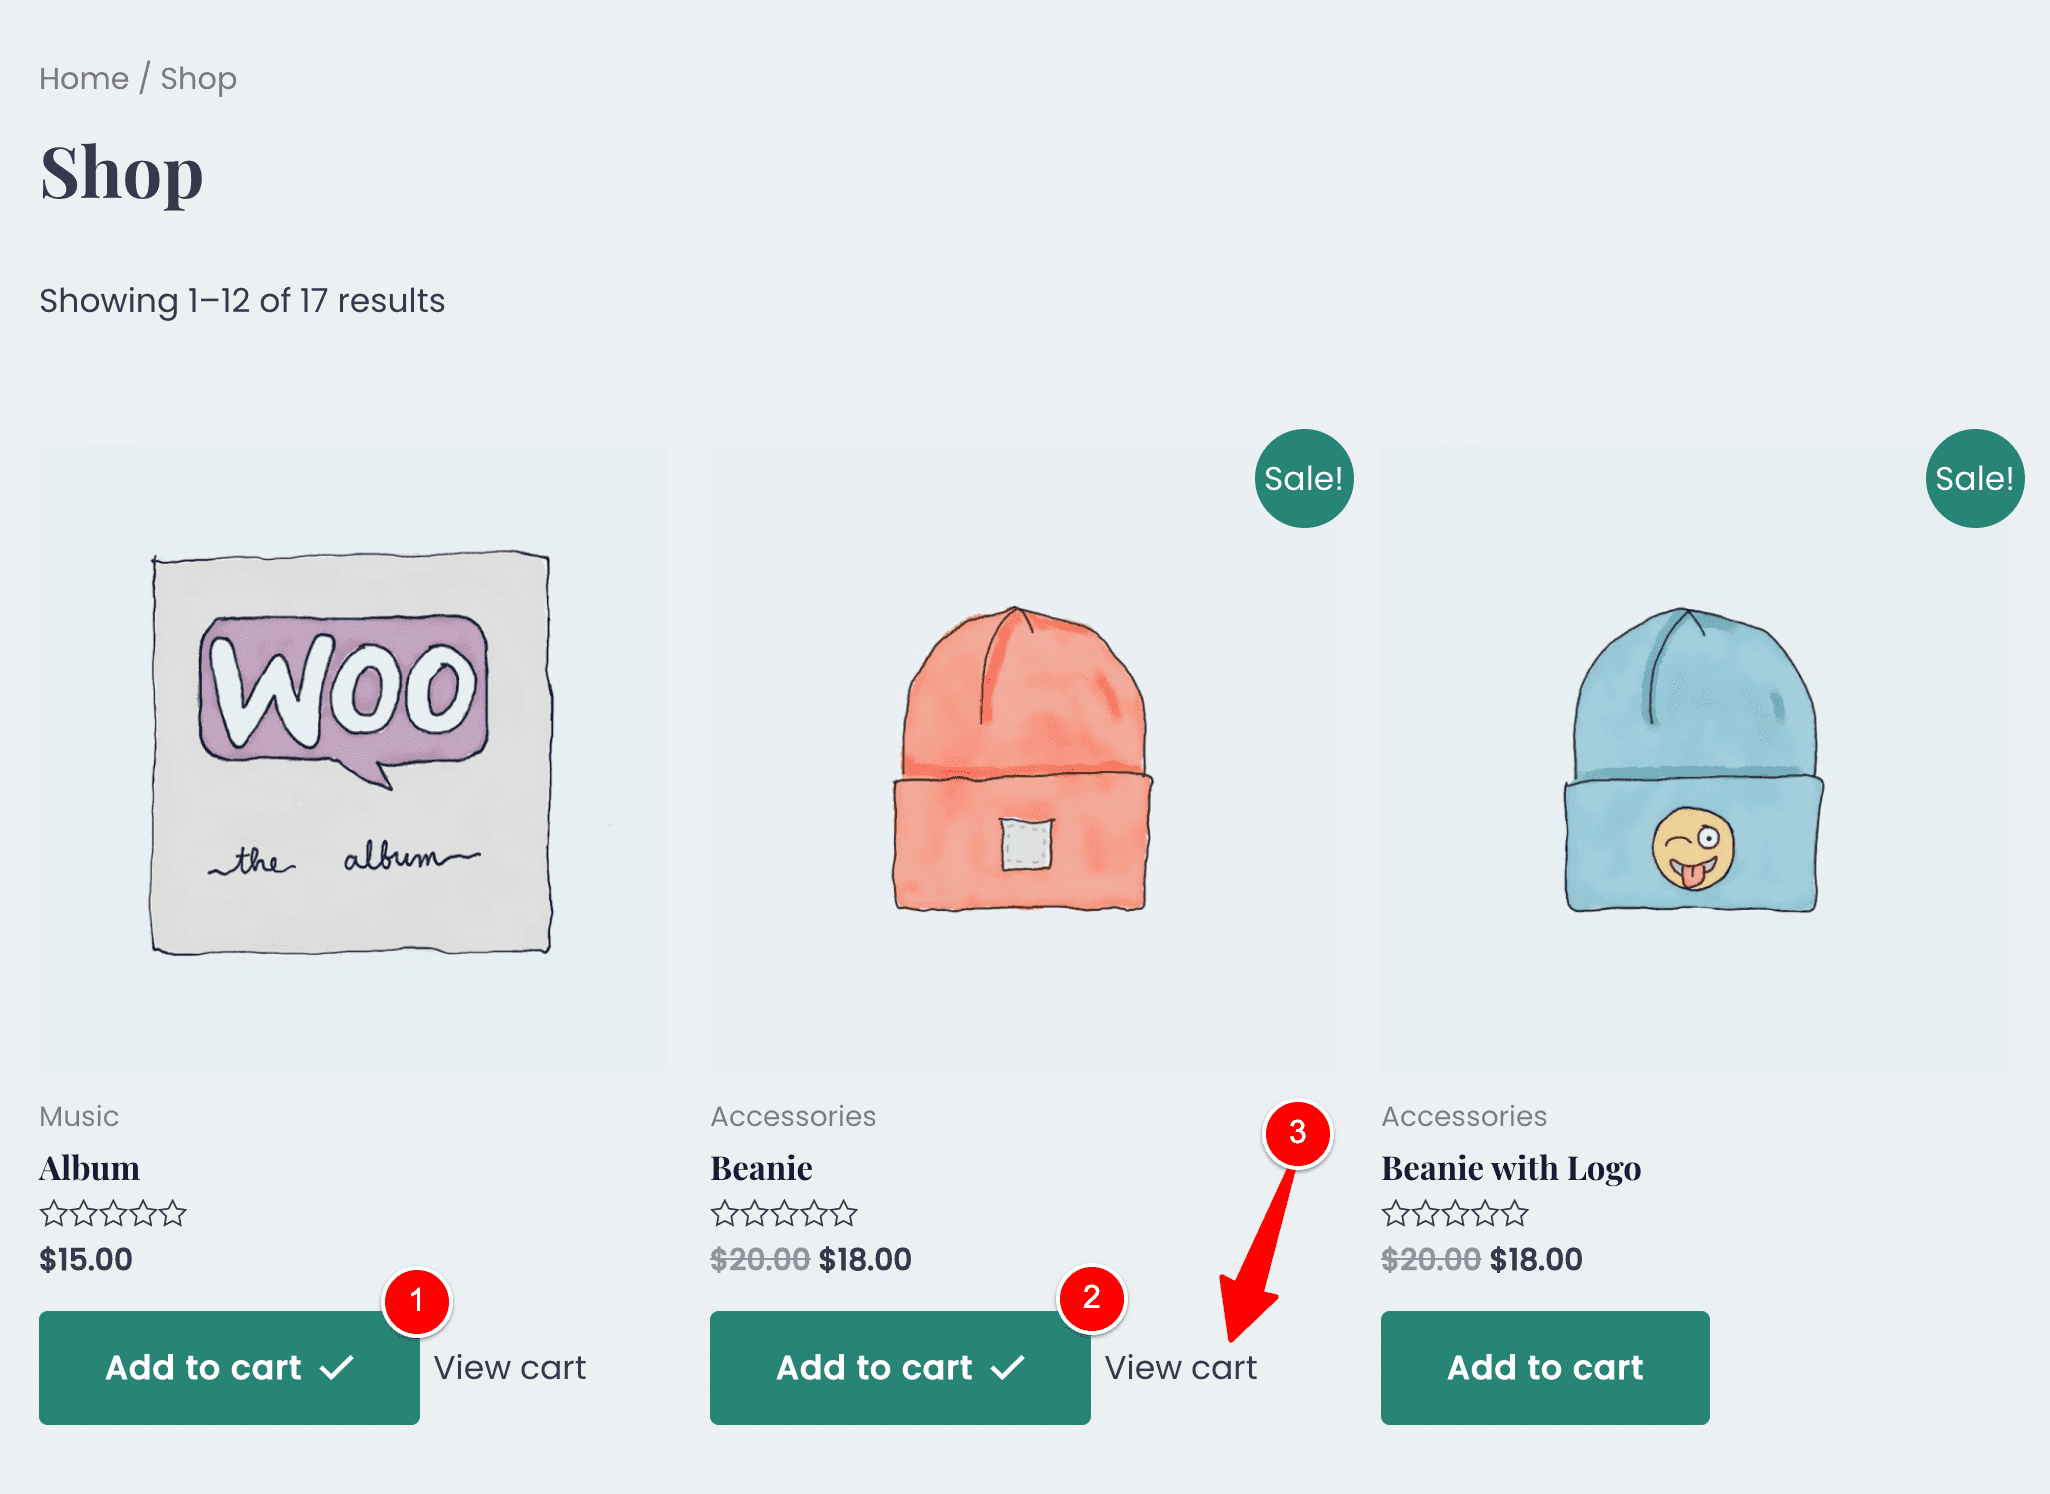
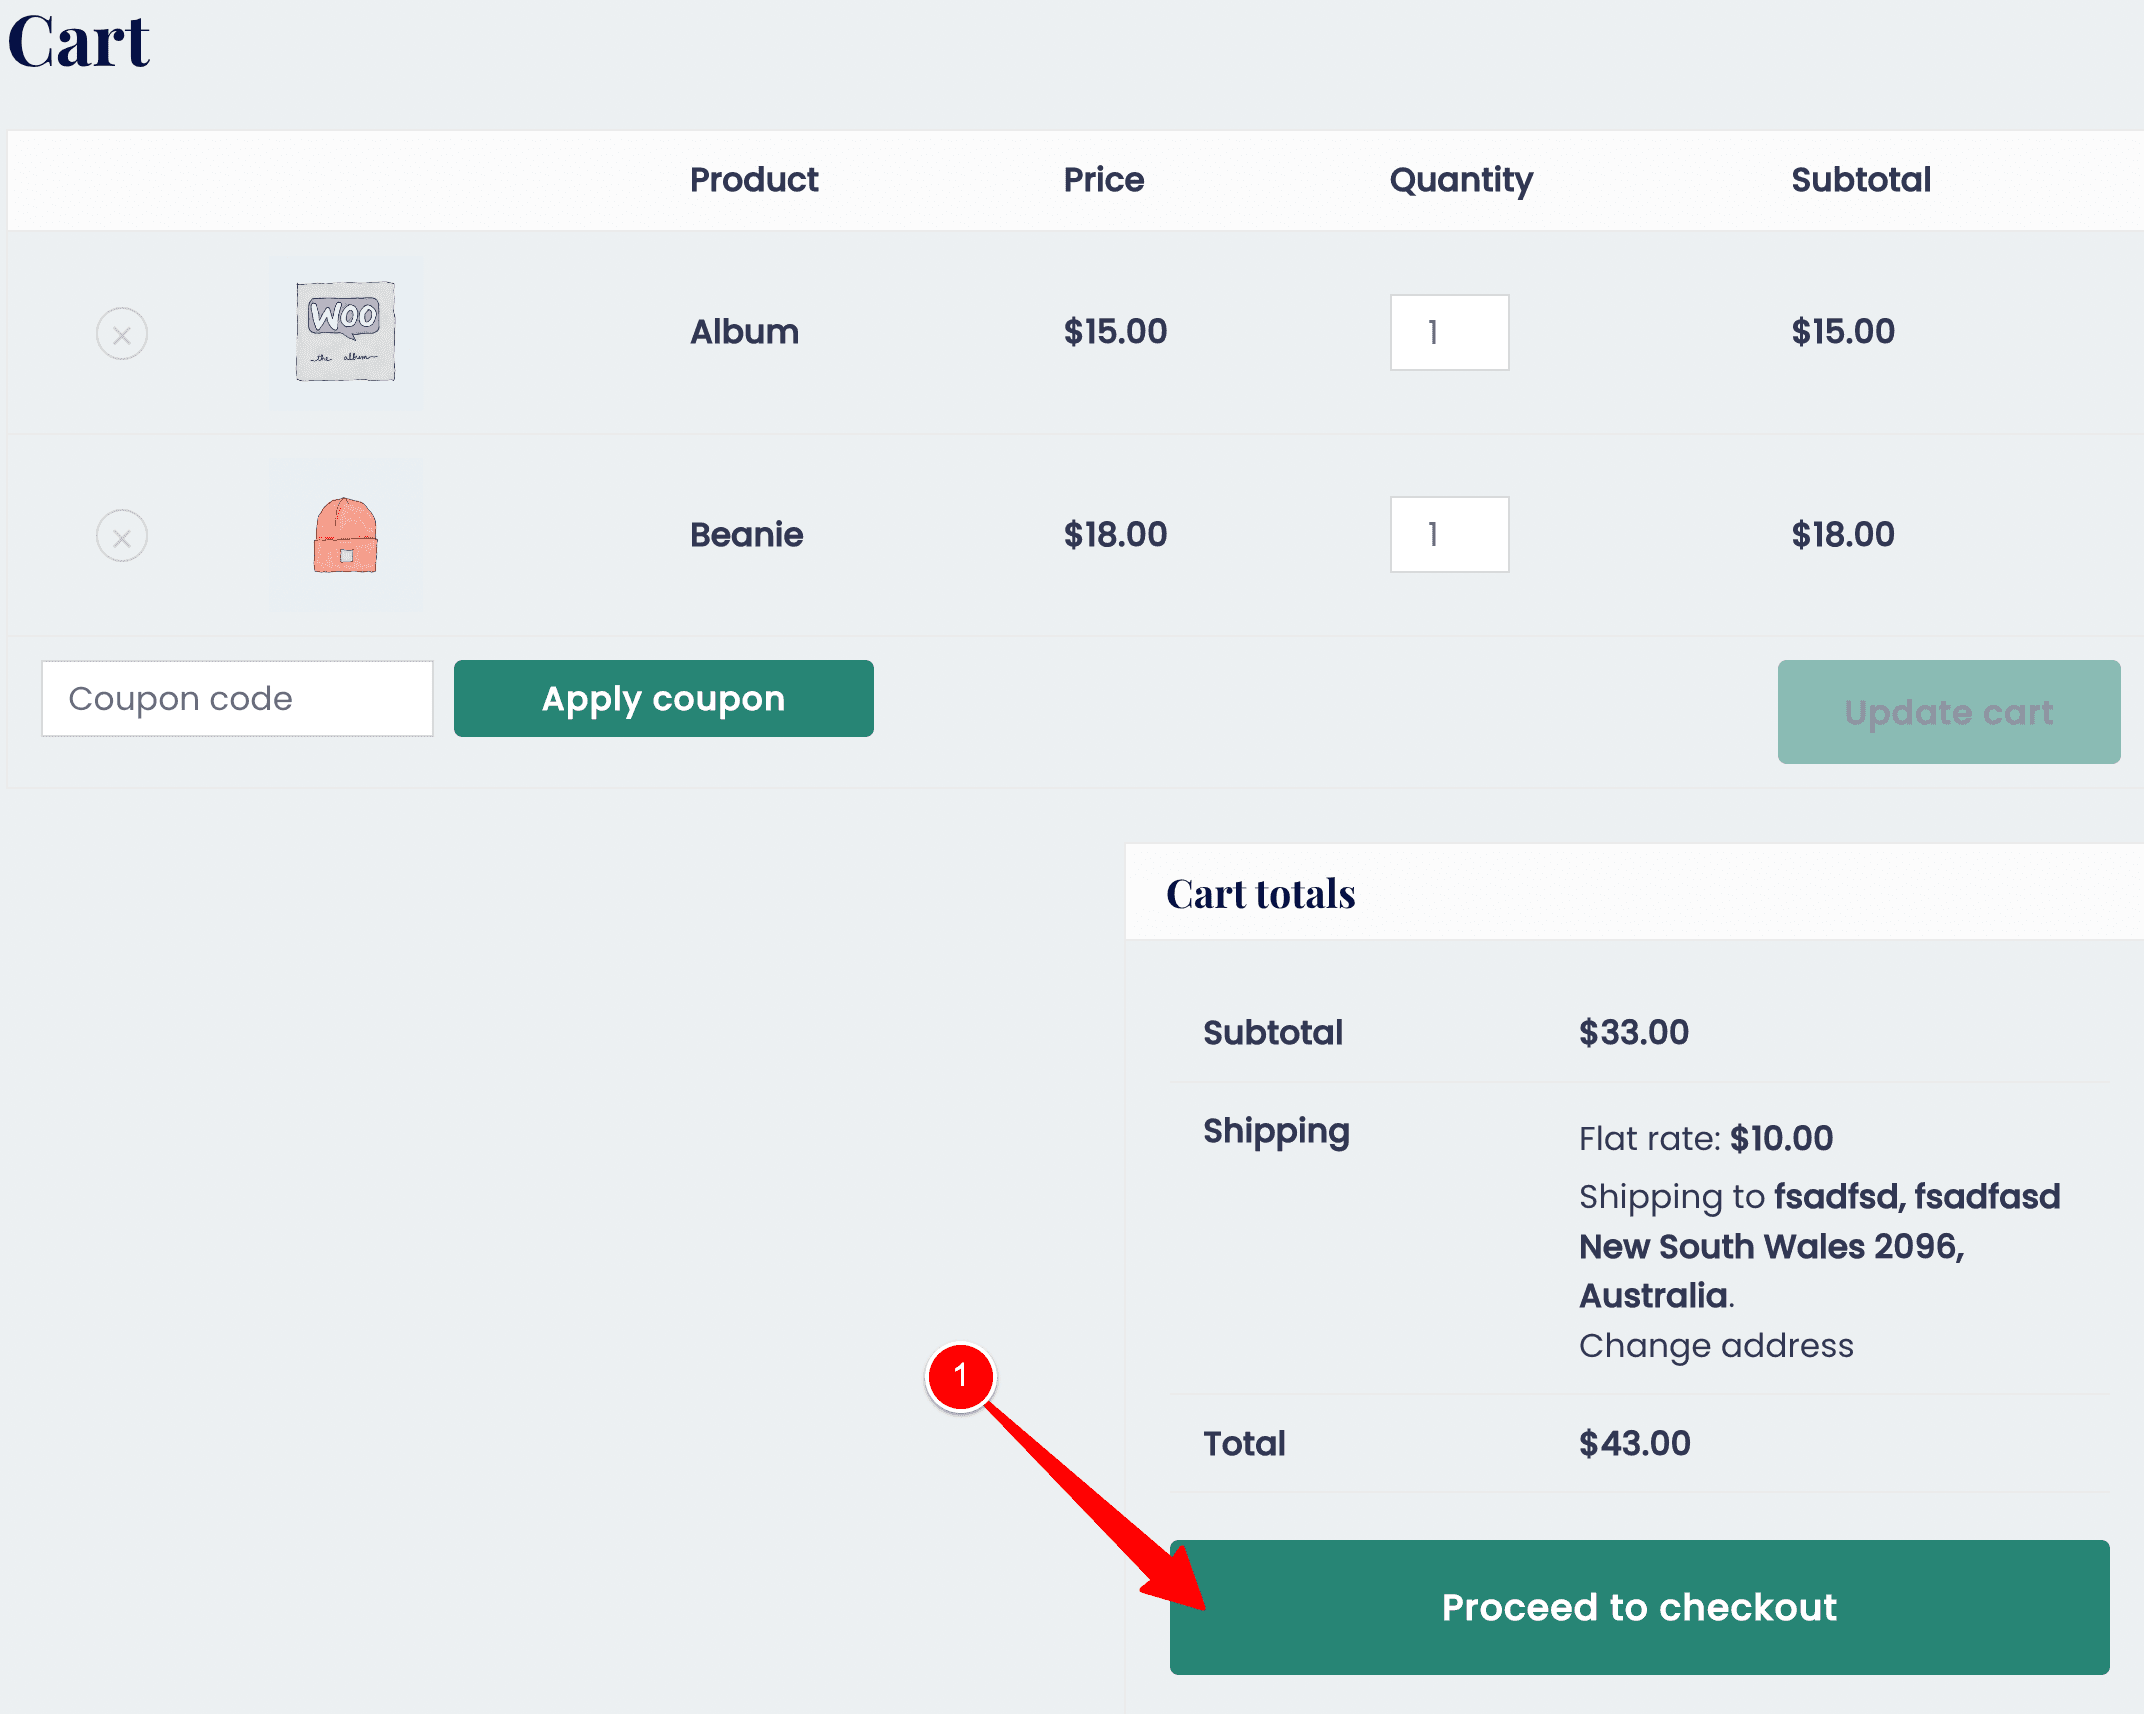
As you see in the above video, I add two products to my Cart and then I click View Cart at (3).
Then I click Proceed to Checkout (1).
Once I complete the Checkout Form I scroll down and click on the Confirm Your Order button and finally land on our customized Thank You page.
The final URL of our Thank You page is below…

https://demo.wagepirate.com/thankyou/your-order-is-in-the-house/?wfty_source=24766&key=wc_order_FvE2tWOHy16nX&order_id=24781&wfocu-si=2113fb6b3b524809a60af2ce66d2f098Code language: JavaScript (javascript)In the next section of this article, I’ll break down the different parts of this URL structure that FunnelKit uses to give you all the information you need.
FunnelKit: Thank You page URL structure
As above, the final URL of our Thank You page after all our customizations in this tutorial is…
https://demo.wagepirate.com/thankyou/your-order-is-in-the-house/?wfty_source=24766&key=wc_order_FvE2tWOHy16nX&order_id=24781&wfocu-si=2113fb6b3b524809a60af2ce66d2f098Code language: JavaScript (javascript)Here is a breakout of the URL structure and what everything refers to
- /thankyou/
All the Thank You pages we build in FunnelKit start with this slug. Thus, /thankyou/ is actually now the slug for the Thank You Page post type that FunnelKit registers in its plugin. And YES – you can build more than one Thank You page using FunnelKit (we will cover this in the next section) - /your-order-is-in-the-house/
As mentioned above, FunnelKit creates a Thank You Page post type and we have set this Post Type’s slug to be /thankyou/ in the FunnelKit plugin settings during this tutorial. In this Thank You Page post type, we create new Thank You pages and each thank you page (i.e. each post in this thank you page post type) has its own unique slug. For our Thank You page post that we set as the global checkout, its slug is /your-order-is-in-the-house/. Other thank you pages we create could have URLs like /thankyou/blackfriday-sale-optin/ or /thankyou/newtv-funnel/ etc – more on this in the next section - ?wfty_source=24766&key=wc_order_FvE2tWOHy16nX&
This code is added by FunnelKit and it uses this to run its engine. We don’t really need to worry about this – it’s just part of how the FunnelKit plugin works - &order_id=24781
This is the created WooCommerce Order ID for this customers transaction - &wfocu-si=2113fb6b3b524809a60af2ce66d2f098
Again, another bit of code that FunnelKit uses to run properly
So now that we’ve broken down the parts of this Thank You page URL in FunnelKit, I want to show you what I mean by the fact that you can create multiple Thank You pages in FunnelKit…
FunnelKit: Creating multiple Thank You pages
Previously in this article, we went into the settings in FunnelKit and set the default slug for all Thank You from the default /order-received/ TO /thankyou/.
Here was that setting…
I’ve shown you how this setting affects the thank you page your customers will see after they complete the default WooCommerce checkout on your website…
But this is just one thing that FunnelKit allows you to do.
FunnelKit also allows you to build entire Sales Funnels and Optin Funnels.
I have a great YouTube video (embedded below) that you can watch that shows you how to build a Sales Funnel using FunnelKit…
But the main premise is that you can set up the following using FunnelKit (the parts in italics are the steps your user takes in your website):
- Global Checkout (i.e. main WooCommerce Checkout)
User: Cart / Checkout / Upsells / Thank You Page 1 - Black Friday Deal – get this watch 50% OFF
User: Sales Page for the watch deal / Checkout / Upsells / Thank You Page 2 - Upsell a private coaching package to people who bought your online course
User: Sales Page for private coaching / Checkout / Thank You Page 3
Thus, FunnelKit allows you to customize your default WooCommerce checkout AND also set up individual landing pages with their own Checkout Pages and Thank You pages.
When you do this, your website will have more than 1 Thank You page (i.e. one for your main Woo checkout and Thank you pages for each of your sales funnels) and thus…
they will all start with /thankyou/ (as per our demo here today) and then have their unique thank you page URL afterwards, i.e.
- Global Checkout (i.e. main WooCommerce Checkout)
Thank You Page: /thankyou/globalcheckout-thankyou/ - Black Friday Deal – get this watch 50% OFF
Thank You Page: /thankyou/blackfridaywatchdeal-thankyou/ - Upsell private coaching package to people who bought your online course
Thank You Page: /thankyou/privatecoaching-thankyou/
Again, some things are better left for a video so please watch the videos on this page because I truly feel EVERY WooCommerce website should be using FunnelKit and Sales Funnels.
Other Page Builders & how to set this up in FunnelKit
If you’ve made it this far in this article – amazing!
I’ve put A LOT of time into writing this out in the best way I can so that I don’t scare you off…
Because this really is something I think all WooCommerce stores should be doing with their websites:
- Set up FunnelKit
- Set up a custom Checkout and Thank You page
- Add one-click Upsells between the Checkout and Thank you page (FunnelKit allows you to do this and helps you make A LOT more extra revenue)
- Build a Sales Funnel for each of your best-selling products / offers
But one thing I haven’t covered this far is how you would do all of this if you aren’t using Elementor or one of the other page builders listed here inside FunnelKit…
In this tutorial and across my website I usually use Elementor in my examples because FunnelKit has pre-built templates for it and it makes these tutorials much easier to get out for you faster.
HOWEVER…
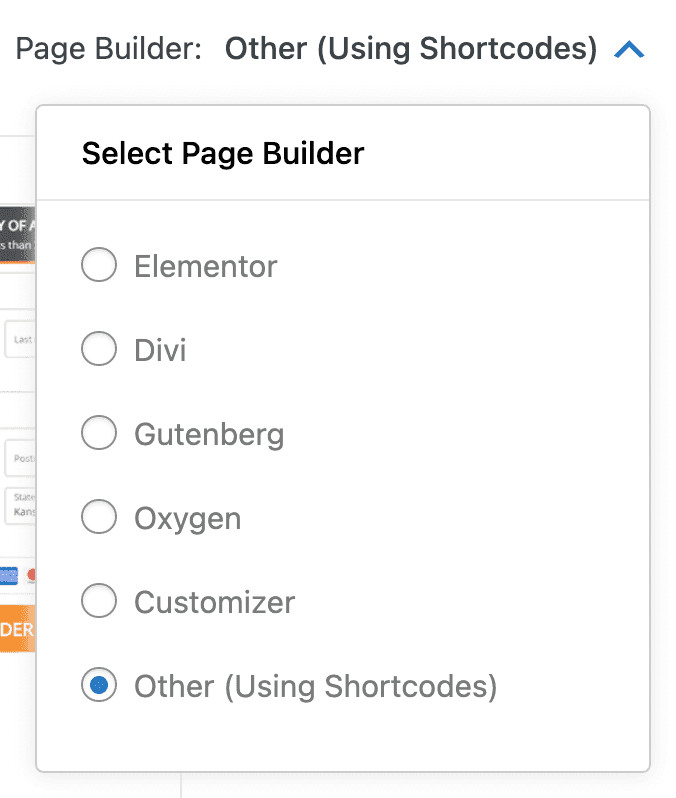
In my business, I actually select Other (Using Shortcodes) because I use page builders that are not listed in that dropdown.
I was using Beaver Builder until I recently swapped over to using Bricks Builder because of how fast it is.
To get an idea of how you’d use a page builder that is NOT Elementor with FunnelKit, head on over to my YouTube channel.
I have a whole playlist dedicated to FunnelKit and showing people how it all works.
I also have a lot of articles you can find on this website, too!
Leave a Reply