I have found the easiest way to redirect WooCommerce to a Custom Thank You Page after Checkout and this post will show you how to set it up in under 1 minute.
Using this method, you can design your Thank You page using your favourite page builder for WordPress and set up your redirect to a custom Thank You page without having to write any code.
The Final Result
Here is an animation that shows the final result of what you’ll learn in this article…
Also – here is a short video that shows you more in-depth how this will all work.
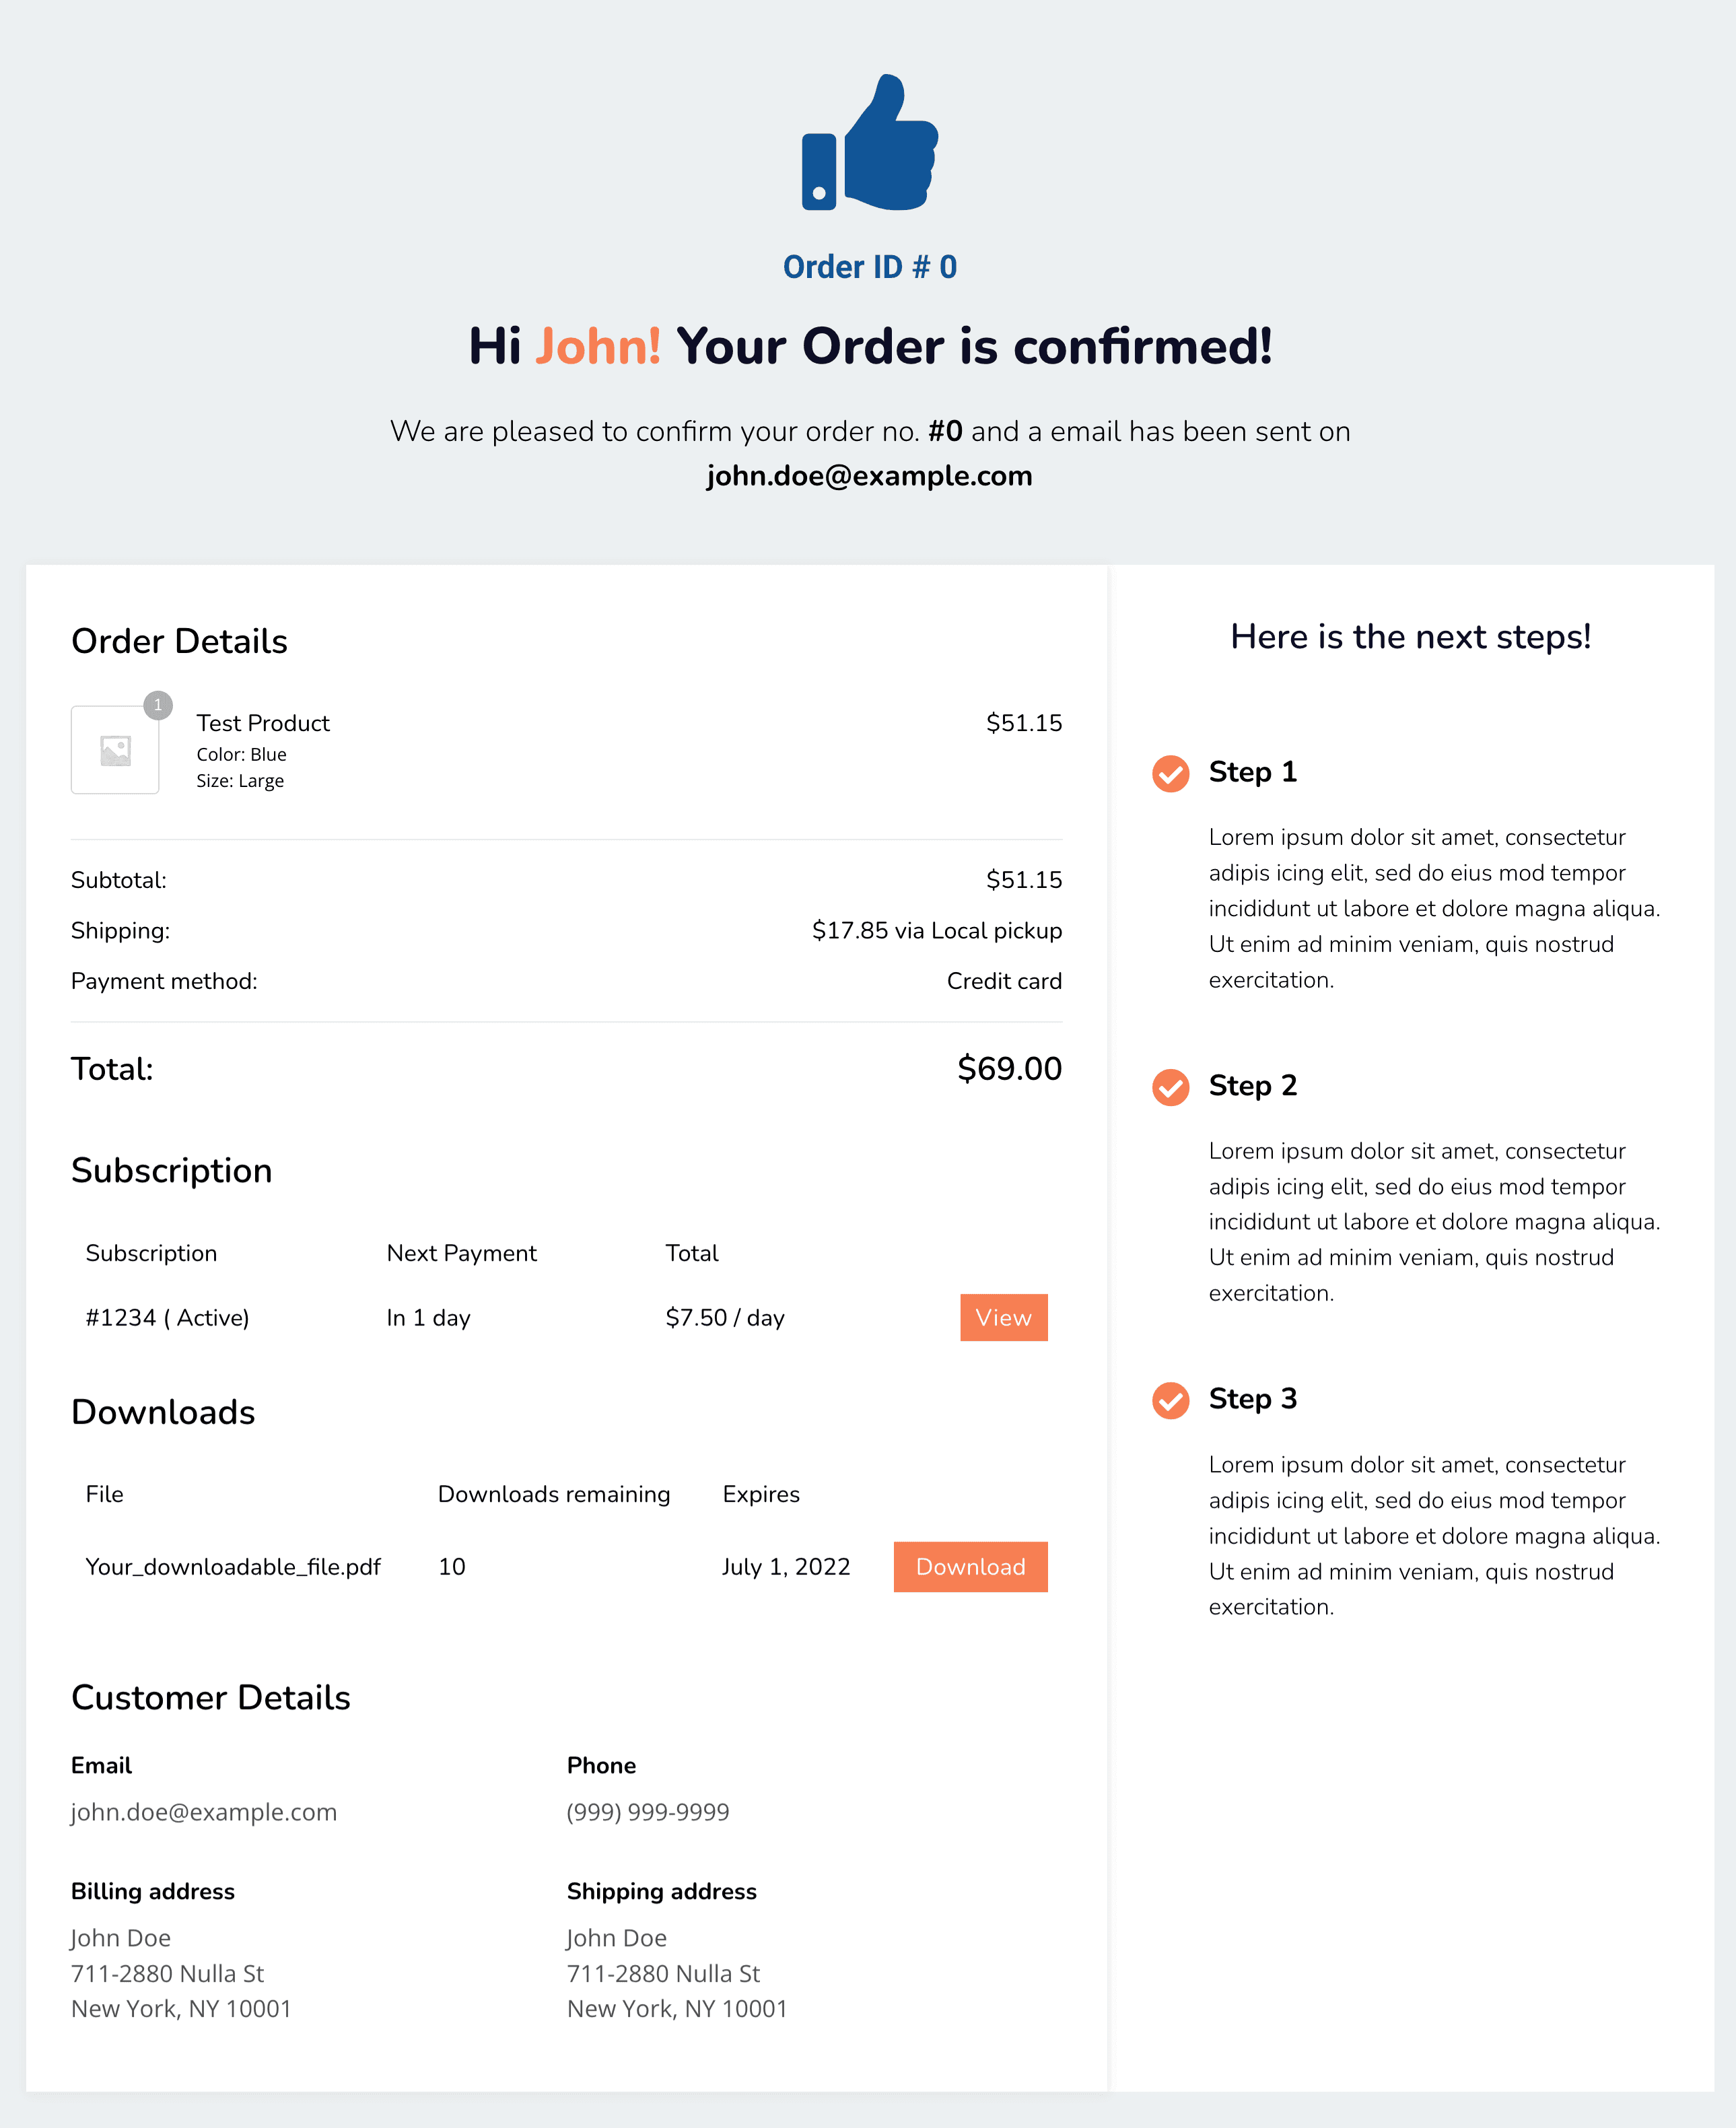
In the video, you can see that we created a custom Checkout Page design and once the customer completes the Checkout Form, they are redirected to a Thank You page that I have also customized using my Page Builder.
In this tutorial, I’ll show you how to do everything in the above video, including how to:
- Create a custom Checkout Page that you can edit using your favourite Page Builder
- Create a custom Thank You Page (that you can edit using your Page Builder)
- Set this Checkout Page to be your default WooCommerce Checkout Page
- Redirect from your Checkout Page to your custom Thank You page
To do this, we’ll use one of my favourite WordPress plugins for [year] called FunnelKit AND you can use the FREE version of FunnelKit to achieve all of this.
Now, let me explain this first…
PHP Code to redirect to a custom Thank You page
I understand that you’ve searched Google for a way to redirect your users to a custom thank you page in WooCommerce and you’re probably just looking for a bit of PHP code you can copy and paste into your functions.php file or something similar.
But I promise you this…
I previously used a PHP snippet to achieve this redirect but now in [year] there is a MUCH better way to do this.
If you want to use the old PHP method, I have added this at the end of this article for you BUT I would recommend seeing how I achieve this redirect using a free WordPress plugin as it is a MUCH better way.
So, let me quickly summarise why I recommend you use this new method…
Why I recommend you use FunnelKit
I recommend that you use the FunnelKit plugin for WordPress to redirect your customers to a custom Thank You page after checkout in WooCommerce.
Now, I install the FunnelKit plugin on all my websites these days because it is THE #1 PLUGIN I use to make money online with WordPress and in my businesses.
I use FunnelKit to:
- Build my entire Sales Funnels (it replaces ClickFunnels and runs in WordPress)
- Build my Optin Pages
- Build my Sales Pages
- Create my one-click Upsells that run after checkout in WooCommerce.
So that should give you an idea of why I install it on every website I currently run.
FunnelKit is the plugin you want to use to build your Mailing List and make more sales for your WooCommerce store.
Now, 3 features that FunnelKit allows you to do which are relevant to today’s article are:
- FunnelKit allows you to create a custom WooCommerce Checkout Page design using your favourite WordPress Page Builder.
- FunnelKit allows you to design your Thank You page using your favourite Page Builder
- FunnelKit will automatically redirect everyone from your custom WooCommerce Checkout Page to your custom WooCommerce Thank You page that you’ve created inside FunnelKit.
You can read my full review of FunnelKit below to get more of an idea of what it does…
Also – here is an article I’ve written that will give you an idea of why FunnelKit is so powerful:
RELATED: Two Column WooCommerce Checkout Page In 30 Seconds (With Code)
RELATED: WooCommerce Checkout Page Like Shopify (Only takes 1 minute) + BONUS Video
NOTE: FunnelKit also has a lifetime deal that might be a great investment for the right type of business.
But for this tutorial we are going to focus specifically on a feature inside FunnelKit called the Global Checkout.
The Global Checkout feature is what will allow us to redirect our customers to a custom Thank You Page URL in FunnelKit in under 1 minute.
VIDEO: The Video Tutorial
In the first 60 seconds of this video, I will show you the easiest way to redirect customers to a custom Thank You page after checkout
THEN I spend the remainder of this video showing you what to put on your Thank You page to make more profit, including:
- How to add one-click Upsells and Downsells after checkout
- How to design your WooCommerce Checkout Page using your favourite page builder
- + many more tips, all aimed at helping you sell more of your products to your customers
Here is that video…
FunnelKit: Redirect to a custom Thank You page using a Plugin
This section will show you how easy it is to redirect your WooCommerce checkout to a custom Thank You page using the FunnelKit plugin for WordPress.
NOTE: This works with ALL Page Builders
FunnelKit works with ALL Page Builders.
For this article, I will first show you how to set this up with Elementor and then I will show you how to set it up with other page builders.
So, firstly…
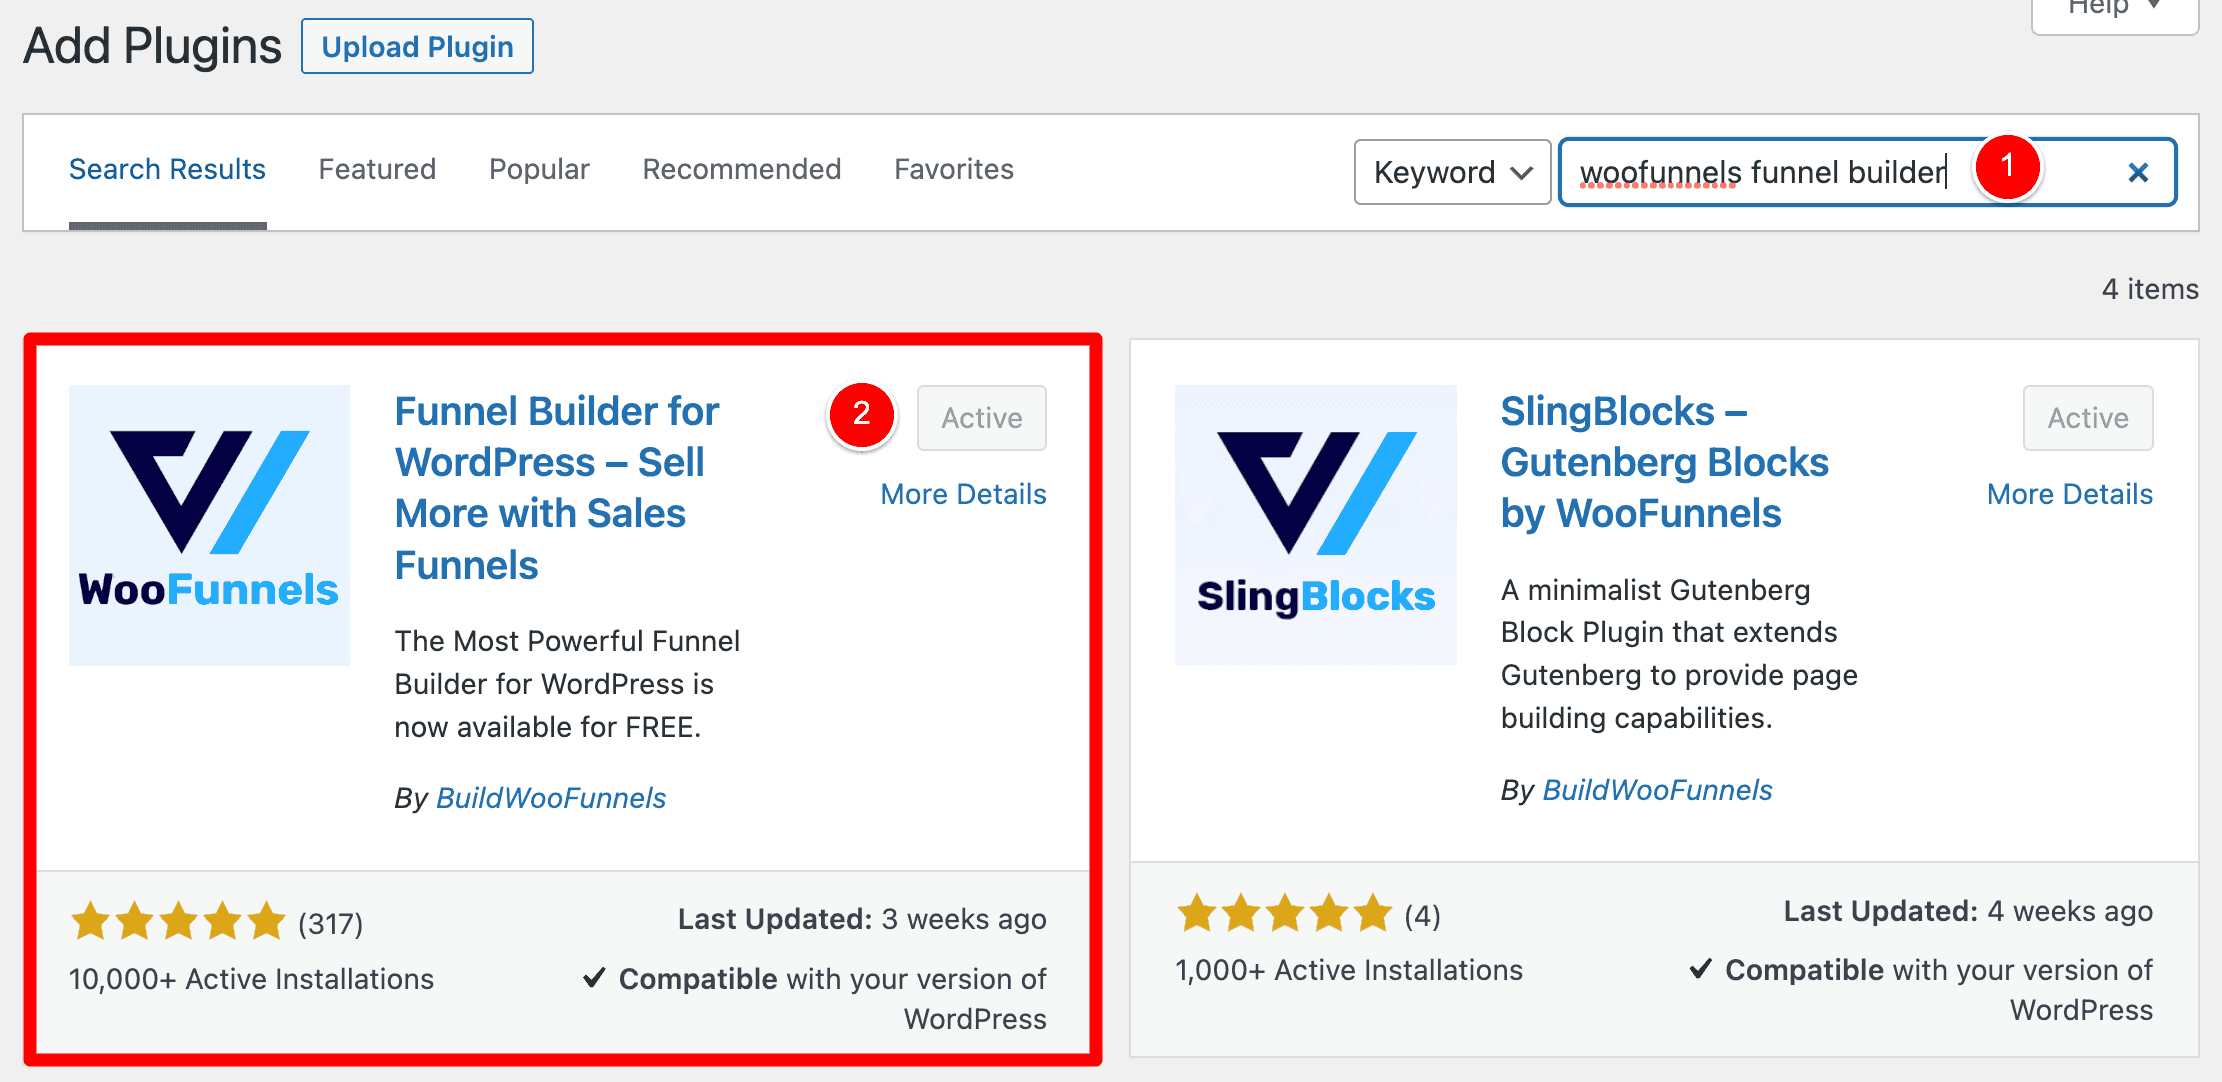
Install FunnelKit
I’m not going to bore you with “how to install FunnelKit” so please go ahead and install the free version of FunnelKit like you would any other WordPress plugin.
Once FunnelKit is installed…
Create your Global Checkout Funnel
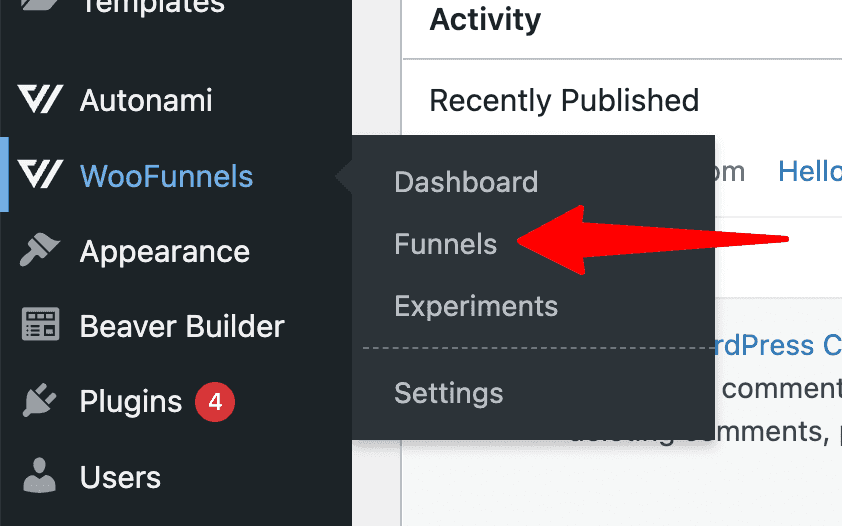
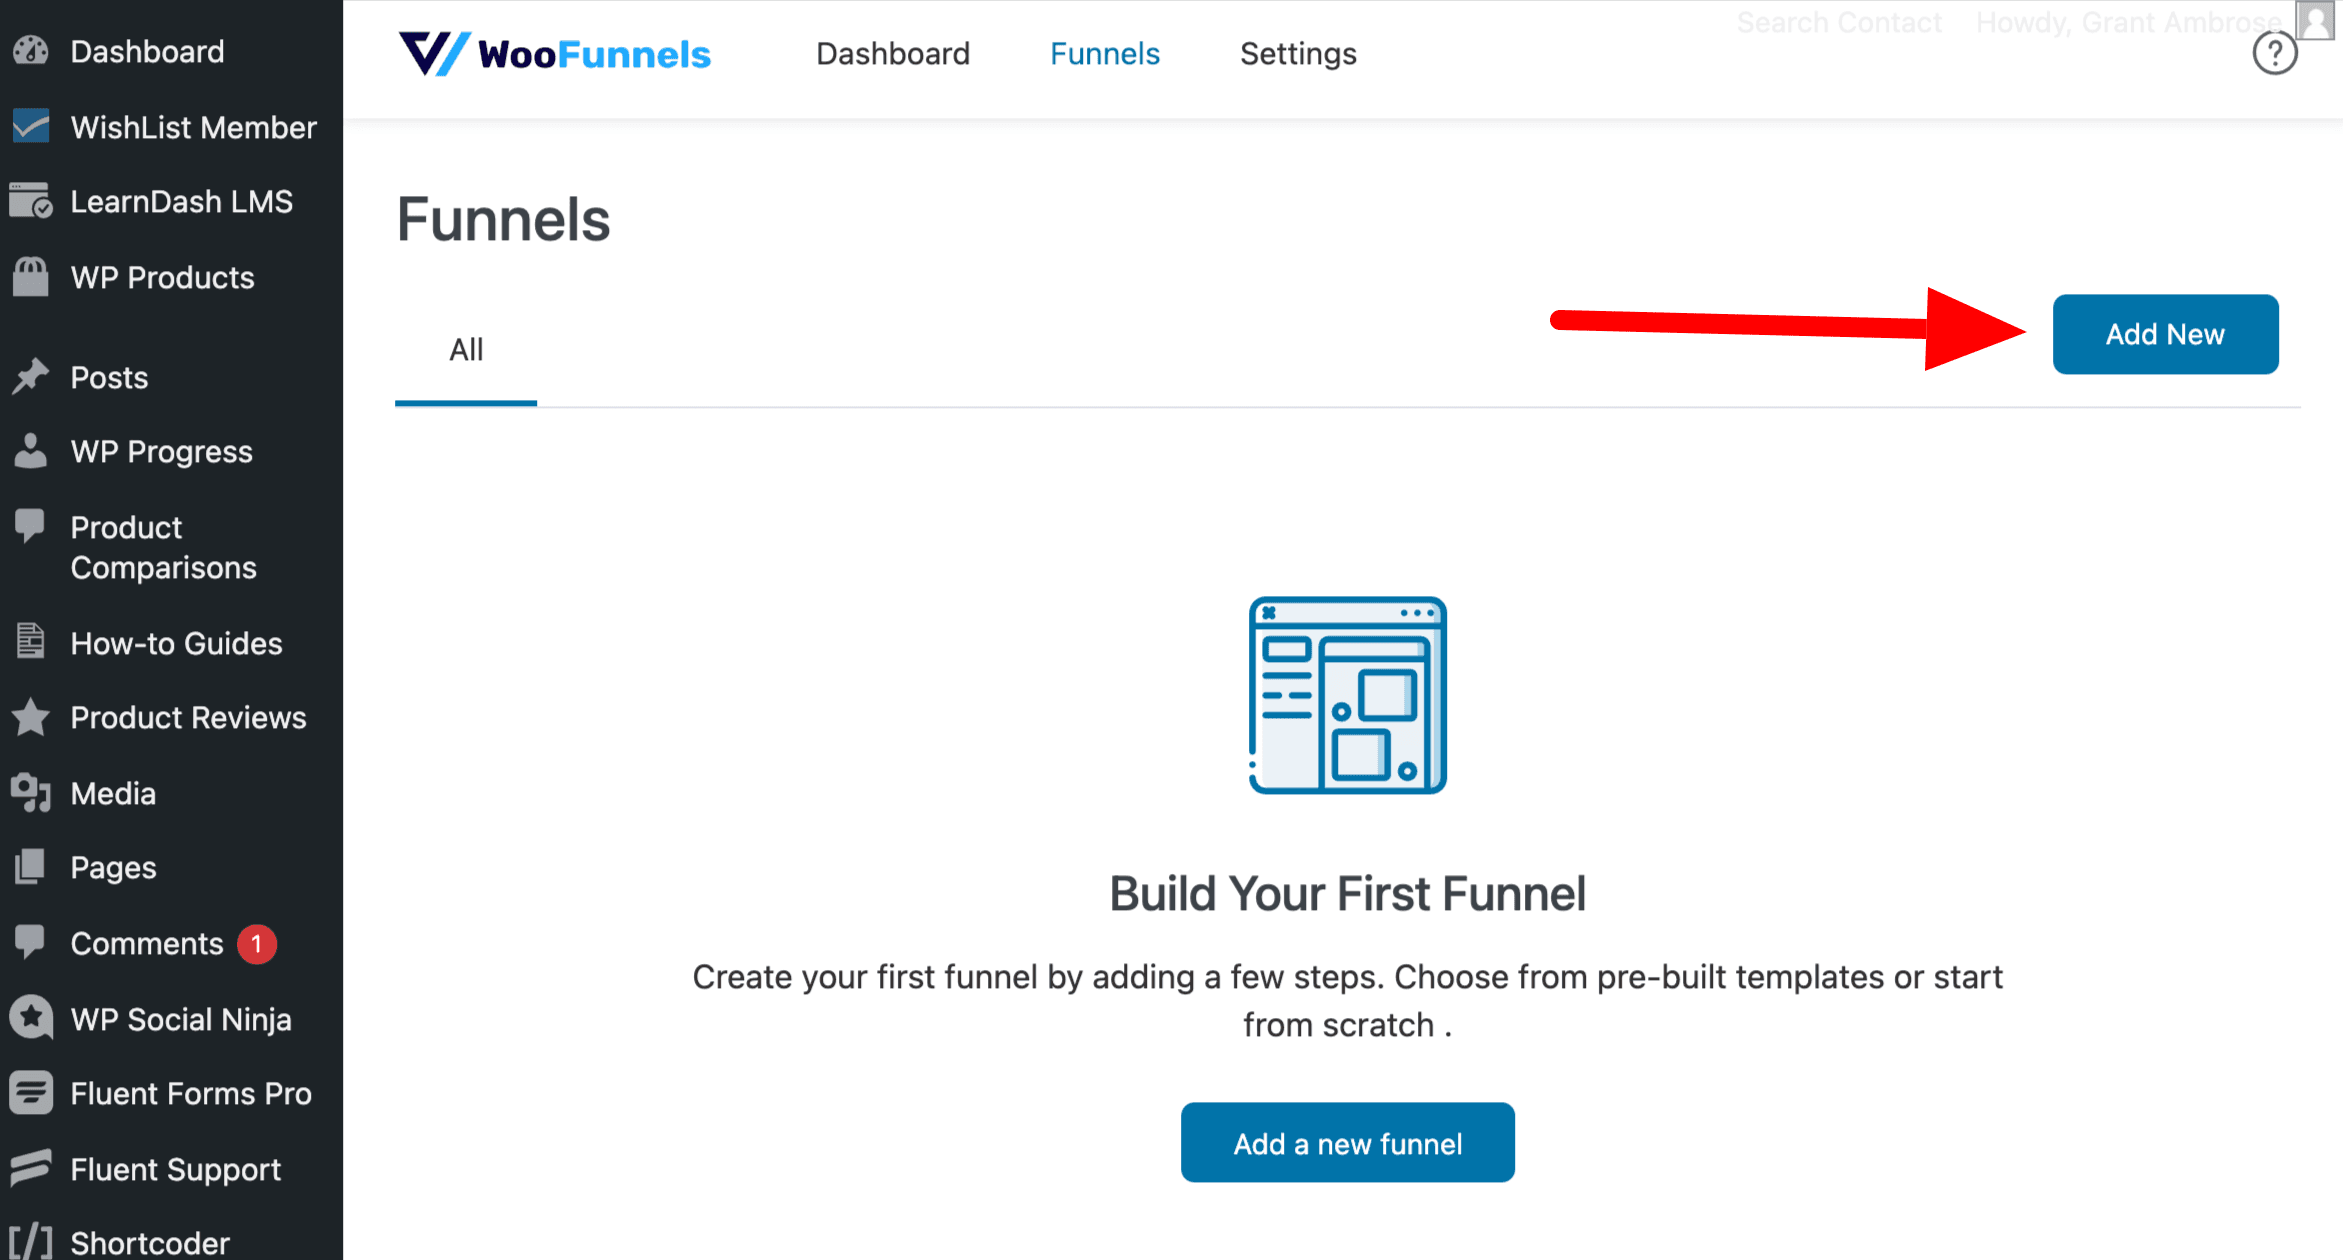
Go to FunnelKit > Funnels.
Then click Add New to create your new funnel.
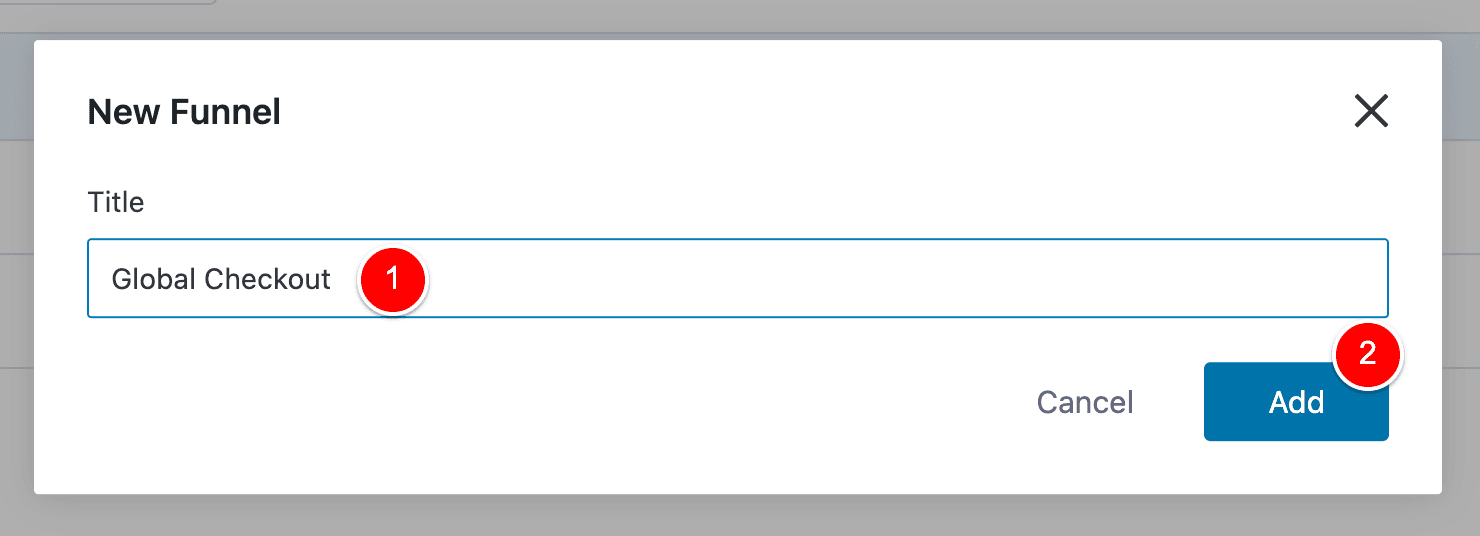
Name this funnel Global Checkout (I’ll explain why you should call it Global Checkout in just a second) and then click Add.
Now you have successfully created your Checkout Funnel.
Next, we need to add our two steps into this funnel:
- The Checkout Page with our WooCommerce Checkout form
- The Thank You page with our custom design
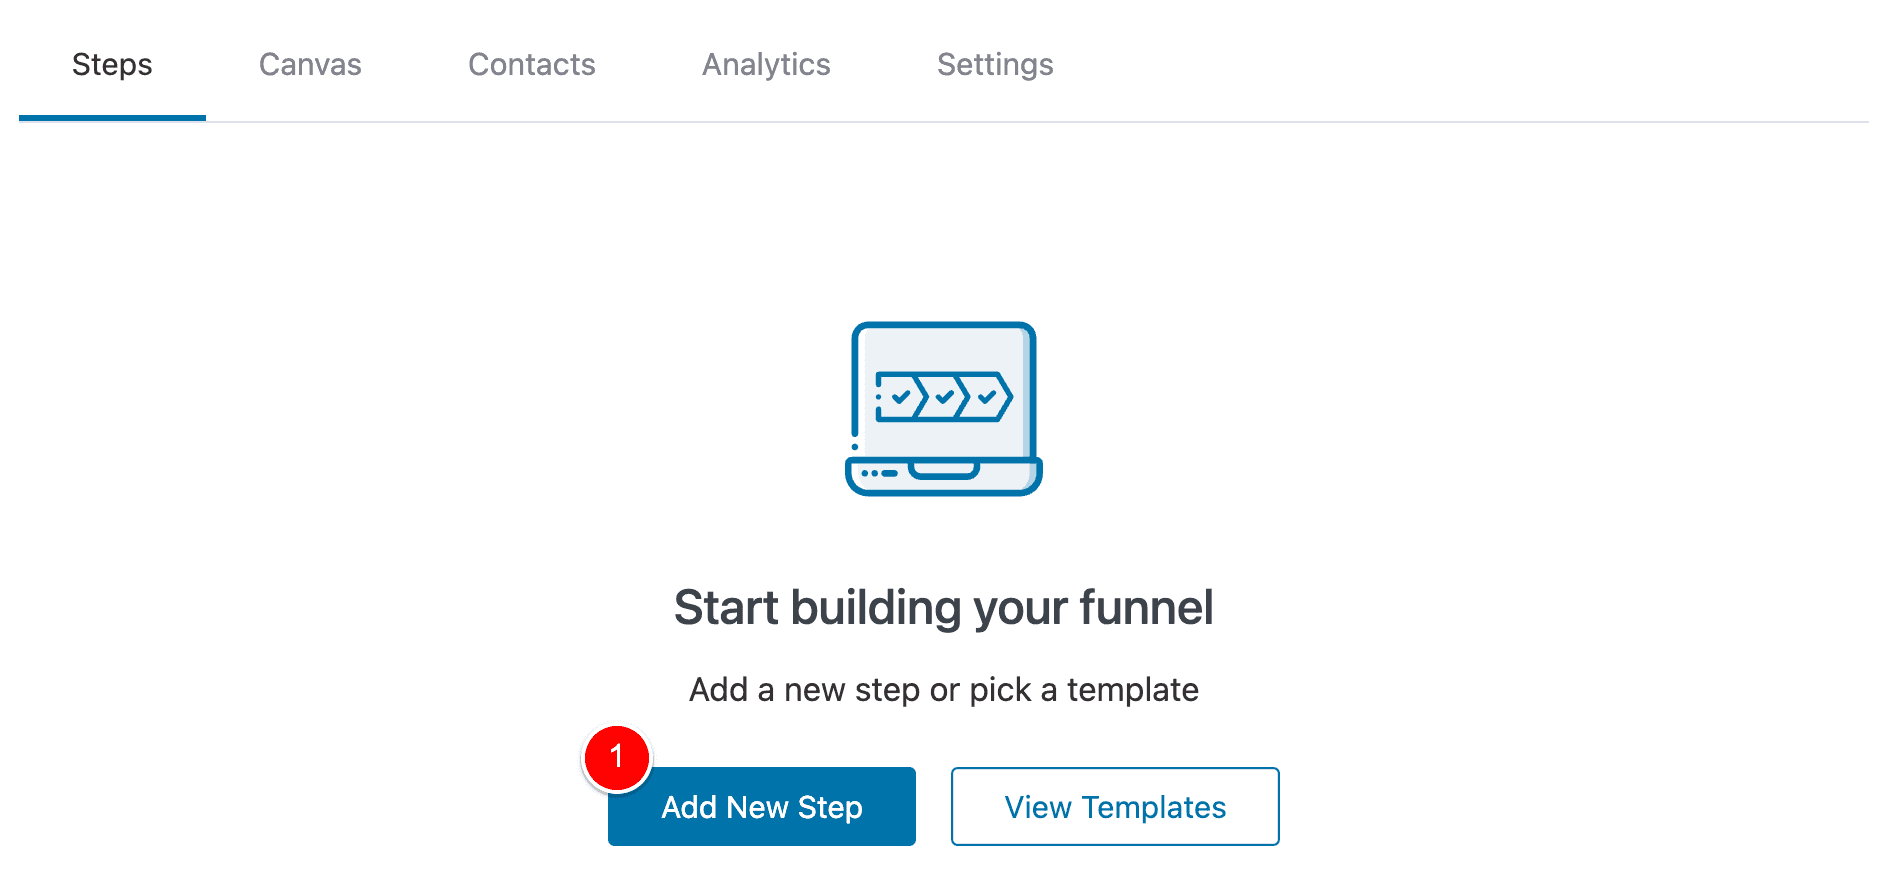
Let’s start with (1) our Checkout Page step in our funnel…
Create your Checkout Page funnel step
To create our Checkout Page step in the funnel, click Add New Step (1).
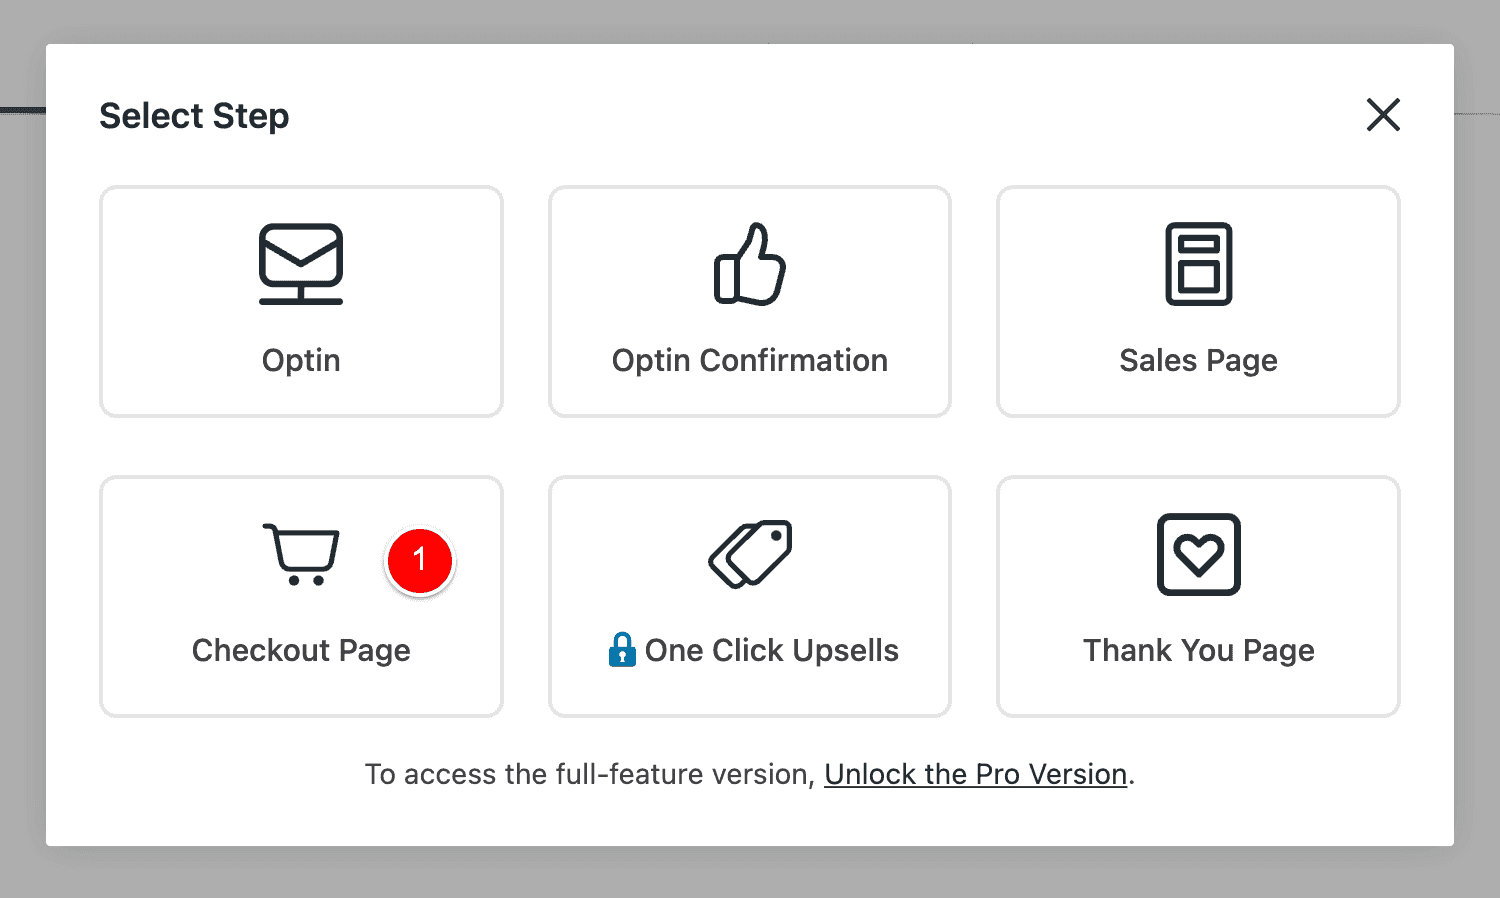
Then click on Checkout Page (1).
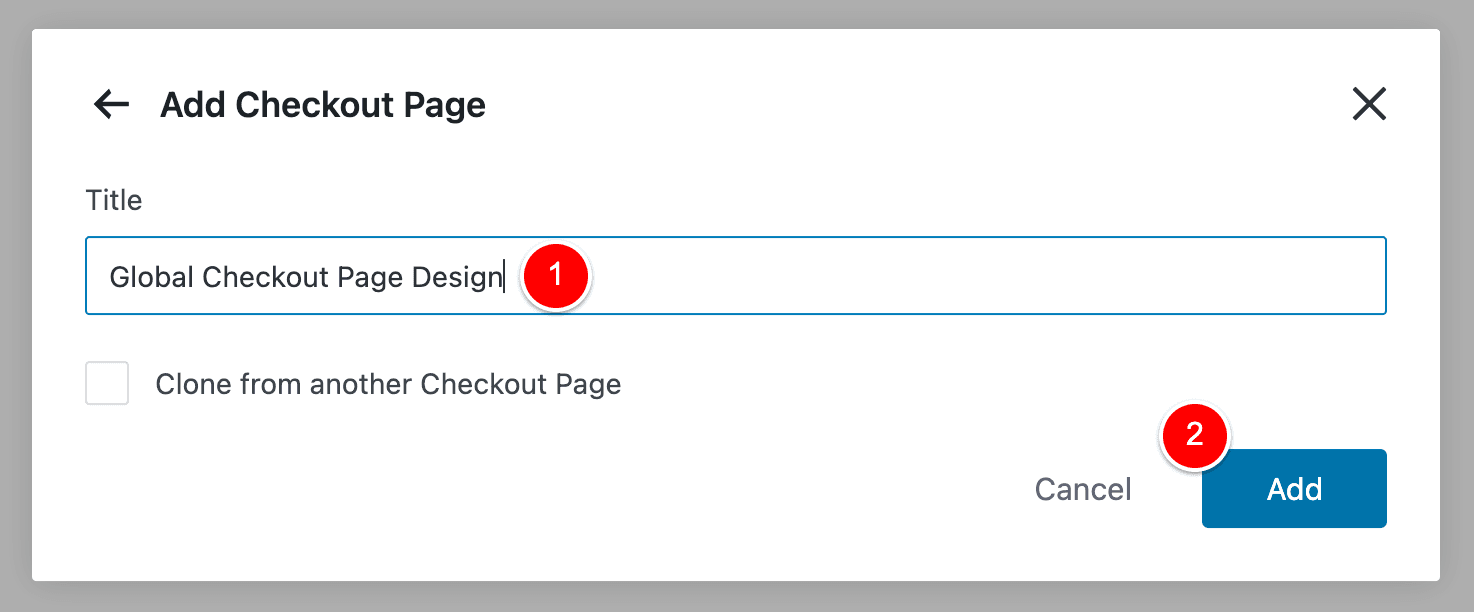
Name your Checkout Page (1) and then click Add (2).
Now that we’ve created this Checkout Page funnel step, we need to go ahead and design the Checkout Page.
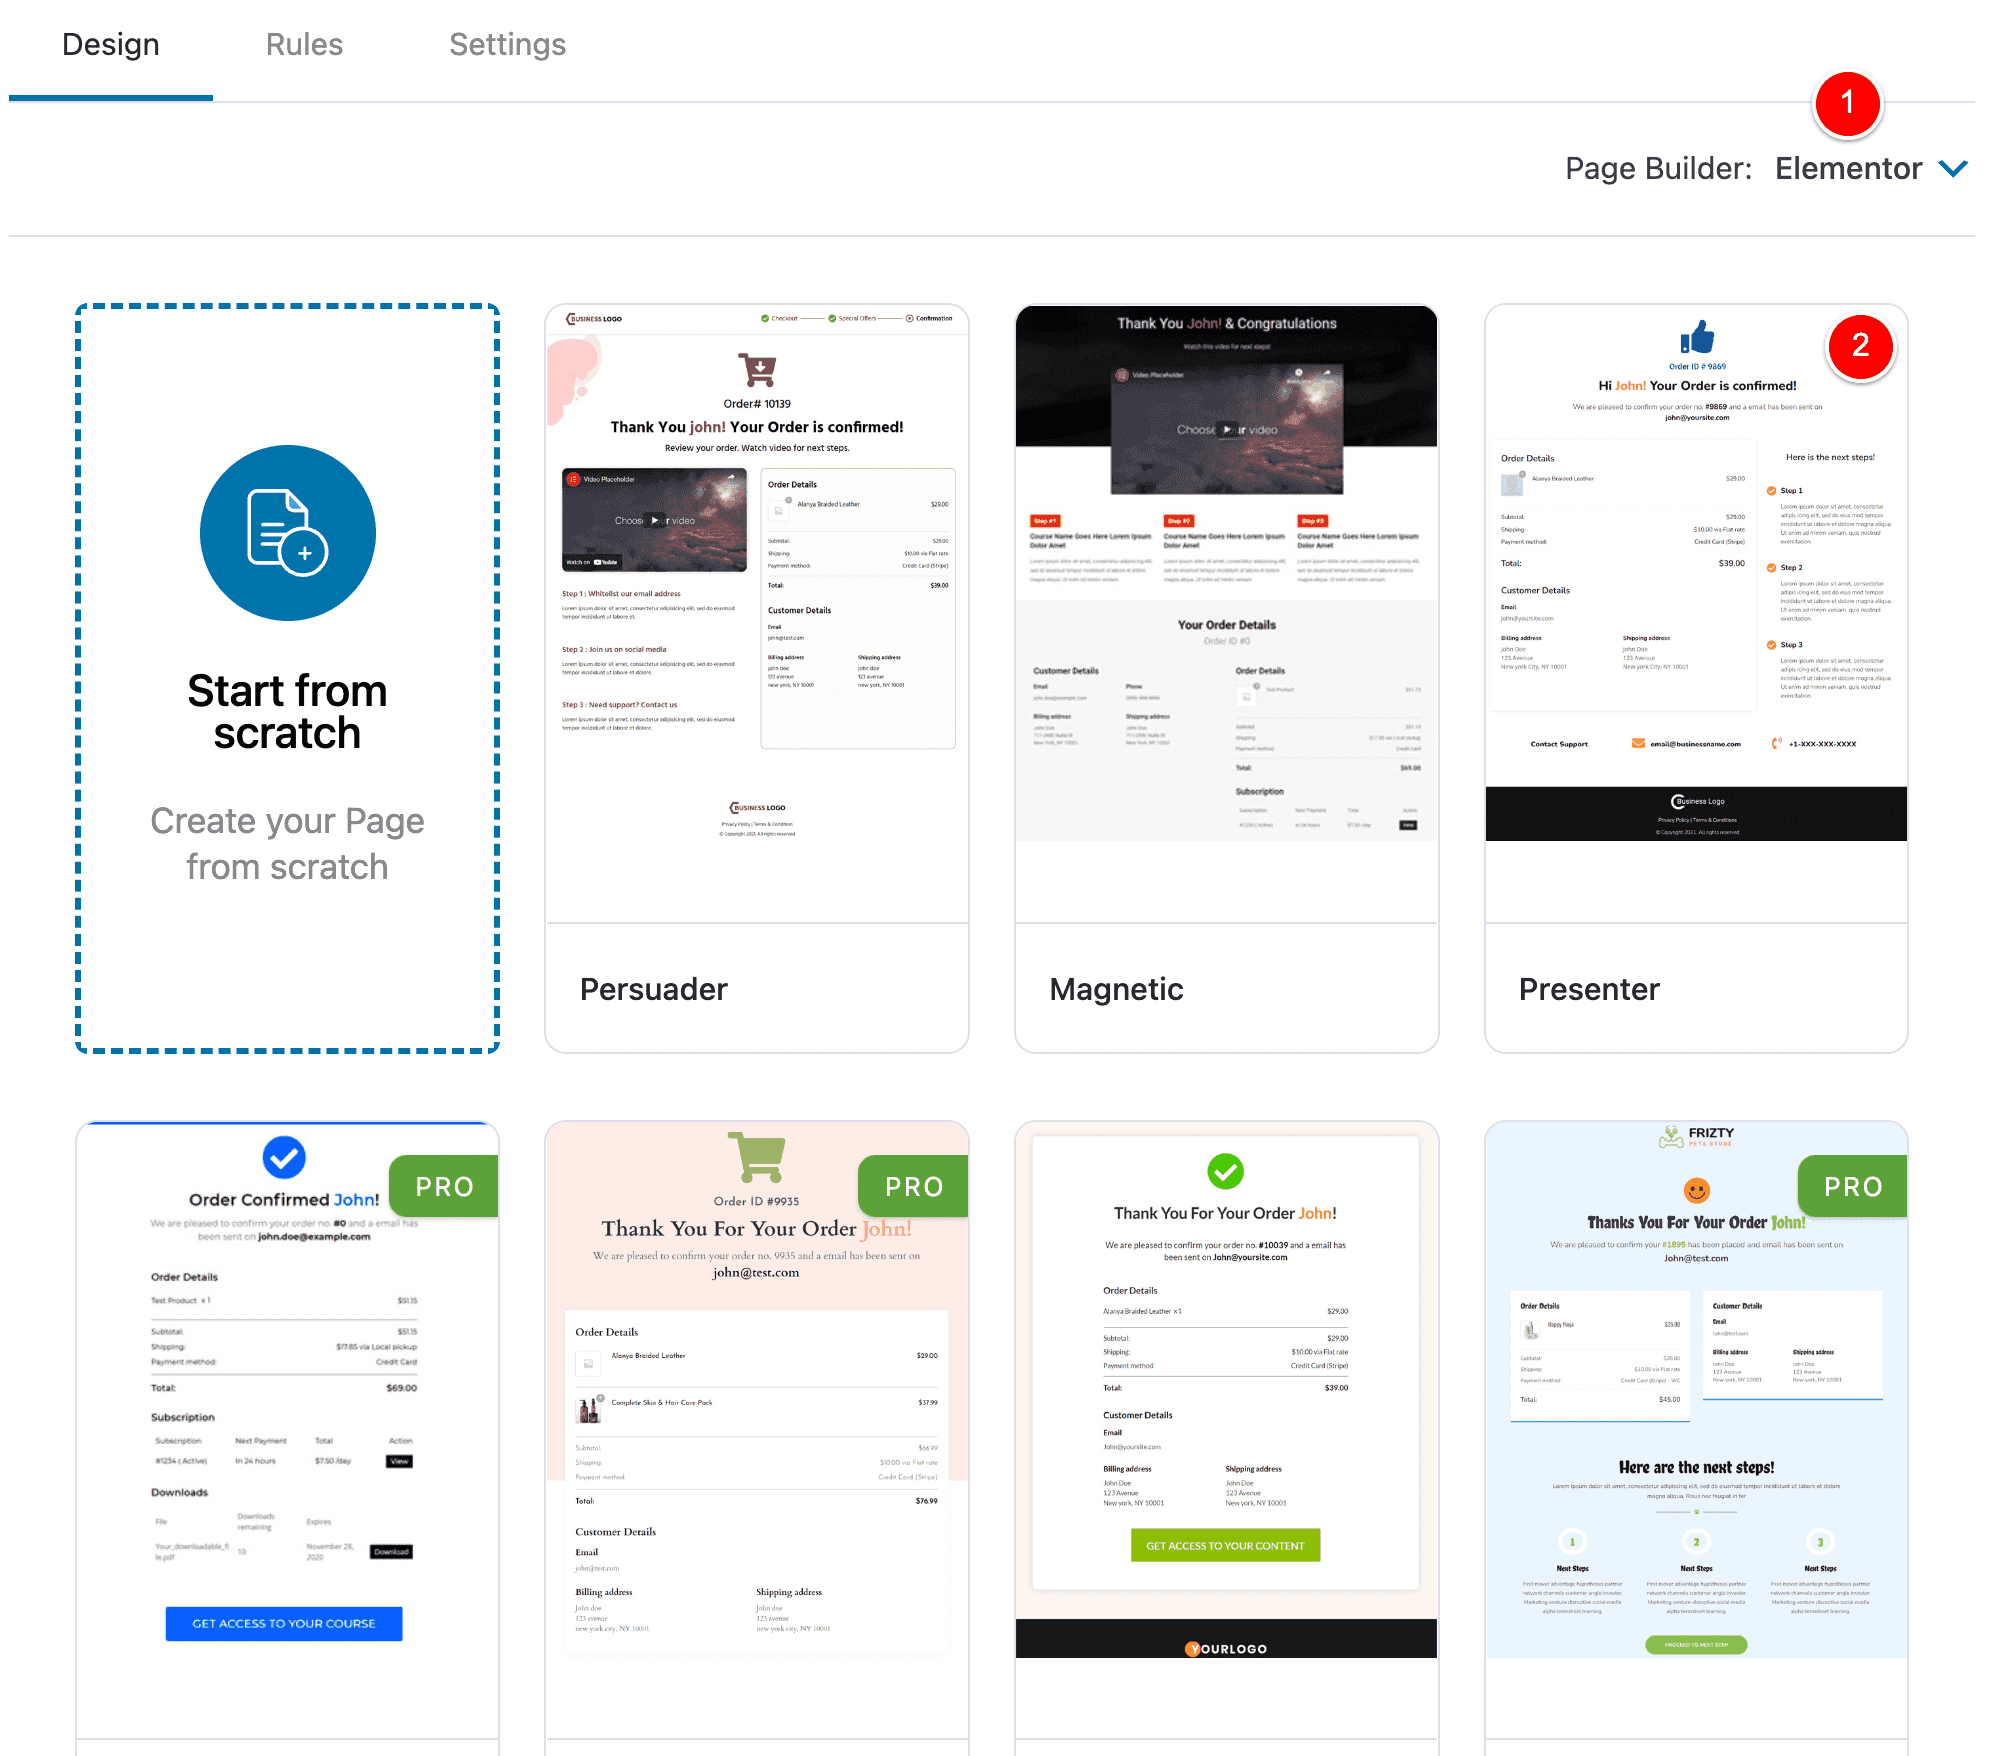
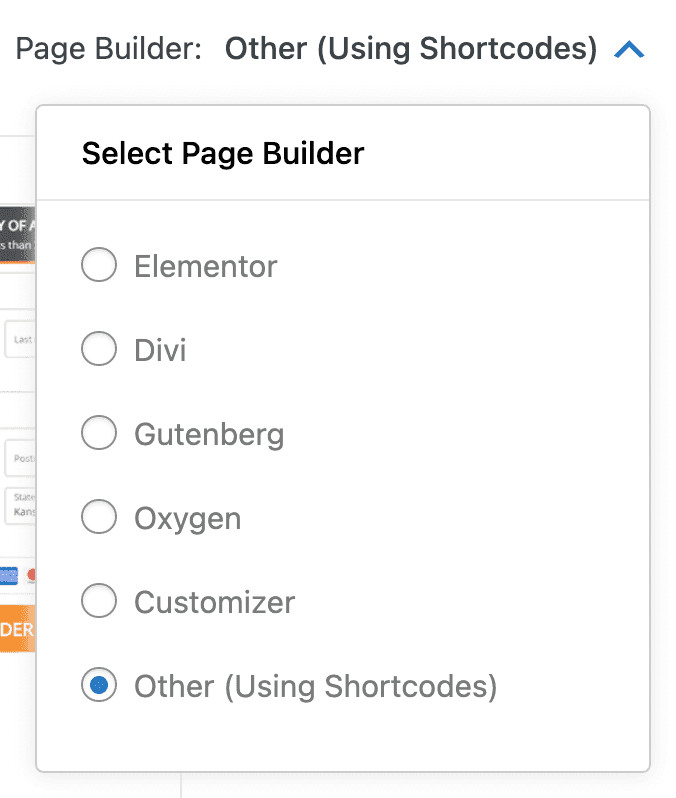
On the Design tab (1) I will click One Step (2), select Elementor at (3) and then choose the design I want to use at (4).
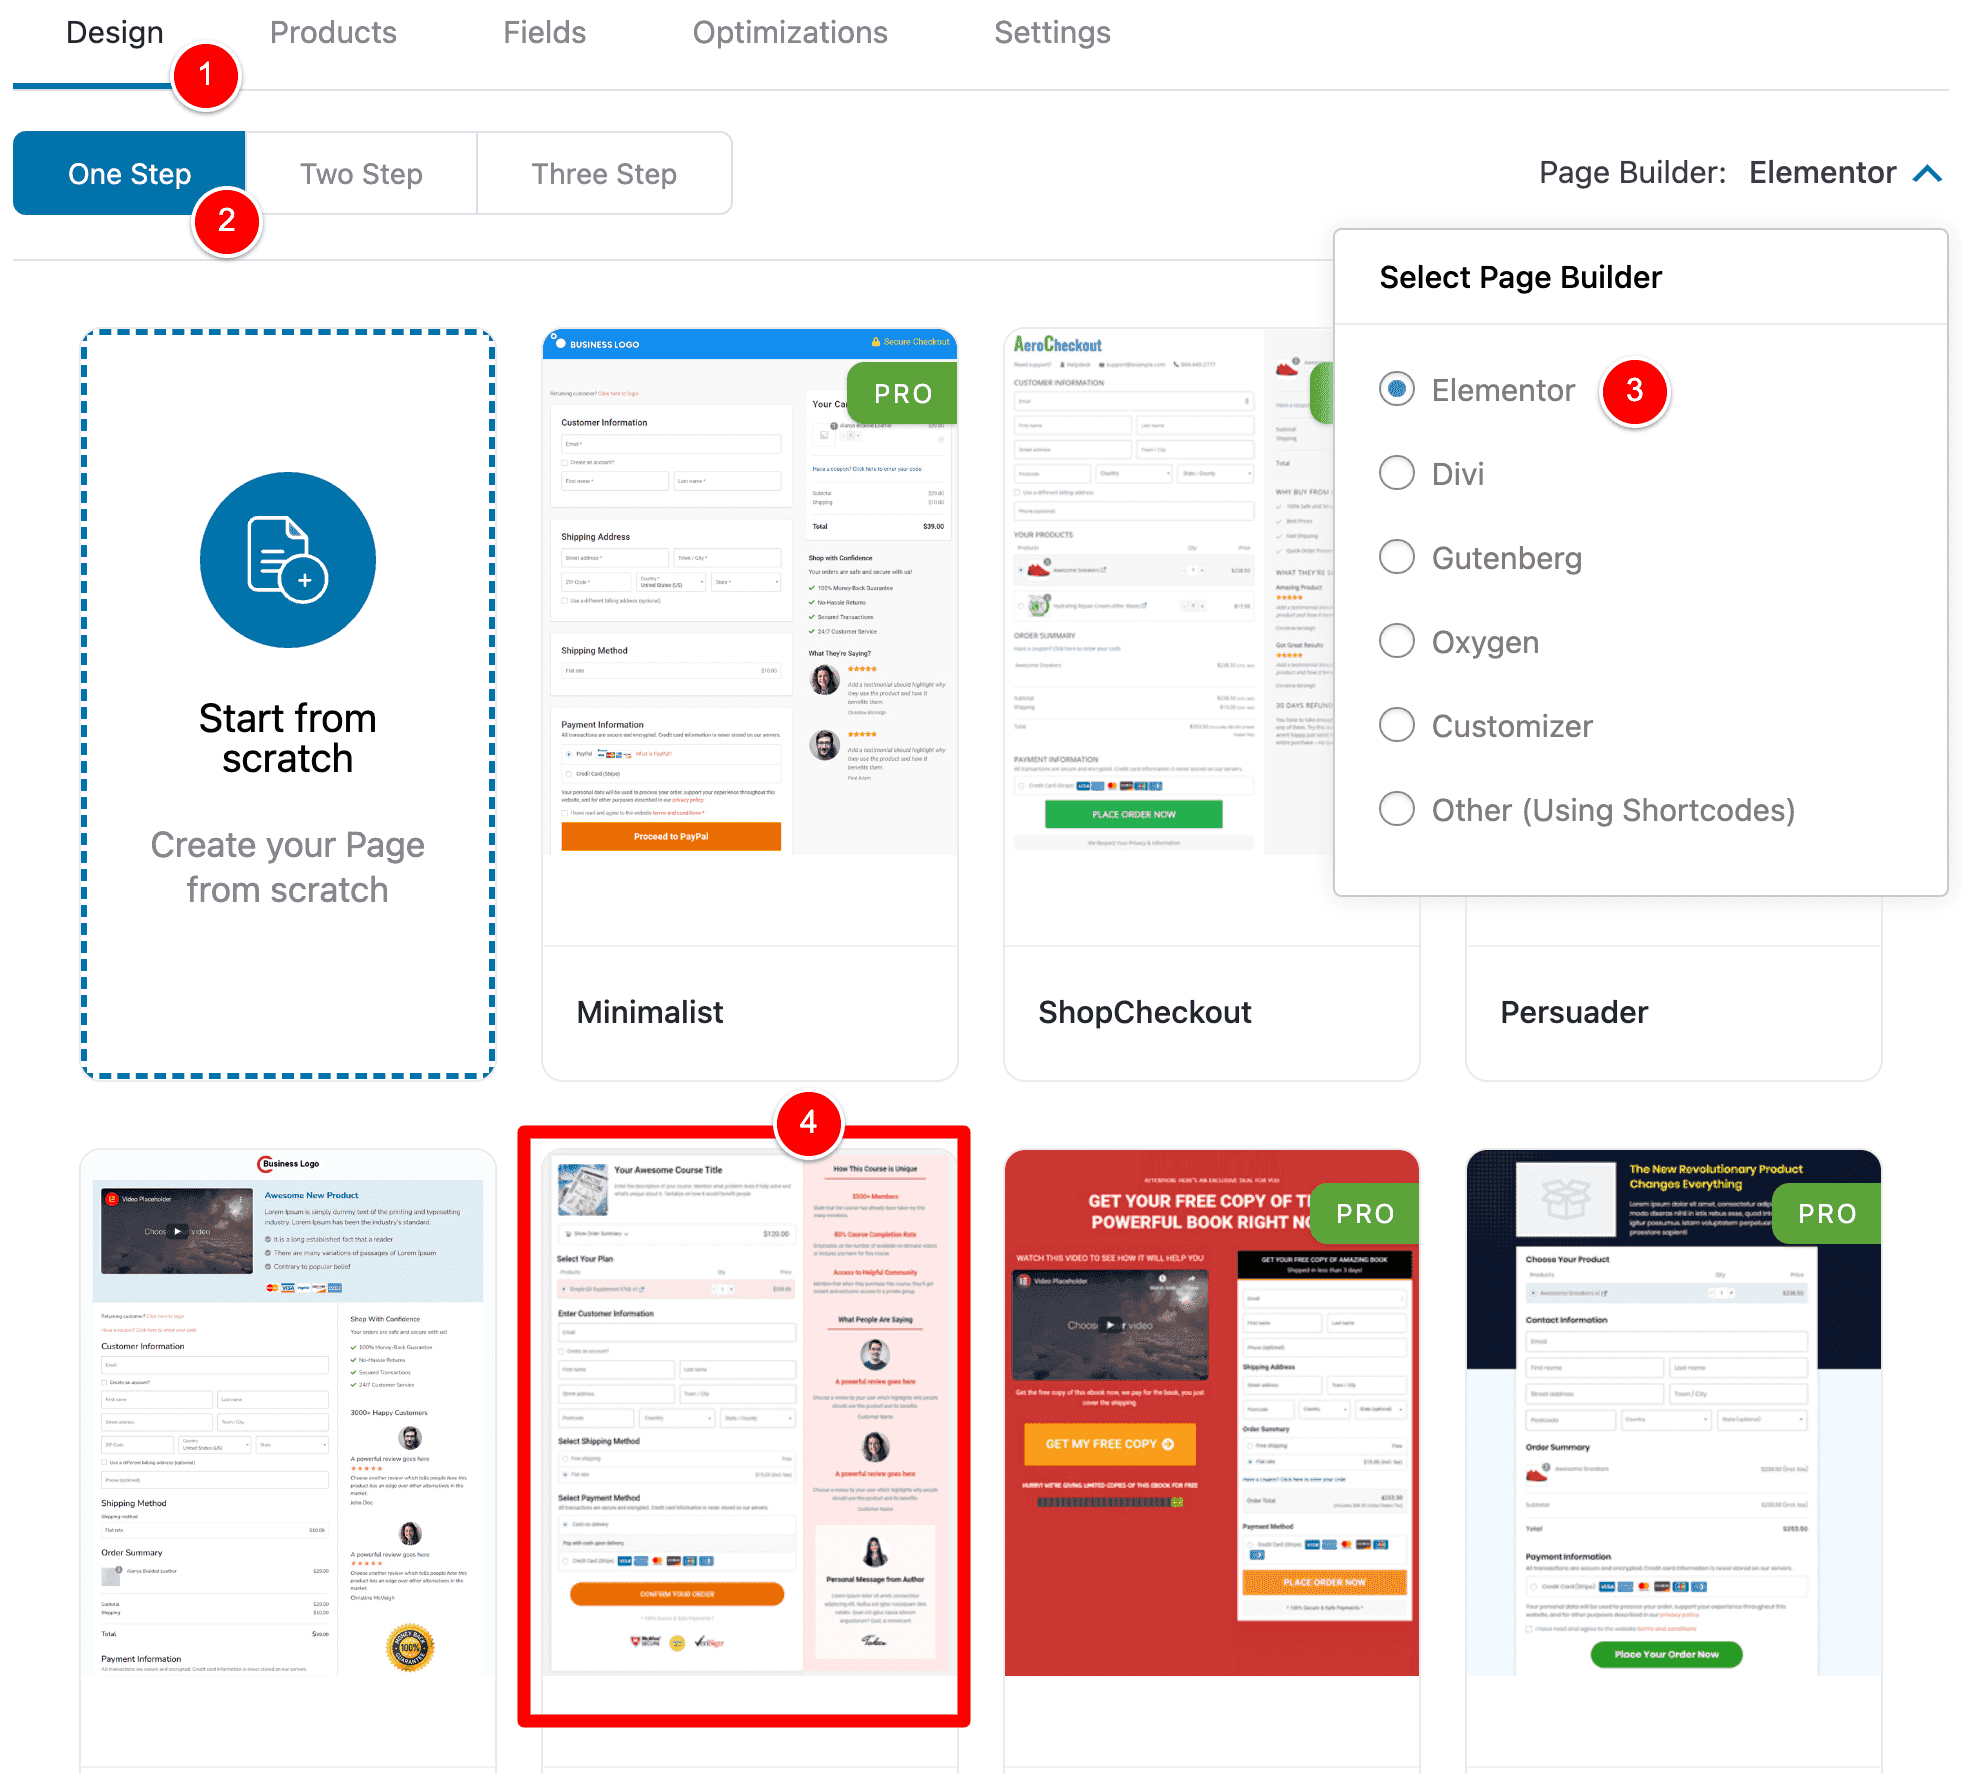
NOTE: As stated above, I’ll select Elementor here for this part of the tutorial but the process for Elementor / Divi / Gutenberg / Oxygen / Customizer is all the same.
“Other (Shortcodes)” is what you select if you’re using a Page Builder that isn’t listed here (like Beaver Builder or my new favourite Bricks Builder) and I’ll show you how to do these later in this tutorial. It’s the same process but with 1 small difference.
NOTE: The designs that say PRO in the green badge are only available in the PAID versions of FunnelKit.
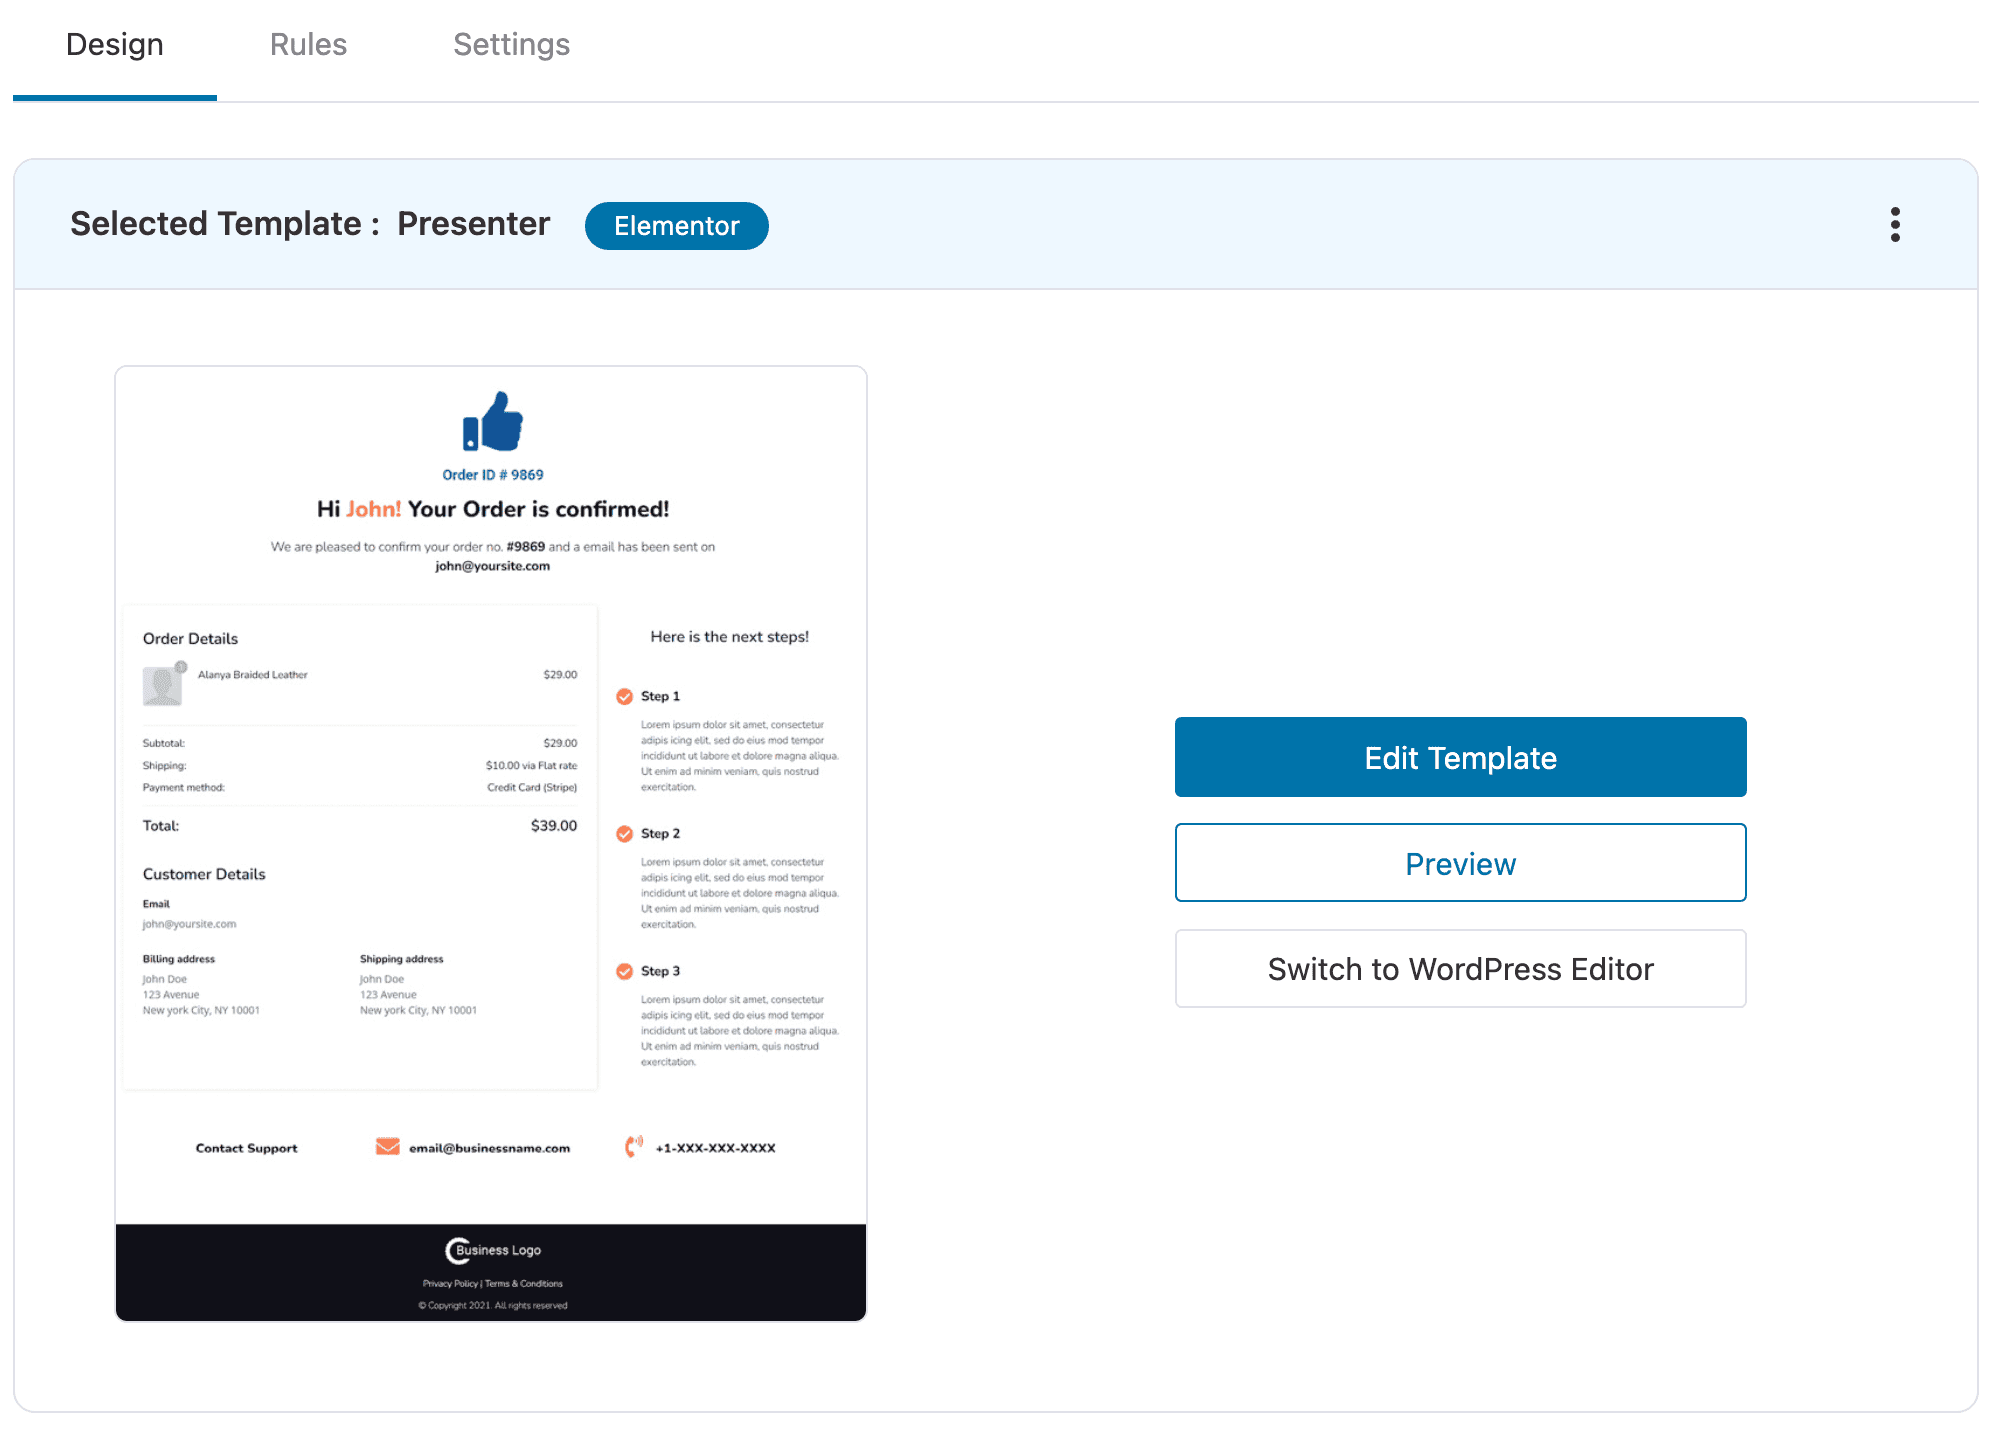
Once I clicked on (4) above, that Elementor checkout design was imported into my Checkout Page funnel step.
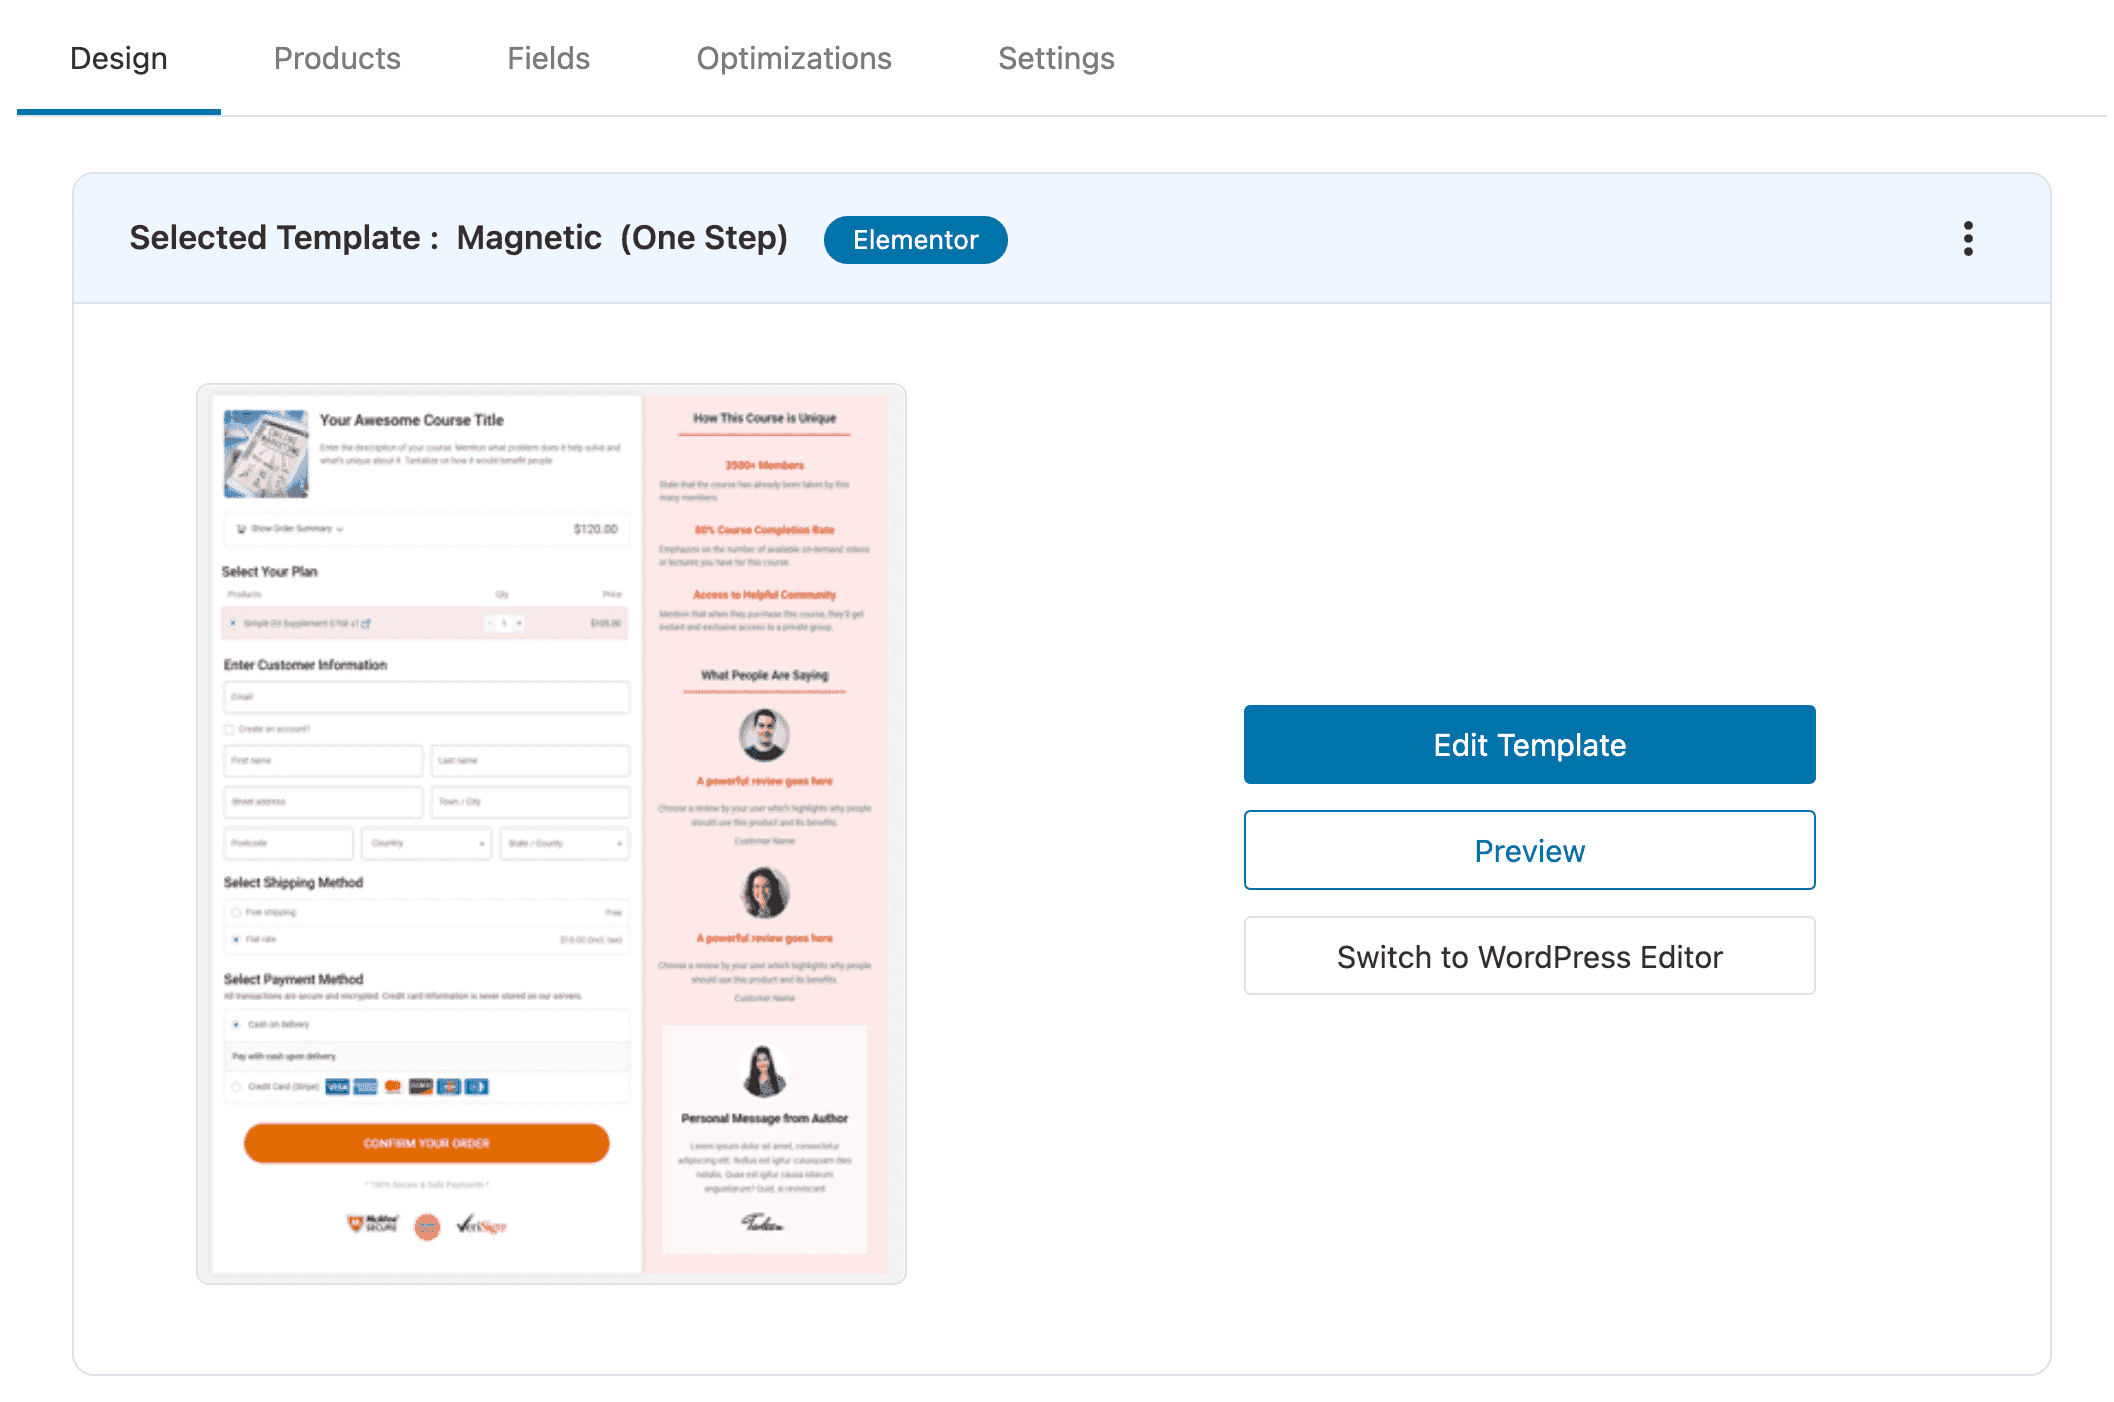
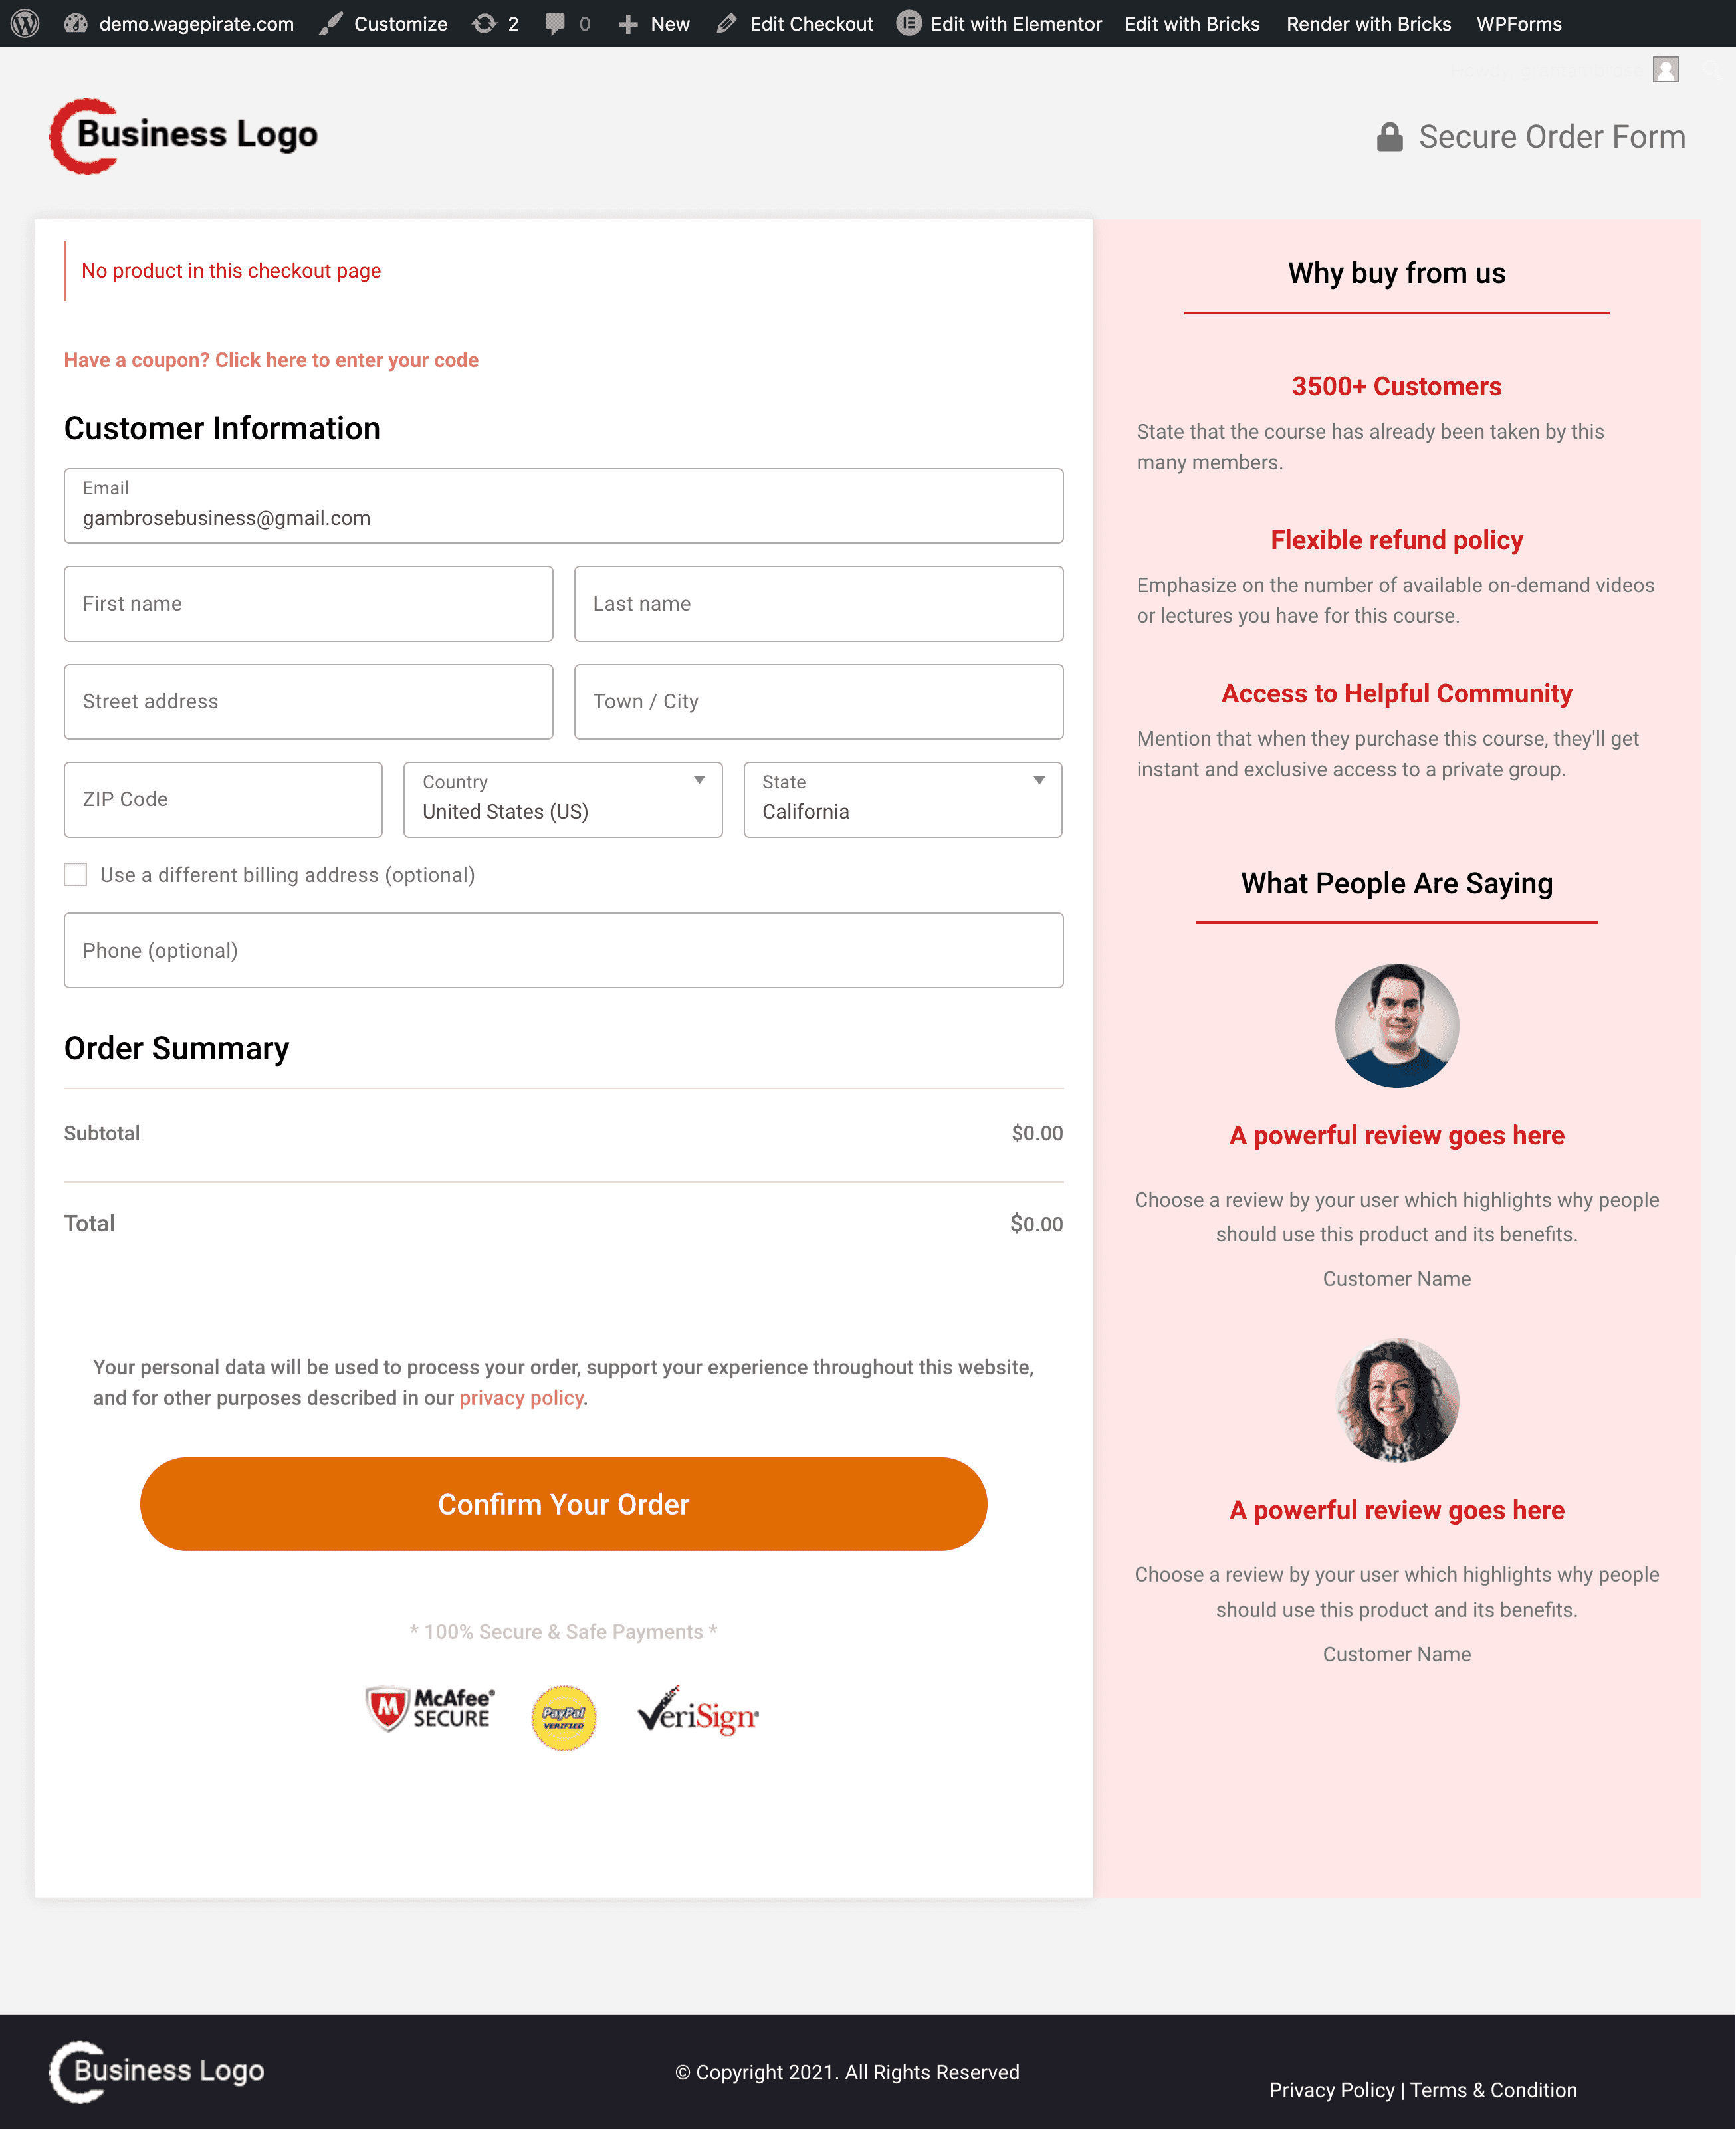
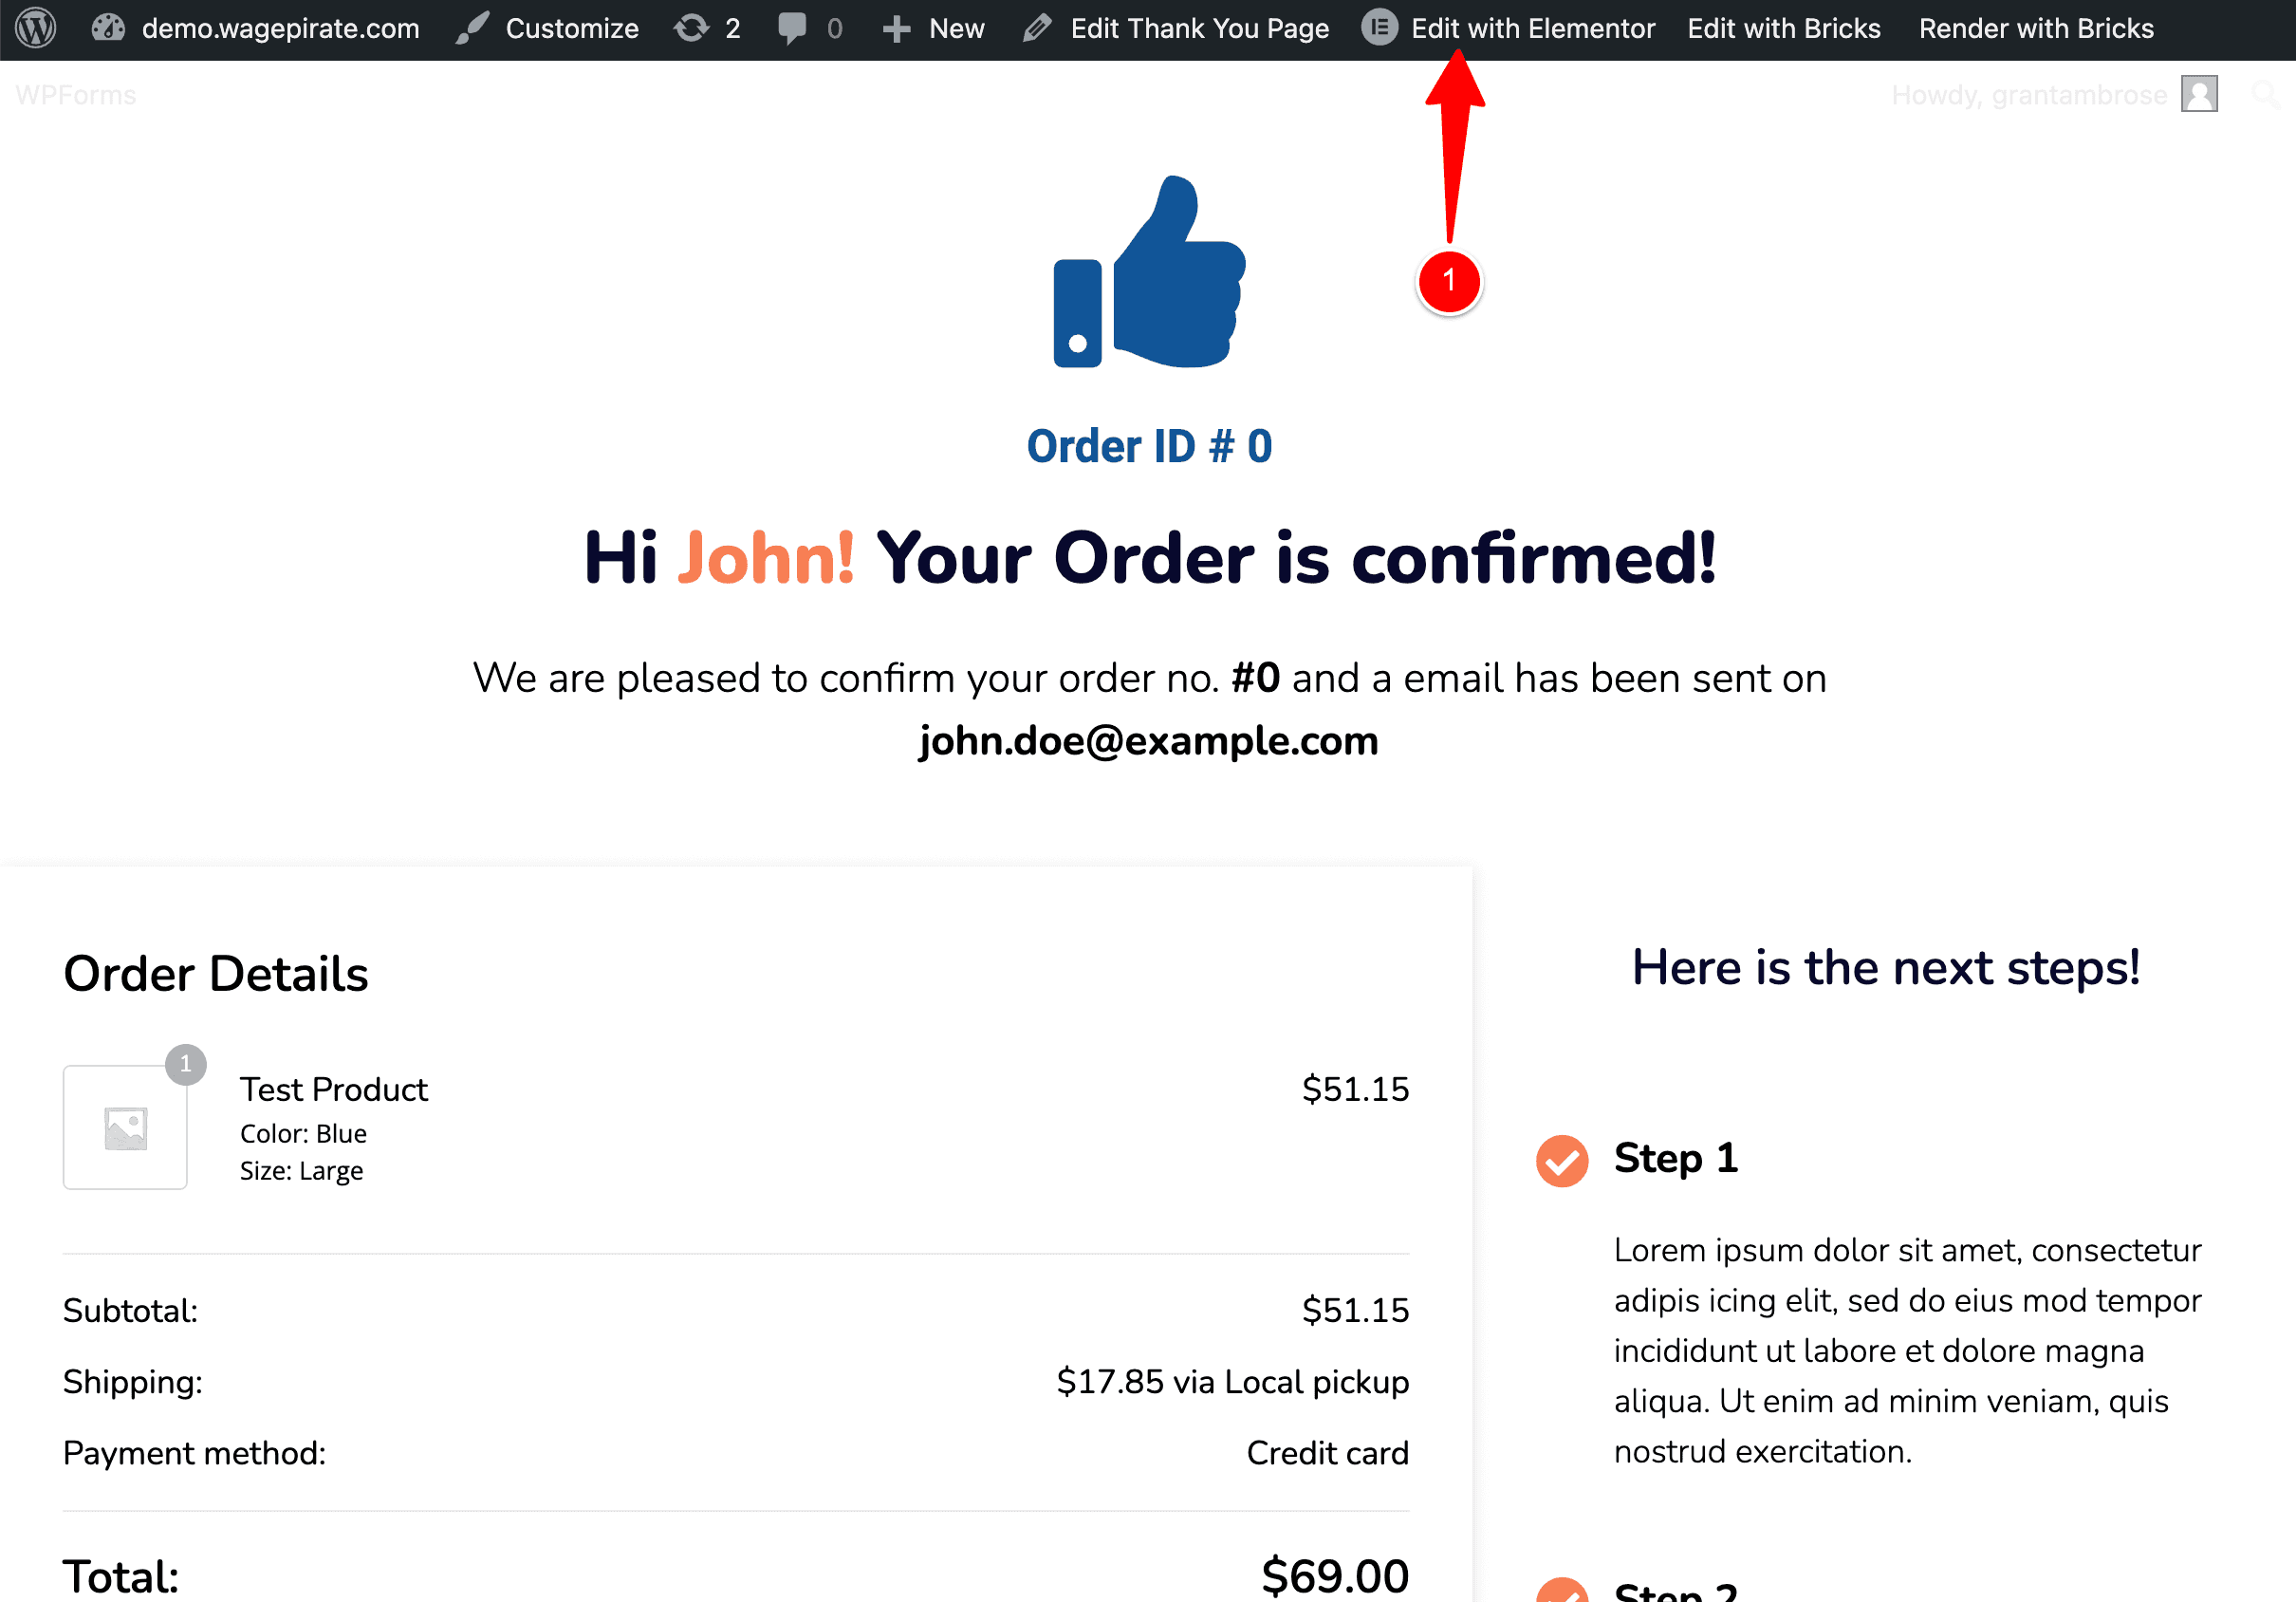
Here is a quick preview of what my Checkout Page currently looks like and I can click at (1) to Edit with Elementor and customize it a bit.
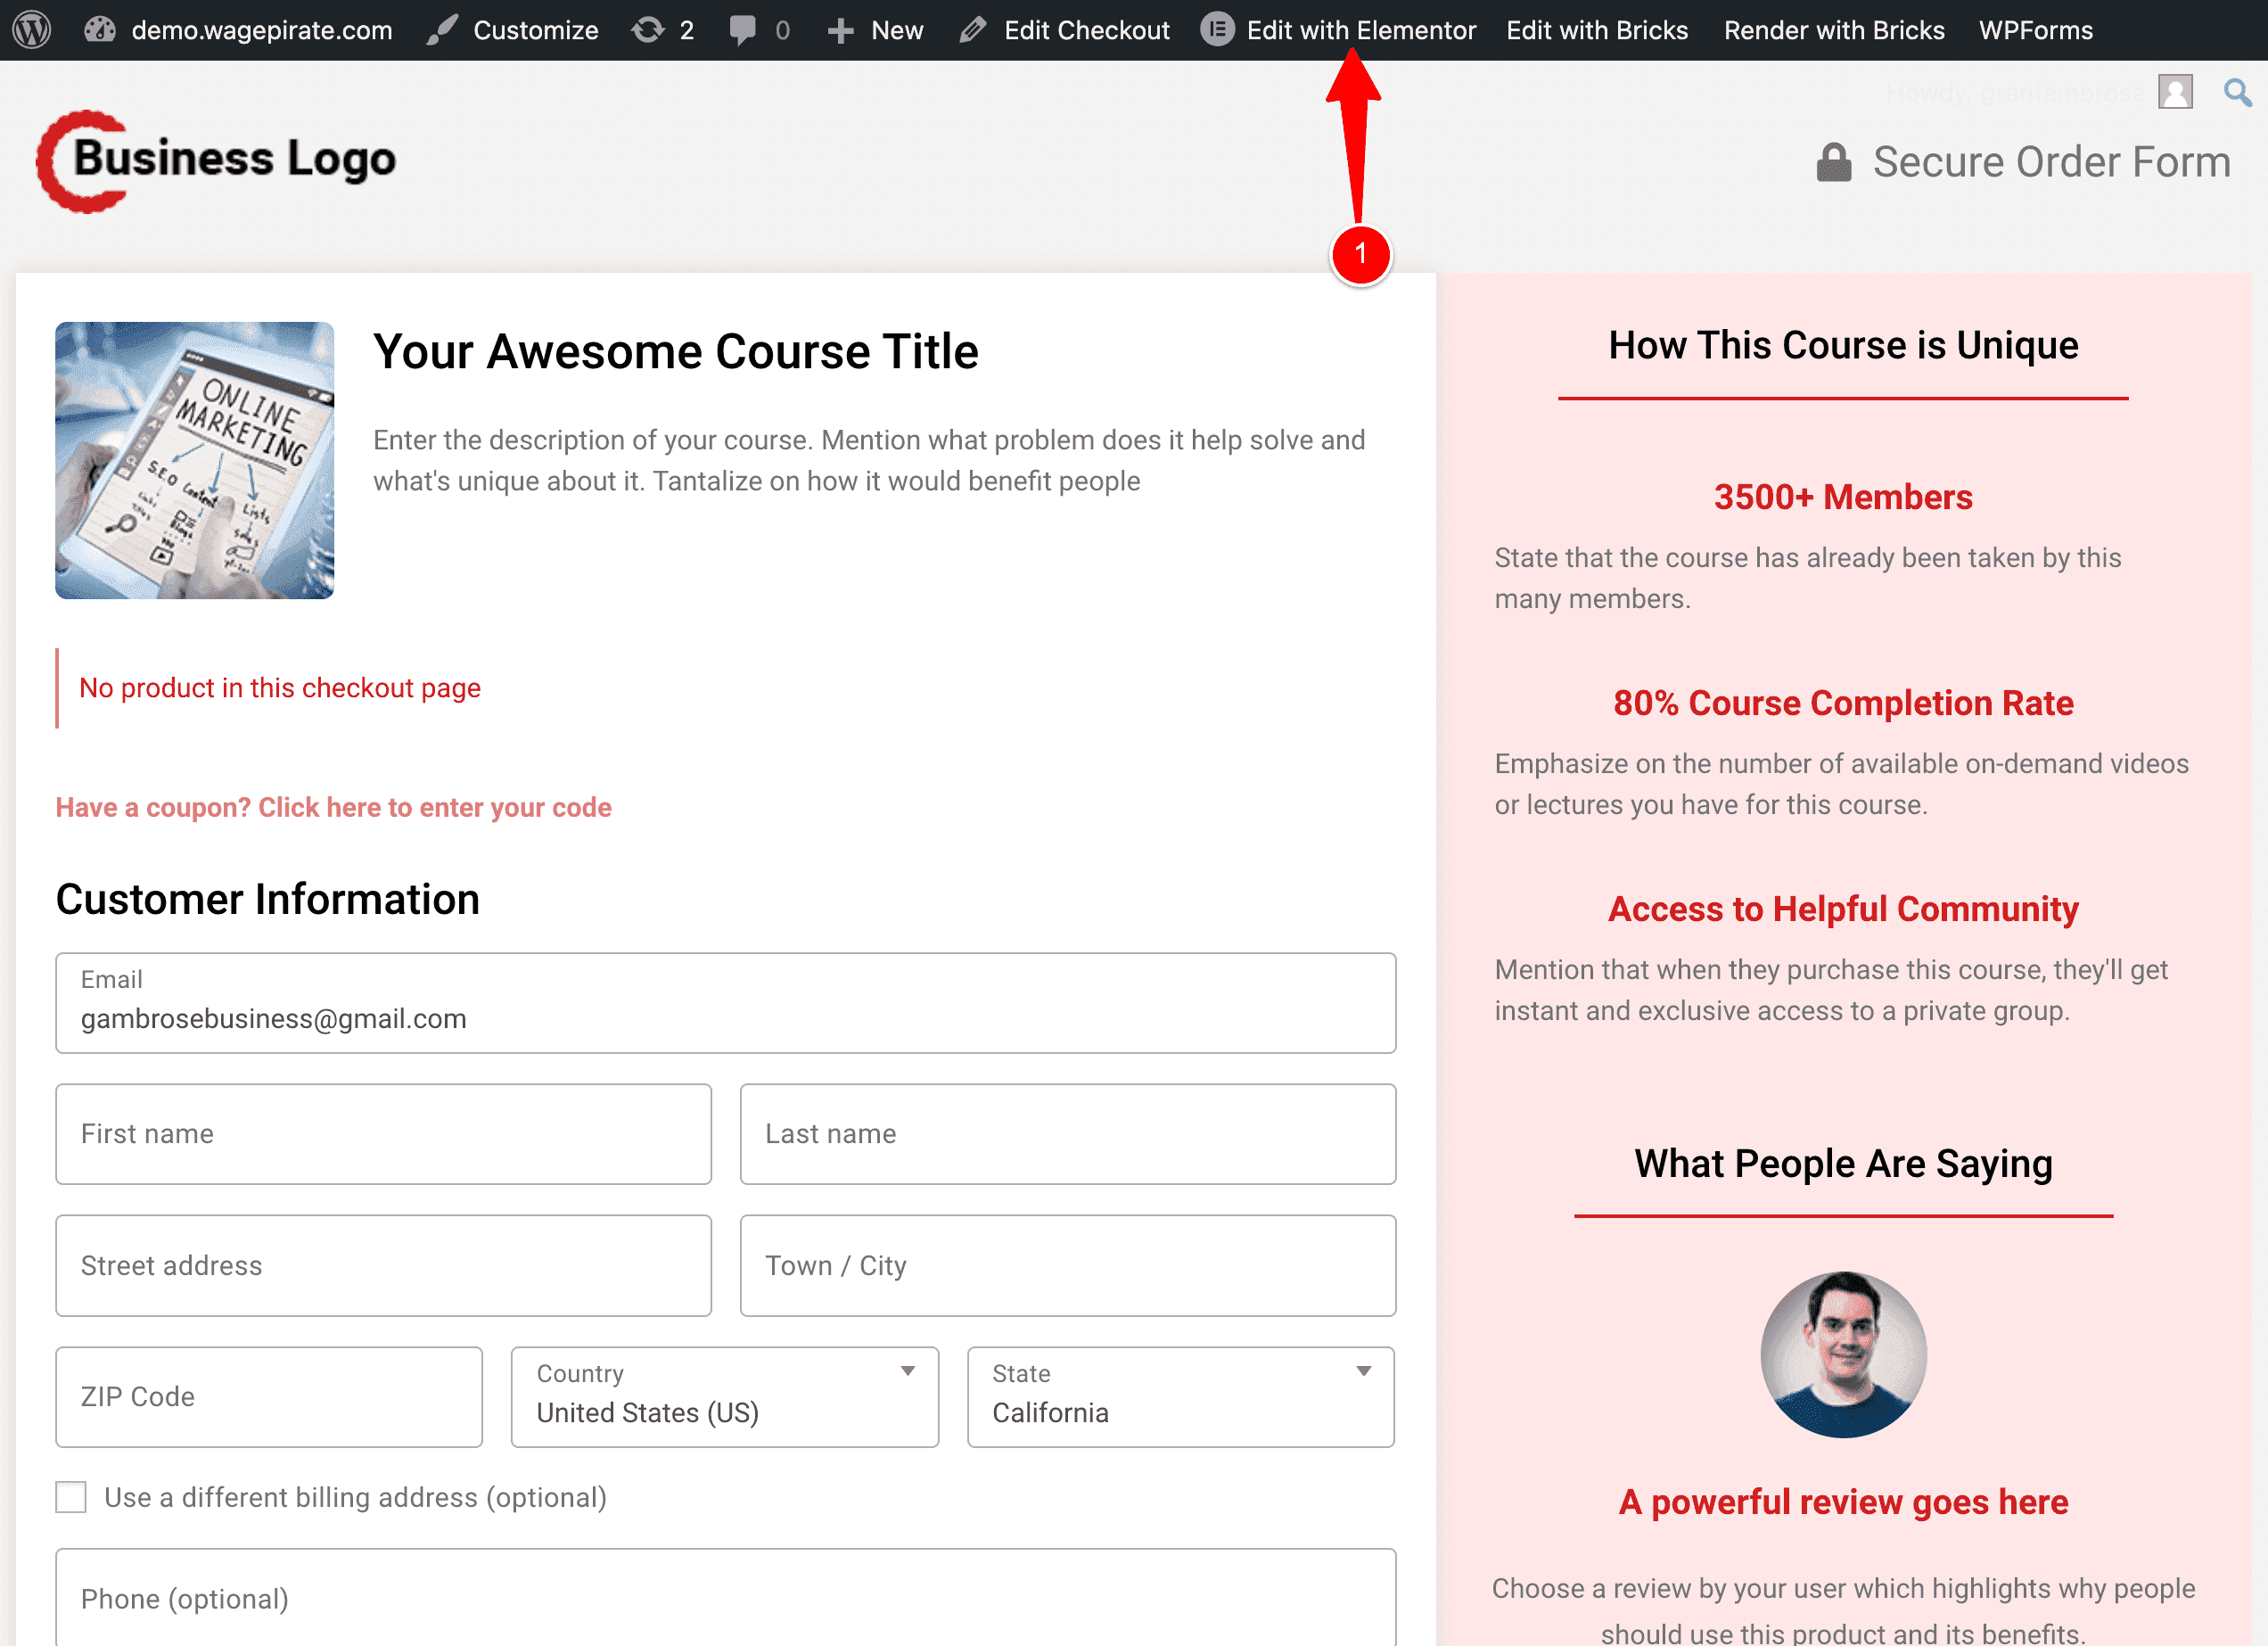
I spent a minute making a few tweaks using Elementor and this is what my final Checkout Page will look like.
Now that our Checkout Page is all ready to go, let’s go ahead and create and design our Thank You page (then I’ll show you how to redirect to it).
Create your Thank You page funnel step
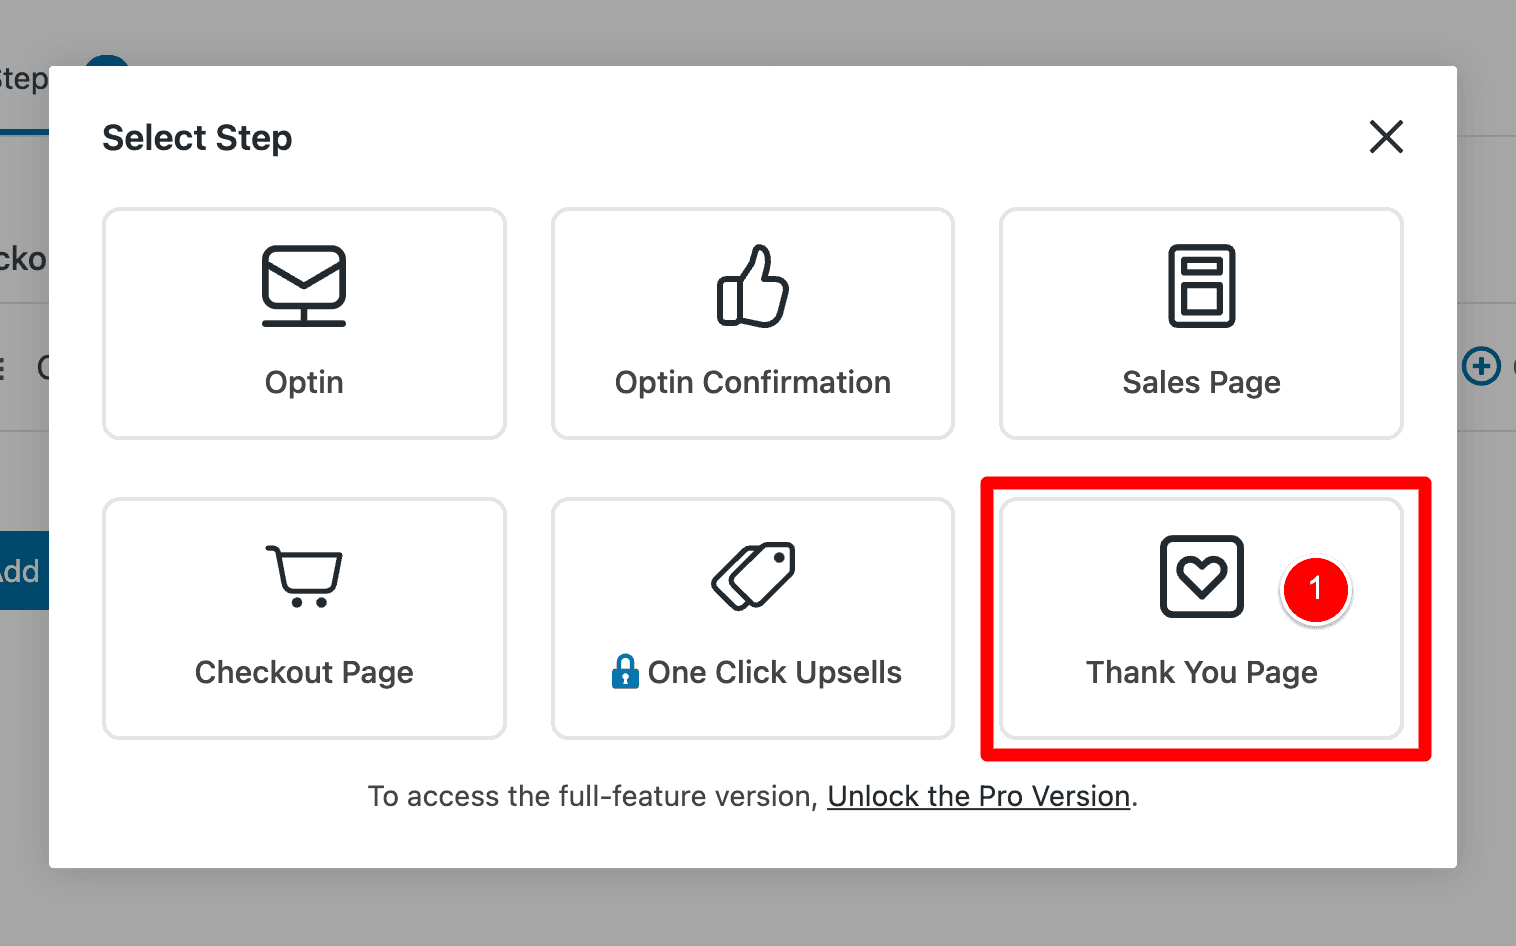
Let’s go back into our Funnel and create a second step by clicking Add New Step.
This time, we will select Thank You Page.
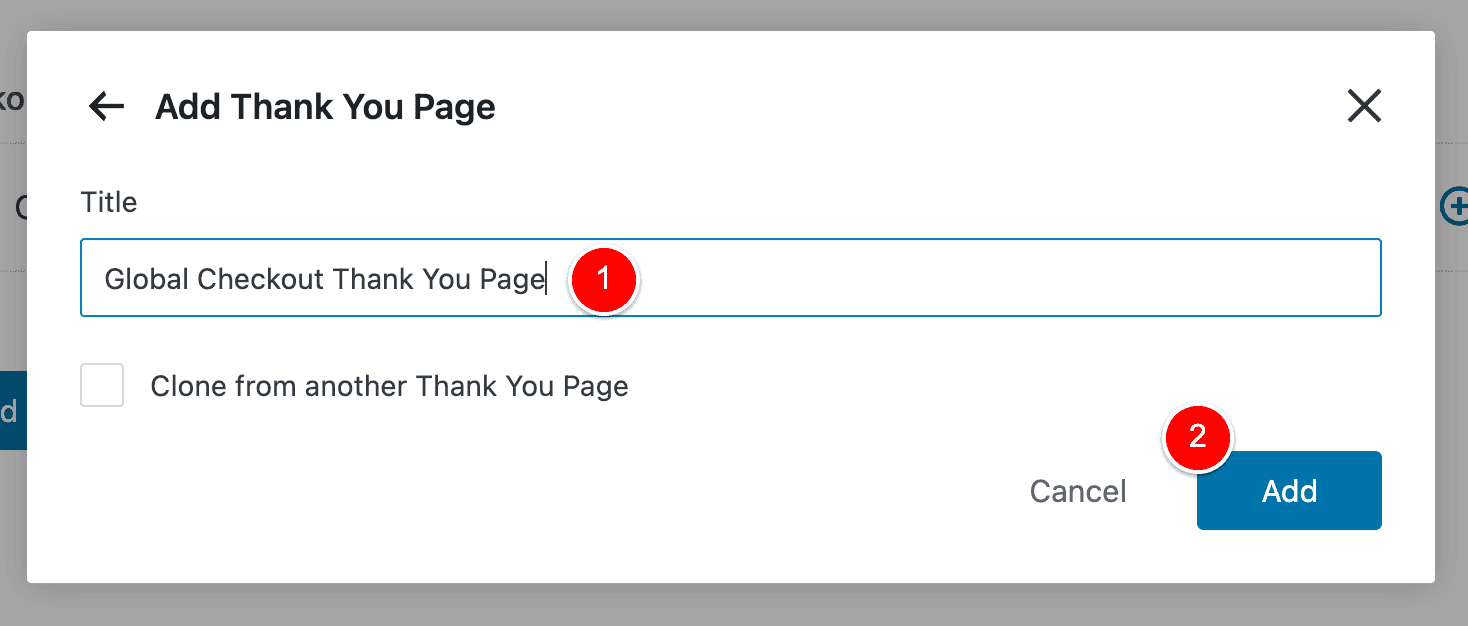
Name it something like Global Checkout Thank You Page (1) and then click Add (2).
Now our Global Checkout funnel created in FunnelKit has the two funnel steps we need for this tutorial!
Let’s now quickly design our Thank You Page.
To do this, click to edit the Thank You Page at (1).
I’ll choose Elementor again (1) and select the design I want to use (2).
To keep this tutorial succinct, I won’t go ahead and customize this page…
But it’s the same deal as before – you can edit it using your favourite Page Builder as you would expect.
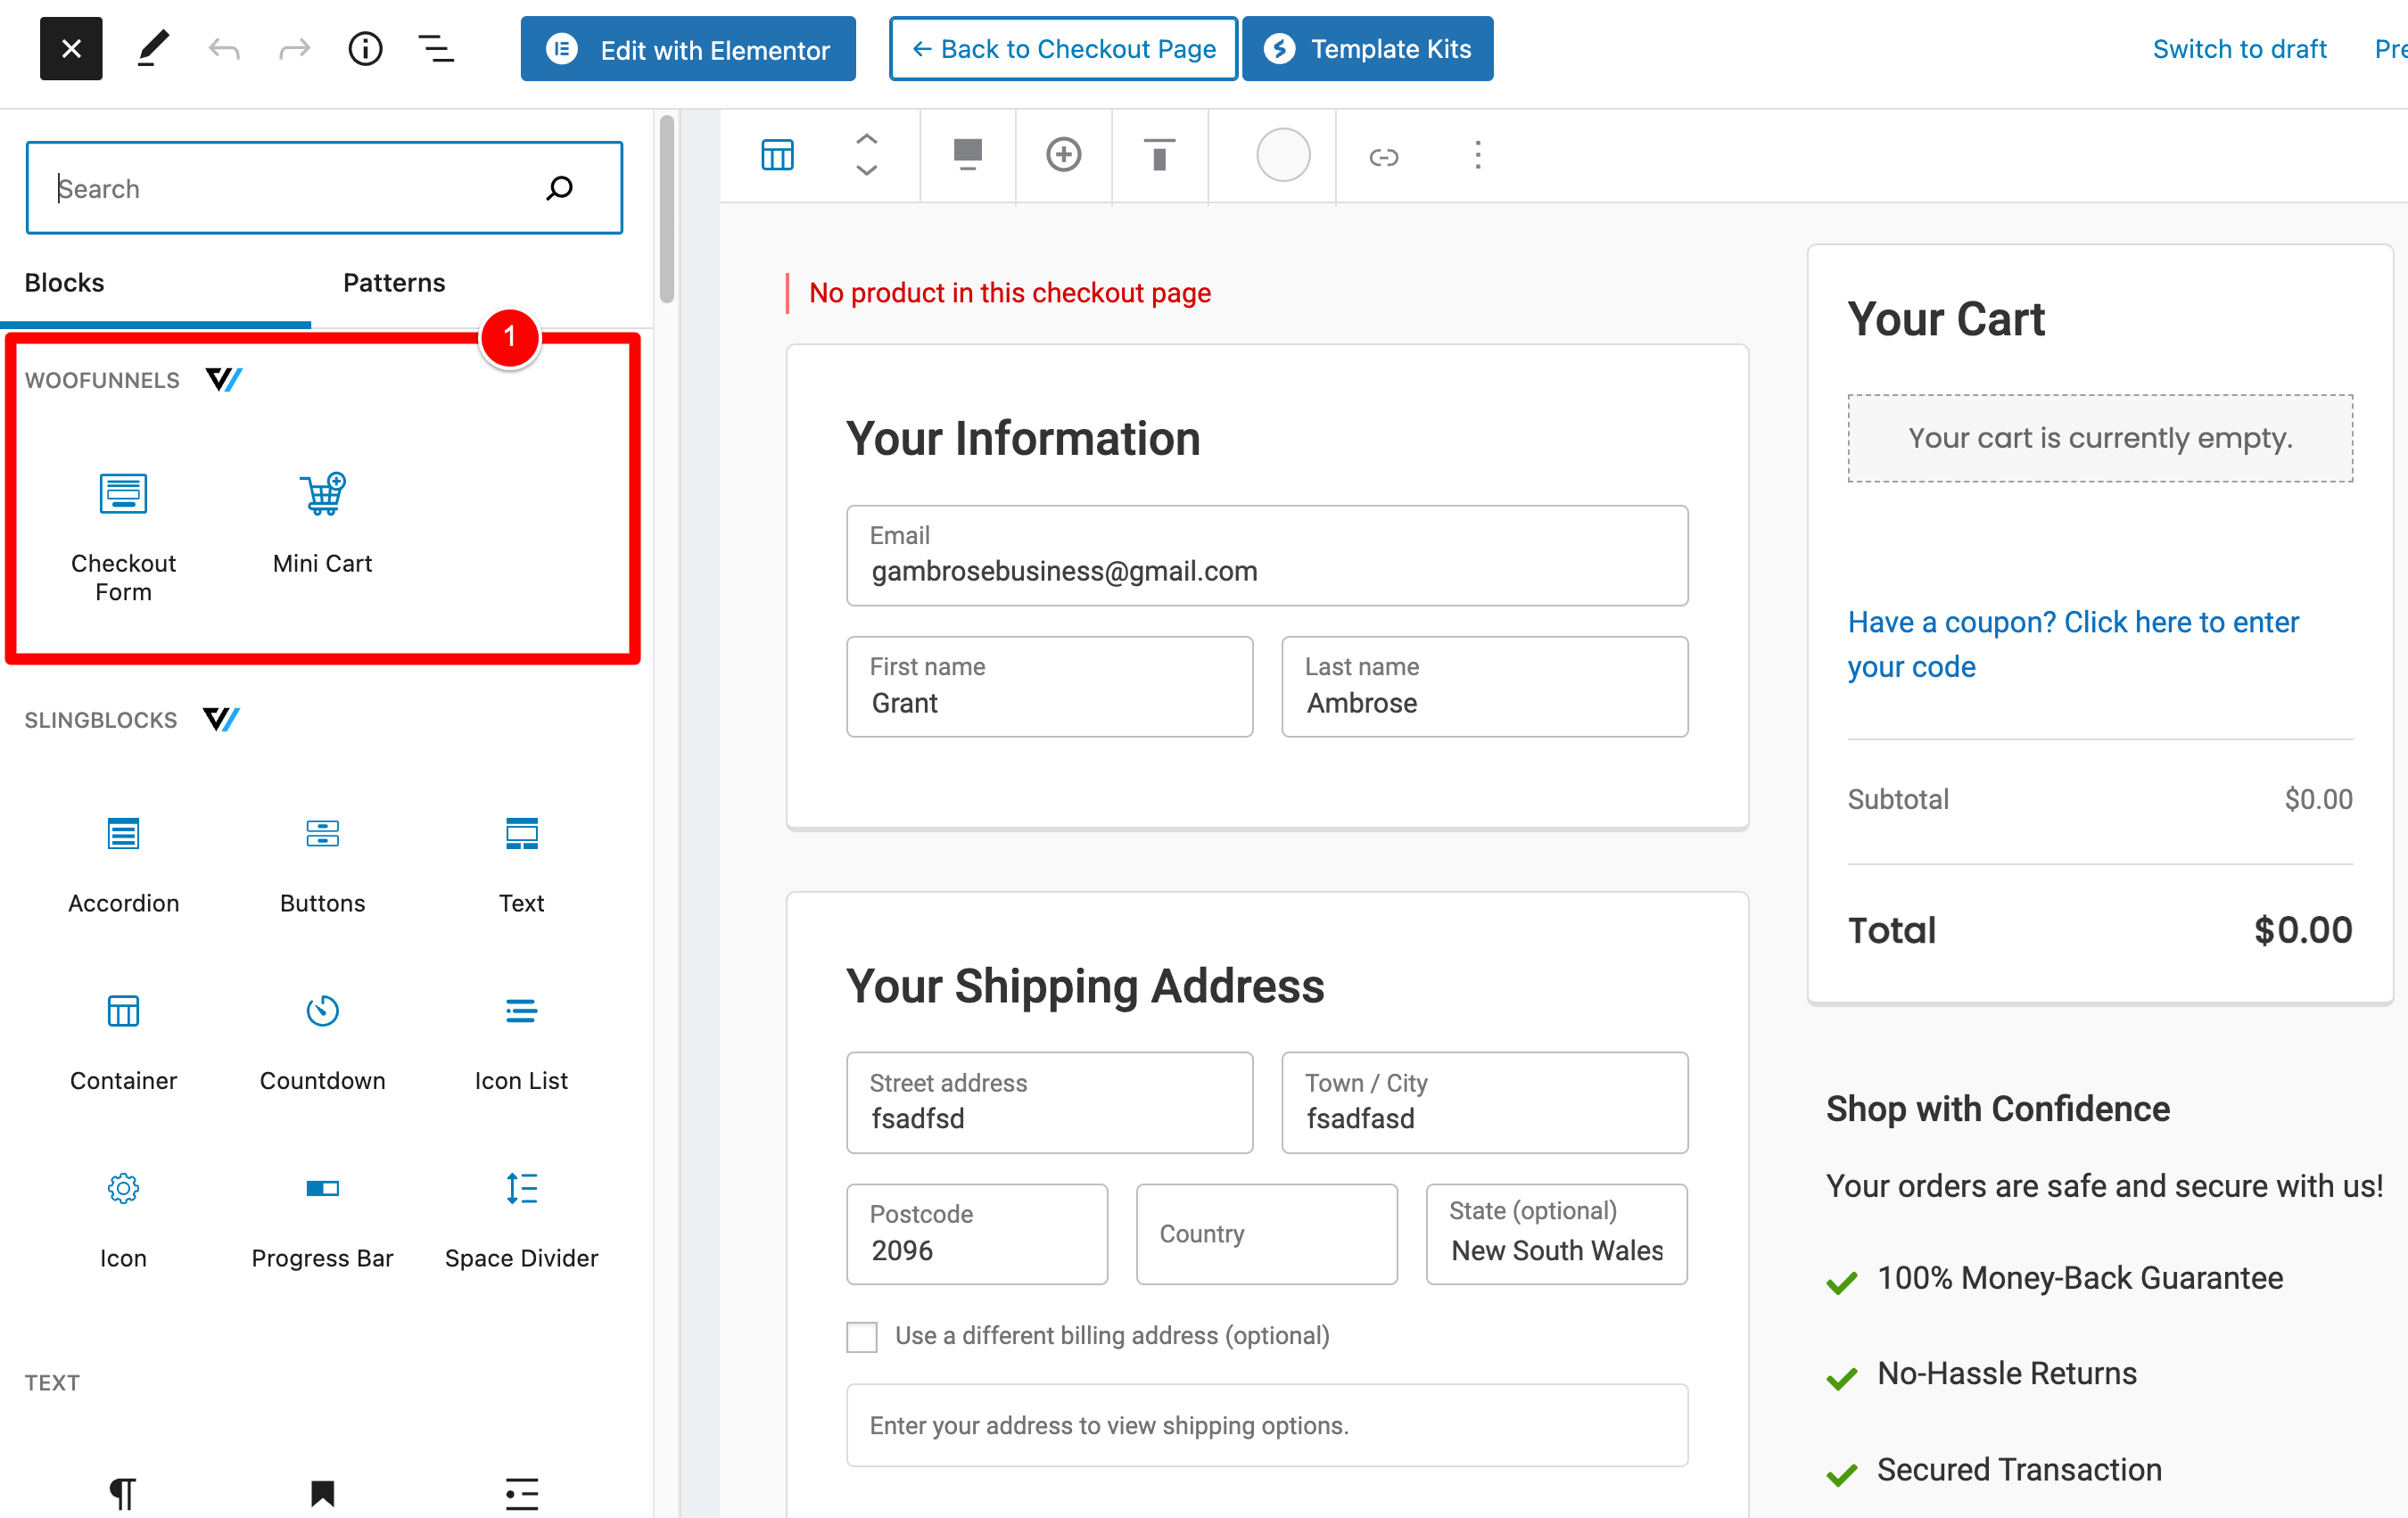
And while editing you just drag in the FunnelKit specific modules shown below wherever you want on the page.
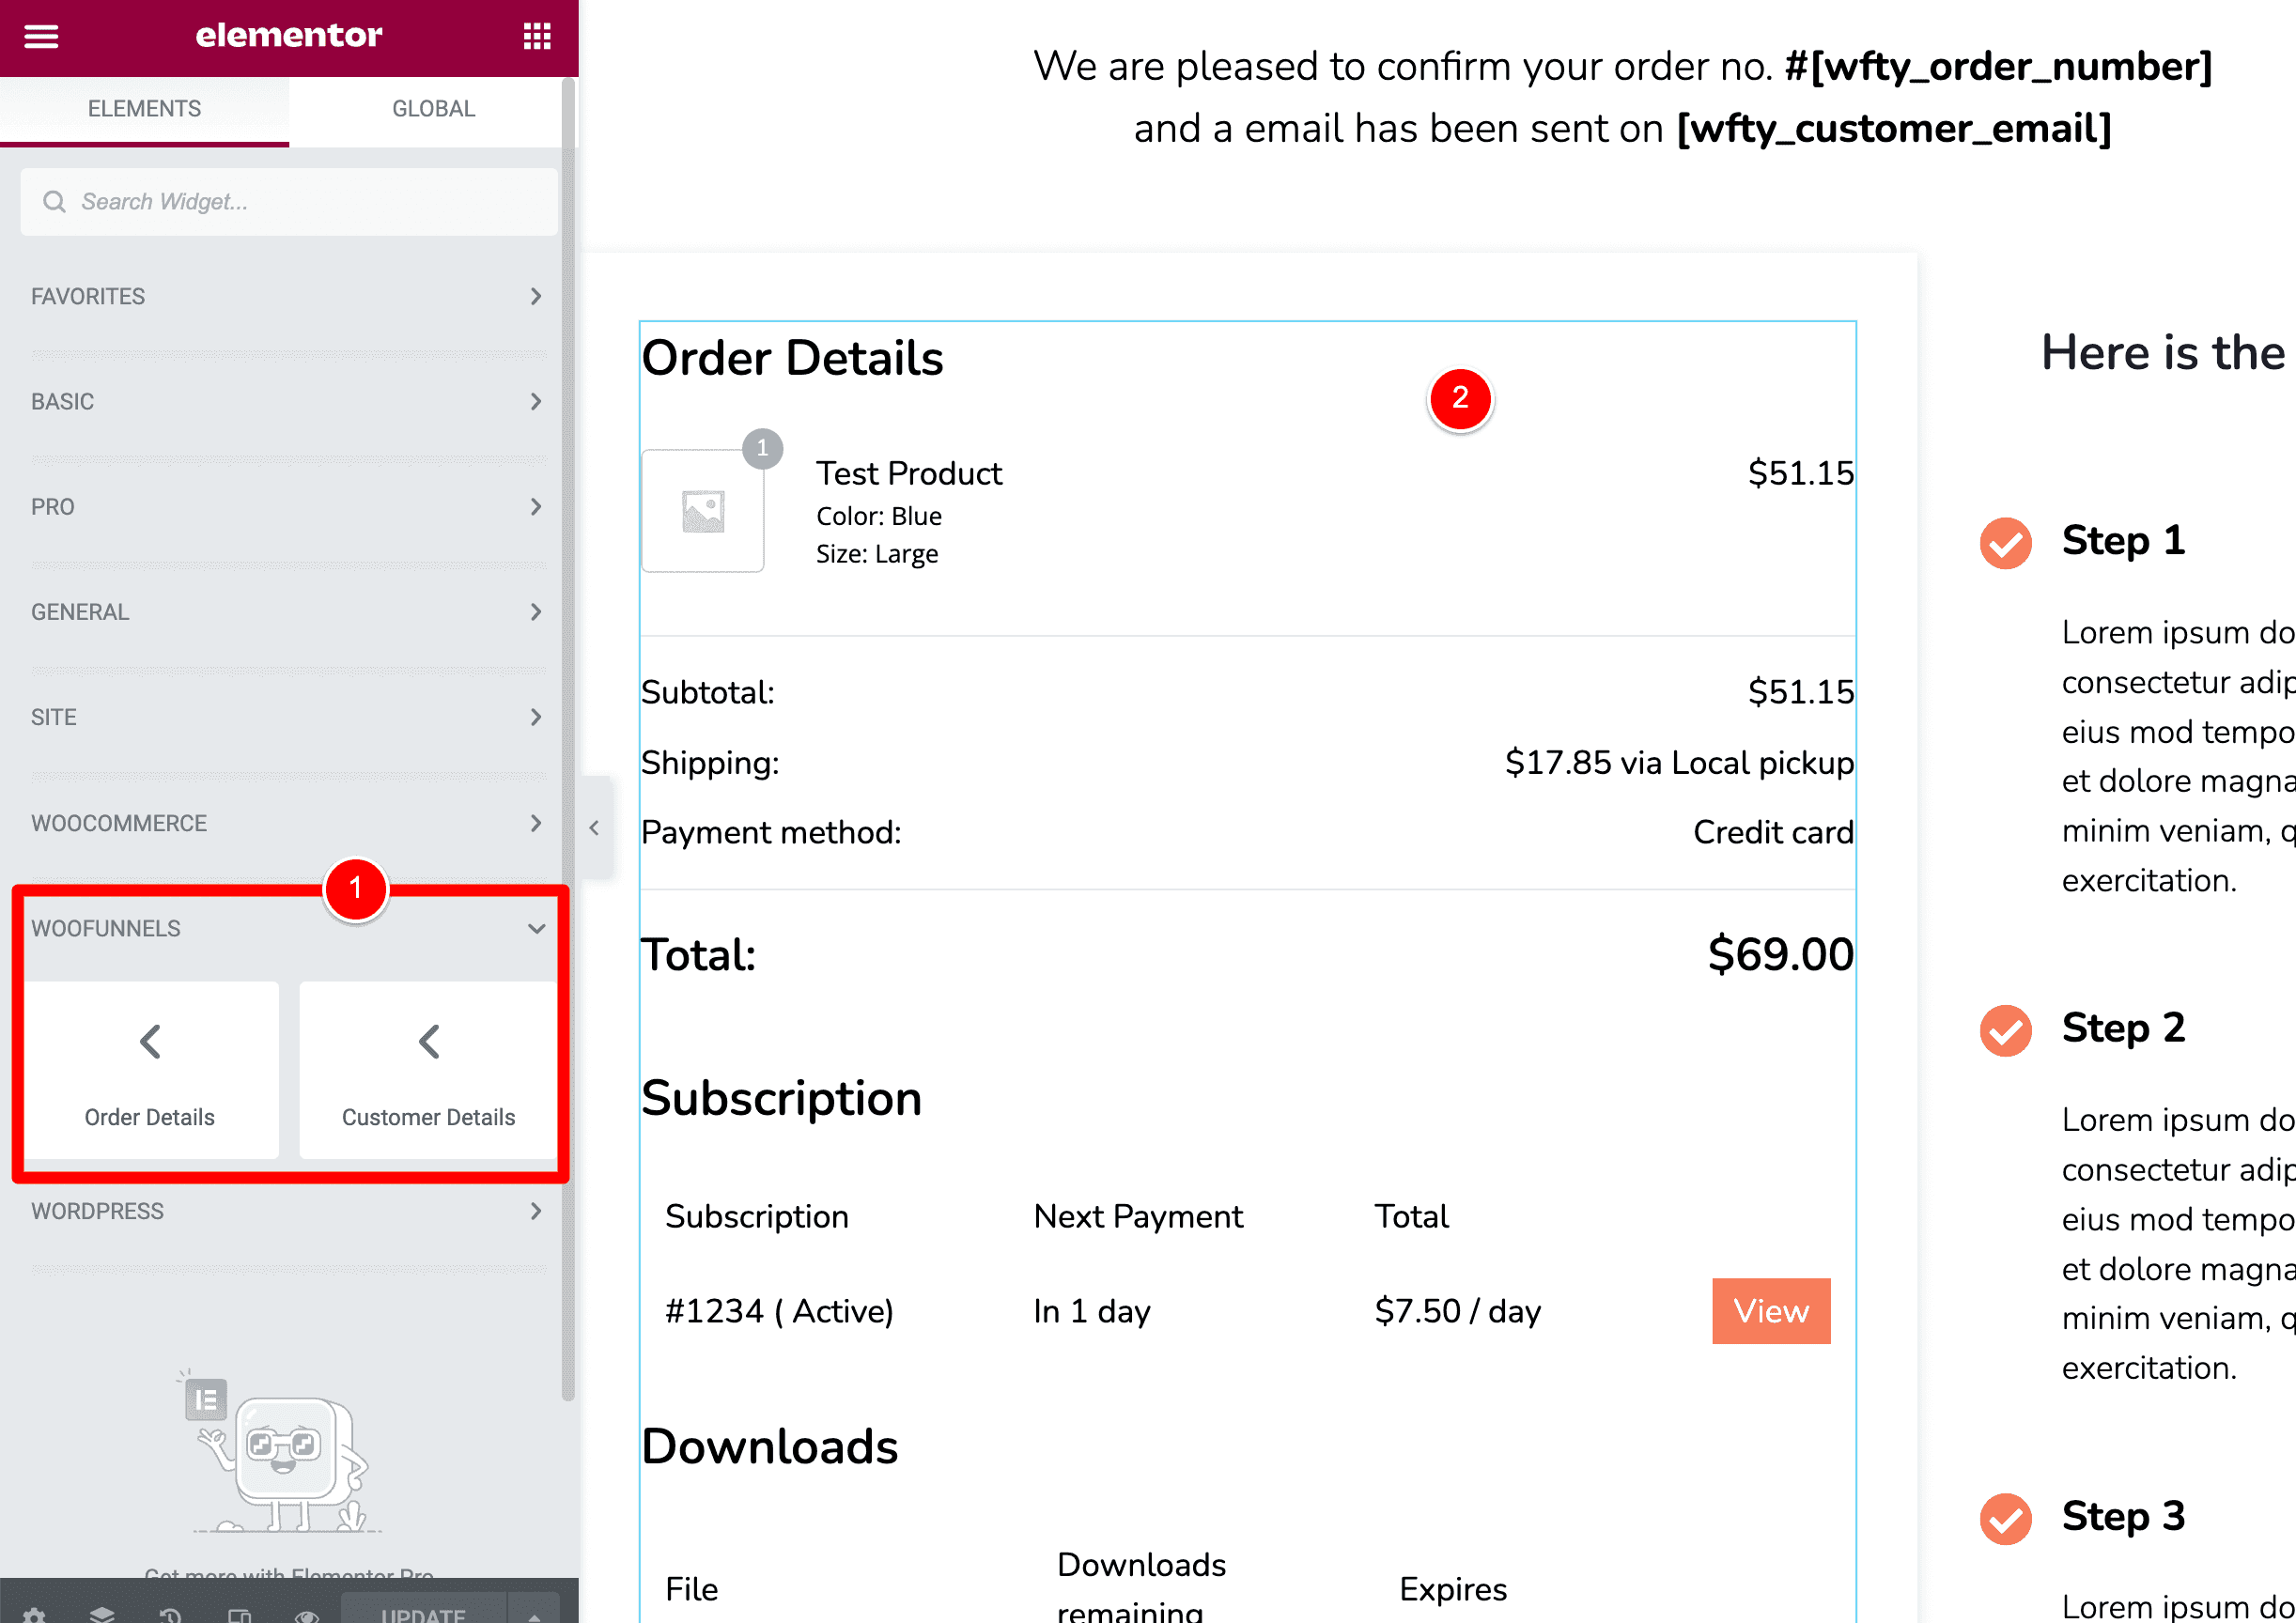
It’s the same process for Gutenberg / Divi / Oxygen.
At this point, our Checkout Page and Thank You Page are all set up and ready to go live.
The last thing we need to do is…
Set WooCommerce to use the new Checkout Funnel
Lastly, we need to tell WooCommerce to use our new Checkout Page we created in FunnelKit.
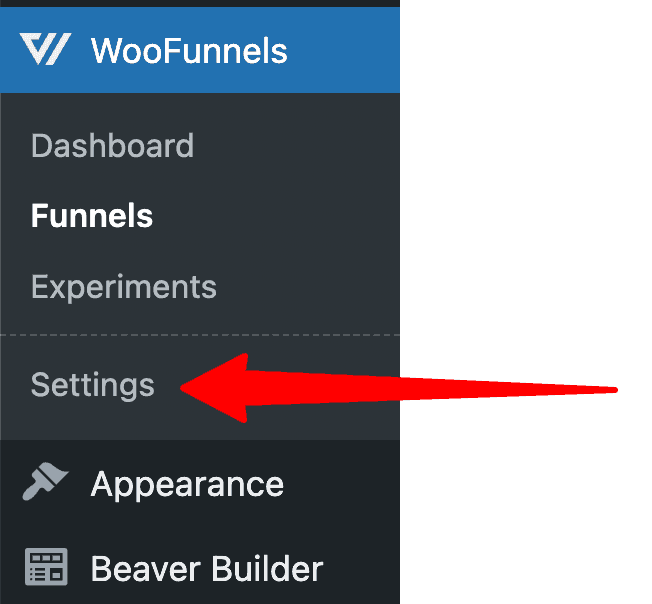
To do this, go to FunnelKit > Settings.
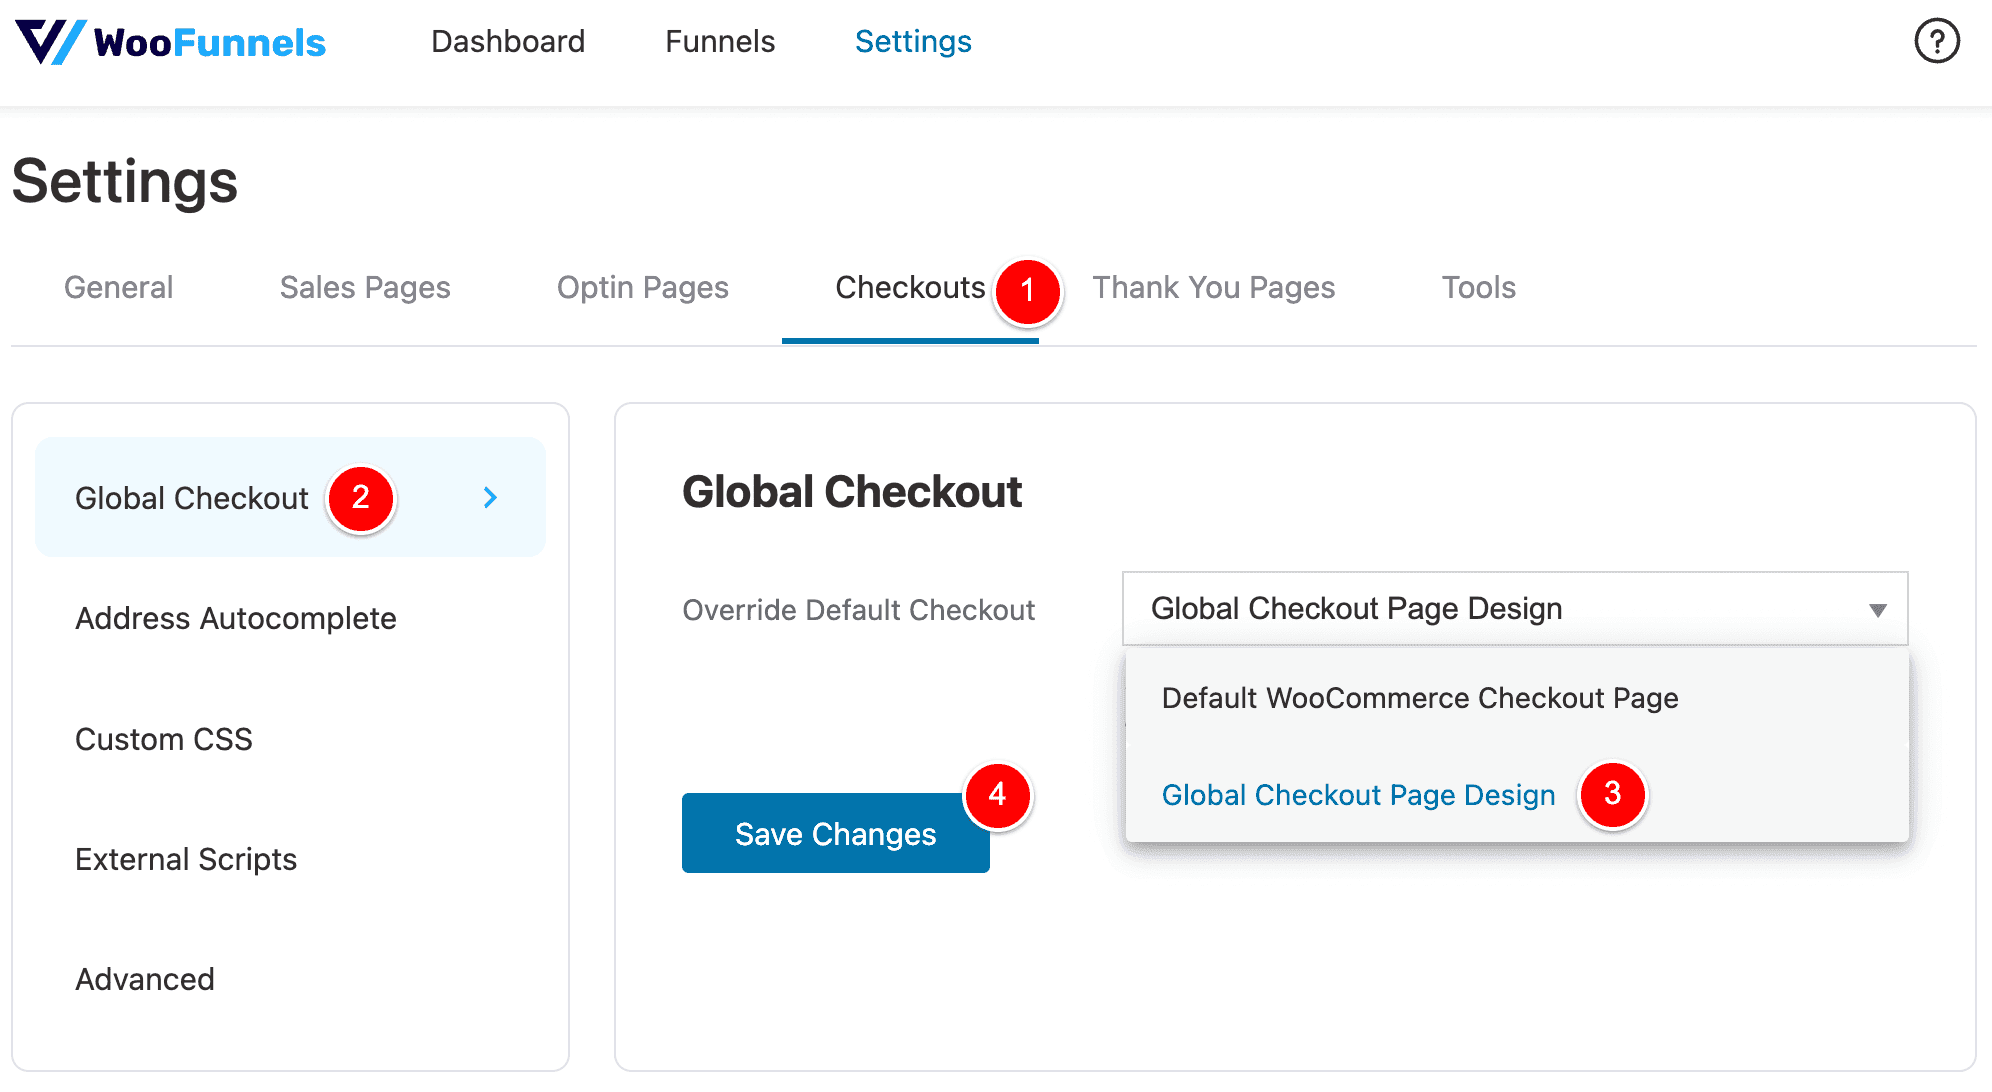
Then Checkouts (1), Global Checkout (2), select the new Checkout Page you created in the dropdown at (3) and then click Save Changes (4).
NOTE: This is why I recommended you use the phrase Global Checkout – it’s actually what FunnelKit refers to as the main checkout on your WooCommerce website in its settings.
Now we’re all done and our new checkout is LIVE and redirecting to our custom Thank You page URL!
Here is a short video I made to show you what we just set up in action (this is the same video up the top of this article).
NOTE: FunnelKit redirects to our custom Thank You page automatically
As shown in the video above, everything is all set up and working as we need.
BUT you might be wondering where exactly we told FunnelKit to redirect from our Checkout Page to our custom Thank You page…
Well – this comes down to how FunnelKit works (and why I love it so much).
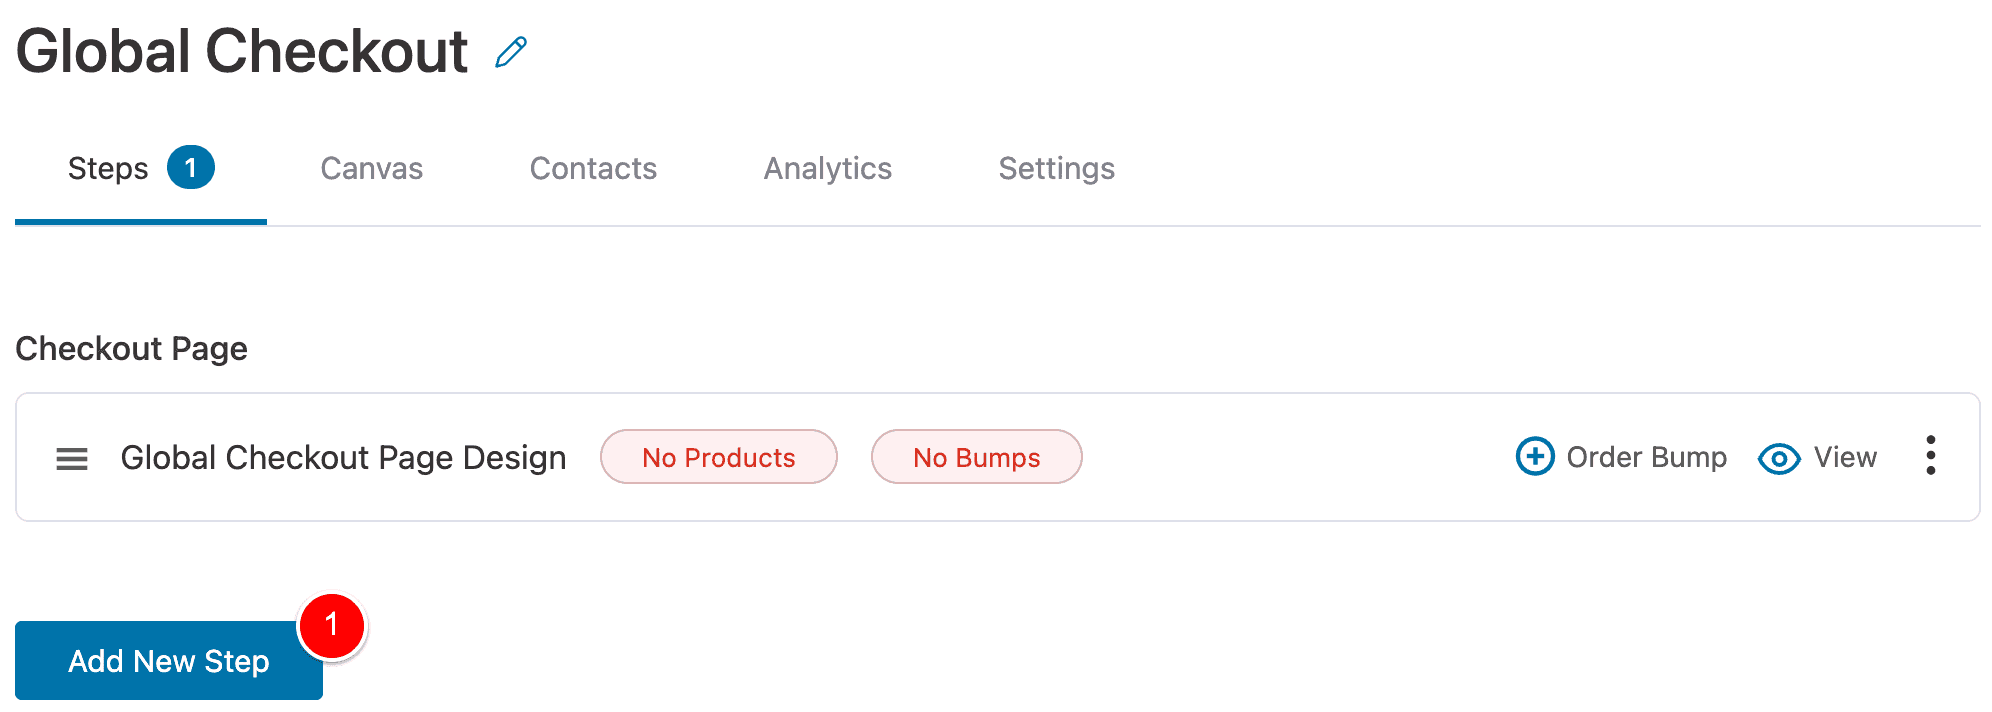
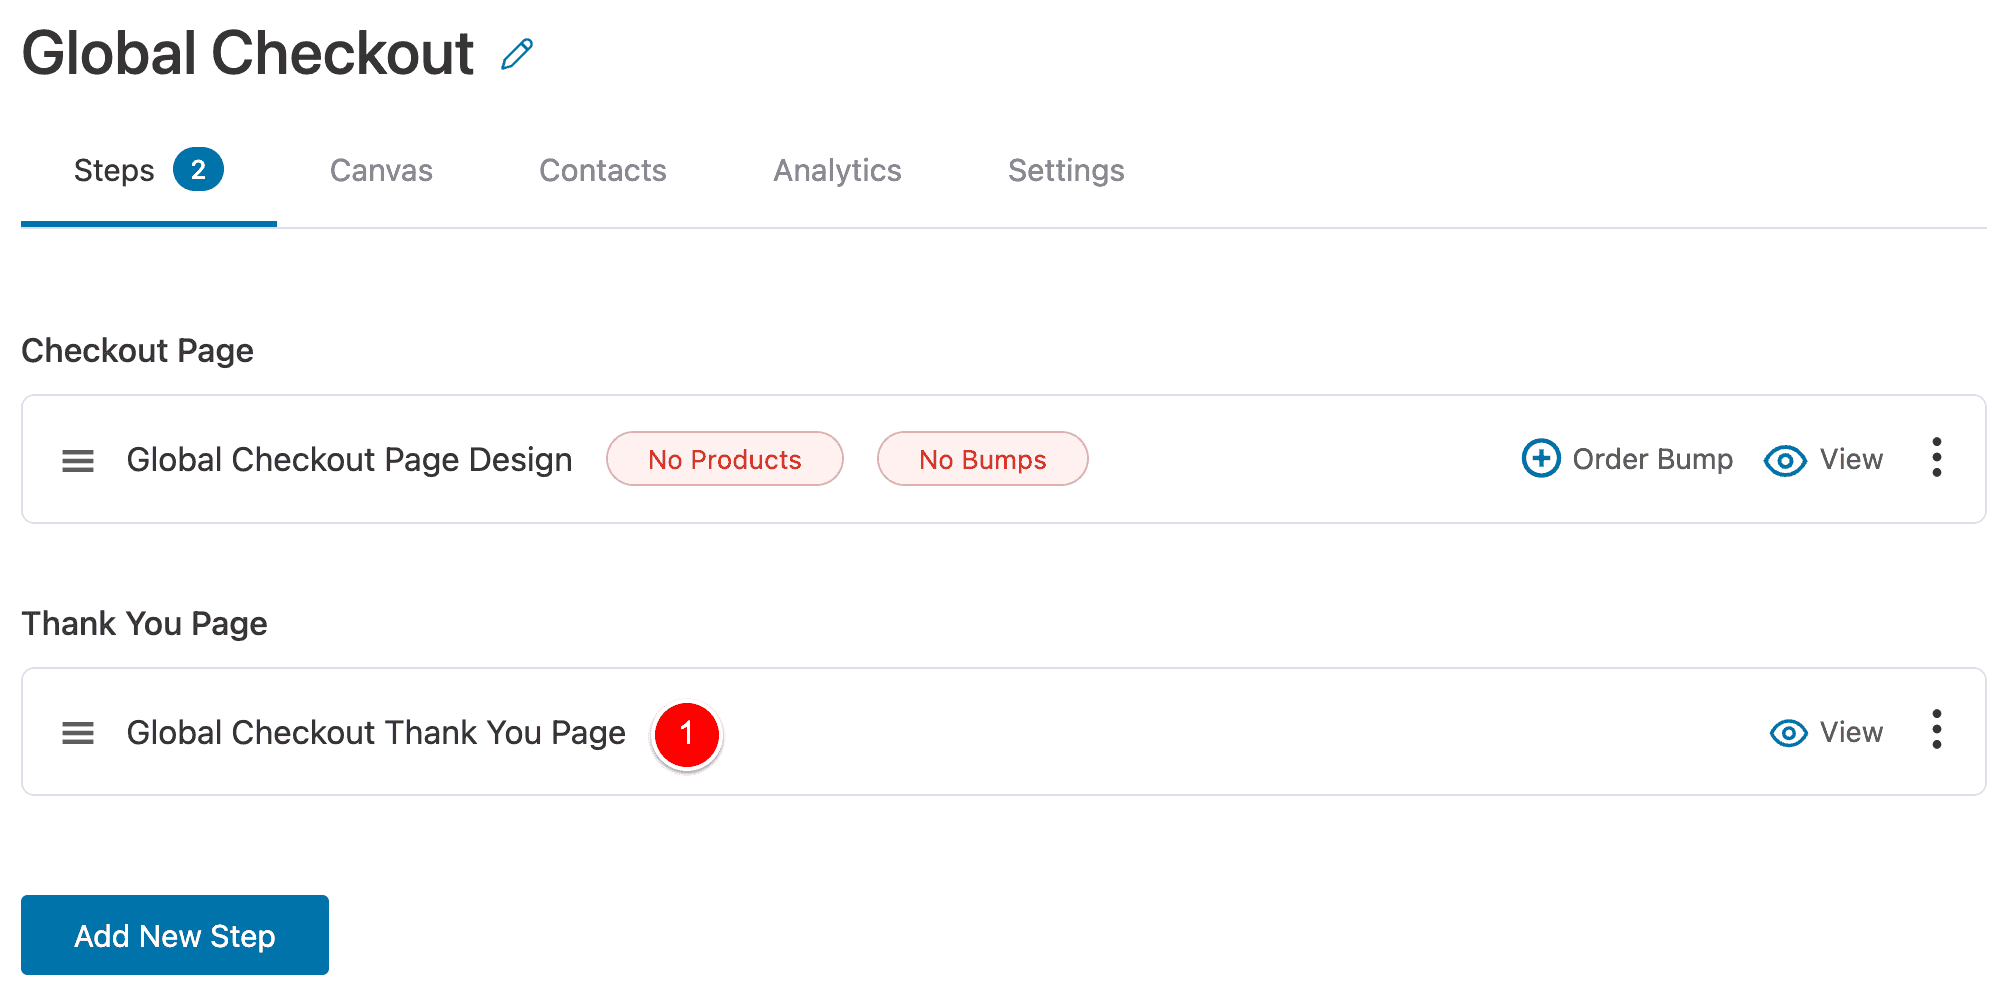
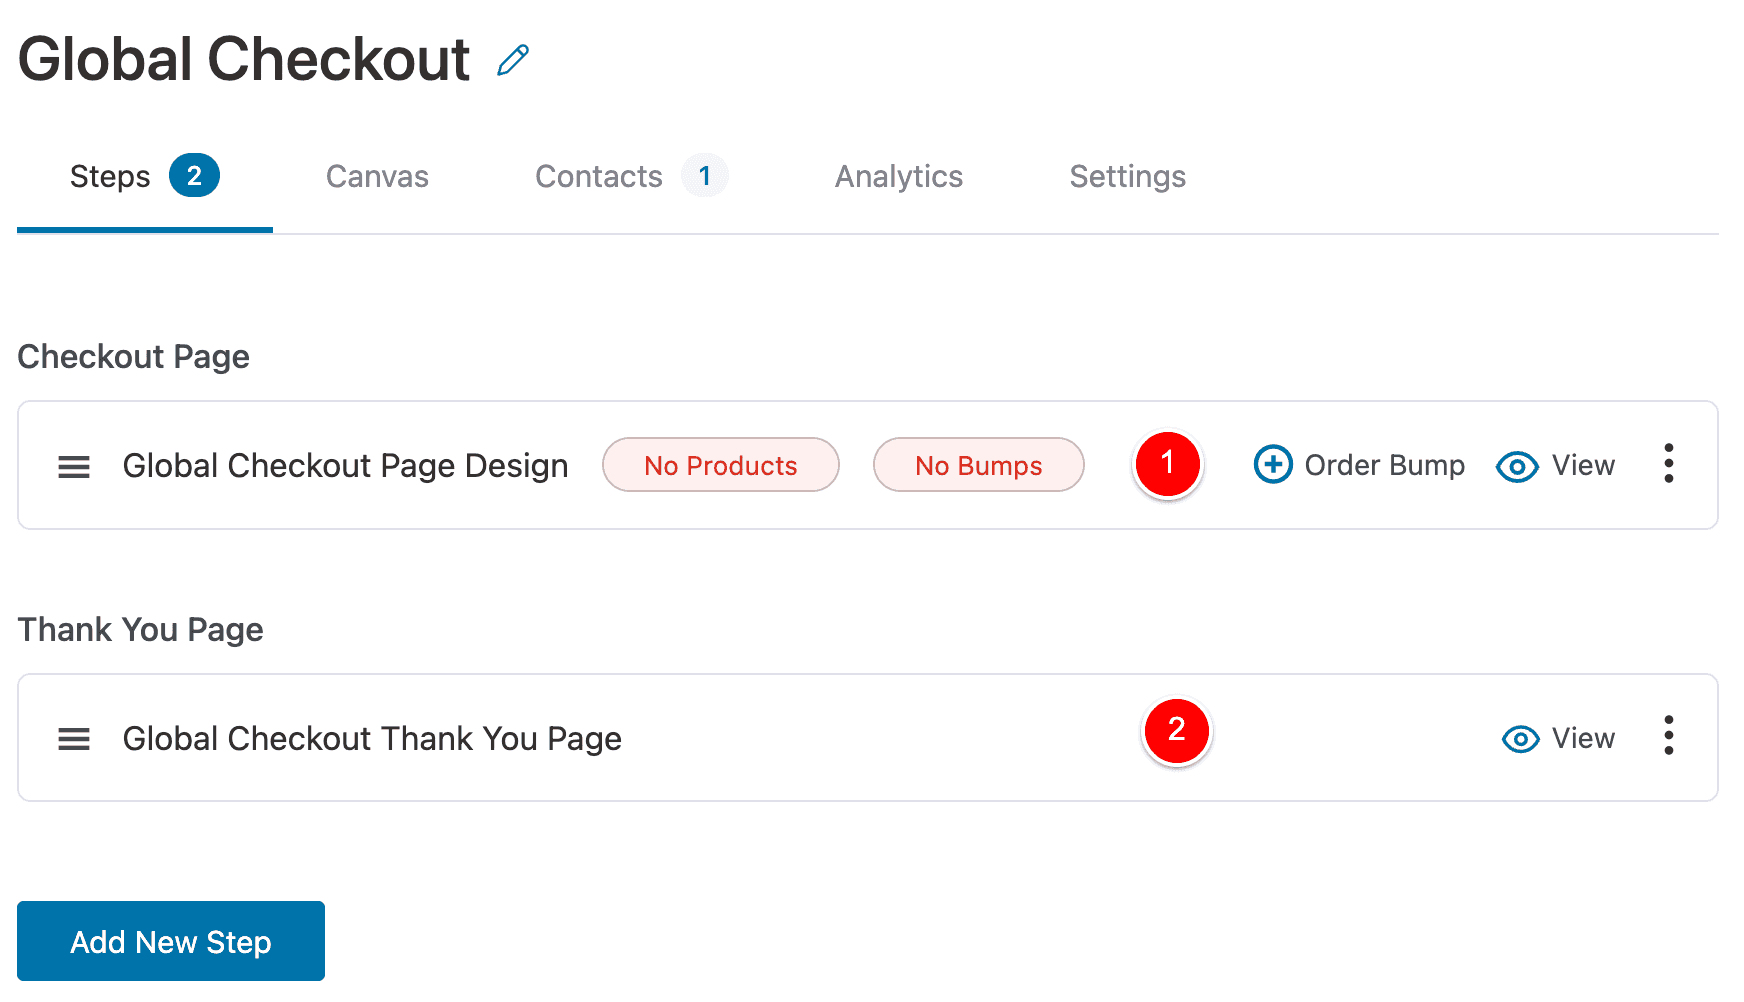
To recap – here is our Global Checkout Funnel we created previously in this tutorial and as you can see this funnel contains two steps in the funnel
- (1) is our Global Checkout Page
- (2) is our custom Thank You page
The FunnelKit plugin has built-in logic where it works from the top-down.
So, if we send customers to our Checkout Page and they complete this step in the funnel (i.e. they complete their purchase), FunnelKit then takes them down to the next step in the funnel automatically which is our custom Thank You page (2).
That’s why we don’t have a step above to specifically enter the URL of our Thank You page – FunnelKit just “knows” what to do based on its top-down logic.
Cool, right!
So that is how you’d redirect to a custom Thank You page using WooCommerce and a free plugin.
Other Page Builders and how to set this up
In this article so far, we stuck to using Elementor in our examples.
The way Elementor works in FunnelKit to set up this redirect is exactly the same for the following page builders:
For all the Page Builders listed above, the FunnelKit team have gone ahead and created custom modules for you to use when you’re building your pages.
For example, in Gutenberg, you have these 2 blocks that FunnelKit have created for you (1).
And in Elementor we had these.
Now, if you are NOT using a Page Builder listed in the FunnelKit dropdown, you should select Other (using Shortcodes).
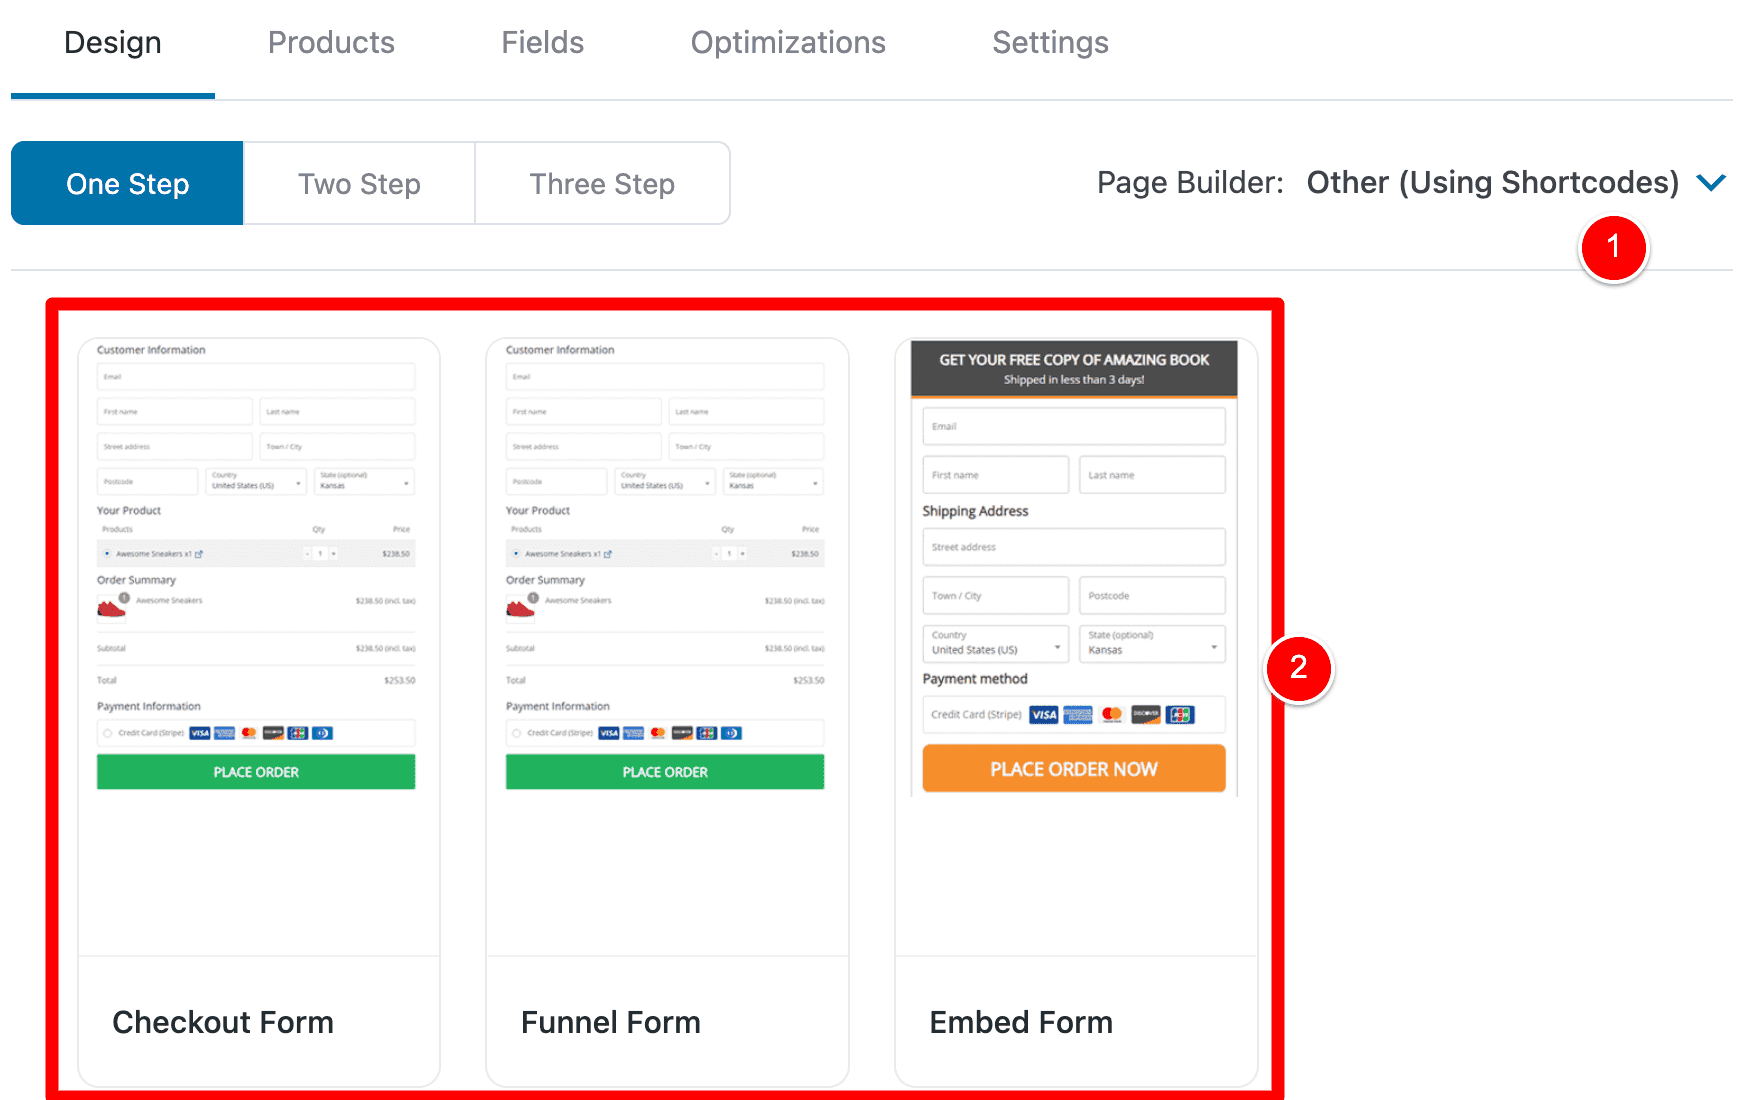
When you select this Other option, instead of being able to choose from a list of pre-made templates you can choose from 3 different form types.
In this example now, I will select Checkout Form and click Import (1).
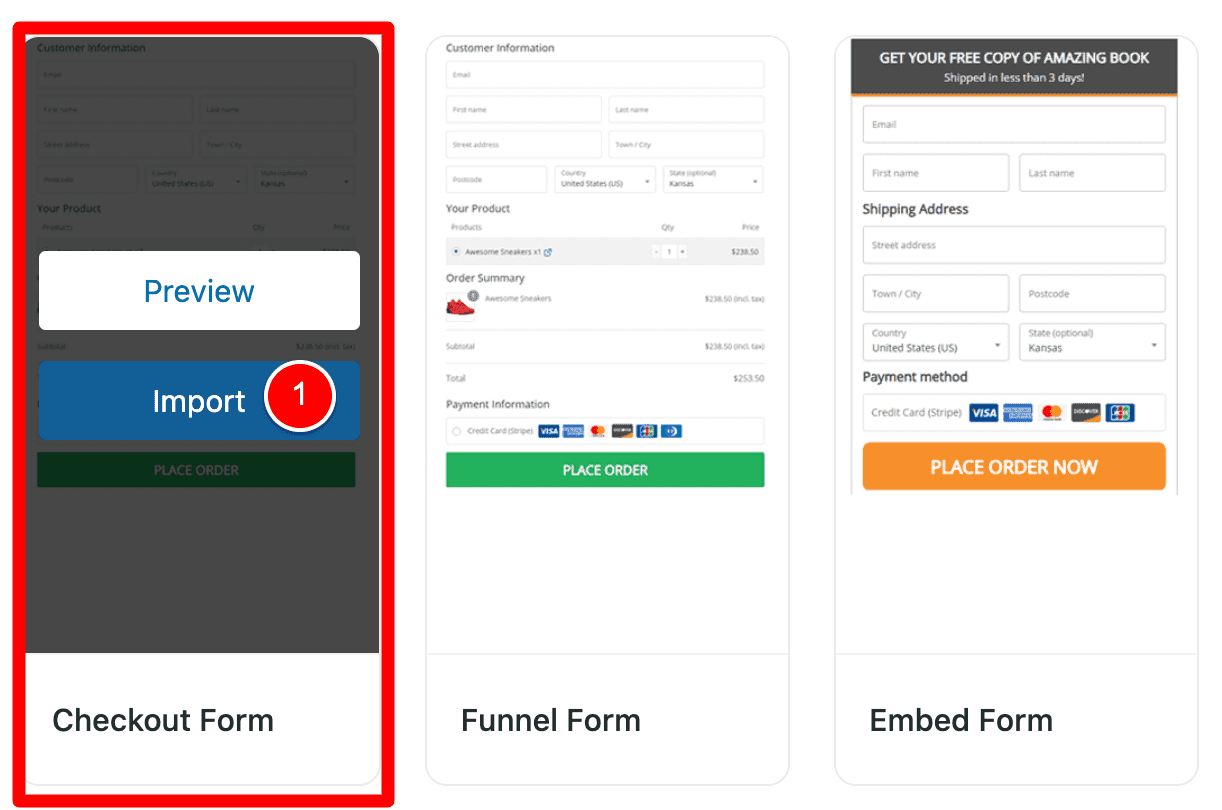
After clicking Import, you are taken to a page that looks like the one below and it lists Shortcodes you can use at the bottom.
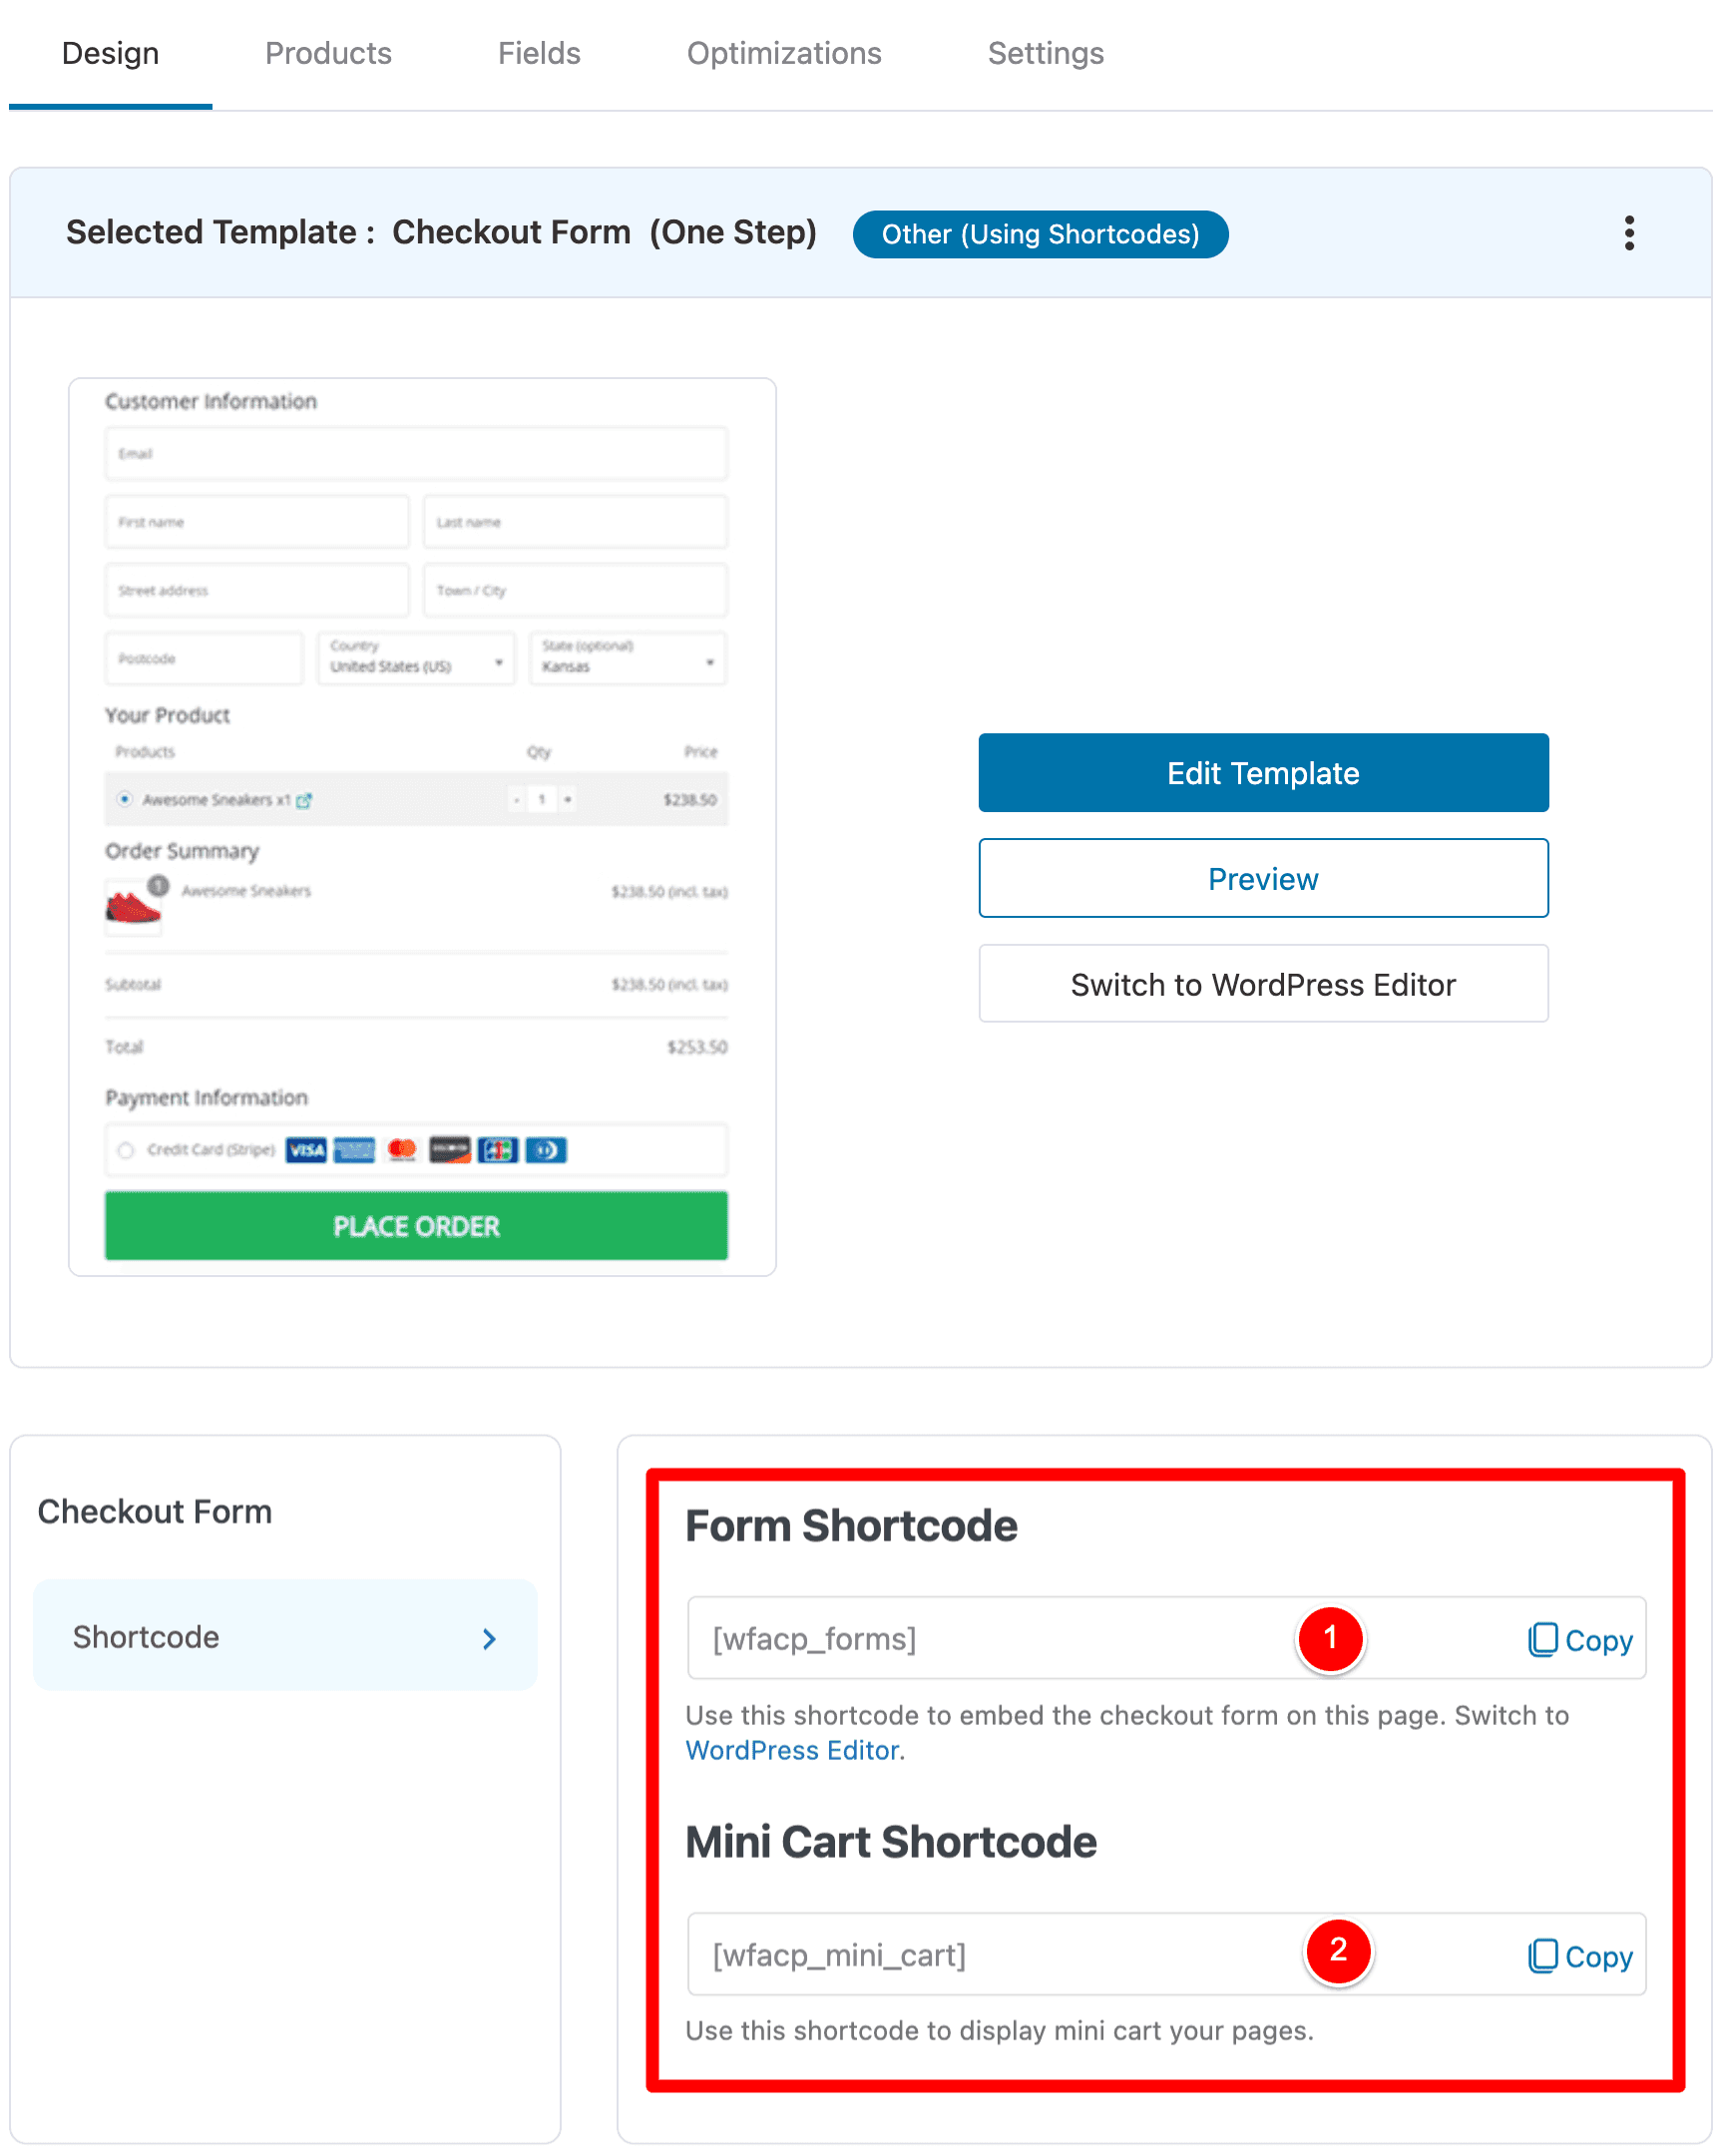
So now, you just design your Checkout Page however you’d like using your Page Builder and then you insert these shortcodes where you want your forms to output and that’s it!
So the difference between choosing a listed Page Builder in FunnelKit VS selecting Other (using Shortcodes) is that:
- There are no native elements for the Page Builder that you can drag into the page. Instead, you add these Shortcodes where you want the forms to output.
- There are no pre-made designs, so you need to design from scratch.
To give you an example of how I would do this in my business…
I recently converted my blog website from using Beaver Builder over to Bricks Builder (my new favourite Page Builder and the fastest Page Builder for WordPress that I’ve found).
In this case, the Bricks Builder page builder is not listed so I need to select Other (Using Shortcodes).
Then, I would drag and drop elements in Bricks Builder to build my Checkout Page and I would just add the shortcode where I want to output my Checkout Form in my design.
So it’s just a small difference but I wanted to note this for you.
FunnelKit FREE VS Paid Plans
I would recommend reading my full review of FunnelKit to see the other ways I use FunnelKit in my businesses, but you can achieve what we set out to do here in this tutorial with the free FunnelKit plans.
Old Method: Using PHP Code to redirect to a custom Thank You page
This is the OLD WAY we used to redirect WooCommerce users to a custom Thank You page using PHP code.
There are 0 cases where I would recommend using this method and not the FunnelKit method (again…FunnelKit is free to achieve this redirect) BUT I will add this here if, for any reason, you’d prefer to do it using PHP.
The PHP Snippet you need
Here is the PHP code you can use to redirect your users to a custom Thank You page URL in WooCommerce.
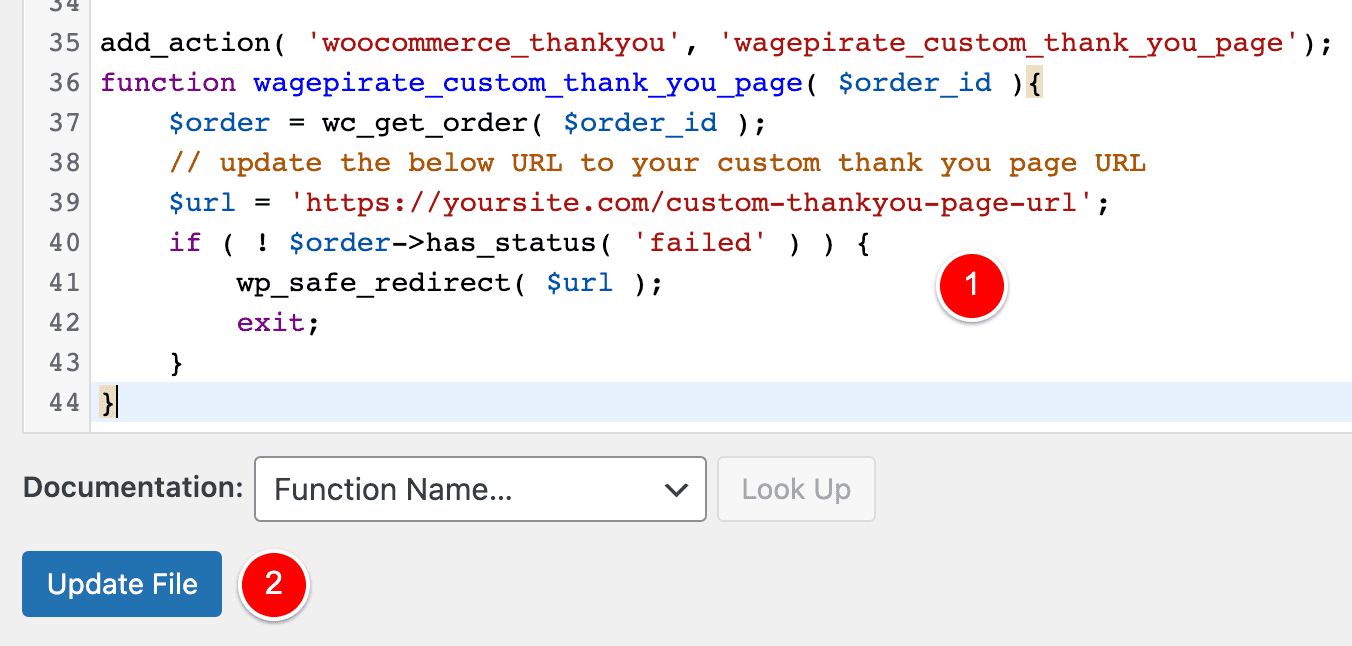
add_action( 'woocommerce_thankyou', 'wagepirate_custom_thank_you_page');
function wagepirate_custom_thank_you_page( $order_id ){
    $order = wc_get_order( $order_id );
    // update the below URL to your custom thank you page URL
    $url = 'https://yoursite.com/custom-thankyou-page-url';
    if ( ! $order->has_status( 'failed' ) ) {
        wp_safe_redirect( $url );
        exit;
    }
}
Code language: PHP (php)
Here is what the above PHP code is doing:
- It gets the Order of the customer
- It checks if the Order has FAILED
- If the Order has not FAILED payment, then it redirects the user to the URL you add on line 5.
WPCodeBox: Add this PHP Code to your website
Since I converted my Beaver Builder website over to using the incredible Bricks Builder, I have also started using a plugin called WPCodeBox to add all my custom PHP Snippets / CSS / JS like this PHP code from this tutorial.
Let me show you how easy it is to add this PHP code using WPCodeBox.
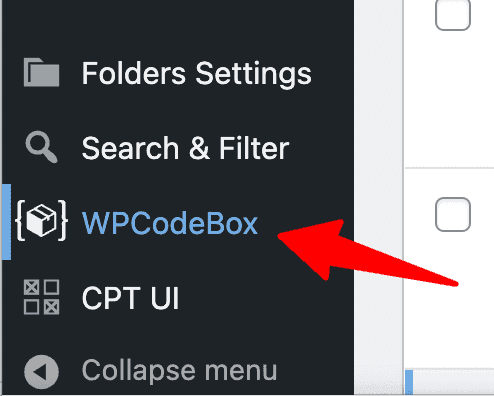
To add this PHP code using WPCodeBox, go to the WordPress Dashboard and then WPCodeBox.
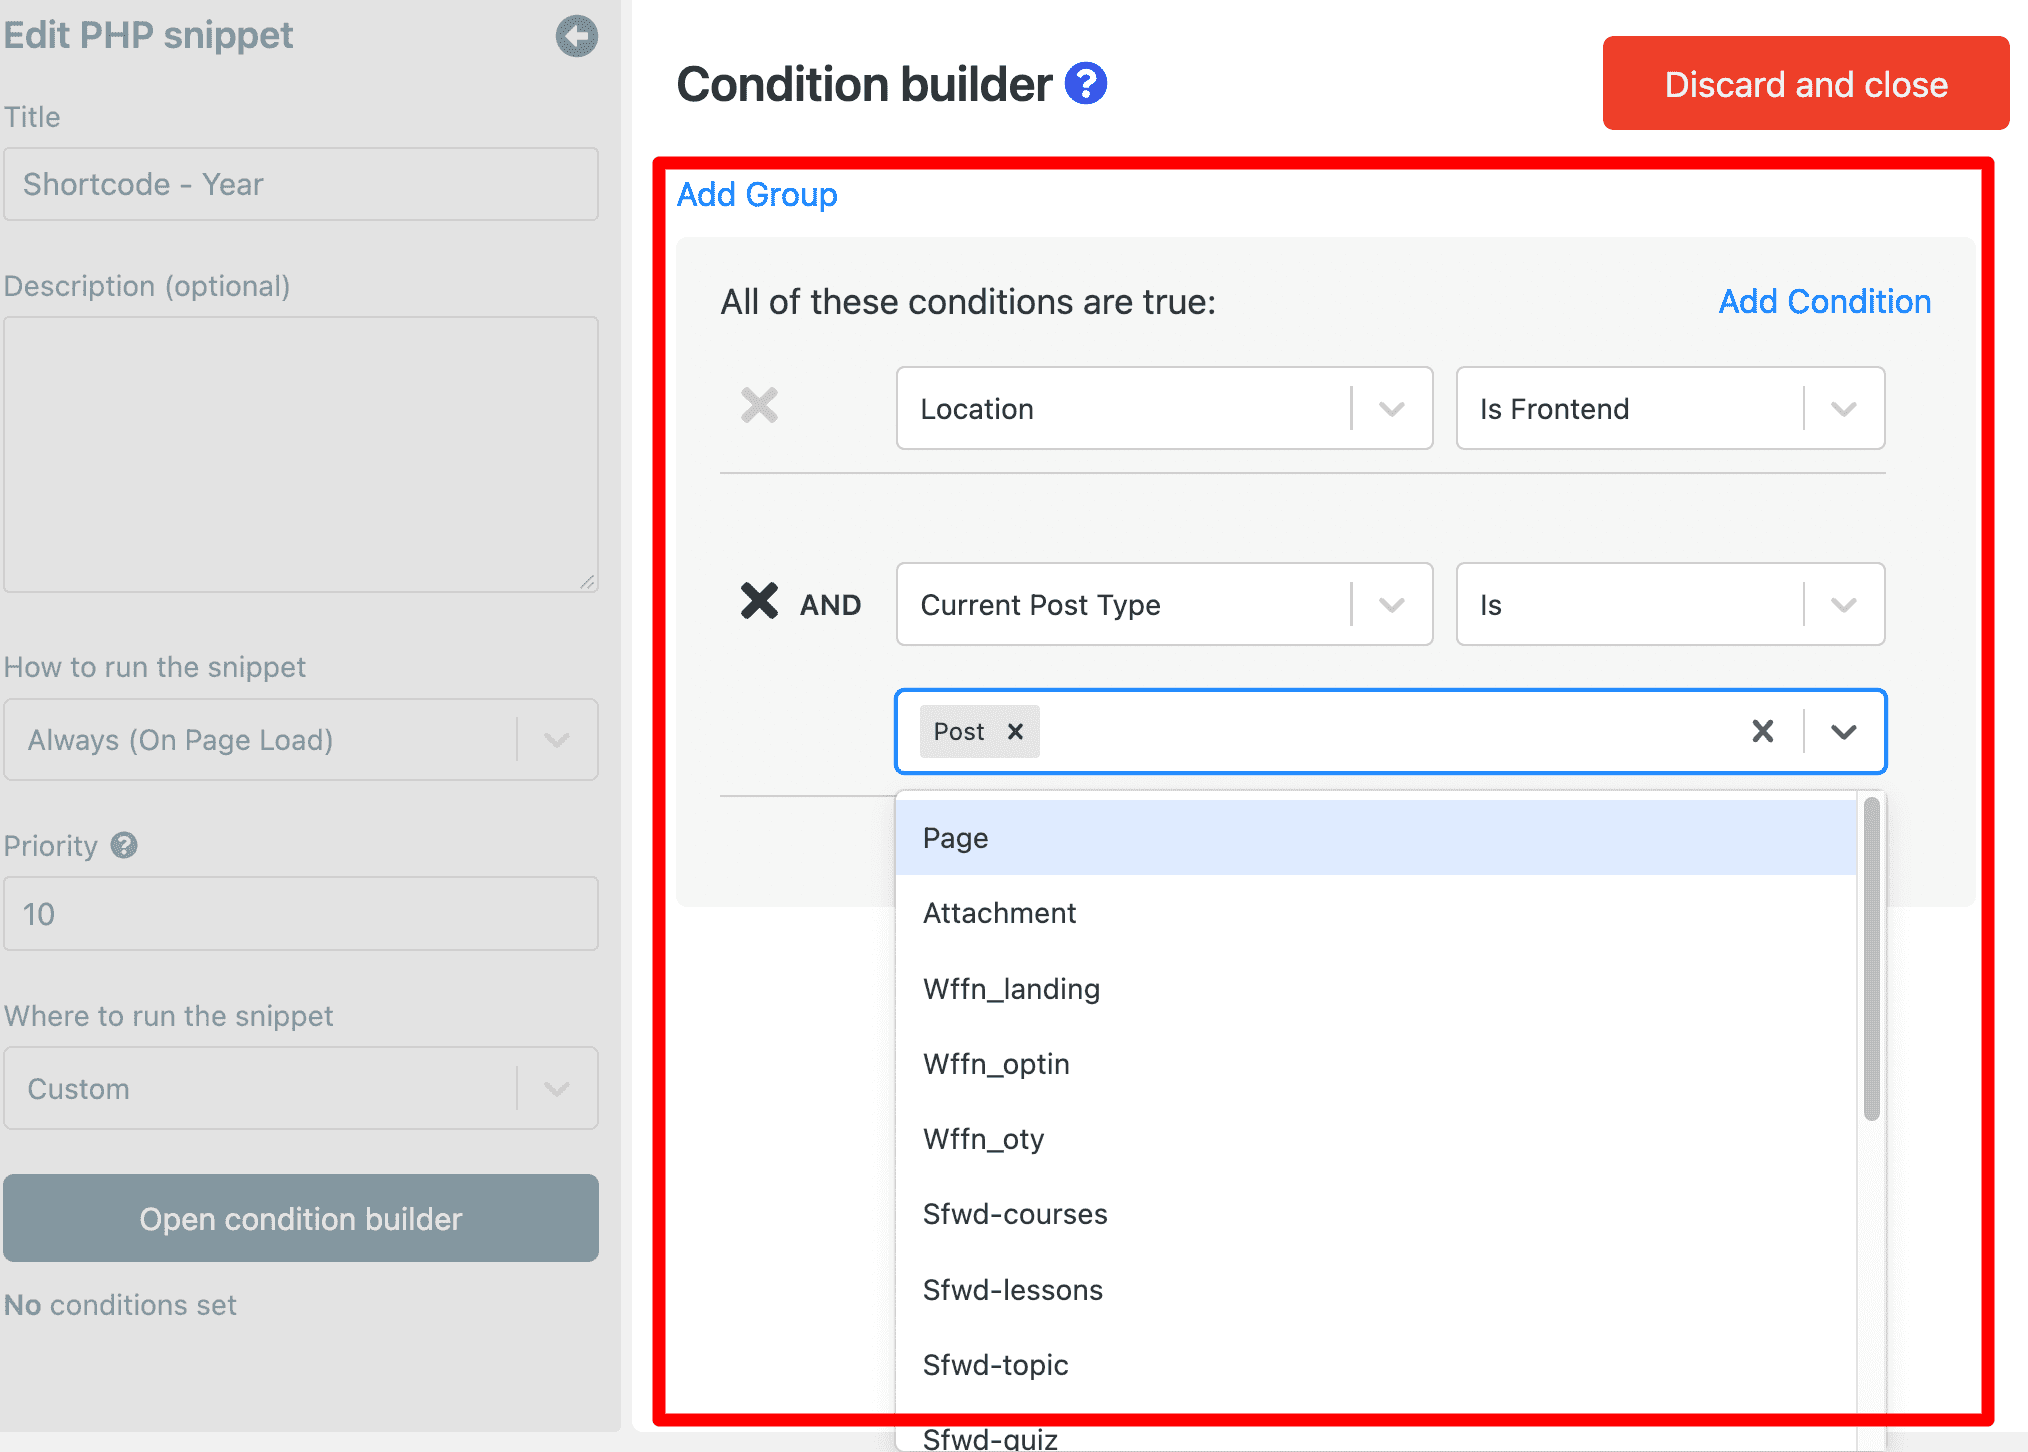
Click on New Snippet (1), give your snippet a name (2), choose to run it only on the frontend (3), paste in the PHP code at (4) and then click Save / Enable at (5).
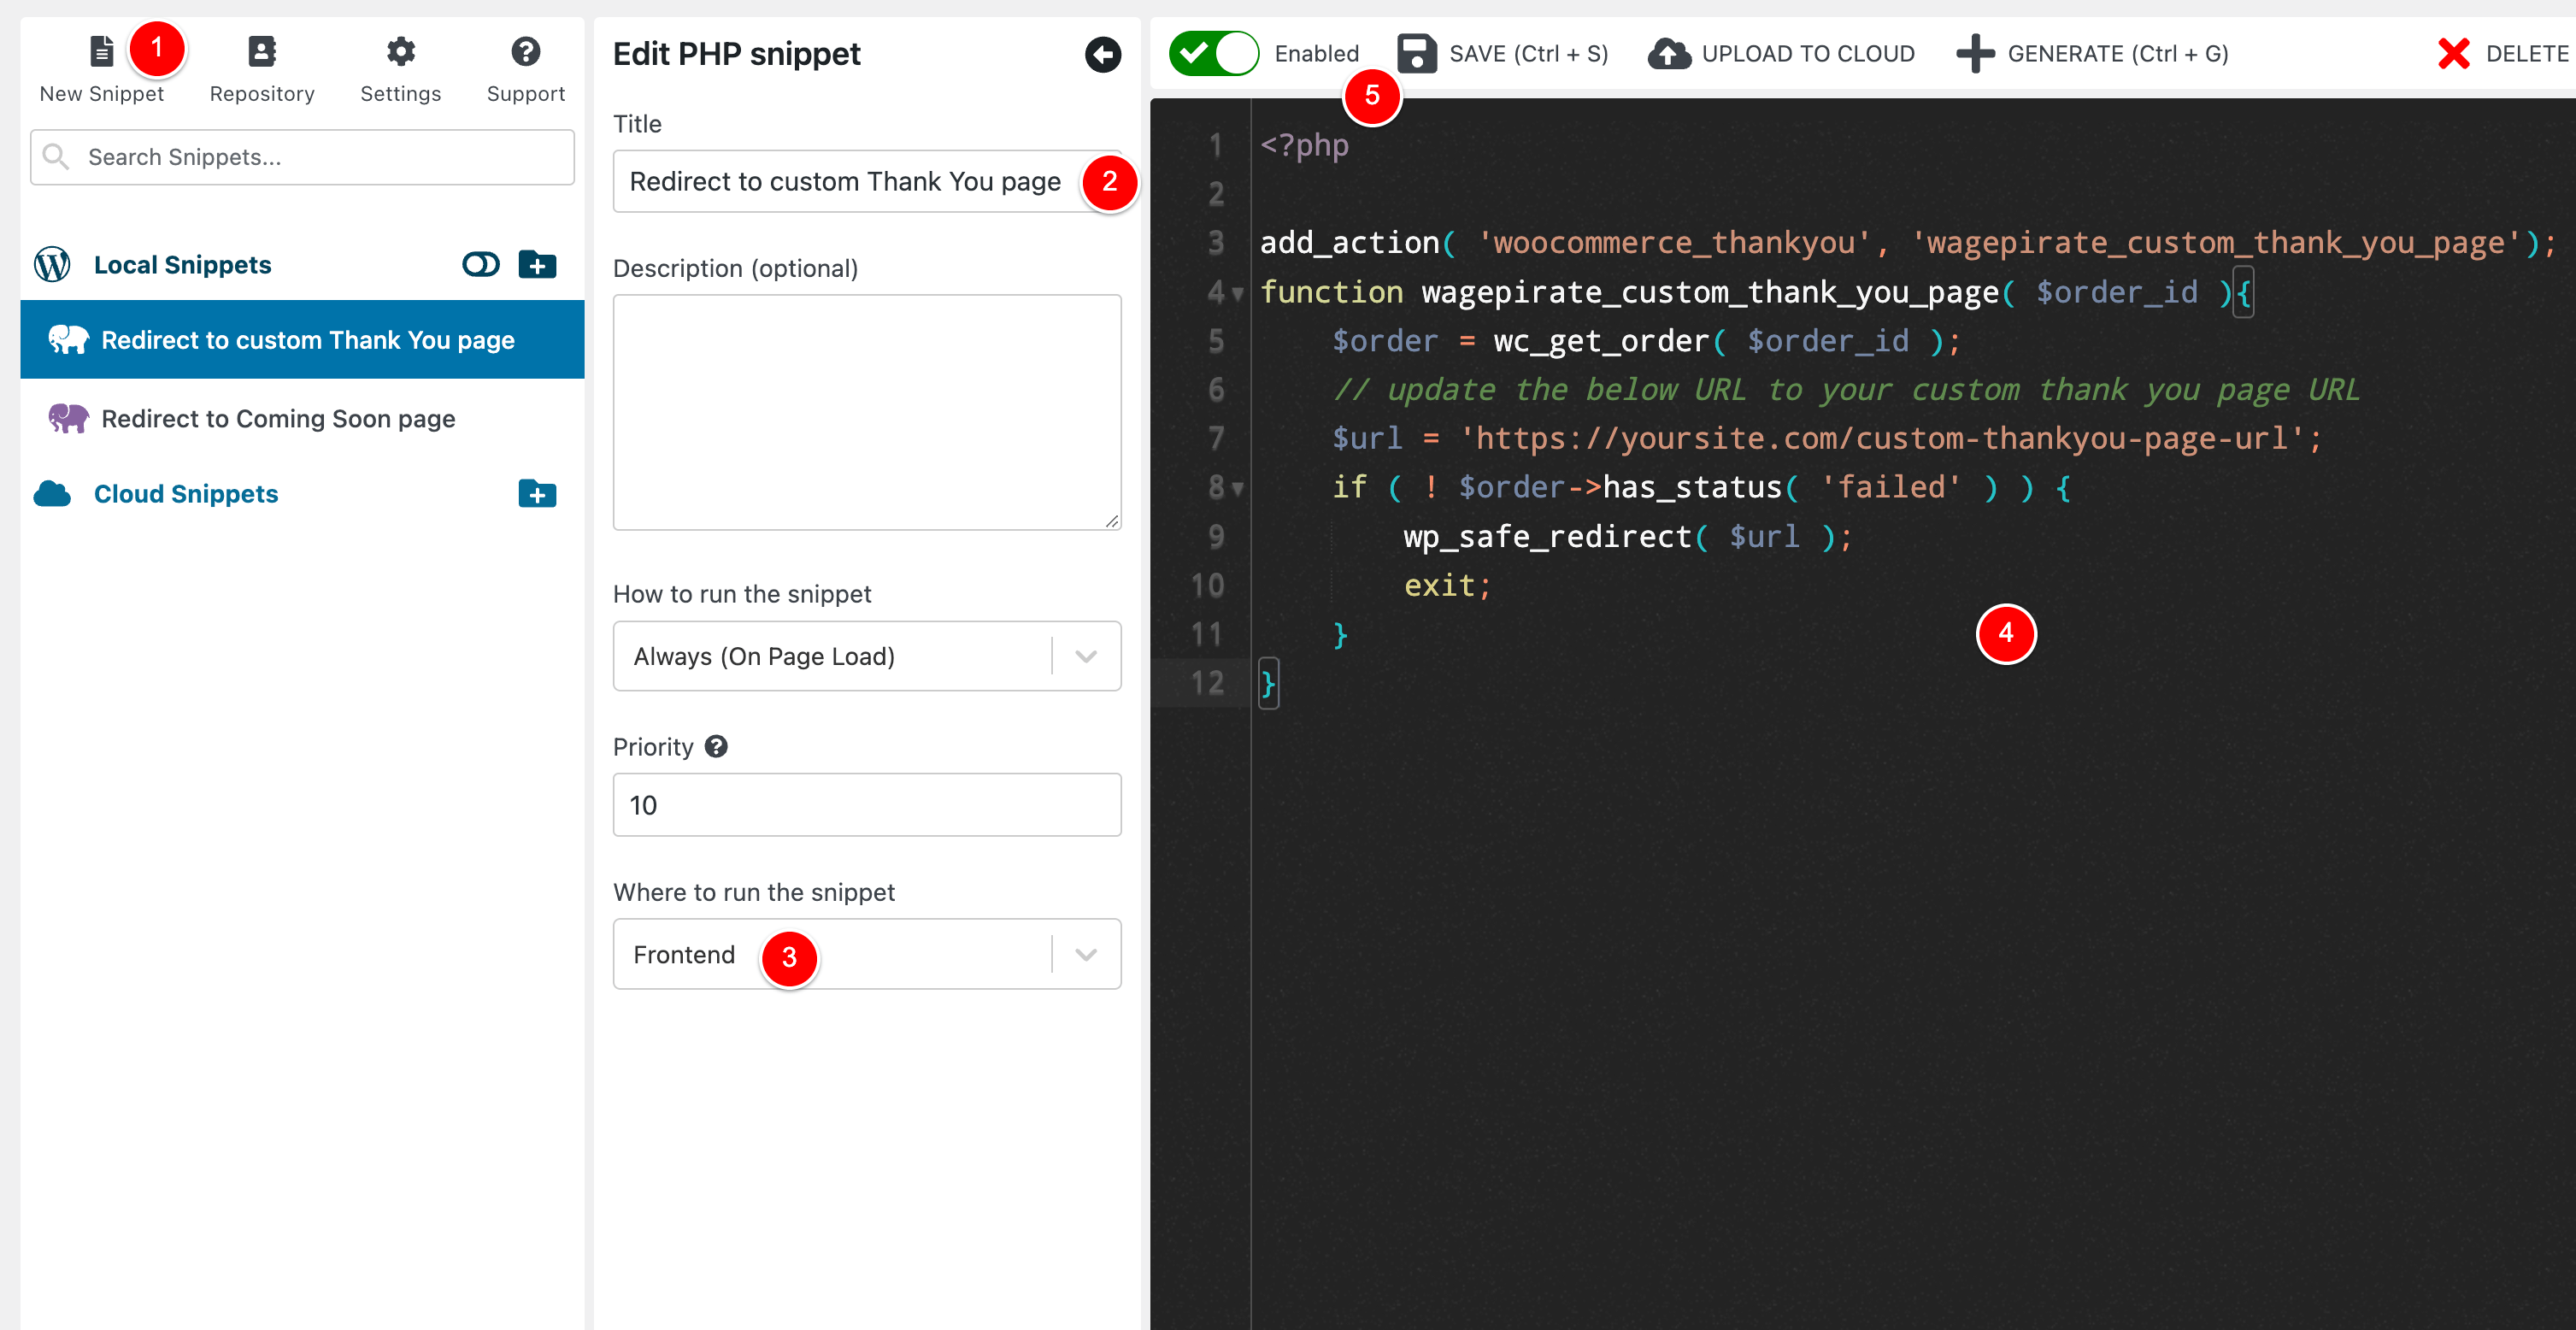
That’s it – it’s all done and live and my customers would be redirected to my custom Thank You page after checkout.
WPCodeBox: Other benefits / pros
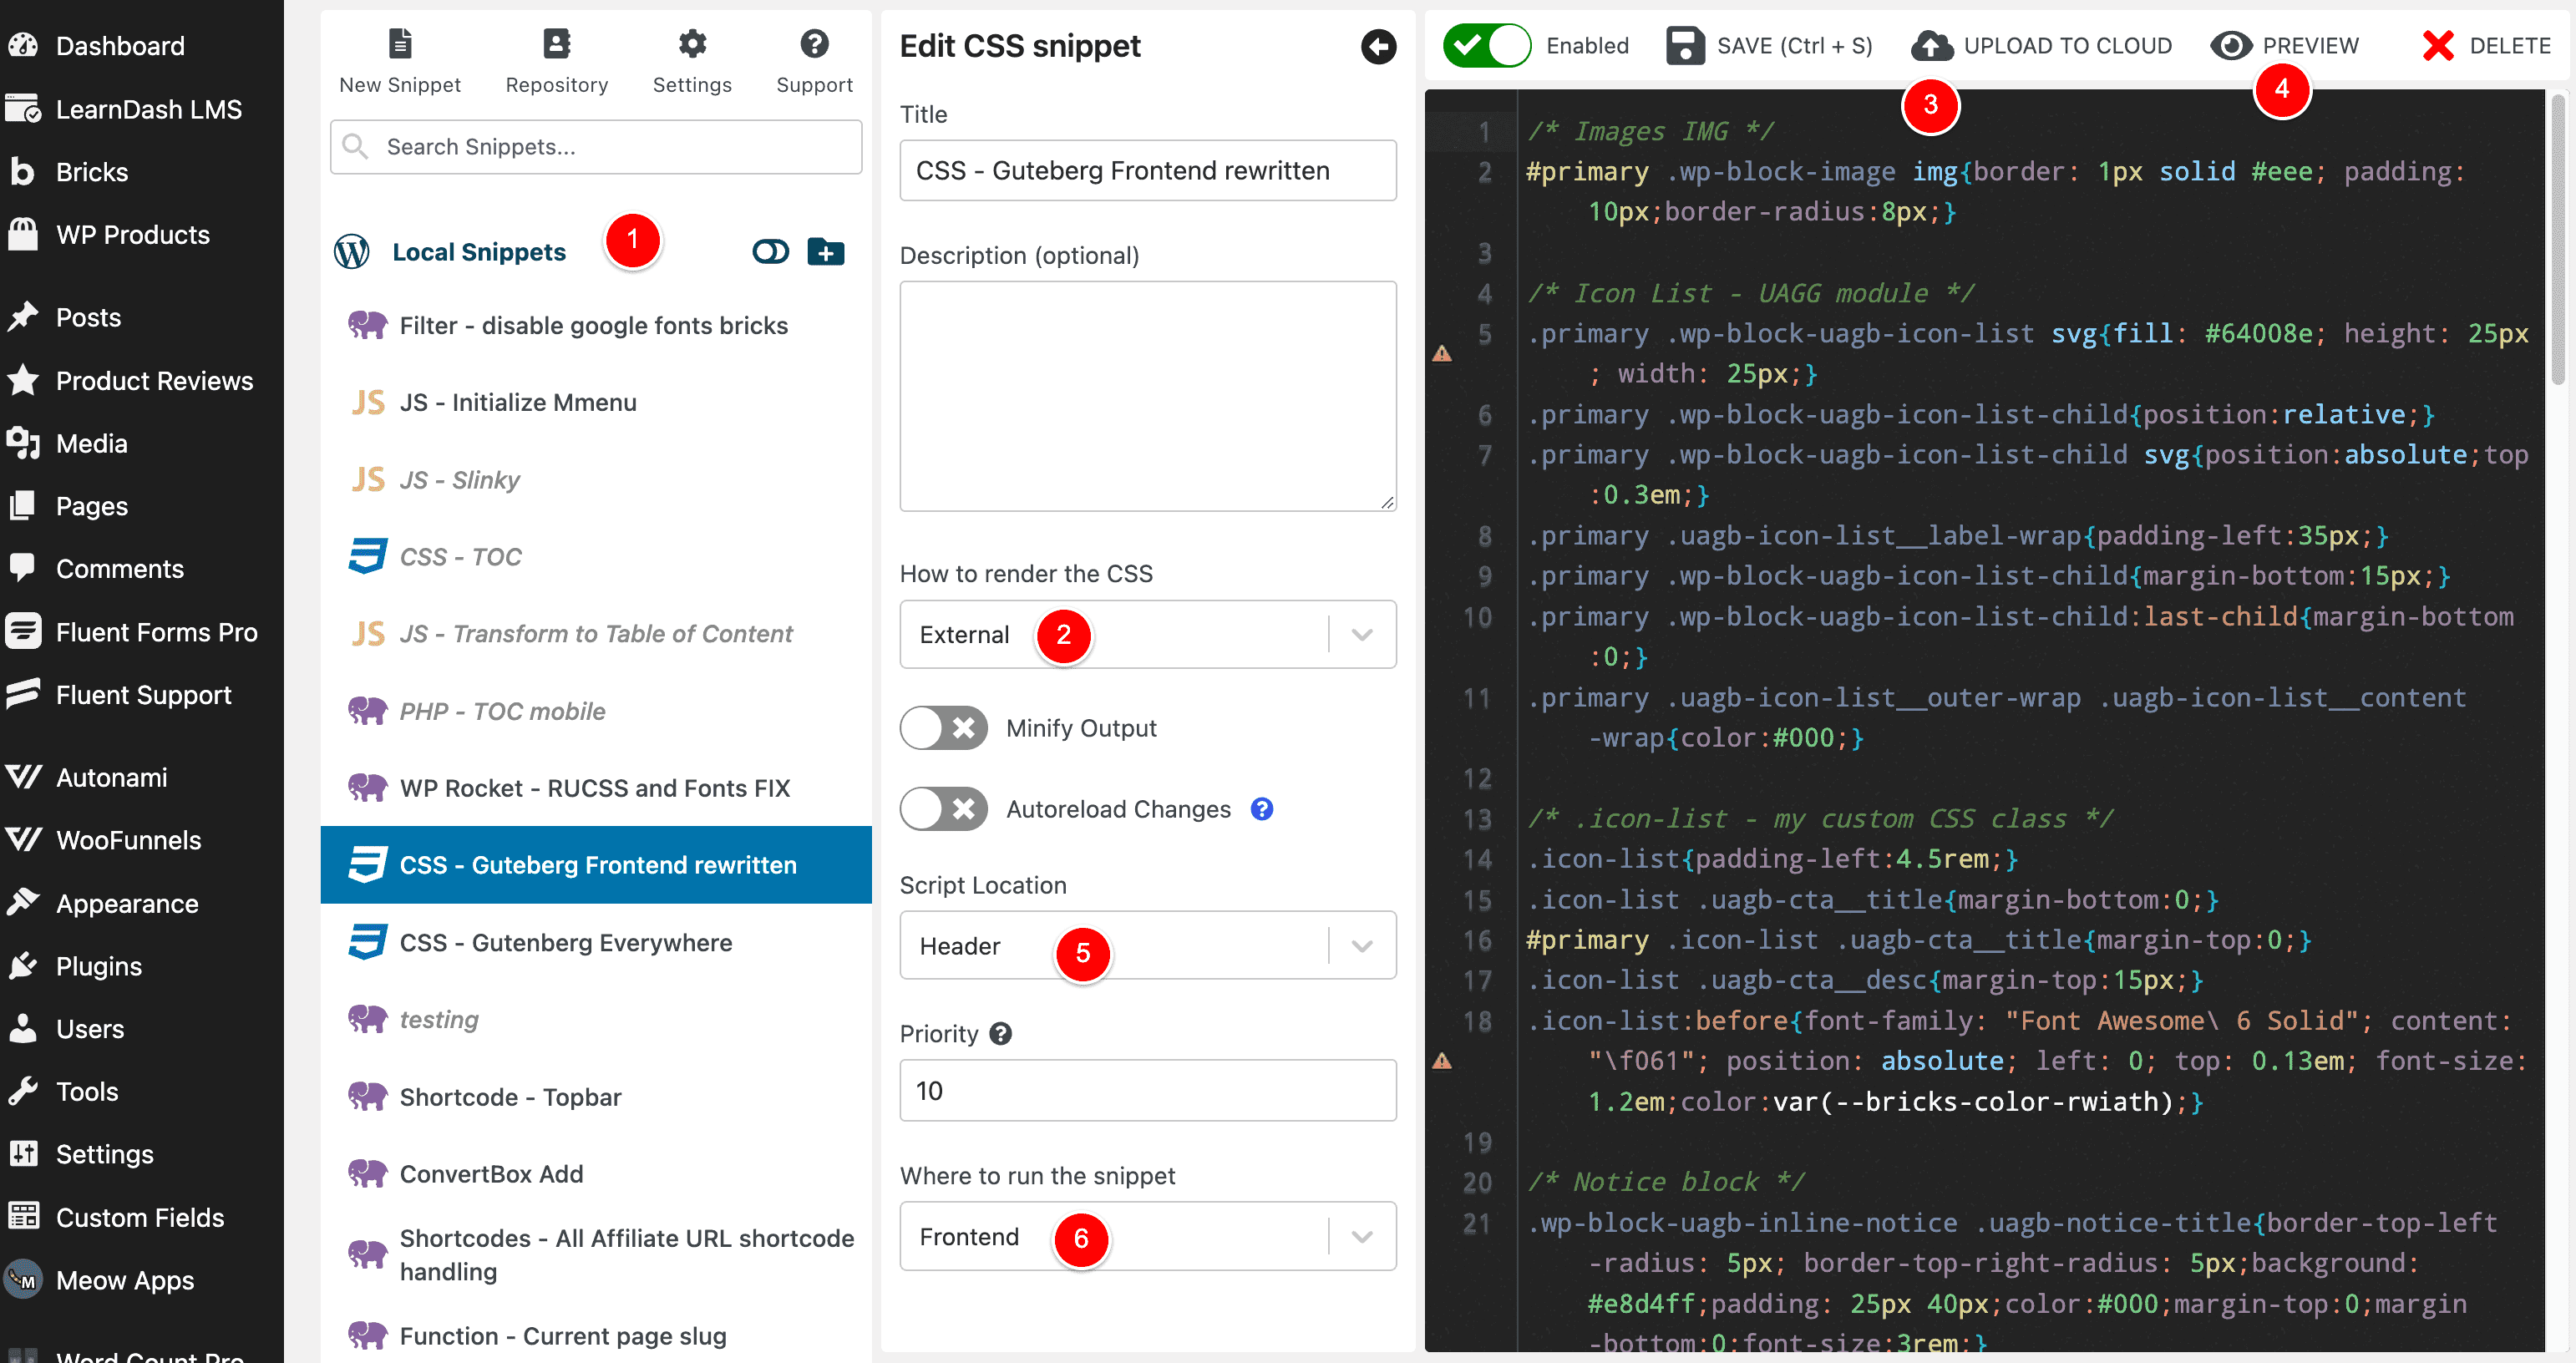
Below is a screenshot of some of the CSS/JS/PHP Snippets I have on wagepirate.com.
Here are a couple of reasons I prefer using WPCodeBox vs functions.php in my child theme etc
- Easier to manage everything
Instead of having one long functions.php file, each snippet is here in its own searchable / filterable snippet. I am finding it a lot easier to know at a glance what functions are running on my website and I can find code I need to update a lot faster. - Add CSS inline or render as an external CSS file
In the above screenshot, you can see at (2) that I can render my custom CSS as an External CSS file. This is much easier to do using this US than creating a custom CSS file and enqueuing it.
There is also a really good conditions builder so you can use a UI to define under what conditions your snippet will output/render without having to manually write out each PHP conditional (this is a very helpful feature also for people who aren’t too good with coding in PHP).
WPCodeBox is a PAID plugin but it’s a one-time payment (i.e. lifetime deal) and it’s very affordable at $39 for 1 website.
I will leave my WPCodeBox explanation here but if you’d like, you can read my full in-depth review below…
Add this PHP code into your Theme’s functions.php file
If you don’t want to use FunnelKit AND you don’t want to use WPCodeBox, you can add the above PHP by doing the following.
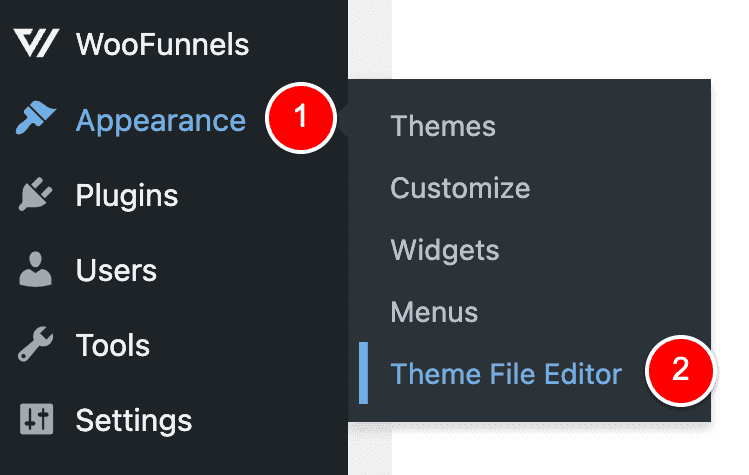
Go to Appearance > Theme File Editor.
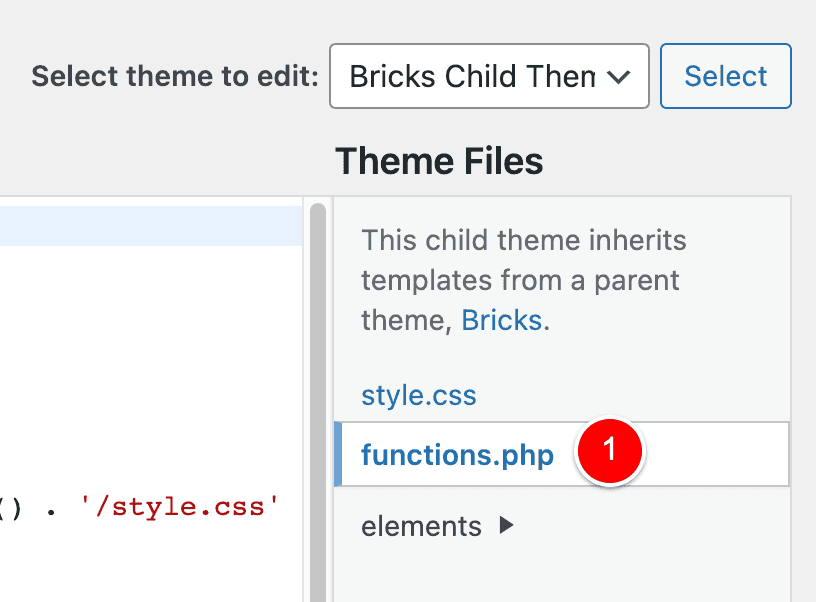
Then click on functions.php on the right (1) to switch to editing this file.
Then paste this redirect PHP code at the end of your functions.php file (1) and click Update (2).
Now that’s all set and live on your website.
So yeah… you can do this easy enough without any plugins, but there are some big downsides to using this OLD METHOD of adding PHP Code to redirect to a specific URL VS using FunnelKit.
Let’s look at these now and why I recommend always using FunnelKit for this…
Learn more about FunnelKit
The FunnelKit plugin will allow you to set up this redirect to a custom Thank You page URL in the easiest and fastest way possible as shown at the start of this article, but this is one of the most basic features the FunnelKit plugins offers.
Click below to see what else FunnelKit can do for your business…
Leave a Reply