I’ve tried many different ways to do this and this post will show you the easiest way to add an Image Slider to your ClickFunnels pages.
By the end of this ClickFunnels tutorial, you’ll have a Slideshow like this on your ClickFunnels page with your images inside:

I also filmed a video for you that shows you how to set up your Slider, if you’d prefer to watch rather than read.
Please NOTE: The video and Blog Post are mostly the same, but I do cover a few specific things in each. I would highly-recommend watching the video AND reading this blog post to ensure you set up your Image Slider the best way you possibly can with ClickFunnels.
The Video Tutorial
From this tutorial, you will also be able to customise your slideshow to have arrows or thumbnails below, add transitions and so much more!
This method will also allow you to create an Image Slider that is responsive and works on mobile phones and tablets – with no additional work and no need to write any complex code.
For this ClickFunnels tutorial, I have created a demo funnel that we’ll be working with (pictured below).
I don’t have a video for this page, so let’s go ahead and change the video below into an Image Slider.

NOTE: There is a BETTER ClickFunnels alternative
There is now a MUCH BETTER, more powerful alternative to ClickFunnels that I have since switched over to.
After sticking with ClickFunnels for many years and using it to sell millions of dollars in sales for my Ecommerce brand…

I couldn’t help but feel like ClickFunnels was holding back my business with its outdated features.
I went looking for a better alternative and finally found one.
The BEST alternative to ClickFunnels in [year] is a WordPress plugin called FunnelKit and I have recently moved all 30+ of my Sales Funnels from ClickFunnels over to FunnelKit.
After testing it thoroughly, FunnelKit blows ClickFunnels out of the water, so if you’re getting annoyed at the limitations of ClickFunnels, click the link below to read my full review of FunnelKit and why I made the switch.
FunnelKit does MORE than ClickFunnels does and it’s cheaper than ClickFunnels.
I was paying $1,997 PER YEAR for ClickFunnels…

but now I own the Lifetime Deal for FunnelKit, which means I paid ONCE and never have to pay ever again (i.e. no monthly or yearly billing, ever).
I just thought I would share that here in this article, in case you’re here wondering why it is so hard to add a slider to ClickFunnels and find it a bit odd.
HINT: With FunnelKit, you can build your entire Sales Funnel using your favourite Page Builder for WordPress (e.g. Beaver Builder, Elementor or my new favourite Bricks Builder) and (as you know) these all have a Slideshow element you can drag-and-drop onto your page without doing anything extra, like you need to do with ClickFunnels.
So – there’s a bit of food for thought, but if you’re keen to stick with ClickFunnels and you’re just wanting to know how to add a Slider to your ClickFunnels pages, then this tutorial will show you exactly how to do that.
So, let’s get right into it – here’s the first thing you need to do to begin adding a Slider to ClickFunnels.
Add Fotorama to your ClickFunnels funnel
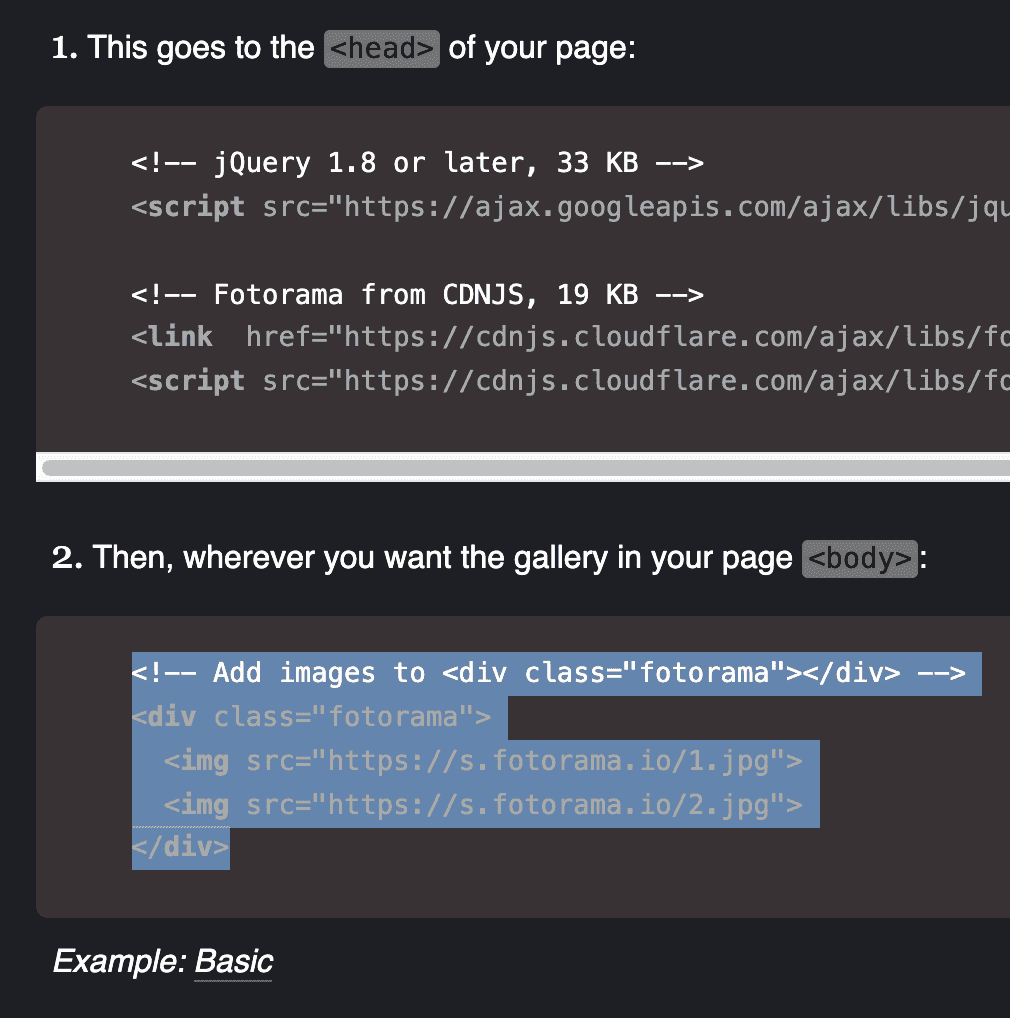
Go to https://fotorama.io/ and scroll down until you see this code.
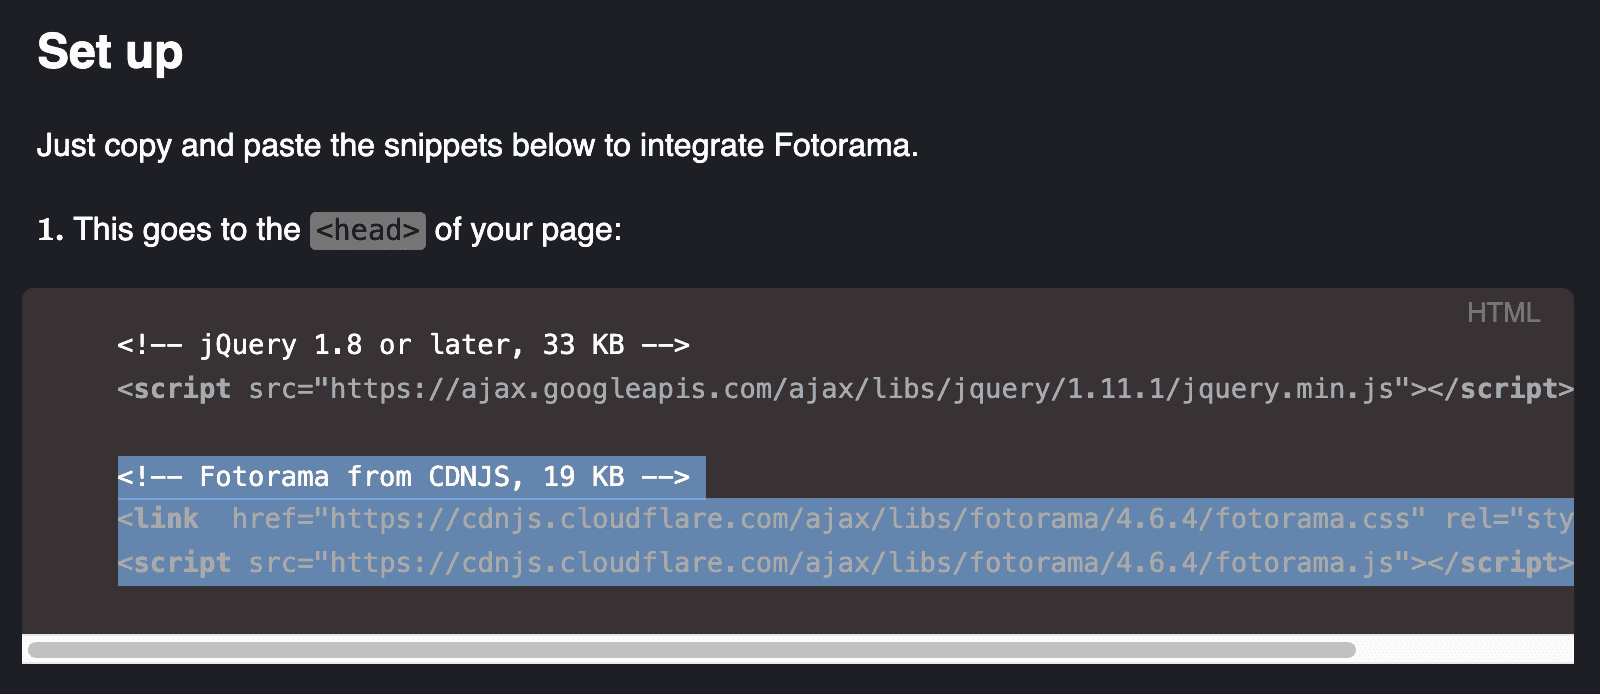
The first bit of code is to install jQuery on your website but ClickFunnels already has jQuery installed by default, so we just need to copy this second bit of code that I have highlighted in the image above.
So copy that code above that I have highlighted above and then go to your ClickFunnels account and edit the funnel you want to add the slideshow to.
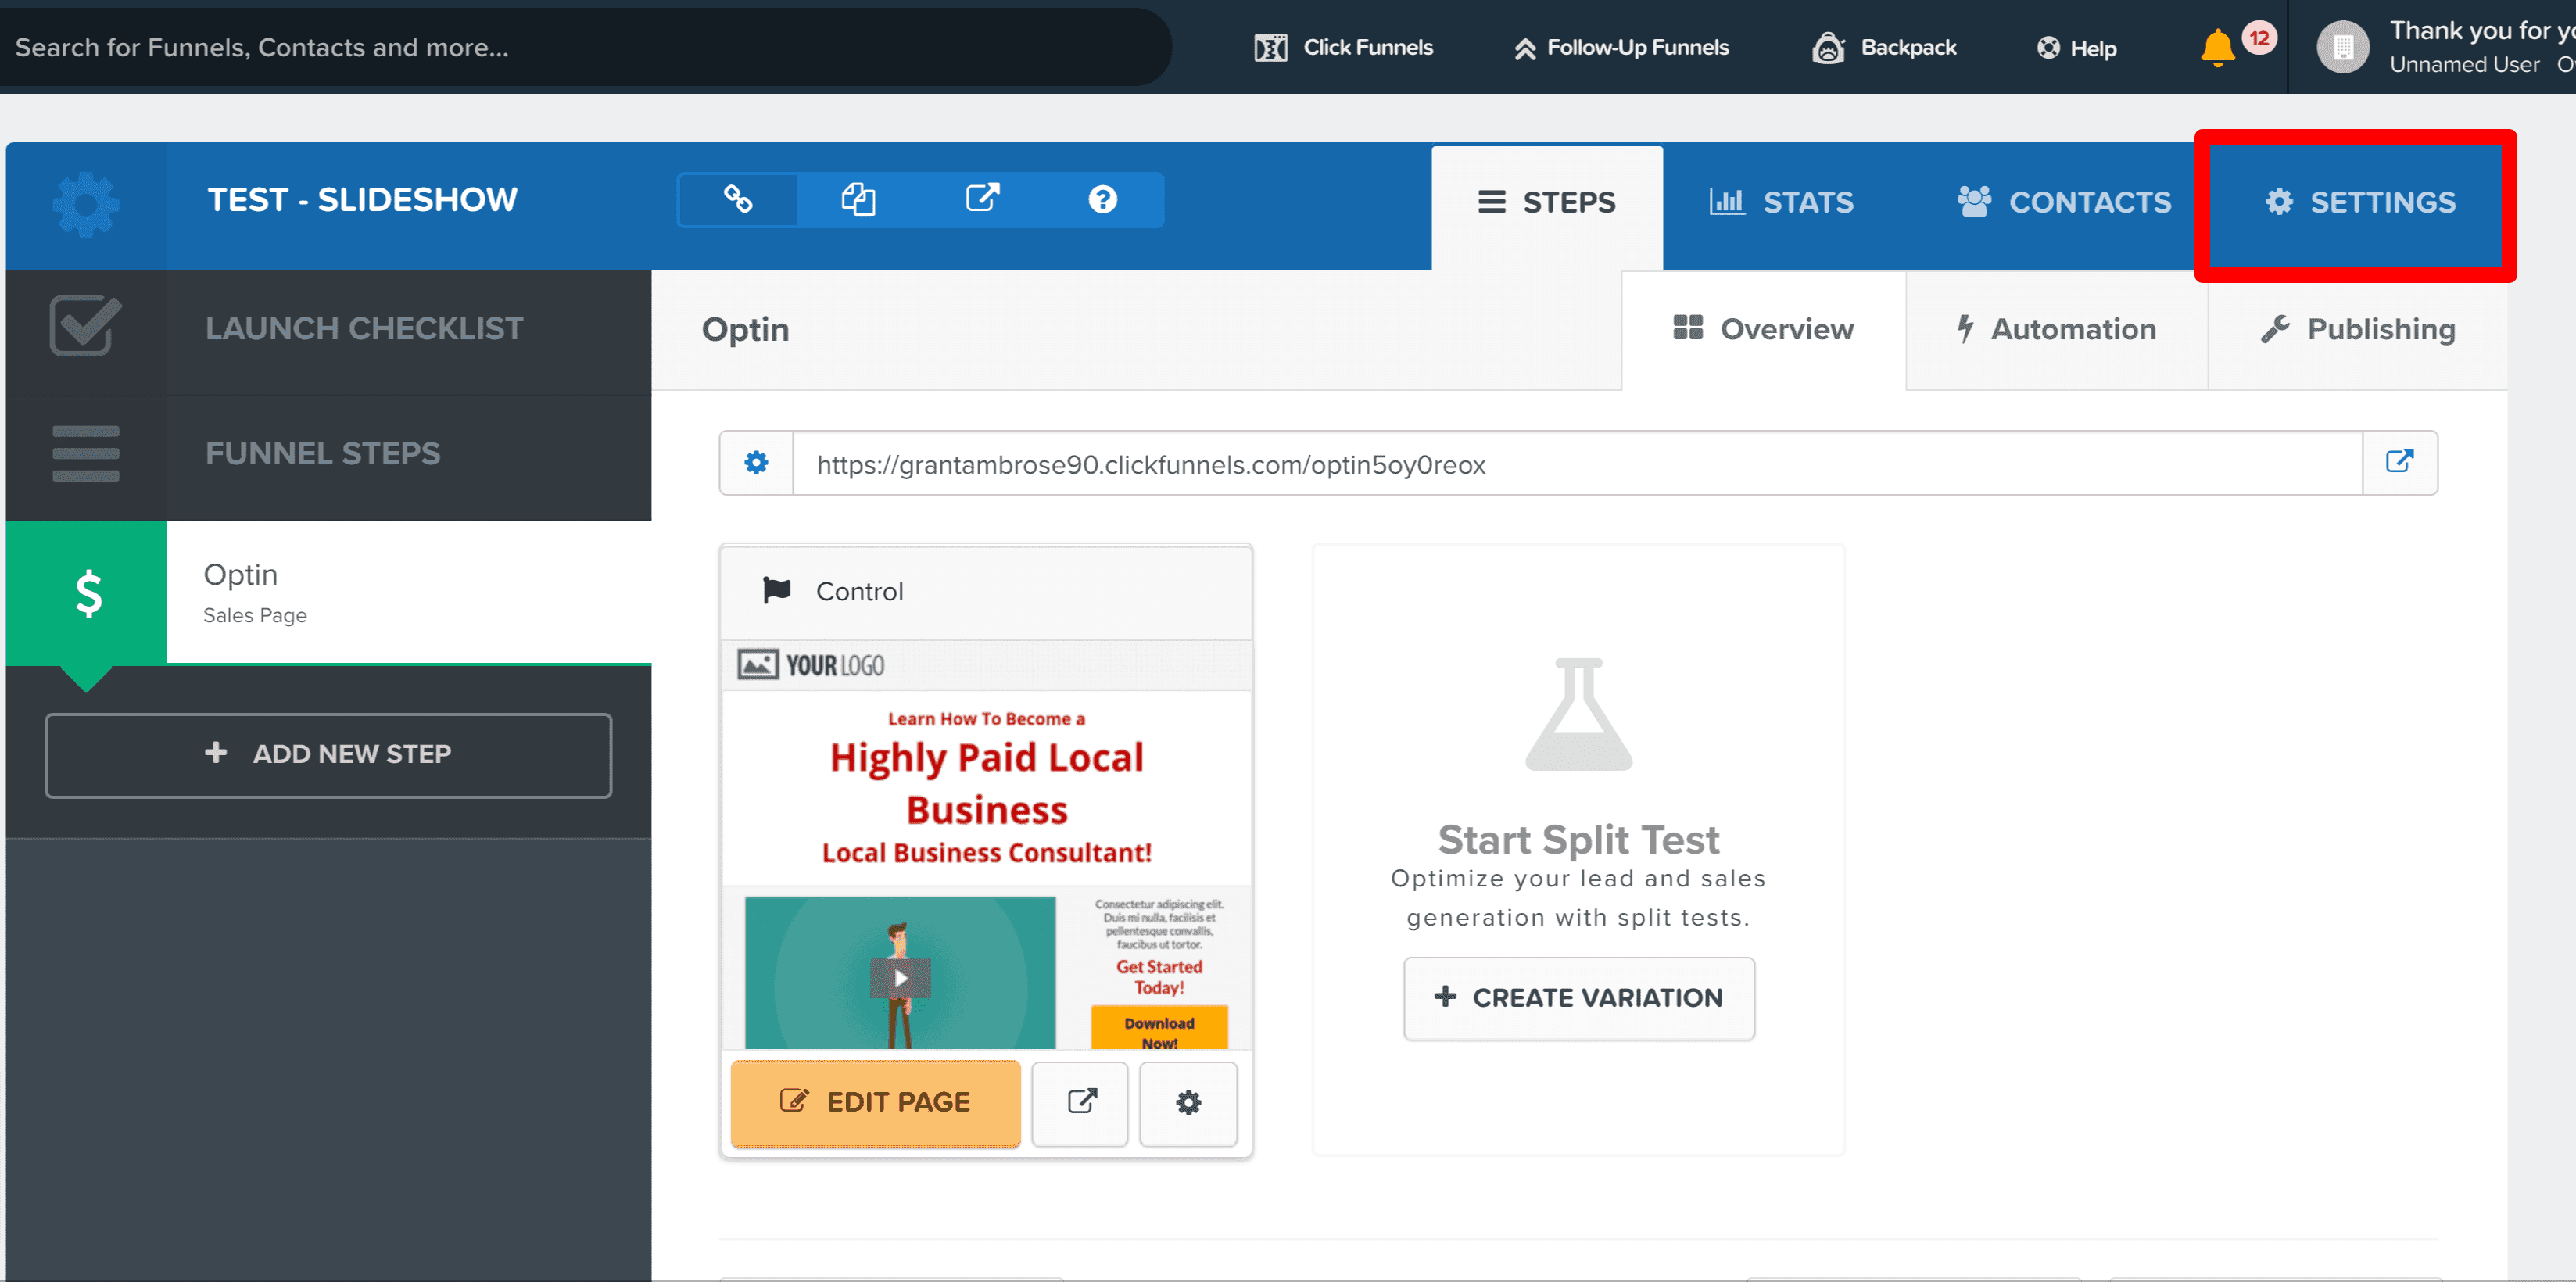
Next, go to Settings, as shown below.
And paste the code you copied from the Fotorama website into the Body Tracking Code box.
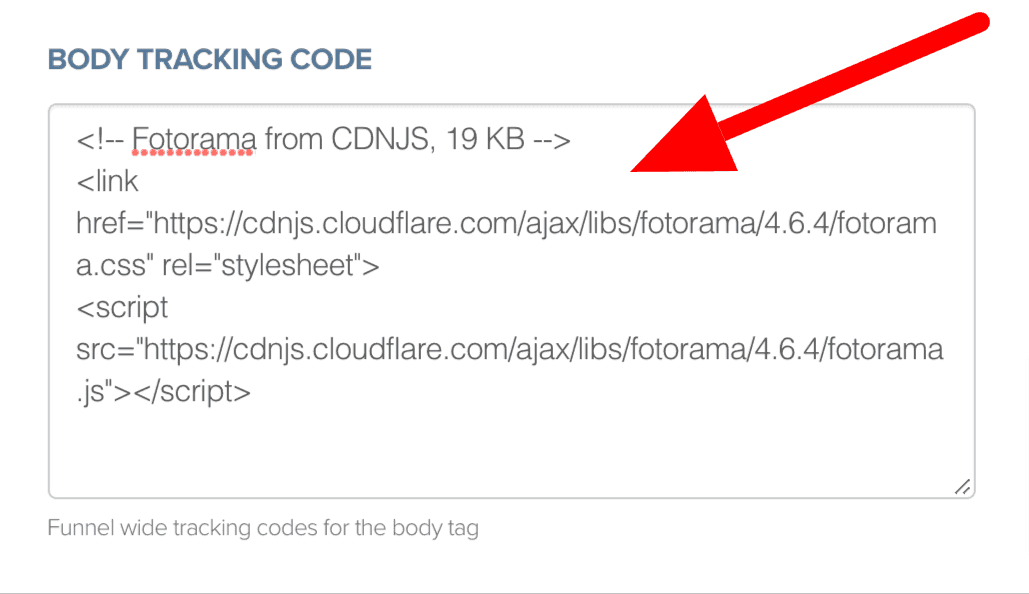
Now, scroll down to the bottom of the page and click Save And update Settings.

What we have done so far:
- We have added the Fotorama files to our Funnel and these files will load on every page in our funnel. That means, that you can add a slideshow to any funnel step very easily – as you’ll see in the next step.
Add the Image Slider to your ClickFunnels page
Edit the Funnel Step that you’d like to add the slideshow into.

I’ll go ahead and delete the video in my template because I want to replace the video with the image slider.
Below, I’ve deleted the video.

Wherever you want to add your Image Slider to your ClickFunnels page, add a Custom JS/HTML element to your page.
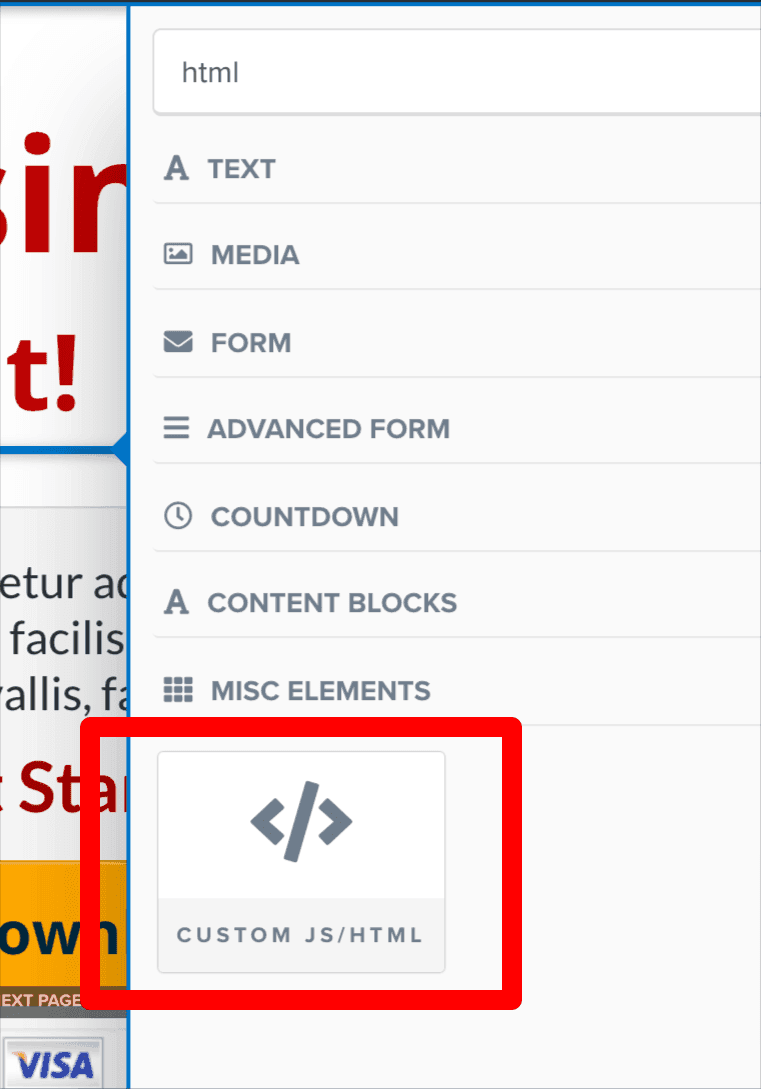
Below, you can see I have added a Custom JS / HTML module where I deleted the video from the original template.

Next, go back to the Fotorama website.
Under where you got the first bit of code you copied, there is another box just below it.
Copy the code from here, as shown below.
And paste it into the HTML module in your ClickFunnels page, as shown below.
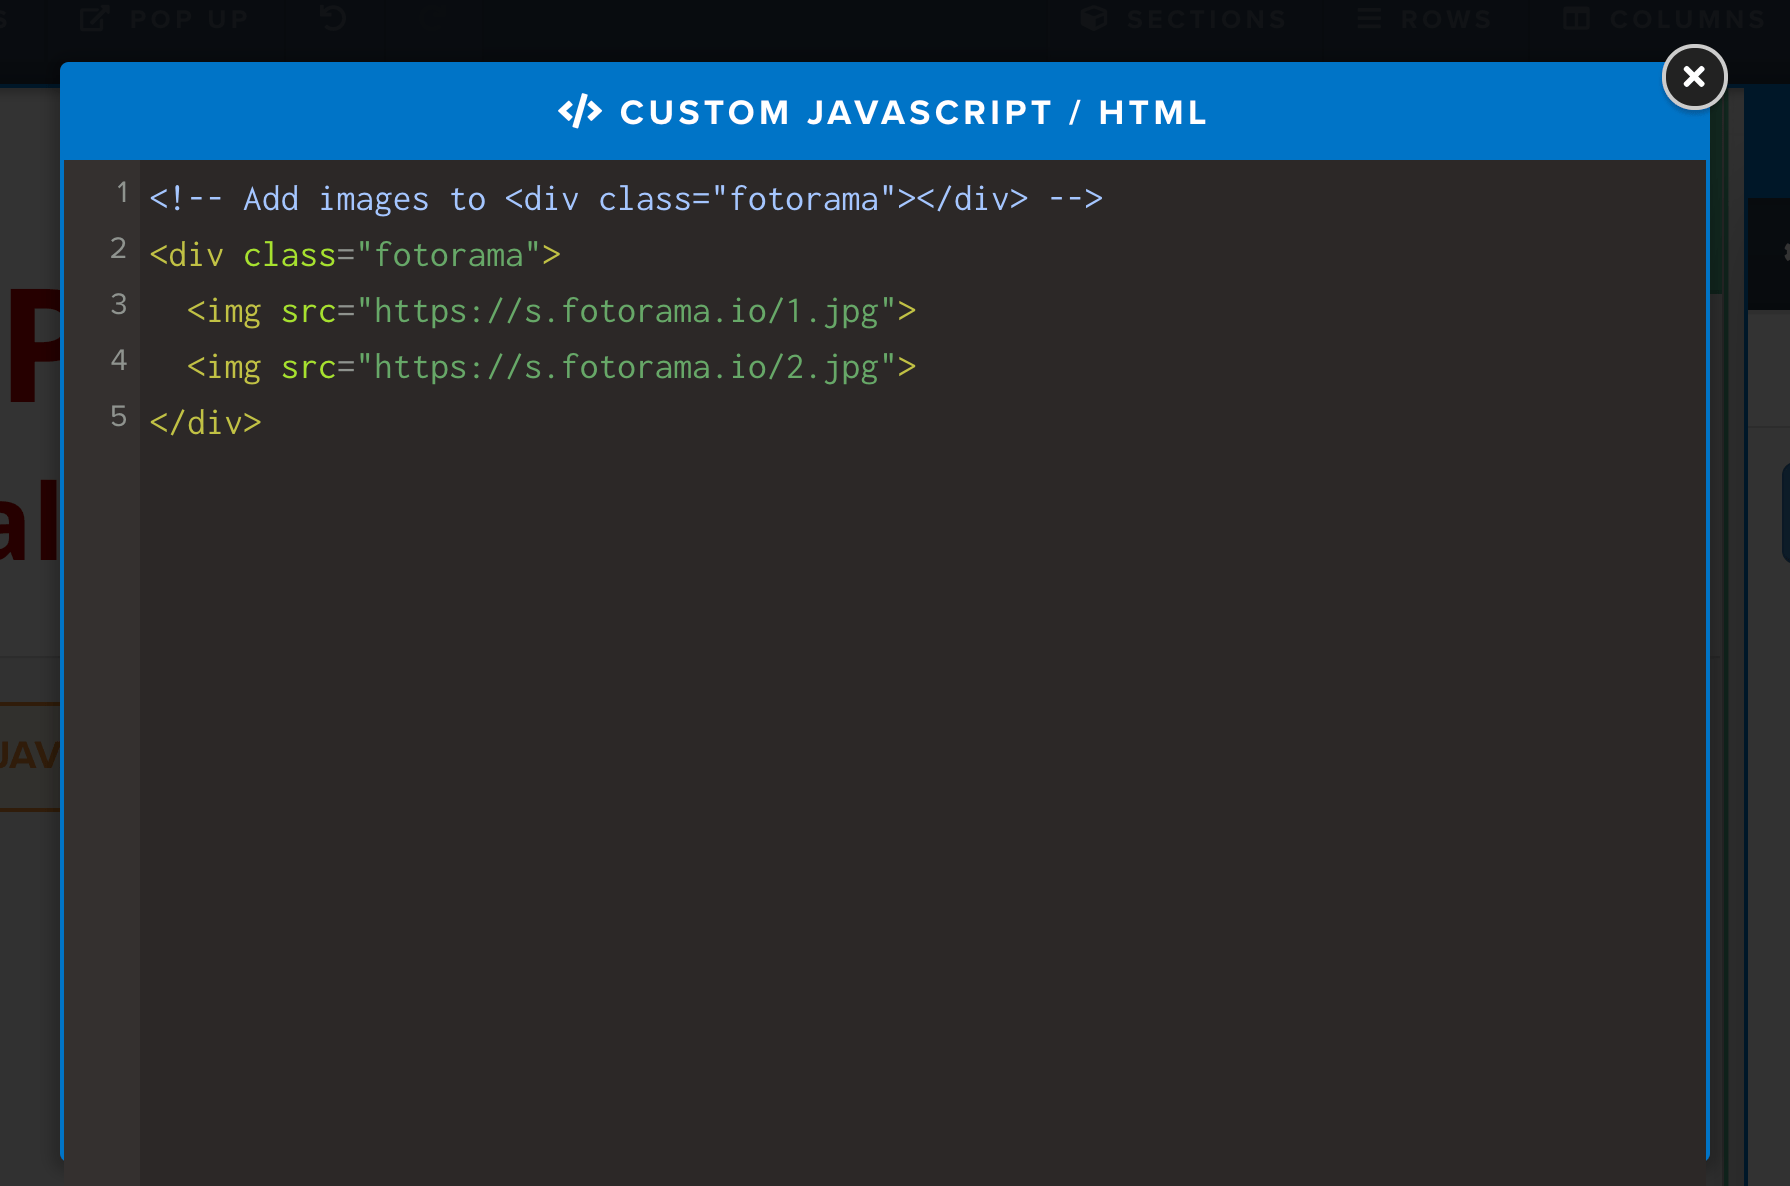
In the above example, you can see that there are URLs to images named:
- https://s.fotorama.io/1.jpg
https://s.fotorama.io/2.jpg
That’s fine for now – you’ll replace these with your URLs to your images.
But what I like to do at this stage is just SAVE the page and preview it to make sure the slideshow is working.
Once we do that, then you can come back here and edit these URLs to your images.
So let’s save this page and then preview it.

As you can see below, it’s working!

So now all you need to do is add your images and then I’ll share some ways that you can customize the Image Slider to add thumbnails and a whole lot more.
Add your images
To add your images, you need to replace the URLs in the HMTL element.
What I do, is upload the images into ClickFunnels by adding an Image element onto my page (don’t worry – we will delete this when we’re done).
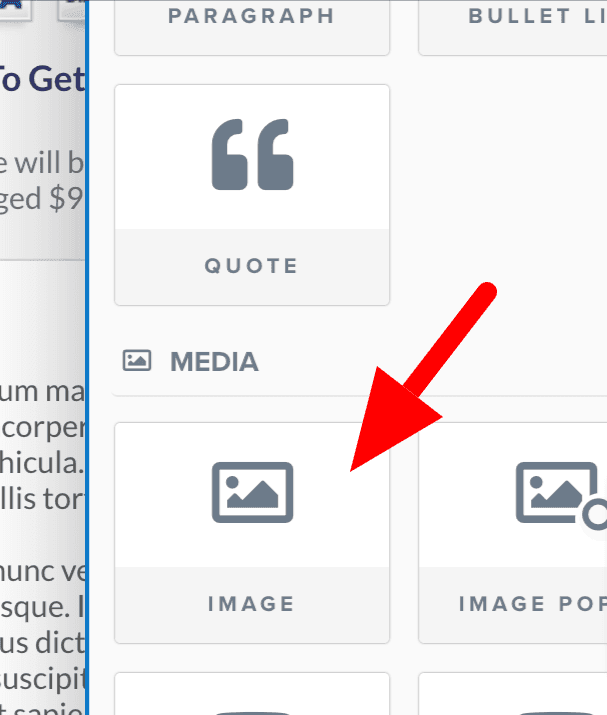
I have gone ahead and added my Image element onto the page under my HTML element, as shown below.
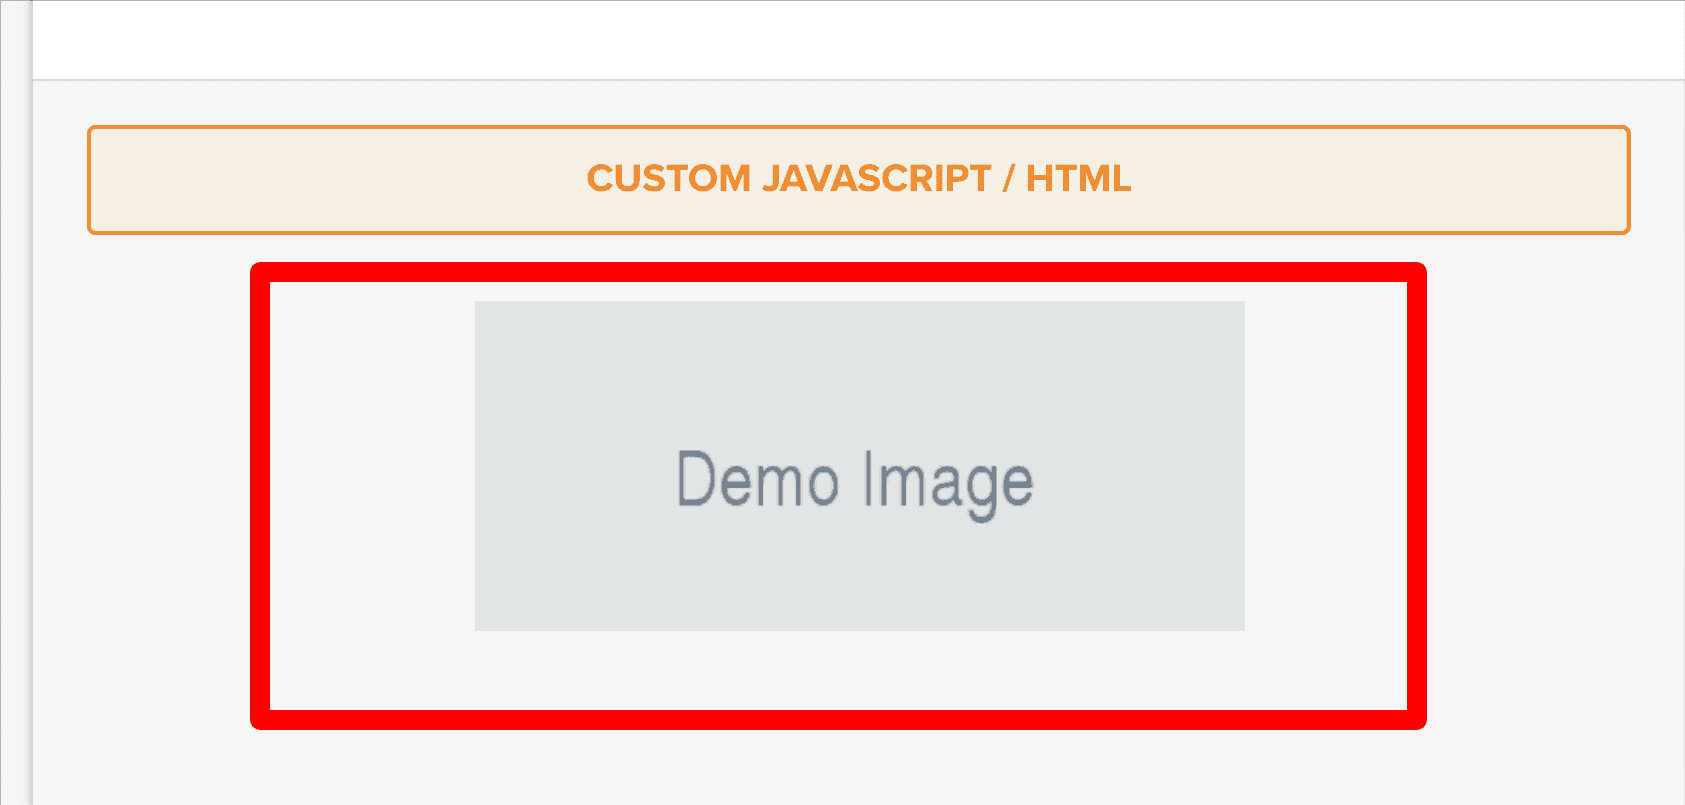
Now, click into this new Image module and upload an image like you normally would into ClickFunnels by clicking the Icon below.
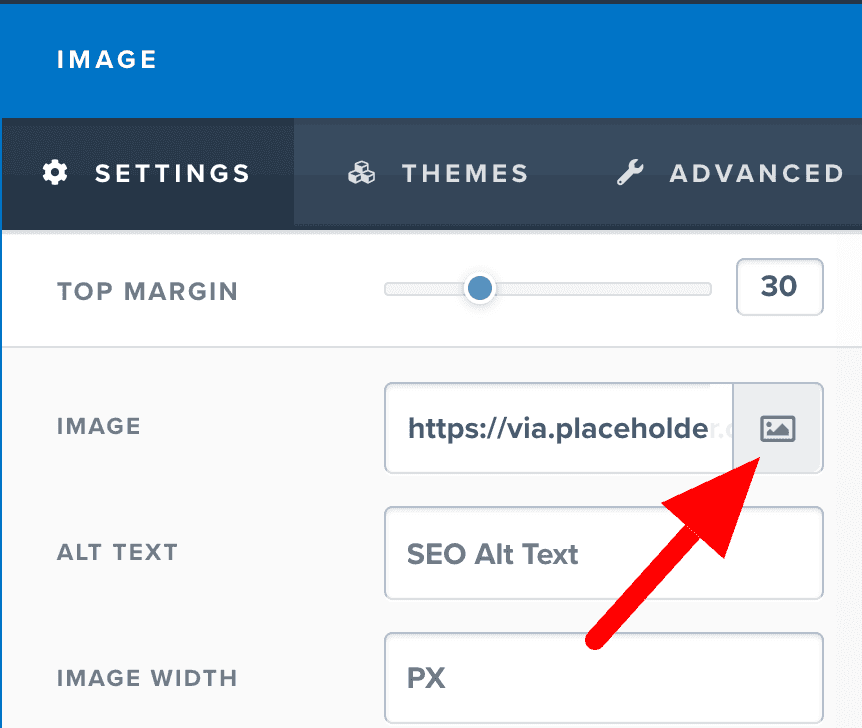
Then Click on Upload and select the images from your computer that you wish to add to your Image Slider in ClickFunnels.

I added these two epic images I found on Unsplash.com.

Once you’ve uploaded your images, click on one of them and then click the green + Add Image button.
Now, the URL that shows here is the URL to the image you want to use in your Slideshow.
So copy this URL from below…
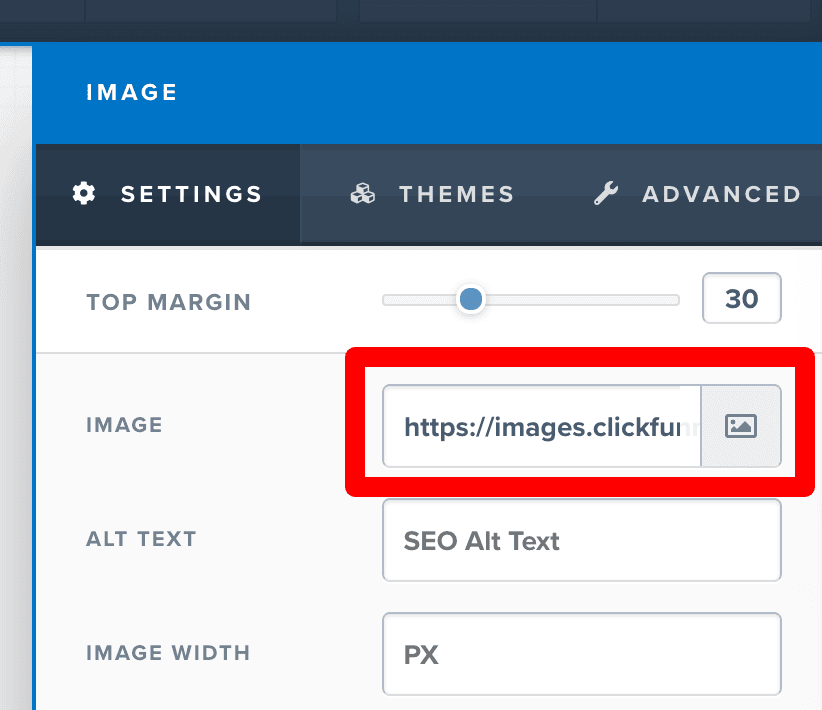
And then edit your HTML element on the page where your Slideshow code is and paste it like below.
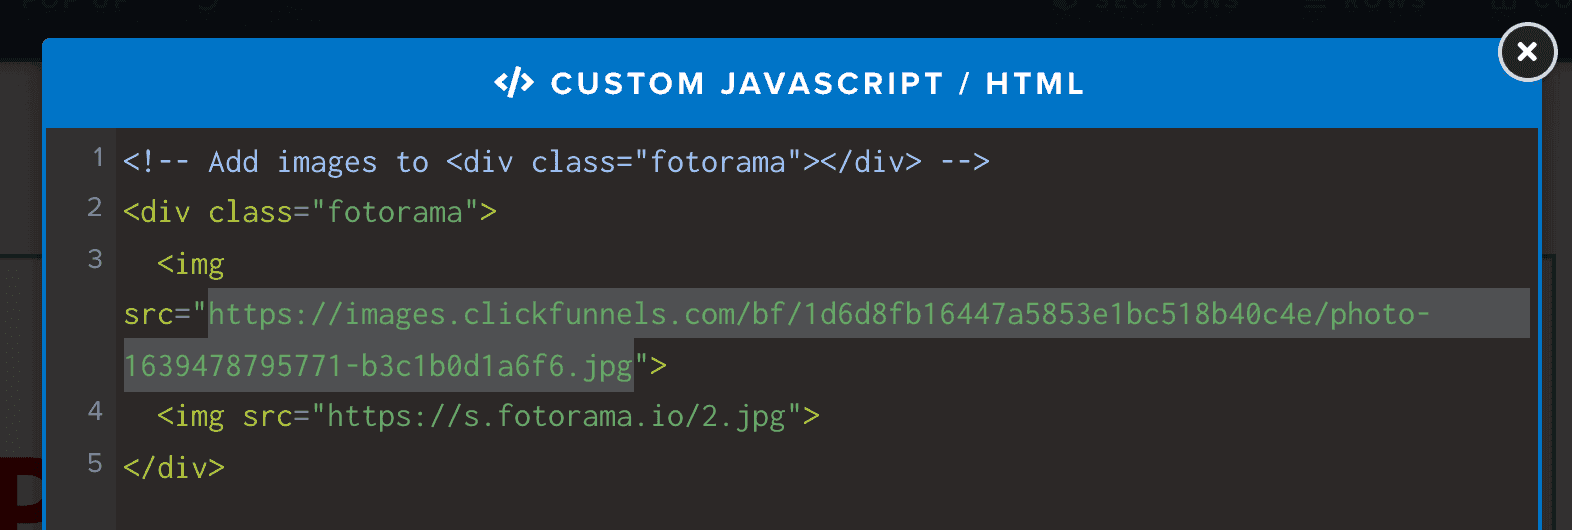
As you can see, what we have done is use the Image module to upload our images to ClickFunnels so that can we generate a URL to the image.
Then, we copied this URL and pasted it into the Fotorama code (like above), replacing the example images that Fotorama had in its code by default.
Now go ahead and do that same process again to add all the other images to your Slideshow.
Here is my final code below:
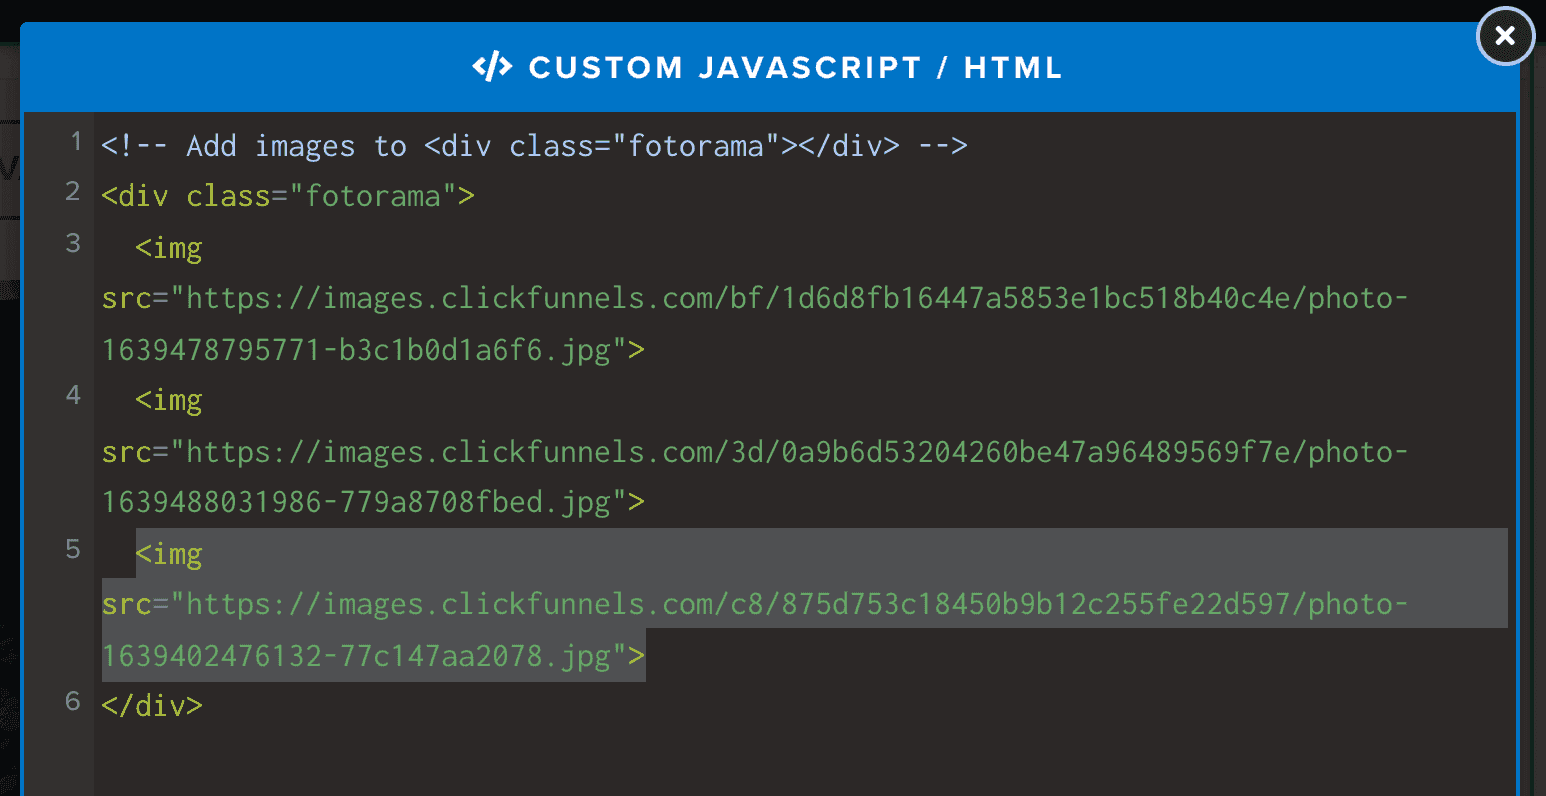
Notice how I now have 3 images in my Slideshow.
If you want to add more images, all you need to do is just add a new <img> Image element.
Fotorama works by looping through all the <img> elements you have here and then displays them as an Image Slider.
You can add as many images as you want.
Now, I’ll go ahead and save and preview this.
Below is what I now have in my demo:

If you’re happy with how your slideshow looks at this point, you’re all set to go!
Your Image Slider in ClickFunnels is now complete.
Keep reading on to see how you can customize this slideshow to do a whole lot more.
Customizing your Image Slider in ClickFunnels
The reason I love to use Fotorama for my Image Sliders is that it comes with some amazing customization options that require a few seconds of work (seriously).
Go back to the Fotorama website and click on Docs up the top.
The direct URL is https://fotorama.io/docs/4/ .

And you will see that you can customize your Image Slider with all these other options listed below.
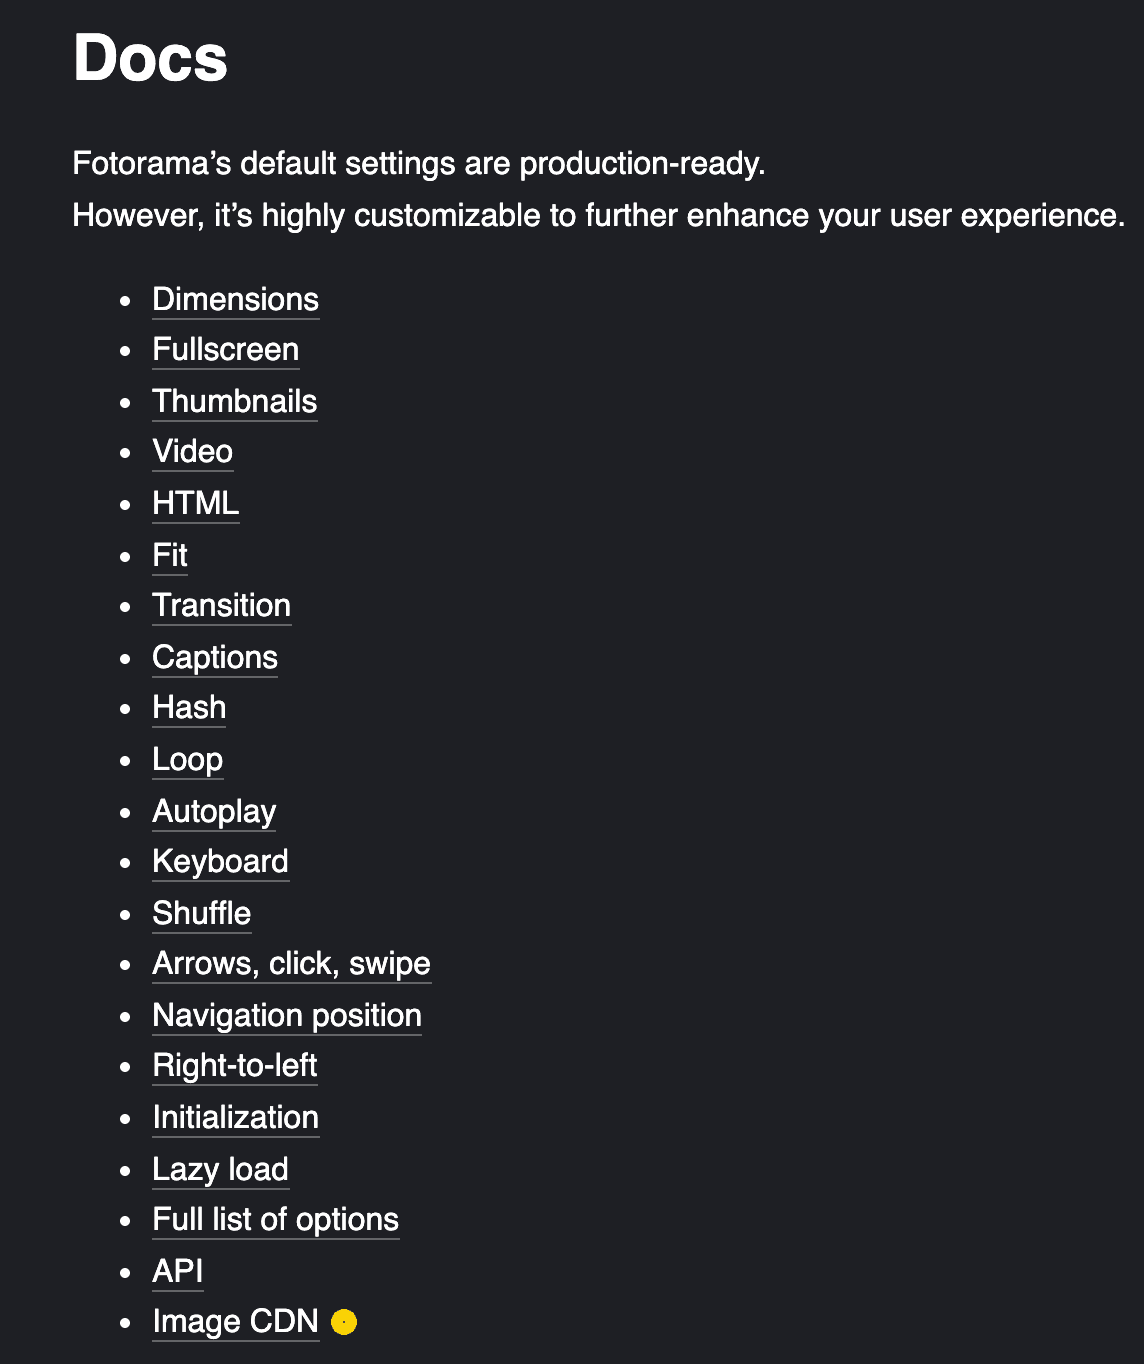
For this demonstration, I’ll cover the most common things you might like to set up for yourself, starting with adding Thumbnails for navigational purposes.
Add Thumbnail navigation to your Slider
Click on Thumbnails.

It might seem way too easy, but yes, it’s true.
To add thumbnails to your Slider, all you need to do is add this little bit of text below to your code.
data-nav="thumbs"Code language: JavaScript (javascript)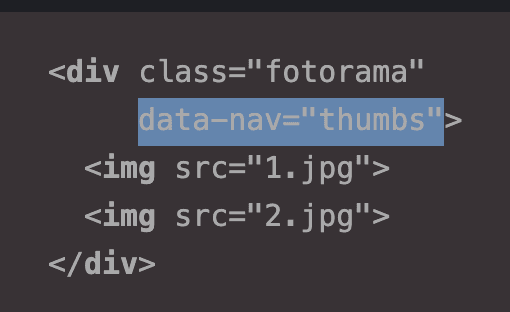
Let’s do that.
Go back to ClickFunnels and edit the HTML element where your Fotorama code is and then paste the above code as I have done below.
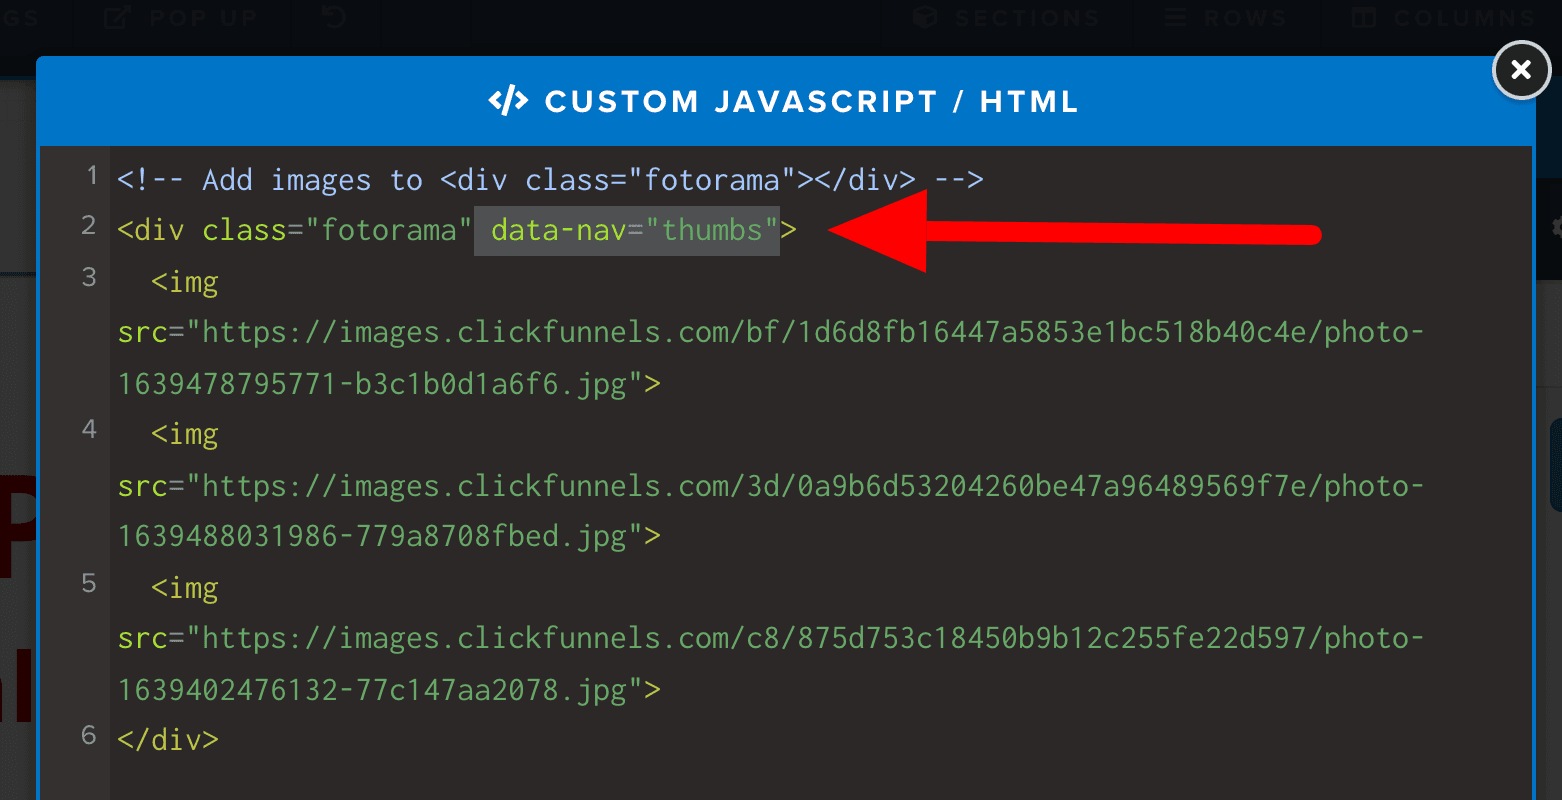
Save your page and then preview it.
You should see thumbnails below the Slideshow now, as shown below.
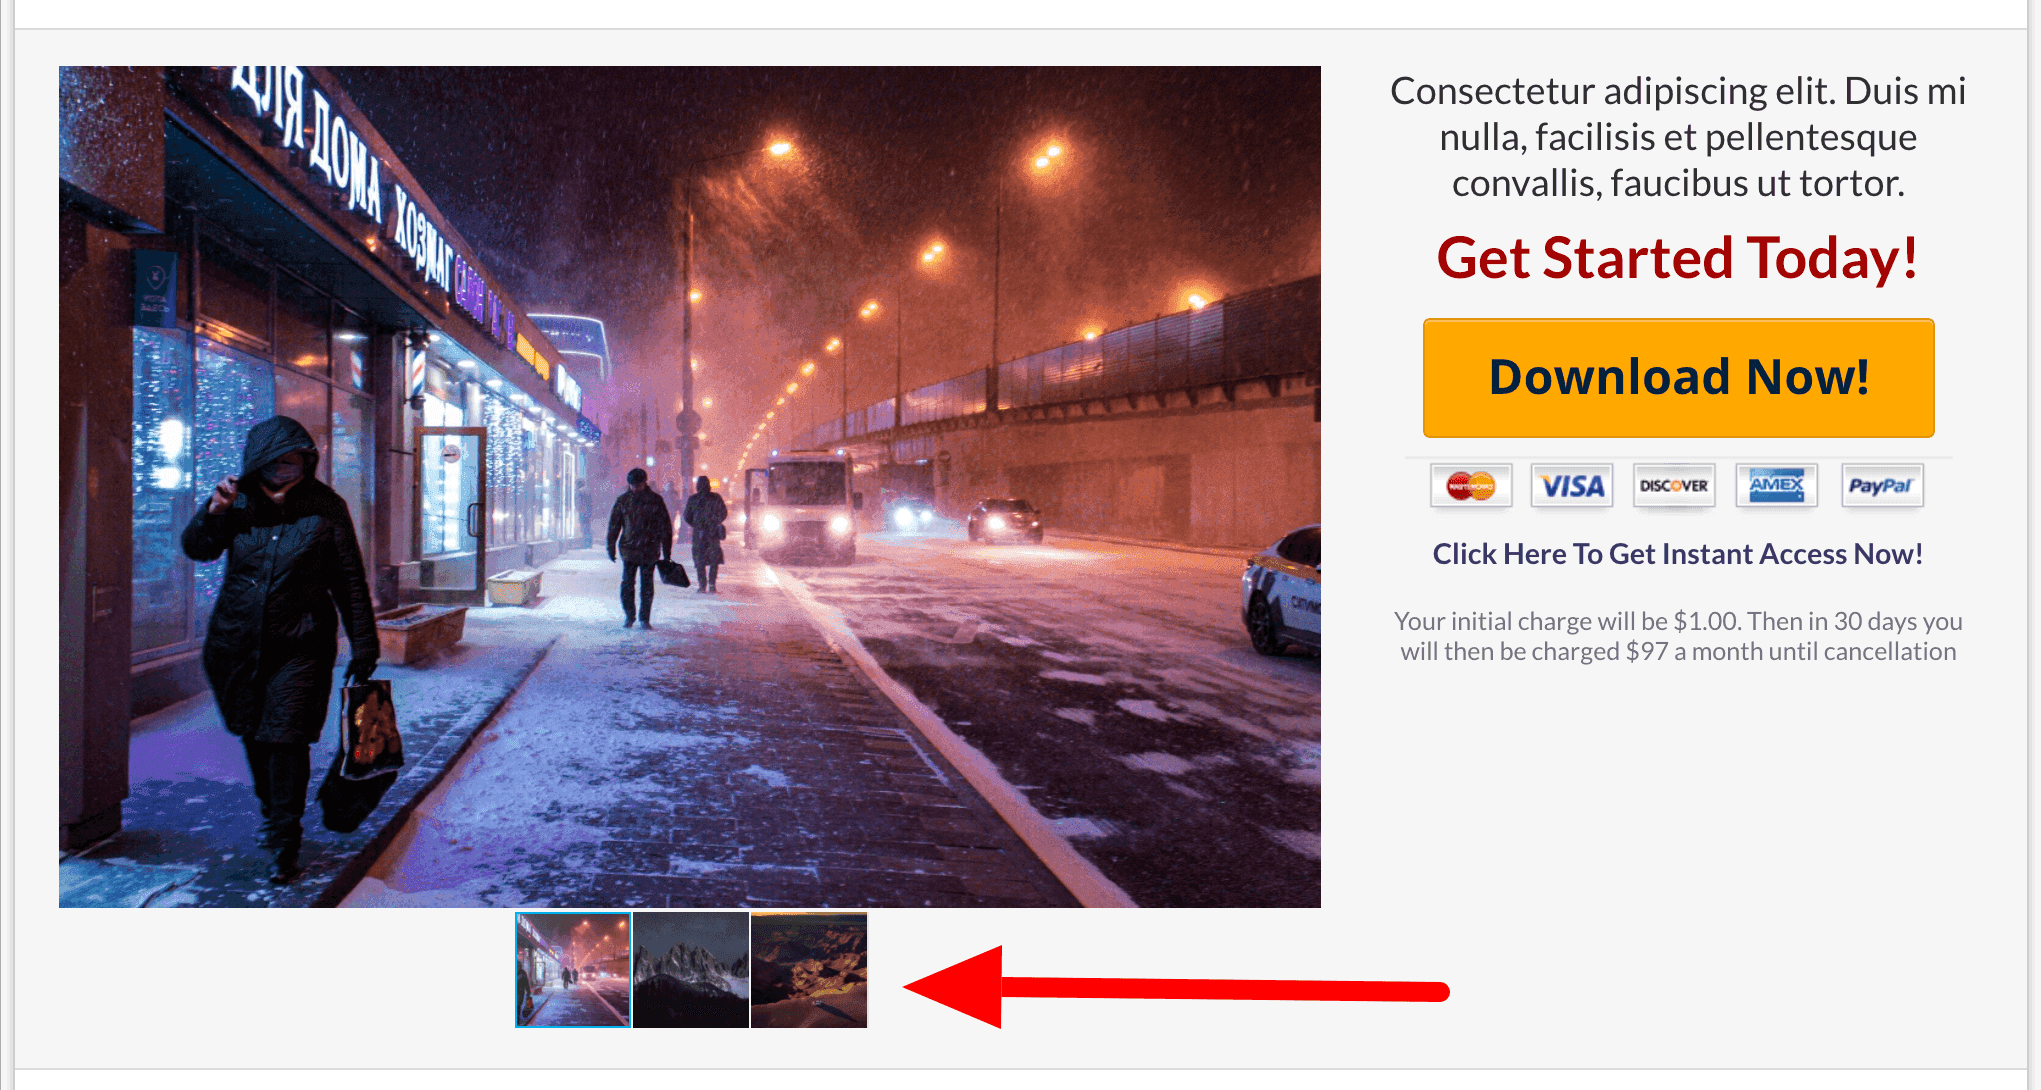
From a user experience perspective, I recommend using Thumbnails as your navigation over arrows because:
- Your user can see how many images are in your Slideshow (so they know where the end is before they start)
- Your user can easily jump to a specific image in your slider directly
- Your user can easily click a thumbnail on your mobile phone
Allow your Slideshow to be fullscreen
All we need to do is add the code below, just like we did for the thumbnail code.
data-allowfullscreen="true"Code language: JavaScript (javascript)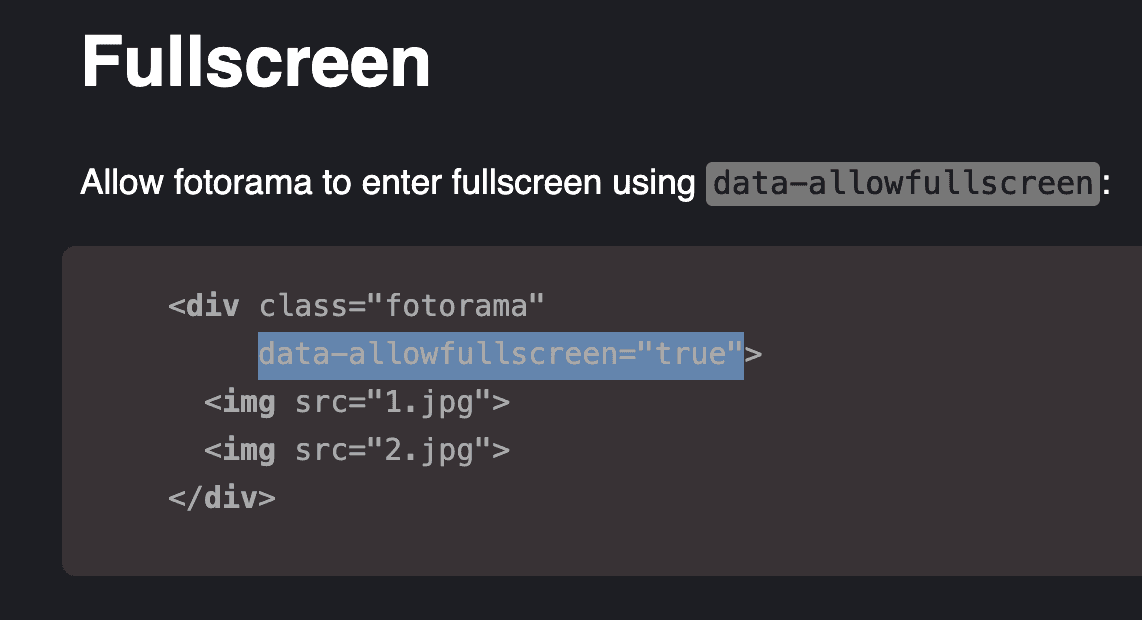
In ClickFunnels, you can edit where we wrote the thumbnail code and just add it onto it, as shown below:
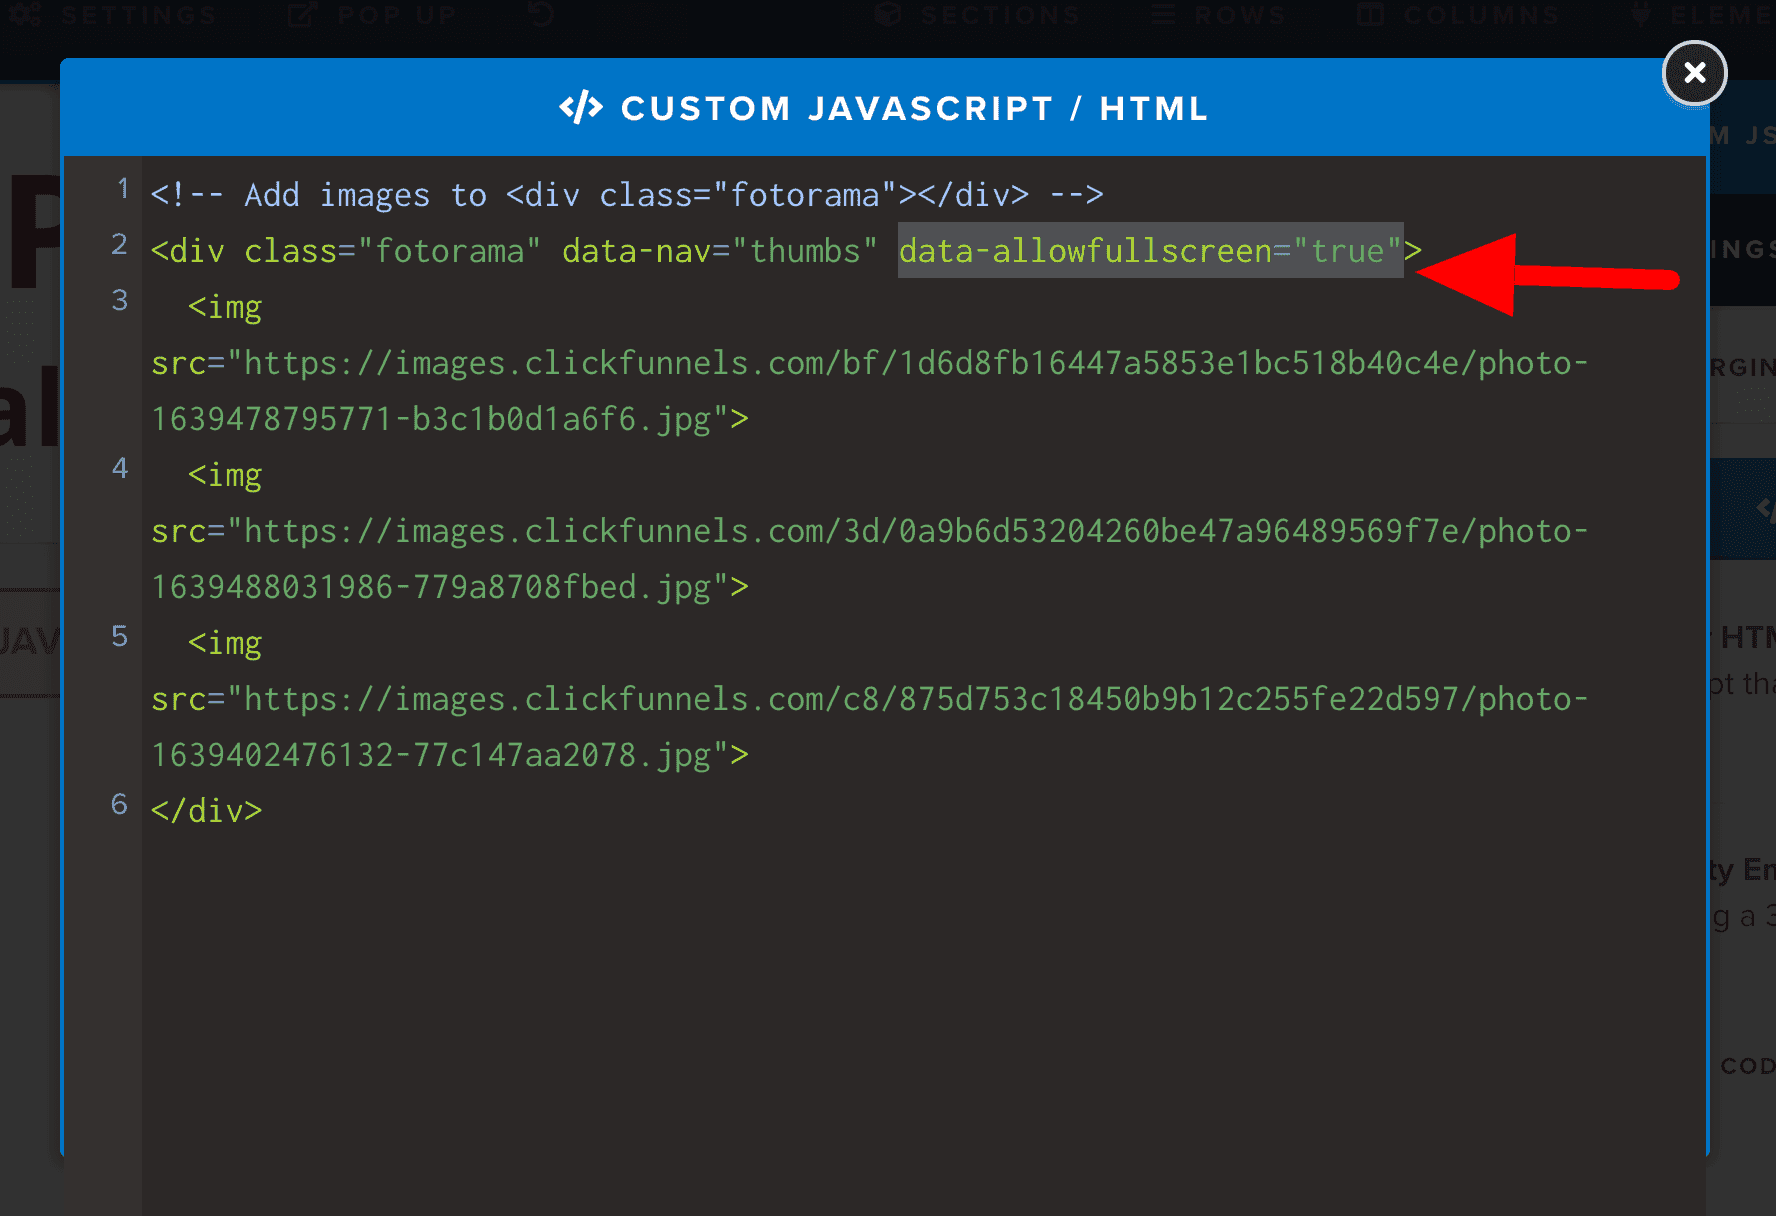
Save and preview.
Wa-la!
Your users can now preview your slideshow in fullscreen using the icon highlighted below.

Clicking this icon, my slideshow appears as below and fills my entire screen.
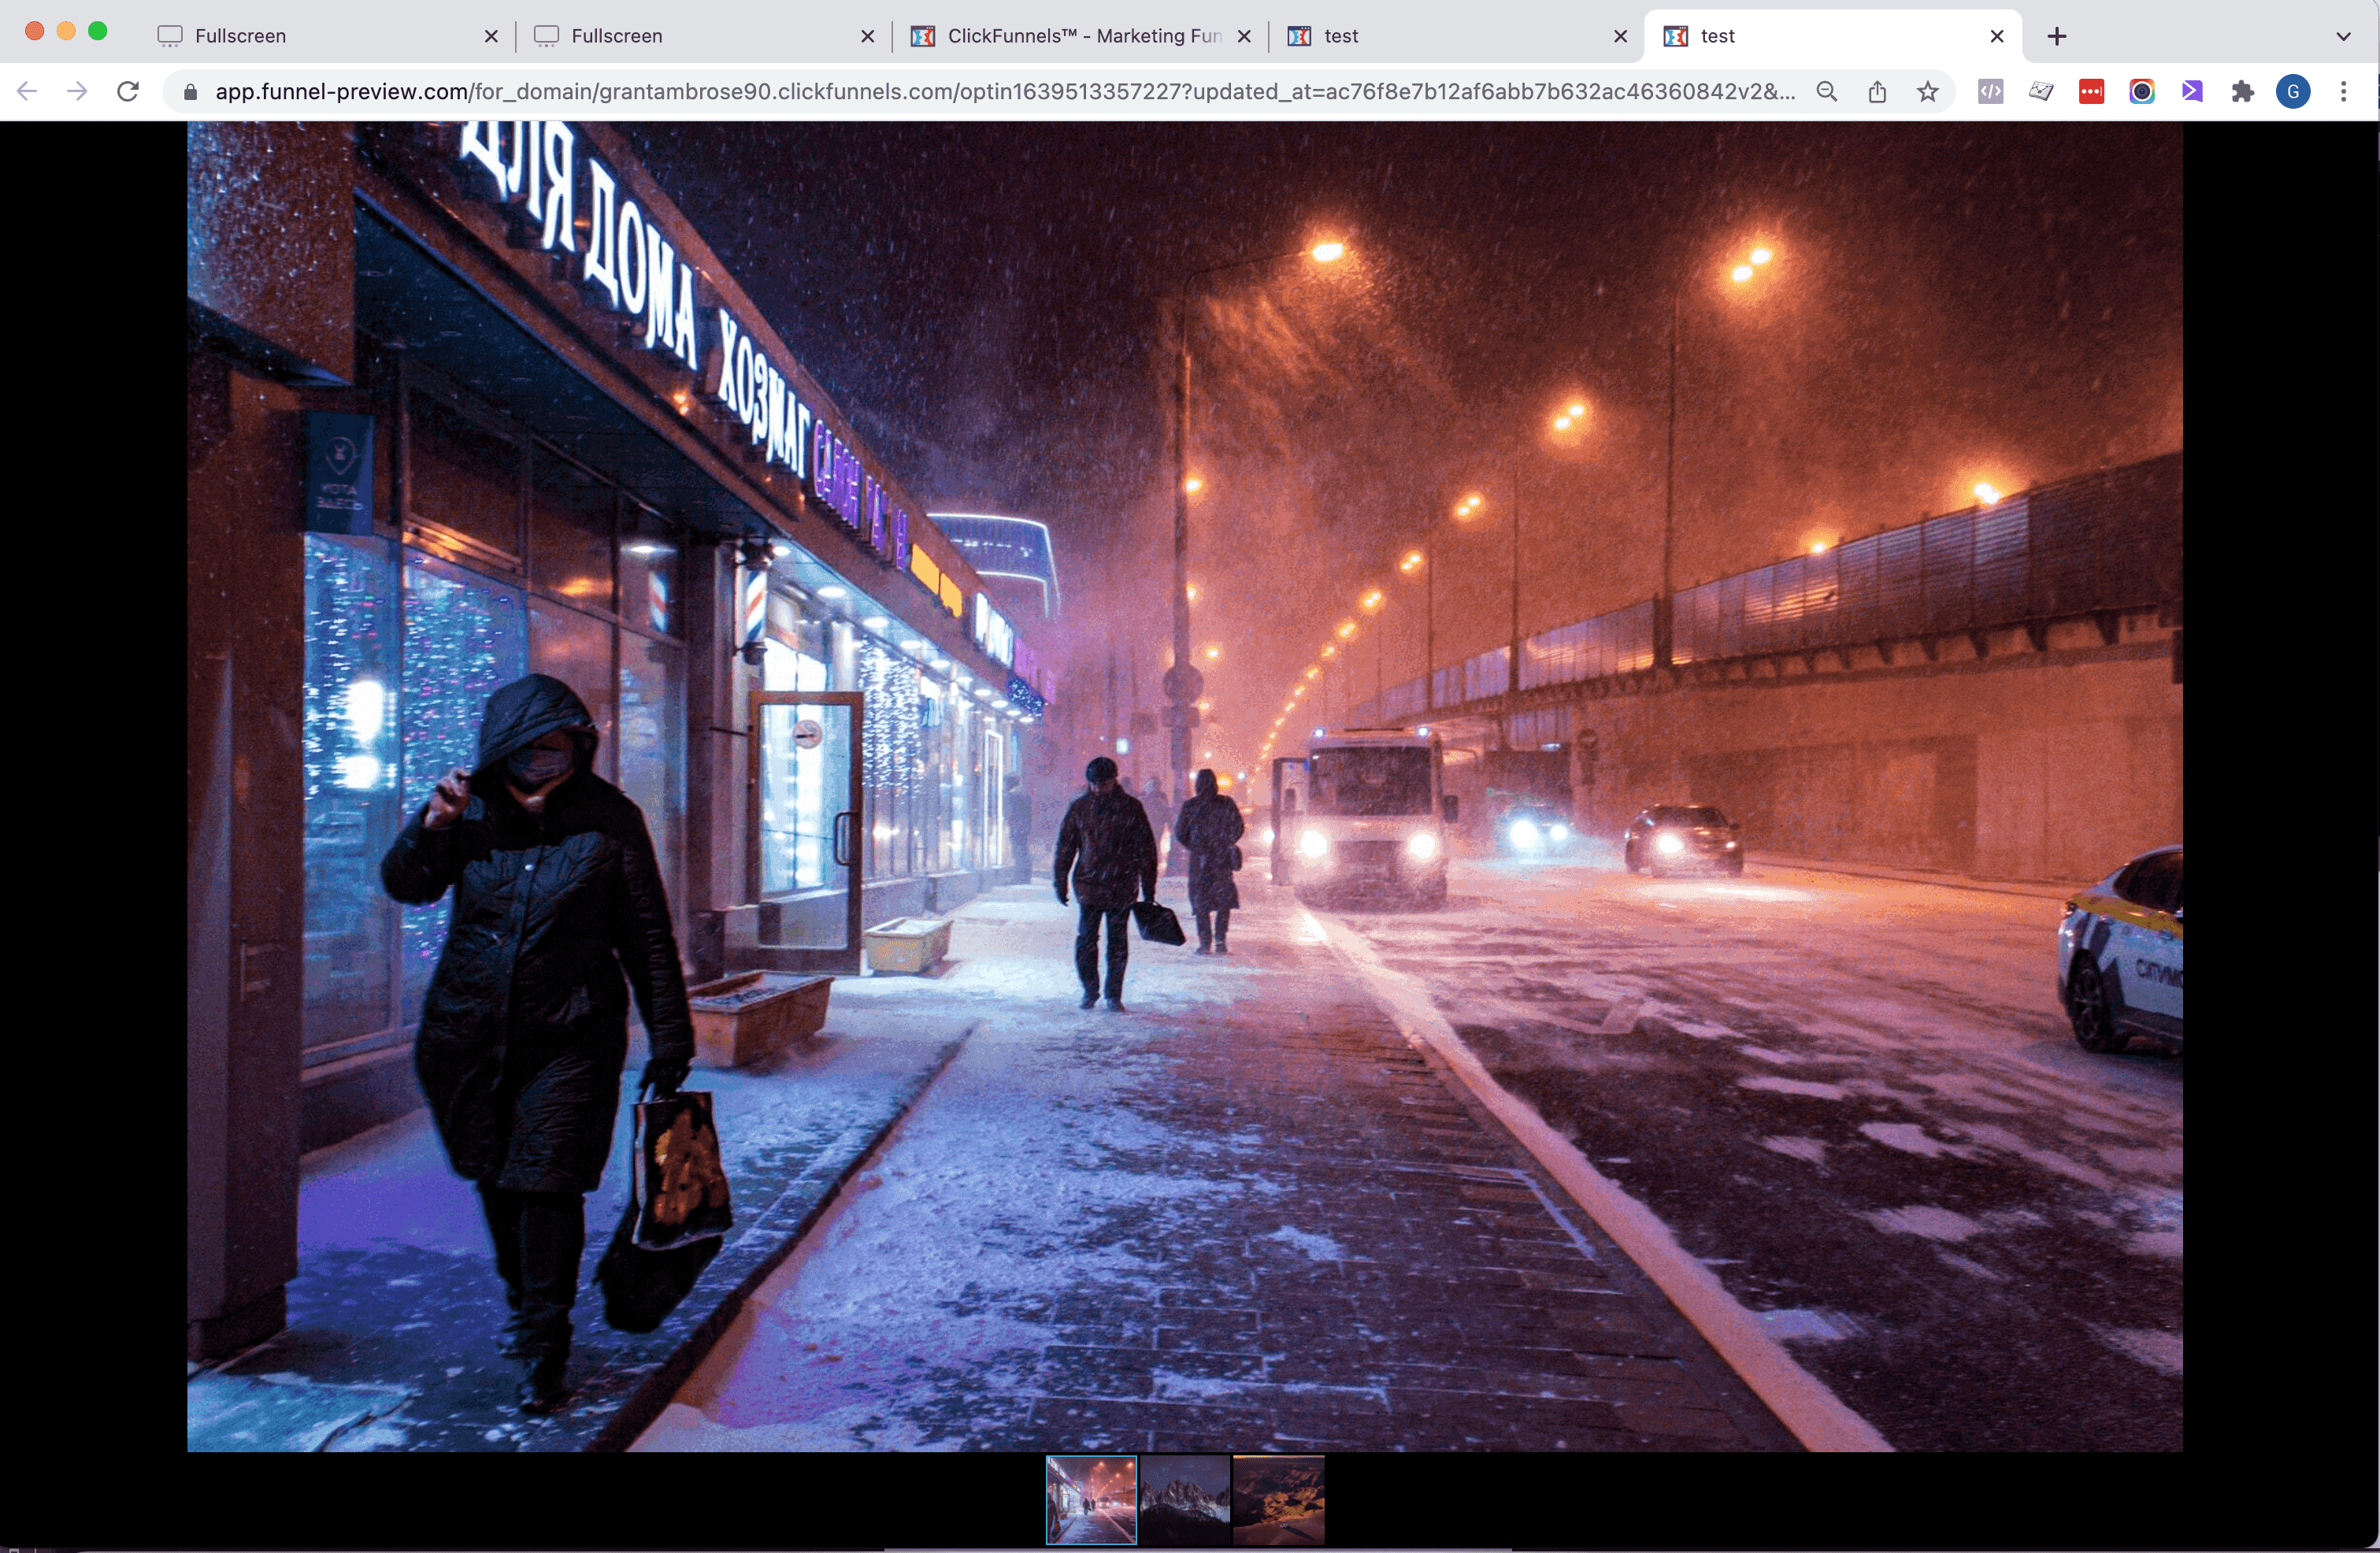
Your user also has an X they can click to close it and return to normal view.
Autoplay your Image Slider
I would recommend against this. I strongly feel the user should have the ability to control how they interact with your page and that images automatically moving when the page first loads will distract the user from the offer you are presenting them on the page…
But, again, to do this is just a simple bit of code.
data-autoplay="true"Code language: JavaScript (javascript)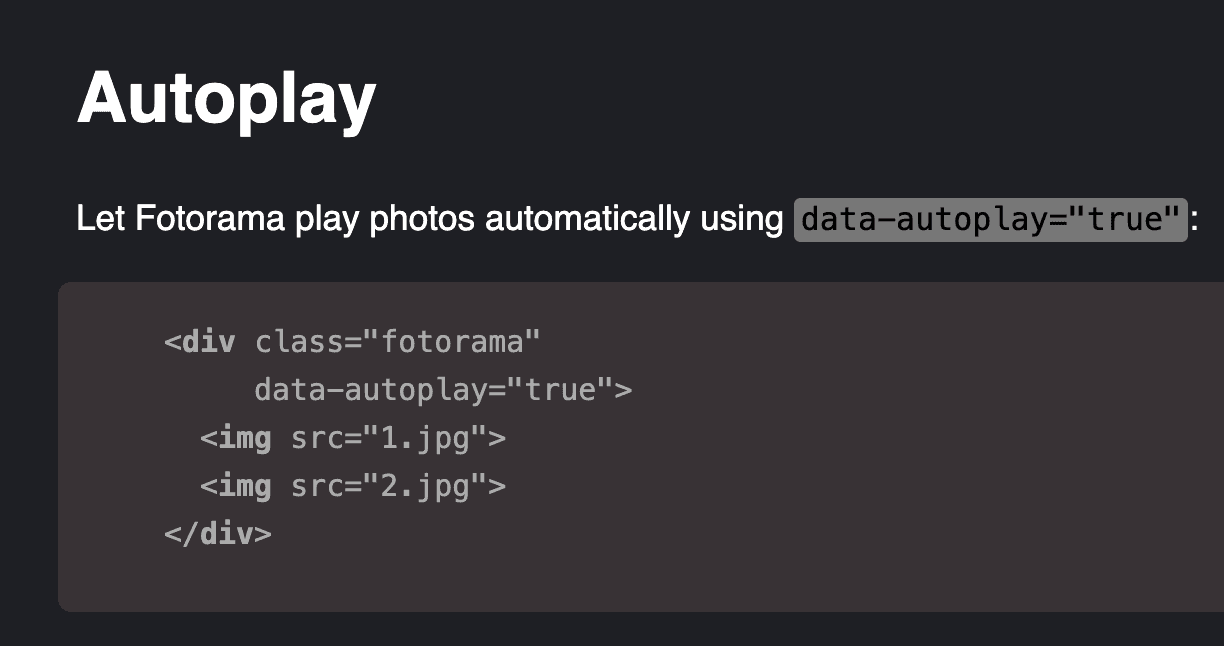

And yep! You just keep on adding to that same area of code we’ve been adding to for the thumbnail and full-screen abilities.
Crossfade or Slide Transitions
All the options are available on the Docs page on the Fotorama website and I’ve shown you how to add these customizations to your slider, so you should be able to customize your slideshow as you wish.
The last option I’ll cover here on this page is the transitions you have available.
Transitions are the animation between one image showing and one image hiding.
With Fotorama, you can choose from the following transitions:
- Slide
- Crossfade
- Dissolve
By default, Fotorama uses Slide.
To change it to Crossfade, add this bit of code:
data-transition="crossfade"Code language: JavaScript (javascript)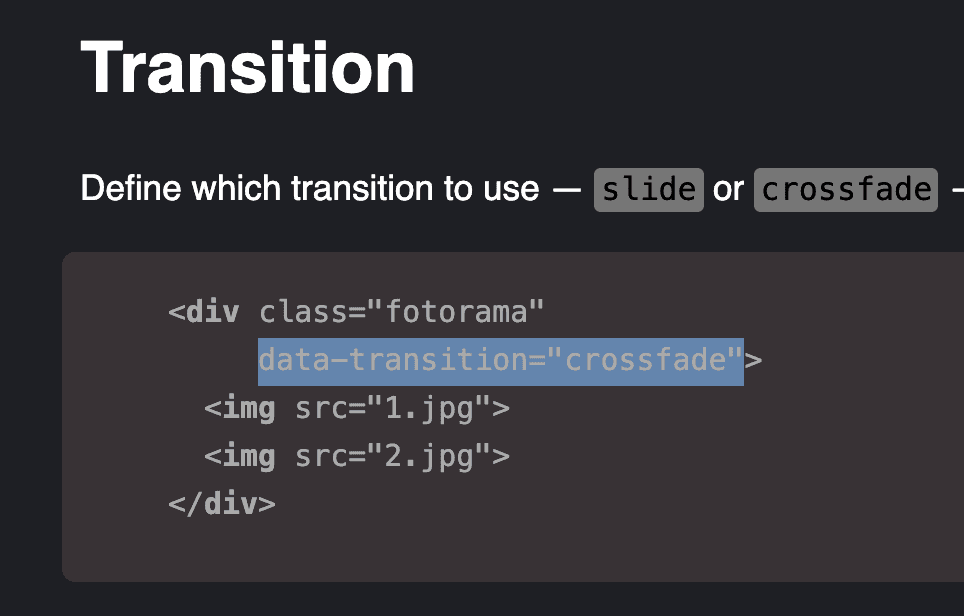
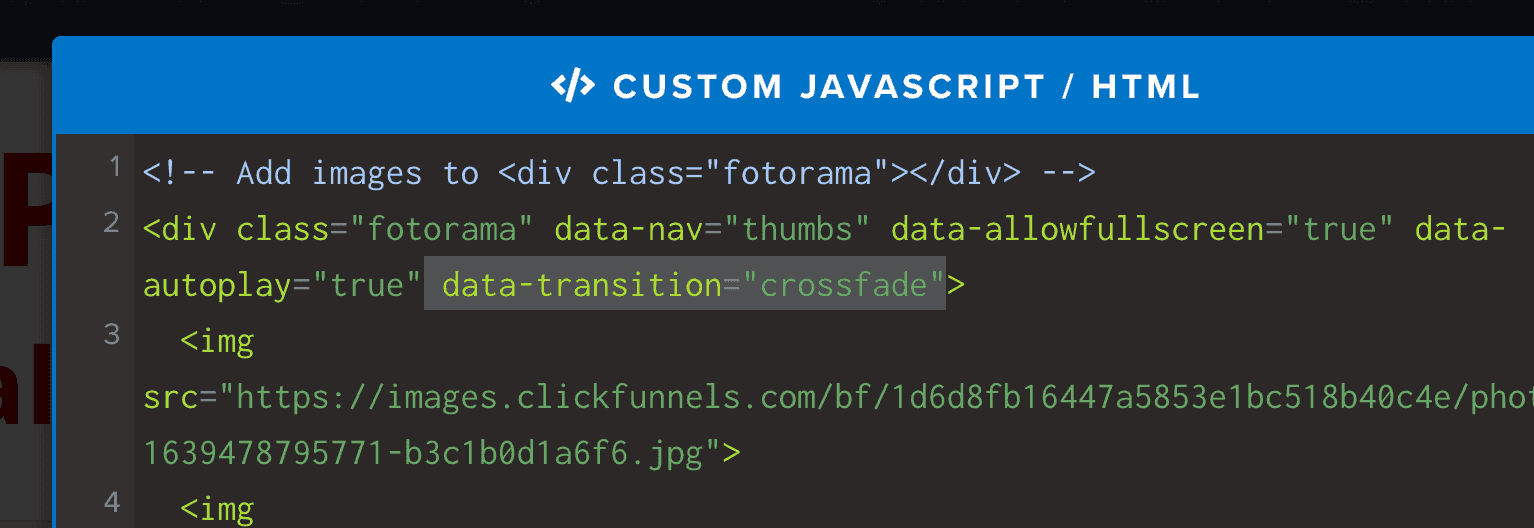
And you’ll get the following effect, where it fades between images instead of sliding them across:

Add links to your images (hrefs)
To add links to your images, we need to adjust the code a bit.
There are TWO (2) changes we need to make.
The FIRST change is to change the html code for the image.
So we change this…
<img src="https://images.clickfunnels.com/bf/1d6d8fb16447a5853e1bc518b40c4e/photo-1639478795771-b3c1b0d1a6f6.jpg">Code language: HTML, XML (xml)To this…
<div data-img="https://images.clickfunnels.com/bf/1d6d8fb16447a5853e1bc518b40c4e/photo-1639478795771-b3c1b0d1a6f6.jpg"><a href="https://wagepirate.com/story/"></a></div>Code language: HTML, XML (xml)Obviously, update the <a href=”XXXX”> part to the URL you want your image to click through to.
Below if the final code where I updating the first image in the Image Slider to link to the /story/ page on my website.
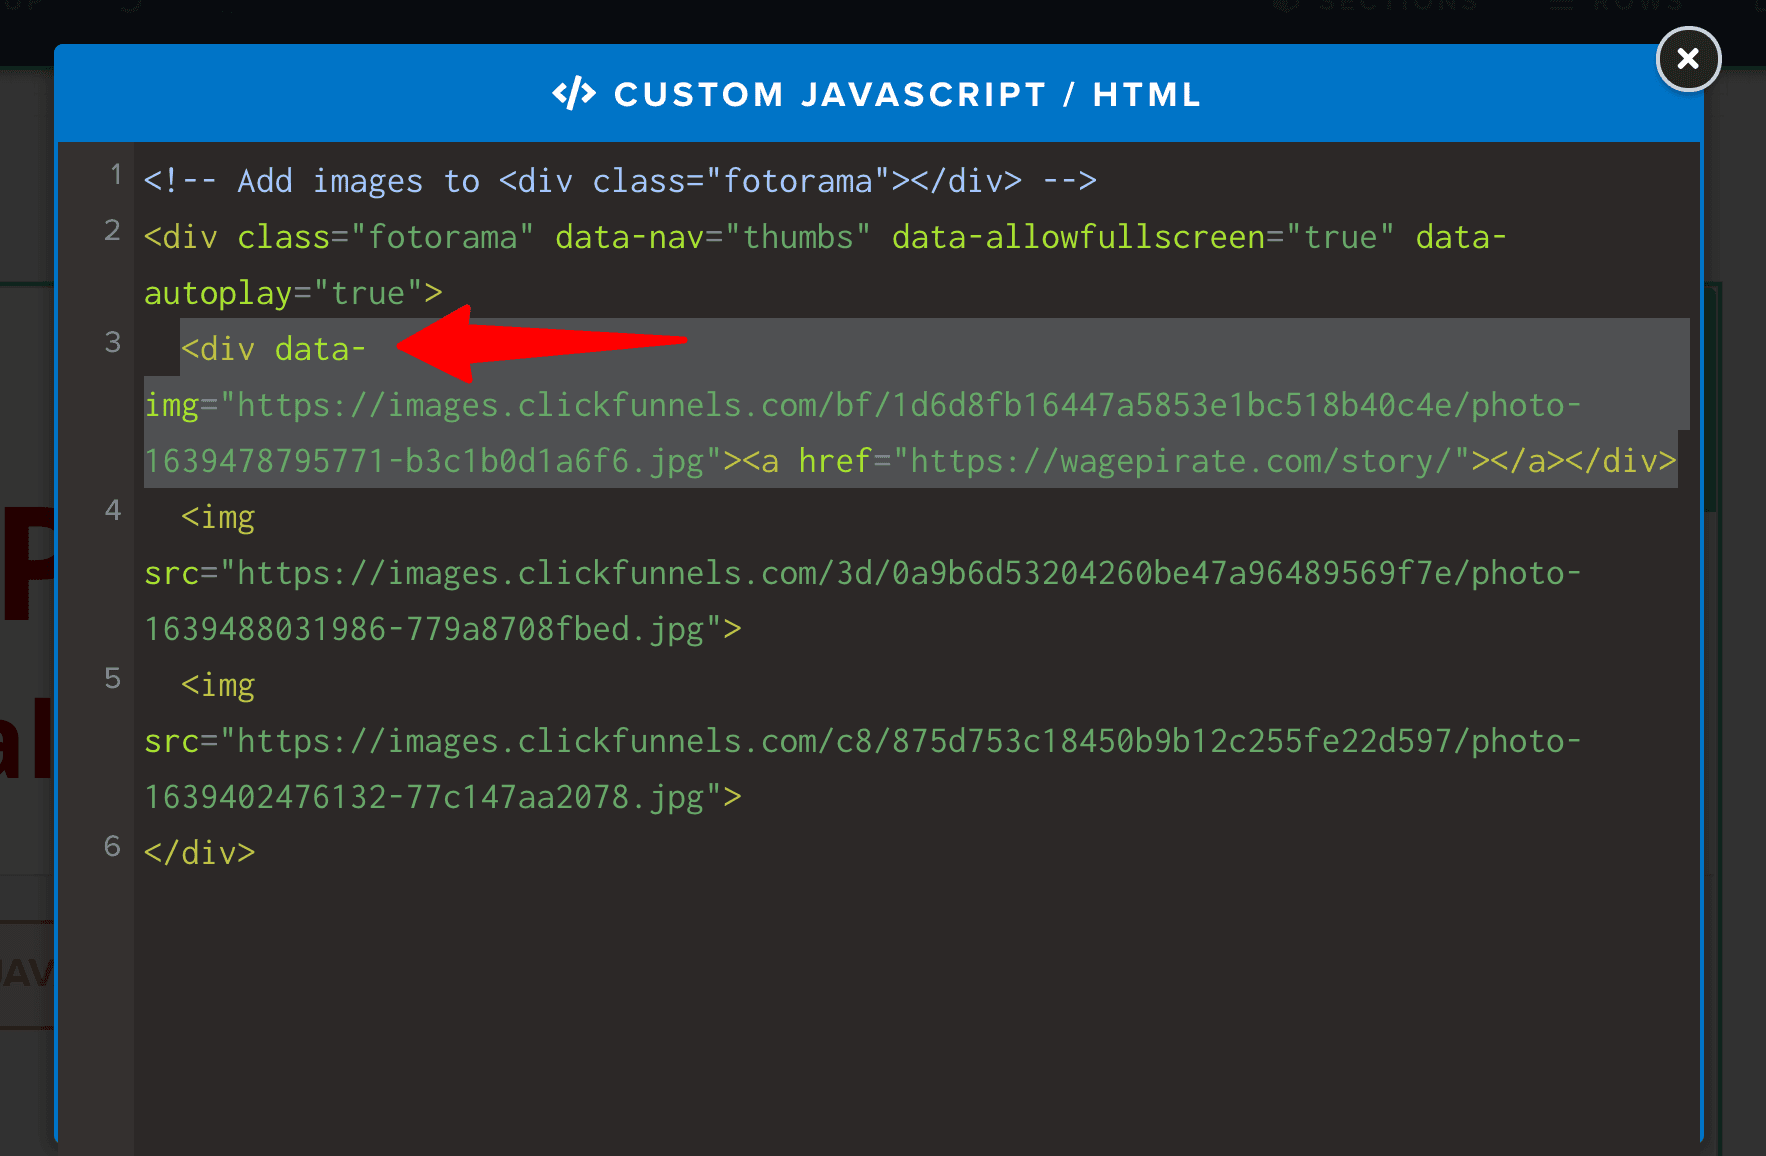
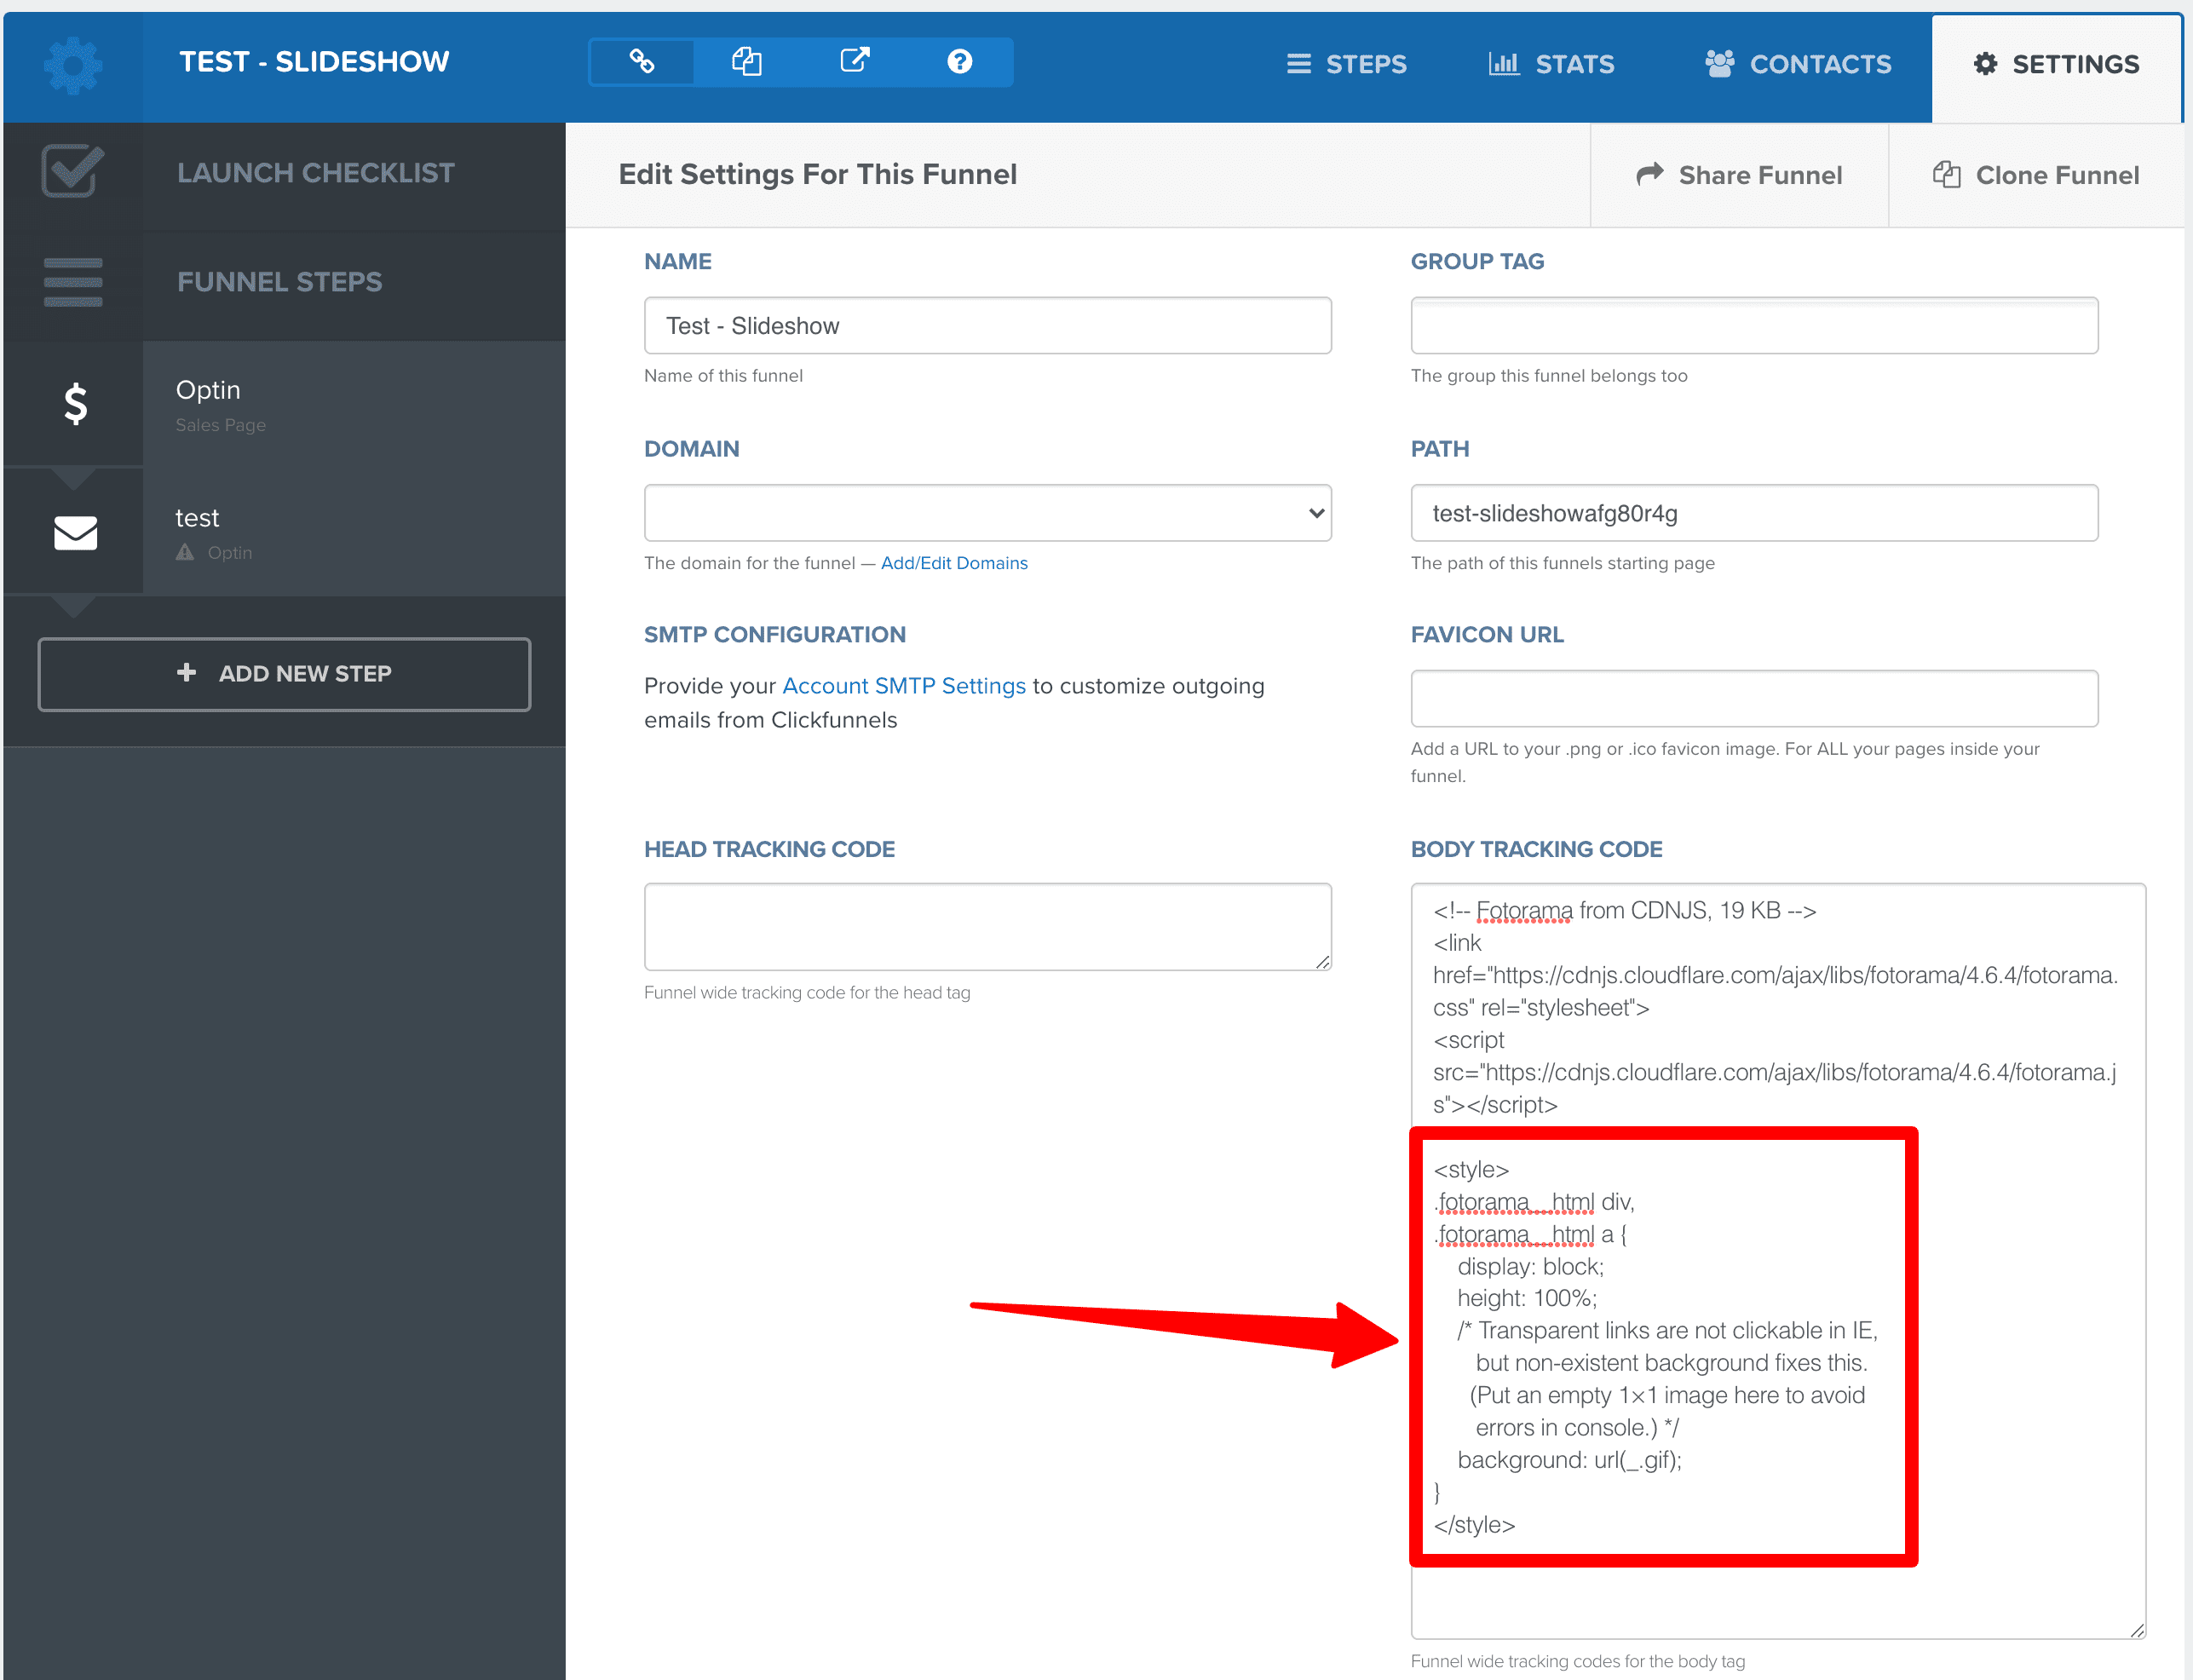
The SECOND change we need to make is to add a bit of CSS code.
To add this CSS code, go back to the main Settings page for your funnel and copy and paste in the below code.
<style>
.fotorama__html div,
.fotorama__html a {
    display: block;
    height: 100%;
    /* Transparent links are not clickable in IE,
       but non-existent background fixes this.
      (Put an empty 1×1 image here to avoid
       errors in console.) */
    background: url(_.gif);
}
</style>Code language: HTML, XML (xml)
Here is what it looks like after I have done this.
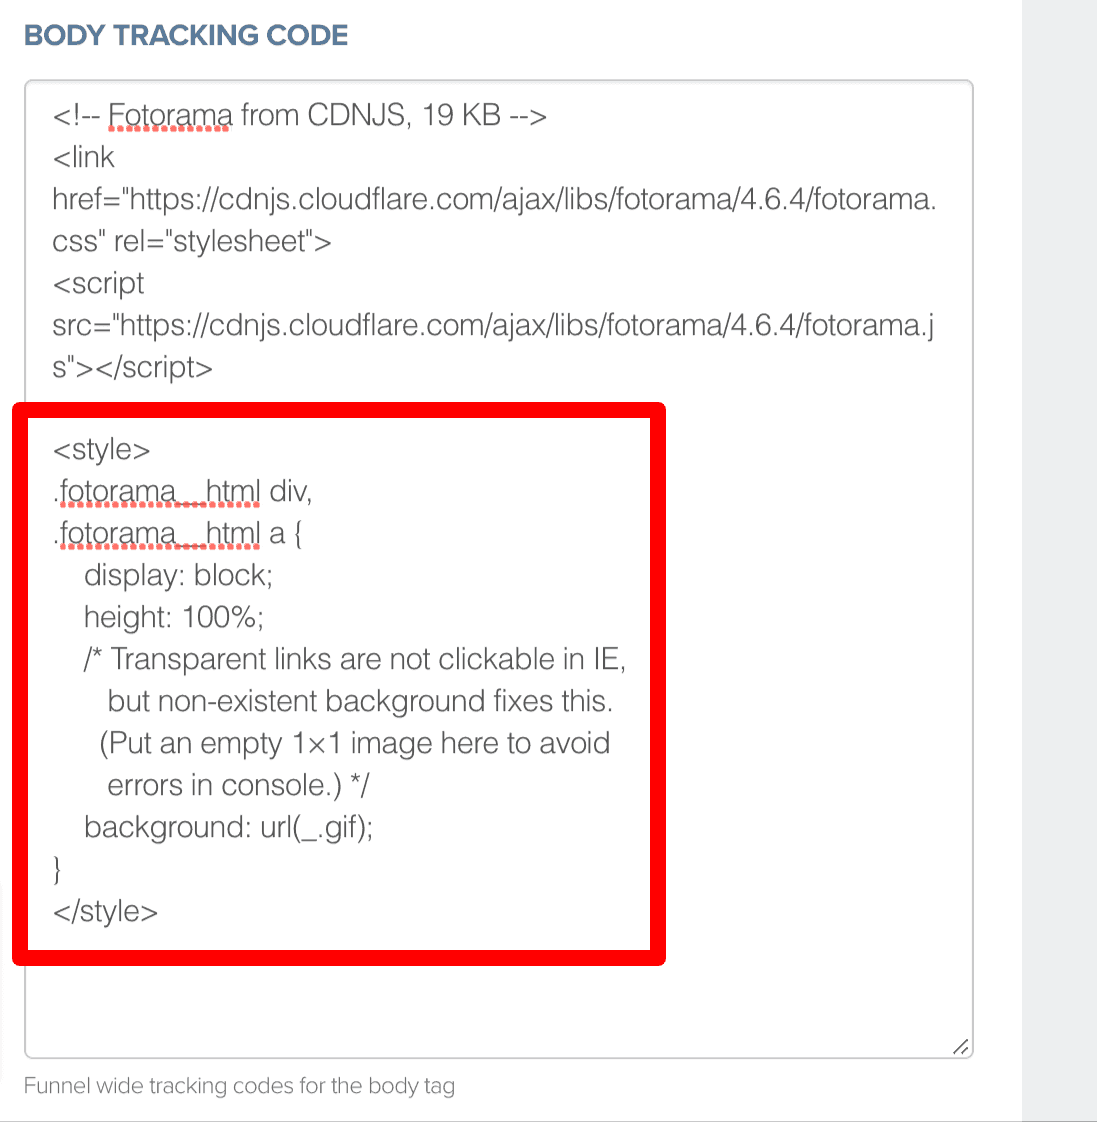
And just so we are clear, this is the box you are pasting that code into.
Save that page and preview your funnel.
Your images will now click through to the URL you set for your image.
Things to consider for your Slider
You have to wonder why ClickFunnels don’t give you a Slider module by default.
I am not sure why ClickFunnel does not give you a Slideshow element to build your pages with, but if I had to guess, I would say it’s because Slideshows can slow down your page.
If you think about it, you’re having to load a lot more images on your page when you use a Slideshow and the items on your page with the largest file sizes are going to be your images.
Hence, your page loads a bit slower.
That’s why it’s very important to do the following:
- Compress your images before you upload your images to ClickFunnels
If you have .jpg images to add to your slider, go to google and type in “jpg image compressor online”. There are heaps of options for you to choose from, so just choose one to compress all your images. Then, add these compressed images to ClickFunnels. That way, your images are as small a file size as they can be and your page shouldn’t slow down too much - Crop all your images to the same size before you upload them to ClickFunnels
Pick a size for your Slideshow images, such as 1000px x 450px, and crop all your images to this size. That way, when your images slide from 1 image to the next they are all the same dimensions and so it looks a lot neater.
Just some things to consider 🙂
If you’ve made it this far, I would love to hear that this tutorial worked for you in the comments below.
Also, let me know what settings and customisations you ended up using for your Slider – I’m curious.


Leave a Reply