In today’s video tutorial, I’m going to talk about restricting user access in WordPress.
Here’s the video
So, let’s say you’re doing a website for a client. Different people will get access to different pages and sections of the WordPress Dashboard like not being able to install plugins (we know plugins can break sites).
For most people, if you’re an admin and you’re giving your client access, there are two User Roles setup in the WordPress website: the Administrator user role (you) and an Editor user role (your client).
For me personally, I do two different things: (1) I manage the capabilities of the Editor user role so I can add or remove them, and (2) restricts the editor so my client can access other parts of the website and not some others. And then for every screen they see, I might actually restrict what they can do on each screen by hiding meta boxes etc (more on this later).
Again, that’s two different things, (1) restricting what areas on the website they can see and (2) restricting what’s on the pages that they do have access to.
To do that, we’re going to use two different plugins so you’ll know exactly how to do these very, very quickly. And even better, once you’ve set all this up, you can export them and re-import them to different websites and you’re going to have the same settings all throughout.
Below is a website I’ve just finished for a client. It’s an Ecommerce WordPress website which runs on WooCommerce (see image below). It’s also using the Beaver Builder page builder to layout the content in WordPress (click here to try the demo). The client is happy with the website and I’m going to hand it over to her so she can start adding content.

What I first need is to do those two things:
- Restrict what areas of the WordPress Dashboard she can access, then:
- Restrict what’s on those pages of her WordPress Dashboard so she won’t get confused and start clicking everywhere, like accidentally clicking screen options and hiding Meta boxes, etc.
Step 1: Install User Role Editor
So the first thing that I’m going to do is I’m going to go to the WordPress Dashboard. Go to Plugins > Add New, and type and search ‘Use Role Editor’ (shown below).
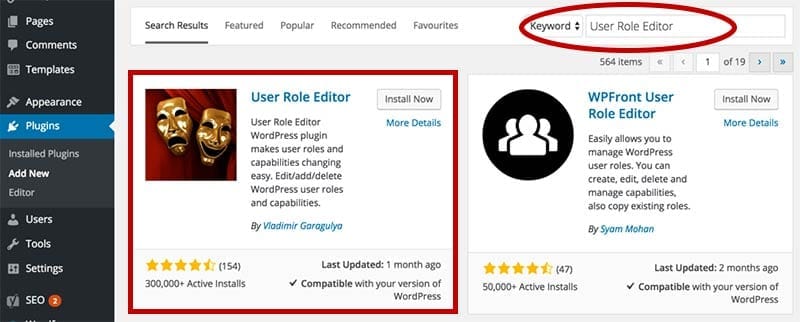
Alternatively you can get it from the WordPress Plugin repository and then upload the .zip
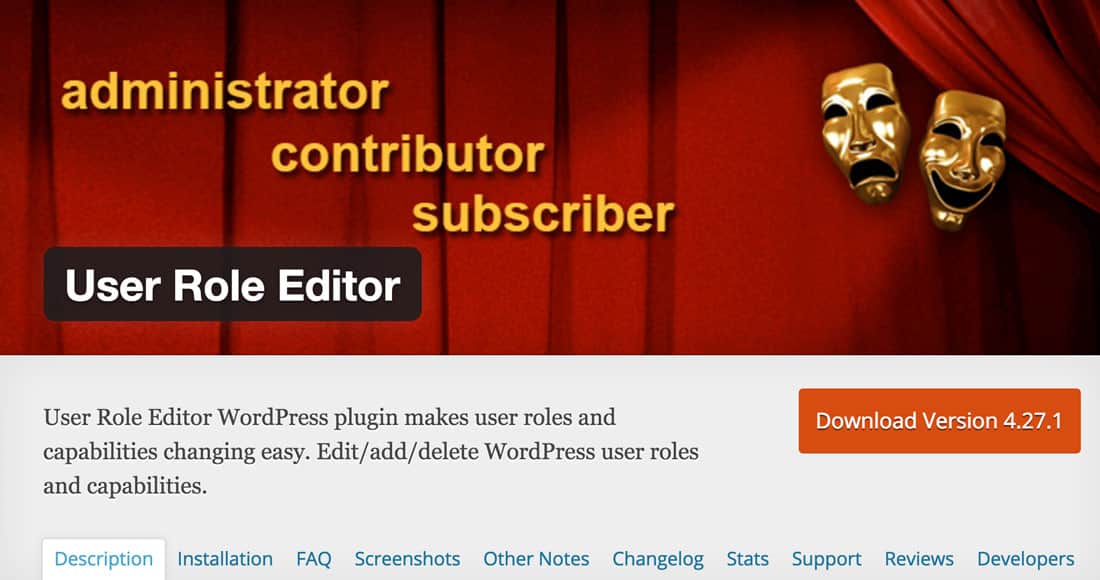
Now, User Role Editor is an incredible plugin.
- It has 300,000 active Installs and was recently updated which tells us that it’s a great plugin.
- I know they have a Pro version so they’re making money somehow, so it’s a sustainable plugin.
Go ahead and install that plugin by clicking the ‘Install Now’ button, then click ‘Activate Plugin’ to activate User Role Editor plugin.
Step 2: Create a new user for the client
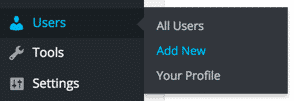
So second thing we need to do is to create a user for a client. So to do that, just do it like in any normal WordPress user. On the Users menu, click Add New.
Put in the username and complete the rest of the details needed, with attention to the option where you can select the User Role for the new user.
For me, I use Editor as the user role for my client, that’s one under admin. This is because I want to give my client the ability to change WordPress as much as possible without breaking things.
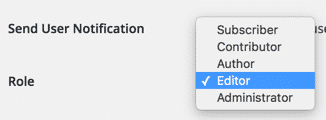
So you create a user, give it an Editor user role, and give click ‘Add New User’ button.
Step 3: Decided what areas of the website need to be restricted / granted access to for your Editor user role
Once you’ve created the new user for the client, what I do is I open a new browser in incognito or private browsing and then I’ll log in as my client. That means I am logged in as an Administrator on one side of the screen and I’m logged in as my client in the other window which has the Editor user role.
TIP! By using incognito or private browsing, you can actually log in as two different users in the same browser. So I’ll go ahead and do that.
Once set up, I’ve successfully logged in as my client, at the other side of the screen is me logged in as administrator.
Now, we’re going to change the WordPress capabilities of the Editor user role our client has so we can see some of the few things of my menu.
Things we’ll be changing: Below is a screenshot of the WordPress Dashboard menu for the Administrator (left) and the Editor user role (right.
As this is a WooCommerce shop, you’ll notice that the Editor user role cannot see the shop menu items available to the Administrator on the right (notice how in the Editor user roles menu on the right you do not have Products or WooCommerce in the menu). We need to provide access to these for our Editor.
Beaver Builder also registers a new WordPress menu item called Templates that you can see below. I actually DO NOT want the Editor to be able to access these, so I need to remove the Templates menu item from the Editor (see how the editor on the right below can see this Templates menu item).
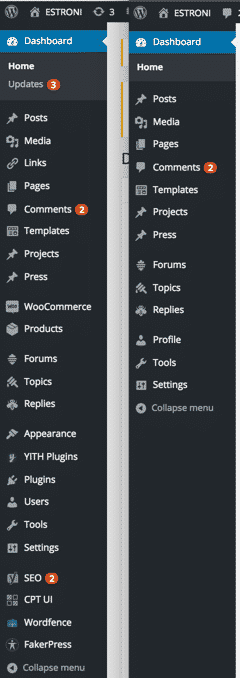
So that’s a great way to compare what you’re needing to do. Log in as both the Administrator and the User role you’re wanting to change (using private / incognito browsing) and then compare the menus and decide what needs to be removed / granted access to. This works because the Administrator has access to EVERYTHING 🙂
Step 4: Restricting / granting access to areas of the WordPress website for the Editor user role
In the Administrator’s WordPress Dashboard, select ‘Users’, click ‘User Role Editor’. This is a new menu editor that was registered when we activate User Role Editor plugin.
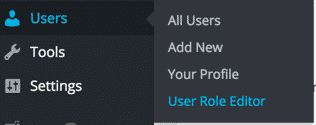
Select the user role you want to edit from the drop down and the page will reload.

After selecting the Editor user role, we can see all the capabilities that are available in WordPress. The checked capabilities are those that are already allowed or assigned to this Editor user role.
In this case (as per the image shown below), the Editor user role has the capability to Upload files, but doesn’t have the capability to view_woocommerce_reports.
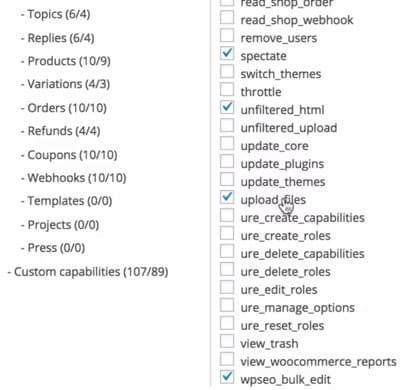
To give the Editor user role (again, the user role assigned to our client) the capability to access WooCommerce, just CHECK the checkbox for everything that has woocommerce or shop in the title. (ex. read_shop_coupon, read_shop_order, read_shop_webhook, manage_woocommerce and so on).
Once we’re done checking all the needed capability access, click the ‘Update’ button at the right-hand section of the dashboard. Click ‘Yes’ to confirm the permission
You can now check the access given to your client by refreshing the browser window where you’re logged in as the client who has the Editor user role and you’ll see that they now have access to the Woocommerce items in the admin menu.
Lastly, we need to remove access to the Templates section for the Editor user role.
To remove the access to the ‘Templates’ item, we first check in the User Role Editor settings for the users whether there is a capability assigned to the ability to access this Templates area.
TIP! You should always check to see if there is a capability in WordPress to access / remove access to a particular section of the WordPress Dashboard. If there is NOT then proceed with the below steps.
For this particular case, there is NOT a capability that controls access to this Templates section, so we need to hide it from the menu with another of my FAVORITE WordPress plugins called Adminimize.
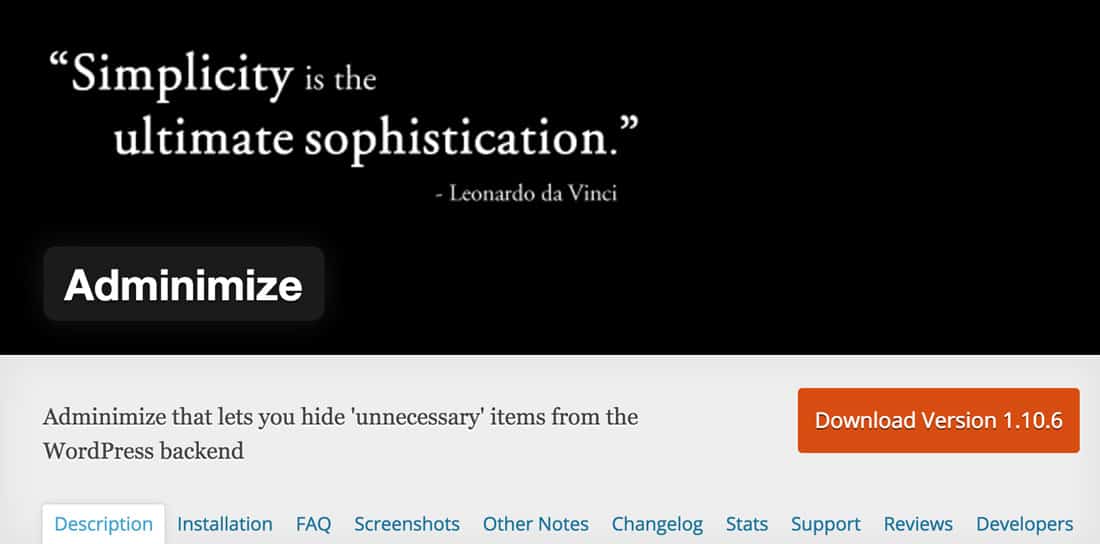
So, let’s go ahead and install Adminimize just like you would any other plugin. In the Dashboard, click ‘Plugins’, then ‘Add New’ and search for the plugin named, ‘Adminimize’. (Again, this is a free plugin). Once searched, you can see that there are 200,000 installs and 5-star ratings out of 157 people. Also, this plugin is updated. I’ve been using this for about 3 months and it’s incredible! Click ‘Install Now’ button and click ‘Activate the Plugin’.
Once installed, in your WordPress admin menu go to Settings > Adminimize to access the settings page for the Adminimize plugin.
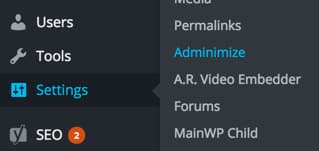
Using the Adminimize settings page to restrict user access in WordPress
Again, what we couldn’t hide user User Role Editor to alter the WordPress capabilities for the Editor user role we are going to hide using Adminimize.
Now, there’s two main sections I use and using them covers 90% of what I need to do with this plugin.
In the below screenshot of the Adminimize plugin’s settings page I have highlighted Global options and Menu options.
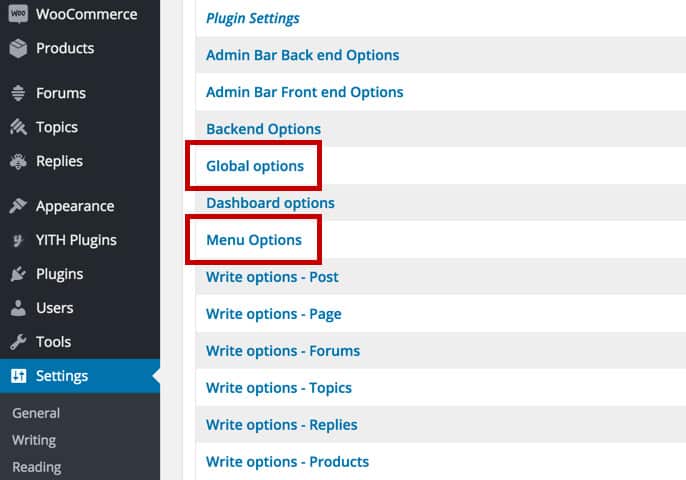
Here’s why:
- Global Options: You can add your own CSS Classes / ID’s here and then hide them on a per user role basis. Extremely powerful!
- Menu Options: Clicking this scrolls down the page and you can hide admin menu items on a per user role basis.
What you want to do first is Menu Options to hide the sections of the WordPress Dashboard you don’t the user role to see, and then add CSS Classes and IDs in the Global section to hide things like WordPress update nags etc.
Back to this tutorial, we’re trying to hide the Templates admin menu item for the Editor user role.
To do this, we click on Menu Options and it scrolls us down the page. The rows on the left are the admin menu items and the columns are the user role. Put them together and you can CHECK the boxes for the user roles you want to hide.
So, we find the cell in the table that is in the Editor user role column and also in the Row for the Template admin menu item, and we check the box. Then we save page page. (See below).

(NOTE!: This 5th column from the right is for our Editor user role).
TIP! See how Templates has the sub menu items All Templates and Add New? Well, if you CHECK the parent menu item like we have Template, it automatically restricts access to the sub menu items 🙂
To check that we’ve hidden the Templates menu item successfully, we refresh the browser window where we’re logged in as our Administrator and wa-la! No more Templates menu item.
For our Editor user role we’ve now completed both things we wanted to do in this tutorial:
- Grant access to the WooCommerce shop pages. We did this using User Role Editor and manipulating the necessary capabilities.
- Restrict access to the Templates area. We did this using Adminimize as there was NO capability that controlled access to this.
Bonus! How to hide sections of each page in the WordPress Dashboard on a per-page-basis (extremely useful)
So we’ve ran through how you can restrict access to different areas of the WordPress Dashboard, but what if you want to allow access to a specific page but hide something on that page? Maybe it’s a meta box, or a custom field that you don’t want a particular user role to be able to edit.
A good example of this is the WordPress update nag. You know how you login to WordPress and there’s a notice up the top of the page that says there’s a new version of WordPress available?
Here’s a screenshot of what I’m talking about.

Well, users with the Editor user role see this notice and if you’re running a web agency it can be confusing for your clients. I mean, you’re offering maintenance plans for your client that includes updating WordPress but then you’re client is getting a message saying it needs to be updated.
How do you hide just that element? This is how!
Get the guide right now: How to hide different sections of the WordPress Dashboard on a per page basis
Wrapping it up
So, that’s it! I’ve discussed how you can restrict user access in WordPress for any of your needs.
Now, I know I’ve said this but I would like also to reemphasize that you should first see what you can do using User Role Editor and capabilities and then use Adminimize for whatever could not be changed by altering capabilities.
In short, User Role Editor is to add or remove capabilities, and Adminimize is used to restrict access to other areas of WordPress and can also be used to clean up the pages that your customer can see using it’s ability to add your own CSS Classes / ID’s.
Any questions, please comment below.

Leave a Reply